
This article is a written account of a video from the Lens Of James YouTube channel. Watch the video above and subscribe if you like what you see!
This article contains affiliate links to relevant products I have used in my videos. By buying through these links, I receive a small percentage of the sale at no cost to you which helps me support and grow my website and YouTube channel, so I can create more content like this in the future. Thank you for your support.
In this article…
- Beginning the van window install
- Cutting through the door carpet
- Checking the door insulation
- Cutting holes in the doors
- Preparing the metal edges
- Preparing the windows
- Time to attach the windows…
- Testing the windows…and the problem
- The windows leaked!
- My options for fixing the leaky van windows
- Getting the pros in
- The finished, waterproof windows
- What’s your van windows story?
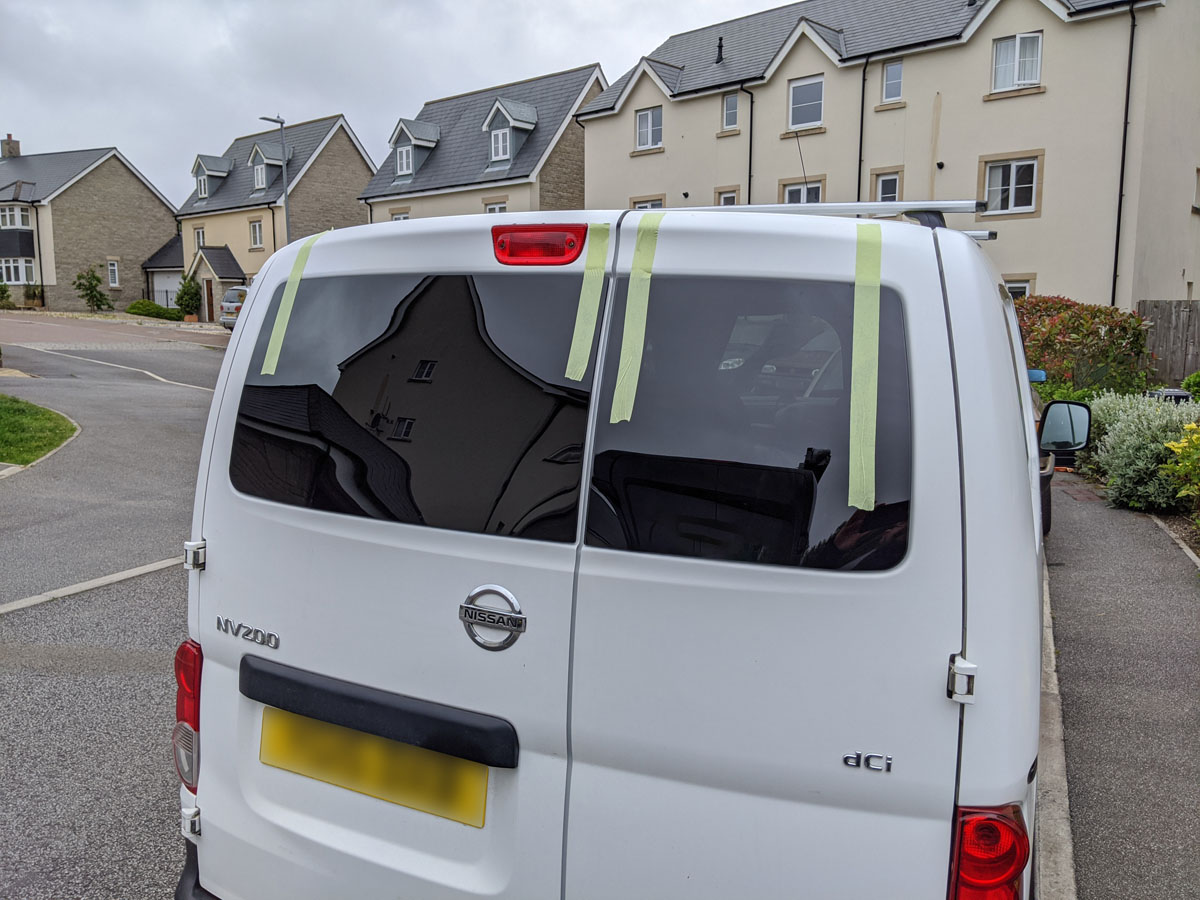
After a bit of a break from my van conversion, during which we’ve spent lots of time using and enjoying the van, I finally got round to the next stage – something I’d wanted to do for a long time, and had seen as a natural next step to my ever evolving build – installing windows in the rear barn doors.
Now this was always meant to be a standard ‘here’s how I installed my van windows’ post, however I made a BIG mistake and learnt some valuable lessons along the way that I want to share.
Beginning the van window install
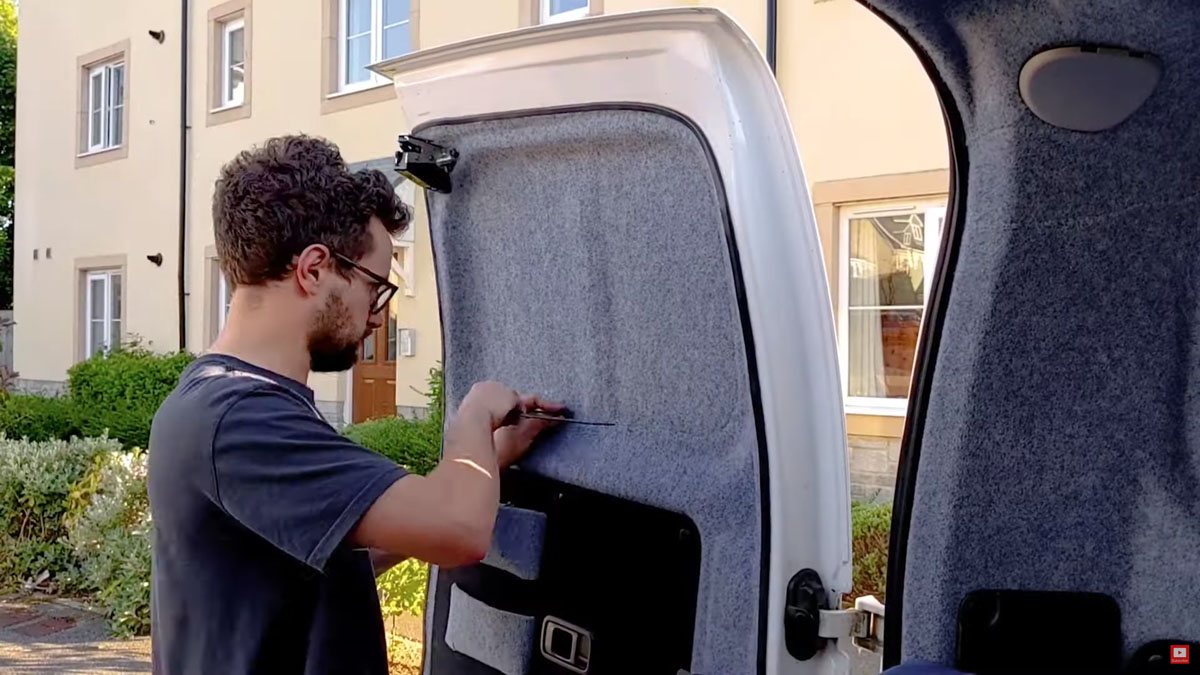
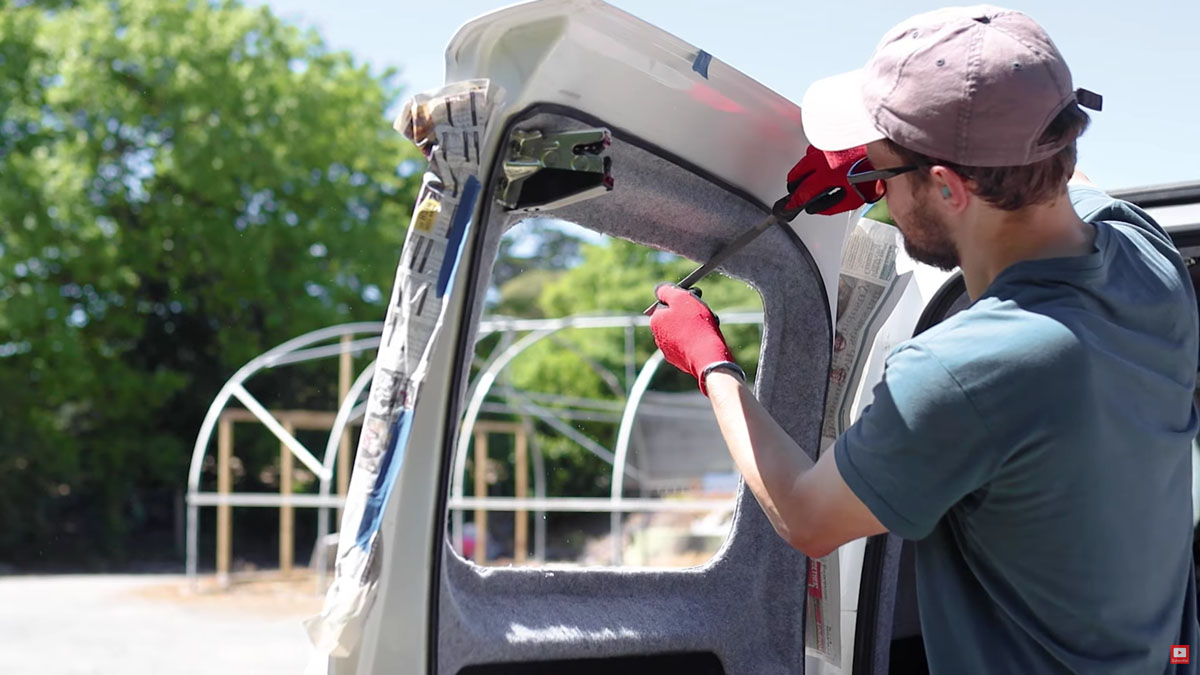
You may have noticed that my van doors are already completely carpeted on the inside, so my van window journey began with trying to work out how to find which bit of the door to remove without cutting in the wrong place and destroying the carpet lining, or worse, having to buy new doors.

I started by working out where the inner metal skin was, as this is where I would be cutting to. I used the edge of a square to feel my way around the carpet and pressed hard to leave a clear mark.
Click to buy your own…


(Affiliate links which help support this website)
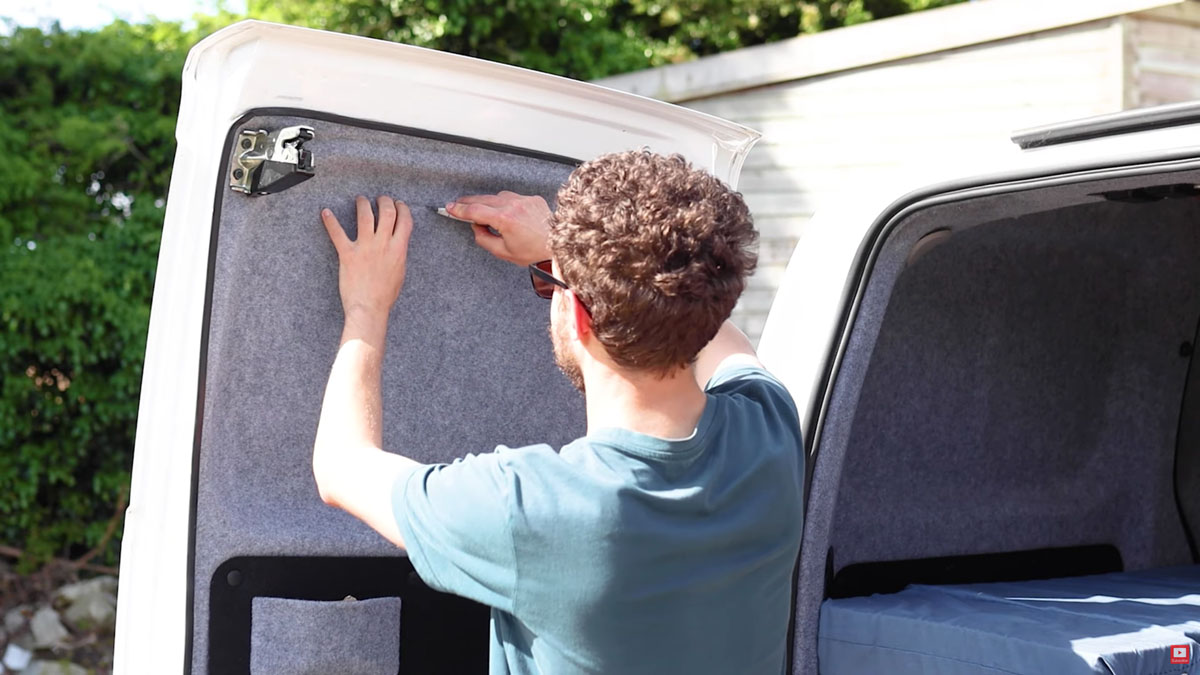
Cutting through the door carpet
I then used a Stanley knife to cut through the carpet – and foil insulation underneath it – to score the edge, and then I could begin removing the carpet. I wanted to keep the carpet edge as neat and intact as possible so it would still tuck under the trim I would be applying at a later date. It didn’t matter about scoring the metal here, as this would be the line I cut to to remove the panel and it would later be coated to prevent rust.
Checking the door insulation
I was really pleased to see that even after over 2 years since I insulated the van, the foil bubblewrap insulation I stuck down under the carpet still looked as good as the day I put it in, which gives me confidence for the other areas of my van where I’ve done the same.
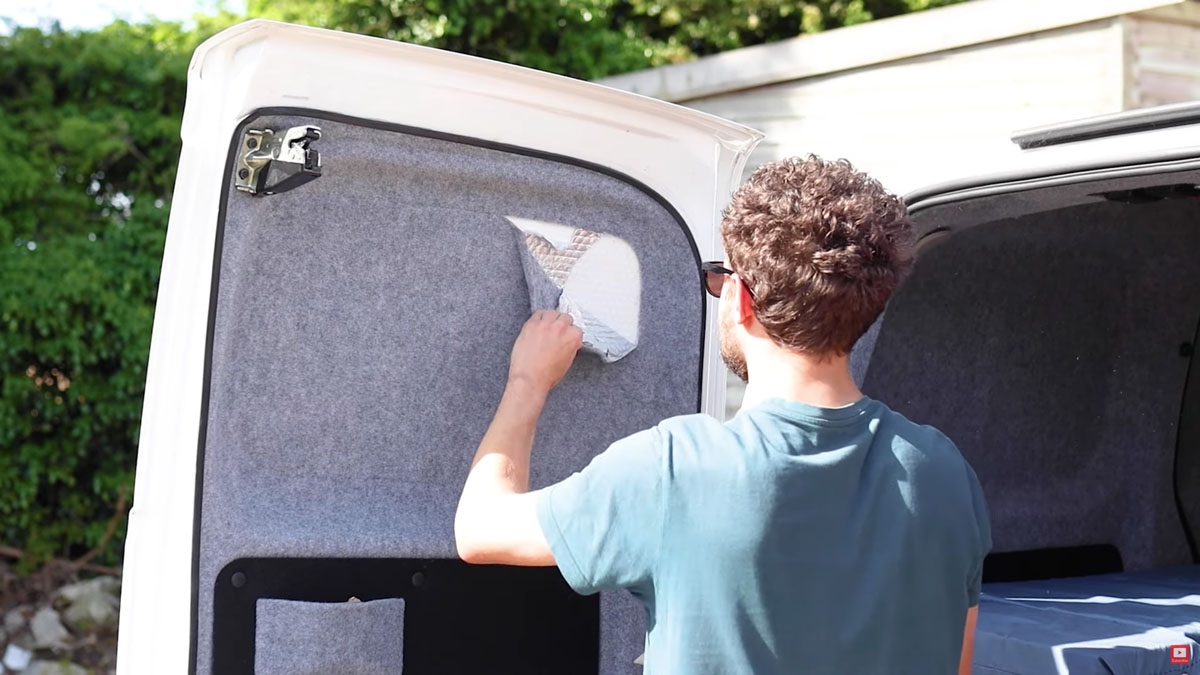
With the panels exposed, I tidied them up a bit not worrying about any leftover insulation too much.
Cutting holes in the doors
After double, triple and quadruple checking where I would be drilling, I used a step drill bit to create my first hole in the top right corner, followed by the other corners. I also tried a high speed steel drill bit, and whilst it was effective, its force meant that it bent the panel a bit – not something I wanted to do!
Returning to the step drill bit, I moved onto the second door. These holes were never meant to be neat or perfectly aligned, but just points at which I could get my jigsaw blade in, to make my cuts.
Now for a health and safety warning – after my first cut with the jigsaw, I realised the amount of metal flying off was…substantial. My glasses alone weren’t enough to protect my eyes, so I got my very attractive goggles on and continued. Oh, and I also used ear plugs too for good measure!
I purchased these Bosch T118AF metal jigsaw blades as they were meant to be better for cutting corners, which I figured would be useful on the doors. They cut well, but by the end I was on my third blade!
I decided to cut from the inside as I had a really clear line to follow. It was doable but it’s probably easier to cut from the outside, drawing the line on the exterior of the doors and then following it round so the jigsaw can sit flat against the metal.

The corners got quite tight, so I drilled the odd relief hole to get the bulk of the panel off, and then came back and tidied the edges up afterwards.
As you can see, I did my best to tape up the van before I started, but the metal filings got EVERYWHERE! I spent a lot of time sweeping the van with a brush and magnet inside and later washed it just to be sure I had got rid of them all.
Pre-carpeting the van actually proved useful here as less metal was exposed and it can be hoovered afterwards!
We’re also on Instagram! Check out yogi.the.van to keep up-to-date with all our adventures in the van!
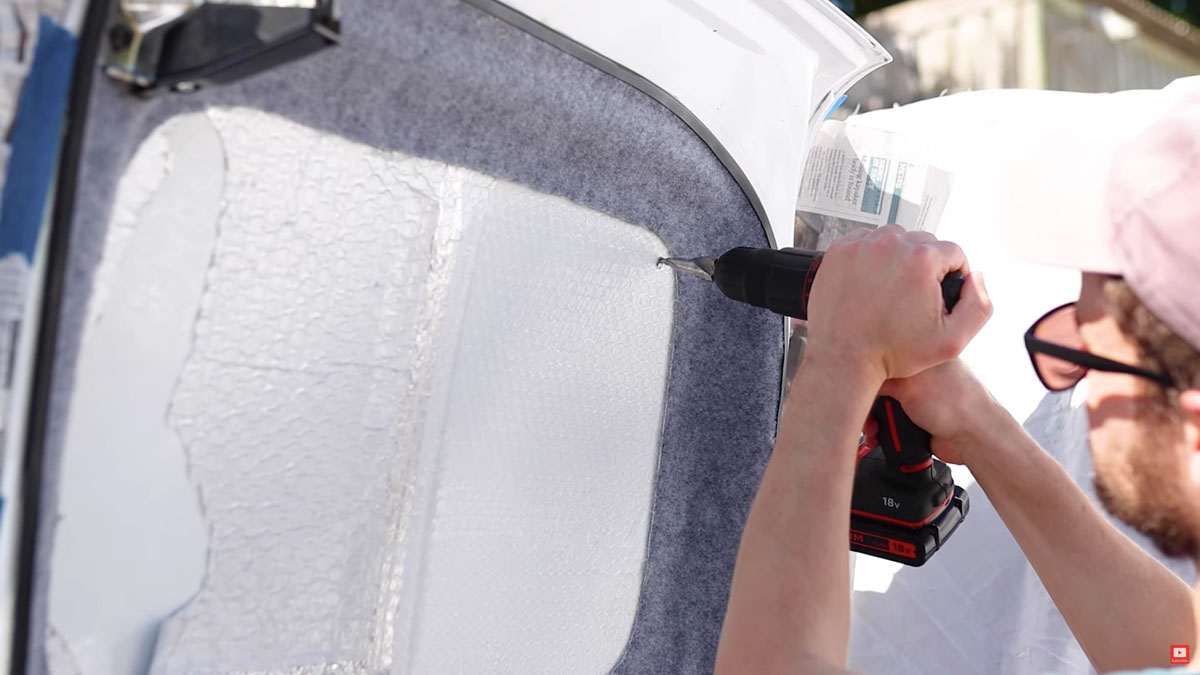
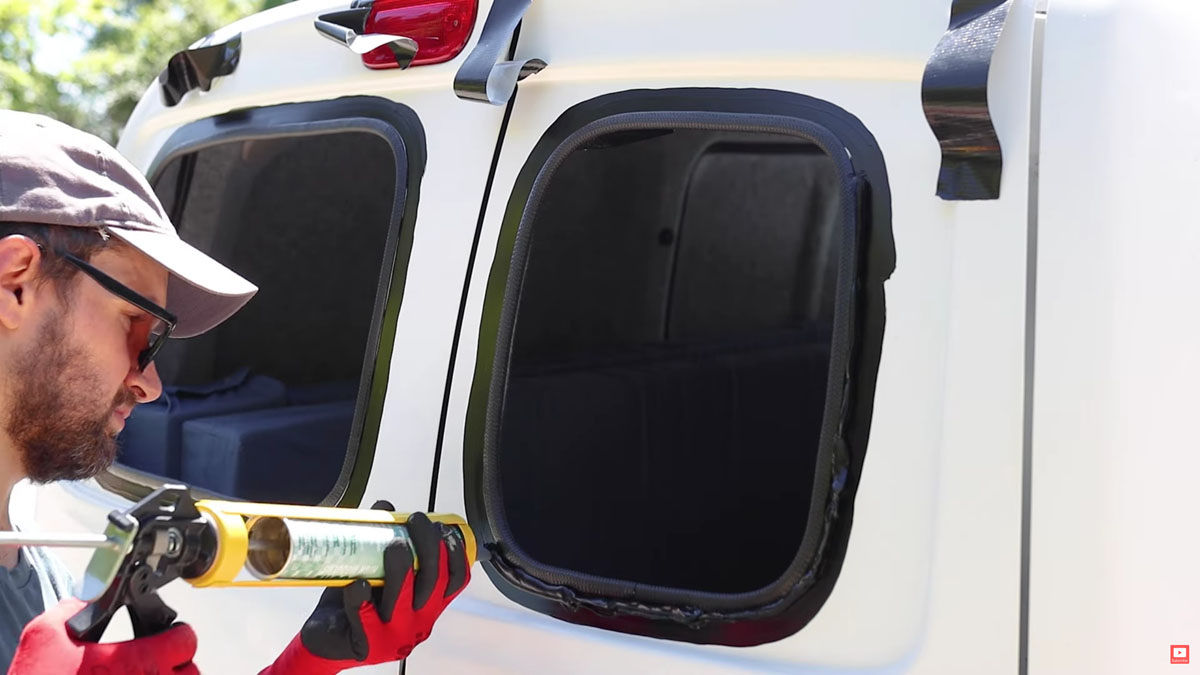
Preparing the metal edges
I finished the edges off with a hand file, getting rid of any burrs, as well as straightening the edges up and making sure the cuts were up to the line.
After that, I coated the bare metal edges with the black primer from the window fitting kit I had bought with the windows.
This just ensures that they wouldn’t be susceptible to rust in the future when I wouldn’t have access to them any more.

With the primer dry, I could begin covering the edges with the rubber trim. I got two bundles of it in the window fitting kit, but one length was enough for both of these windows as they are quite small compared to some of the bigger vans.

I worked my way around both windows, using a rubber mallet to bang them firmly in place. This is quite an important step as the rubber trim has metal inside to grip to the van so is quite rigid, but also because it needs to be firmly installed all the way round by the time you come to cut the end otherwise you’ll have a big gap between both ends.

As I went I tucked the carpet edge under the trim and used one of my trusty plastic panel tools I found on eBay to push it under neatly.
I used a pair of pliers to cut the trim to length first window. Thankfully I had left a bit extra because it wasn’t a very clean cut and some rust from the pliers ended up on the trim. I found that a sharp knife works really well as the metal in the rubber doesn’t appear to run all the way through, so you can cut between the gaps easily.
Click to buy your own…

(eBay affiliate links which help support this website)
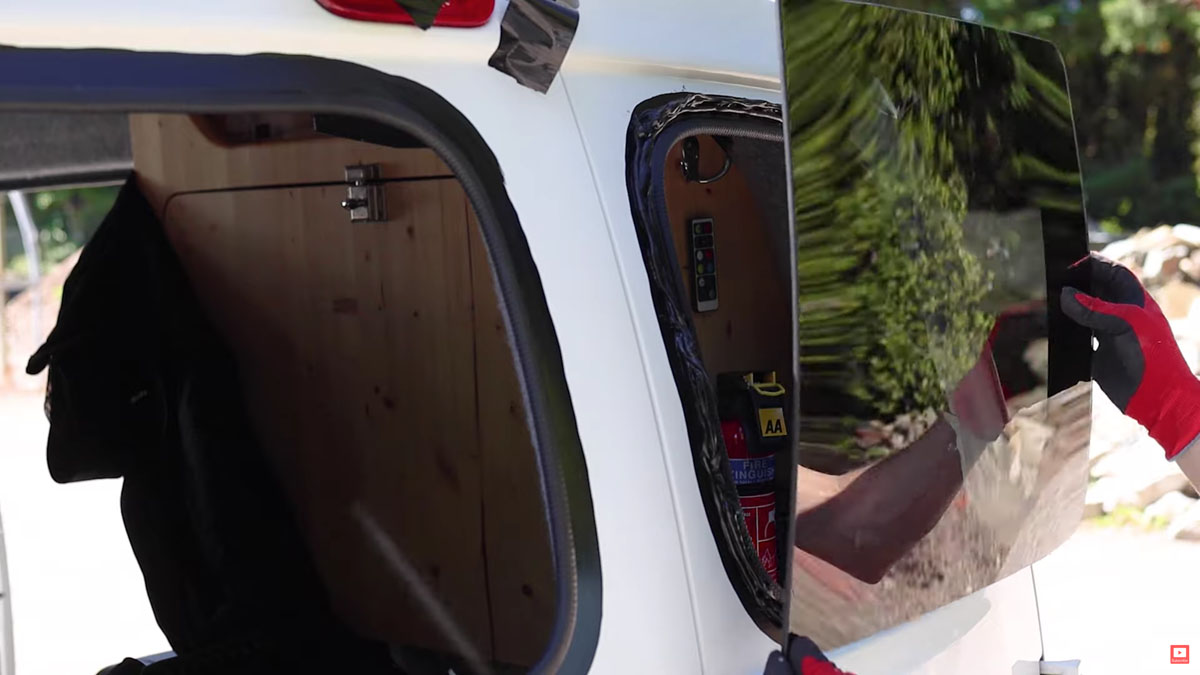
Preparing the windows
With the edge sorted, I offered the windows up to make sure there weren’t any raised areas that they would rock on. There weren’t, but if there are you can knock them back with the rubber mallet.
This marked the end of my preparation stage and I could now begin the installation of the glass.
The first step was to ensure that the paintwork around the doors was free from dirt, grime, metal filings, tape residue or anything else that might stop or weaken the adhesion.
I then cleaned the ceramic edge of the windows with a clean cloth before wiping them down with the activator wipe and, according to the instructions, it’s important not to let the wipe touch the glass, otherwise it could etch or mark it.
Having shaken the primer well, I then applied it to the edge of the window openings with the satisfying felt brush.

I applied it close to the edge trim, as I had seen others do that during my research, but I was advised by expert window fitters later on that they normally do the line nearer the edge. And do keeping watching to find out WHY I ended up talking to the pros!
I widened and neatened the line with a second pass off camera, to avoid ‘painting’ the primer on, before doing the same to the now-activated glass, leaving a small gap to allow for where the rubber trim will be when the glass is bonded to the van.

I waited 15 minutes for the primer to dry – as per the instructions – and could look to sticking the windows in place.
Time to attach the windows…
The adhesive I would be putting my faith in was Winbond Ultra Cure – more on that later – which comes with a pre-cut v-shaped nozzle.

Using a standard caulking gun I applied a thick bead onto the primer all around the openings and used about half a tube of adhesive on the small window and three quarters of a tube on the larger one.
Now I will admit, I struggled quite a bit with applying the adhesive. It was quite difficult to get out of the tube and even then, due to my lack of experience, it didn’t sit too well on the van. But I pressed on…
I stuck the first window in place and taped it as a precaution before doing the second window as I didn’t want the bead of adhesive to skin over whilst I worked on the next window.
With the second bead of adhesive on the van, I stuck the window down, taped it and made sure both were aligned with each other, not resting or sinking onto the paintwork and seated well in the adhesive.
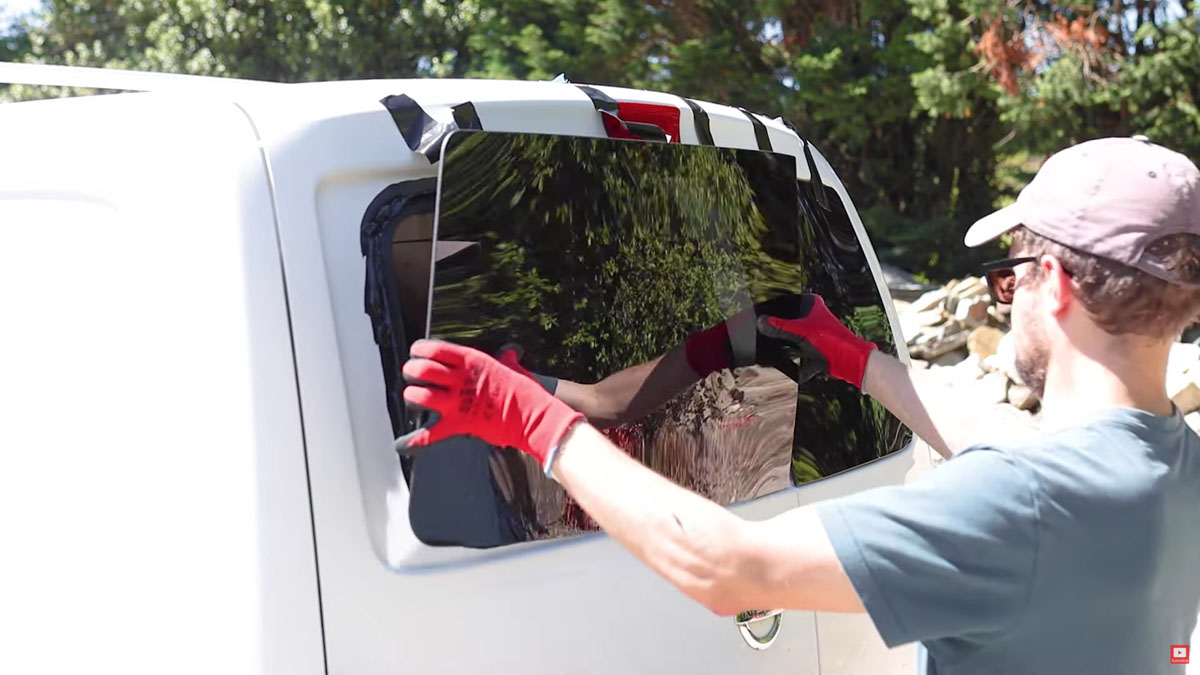
When I was happy with their positioning I pressed them firmly into place, added more tape for good measure and cleaned away any mess.
If you’re wondering what windows I bought for the van, CLICK HERE.
I’m not necessarily recommending these exact ones, but someone always asks so have a look if you’re interested!
Phew! That was a LOT of hard work. I probably spent about 4 to 5 hours on it altogether. I took my time as I wanted to do it properly and – hopefully – not make any silly mistakes. I left the van overnight to cure before driving it.

Coming back the next morning, I was pleased to see the windows were still attached, and nervously drove the van home.
We’re also on Instagram!
Check out yogi.the.van to keep up-to-date with all our adventures in the van!


Testing the windows…and the problem
All sorted…well, not exactly. The final test was to make sure the windows were waterproof. Being a dry day, I thought it was best to test them before a rainy day came where I couldn’t control the water. So I got a watering can and began pouring the water over the windows.

Success! No water came through! …or so I thought.
The windows leaked!
We soon had some prolonged heavy rain and I thought it wise to check the windows again. Unfortunately BOTH windows leaked!

It was a pretty small amount getting through each window, but I was pretty unhappy that water was getting in.
And this was my BIG mistake. Clearly either the adhesive or my sealant skills just weren’t up to the job!
My options for fixing the leaky van windows
So I was left with three options. First, I could try and squeeze some more sealant into the gap between the glass and the van door to attempt to plug the holes – a long shot at best, which would leave me always worrying about a leaf every time it rained.
Next, I could try to remove the windows and attach them again, probably using a different adhesive. But how do you easily remove windows without damaging either them or the van and what’s to stop leaking from happening again?
Getting the pros in
My third option, and the one I went for, was to seek professional help.
Now considering my van build has been completely self-done and on a budget up to this point, this was quite a big step for me. And, to be honest, my pride took a hit too, but when weighing up the options I realised that I had to be certain that the holes I cut into my van wouldn’t put the rest of my hard work at risk.
After getting a number of quotes – the highest of which, at £265, was utterly ridiculous – I found a company that was experienced, well reviewed and reasonable.
They cut the windows off, slicing through the adhesive with a cheese-wire type device. It should be noted that the adhesive – which was now a week old – was still wet in the middle. Needless to say they weren’t too impressed with the product I had used.

In 30 mins they had cleaned up the windows, re-primed the door, applied a proper, even bead of adhesive and reattached them to the doors. They did a brilliant job of re-attaching the windows.
If you’d like to know how much it cost to have my van windows removed and professionally reattached, please CLICK HERE
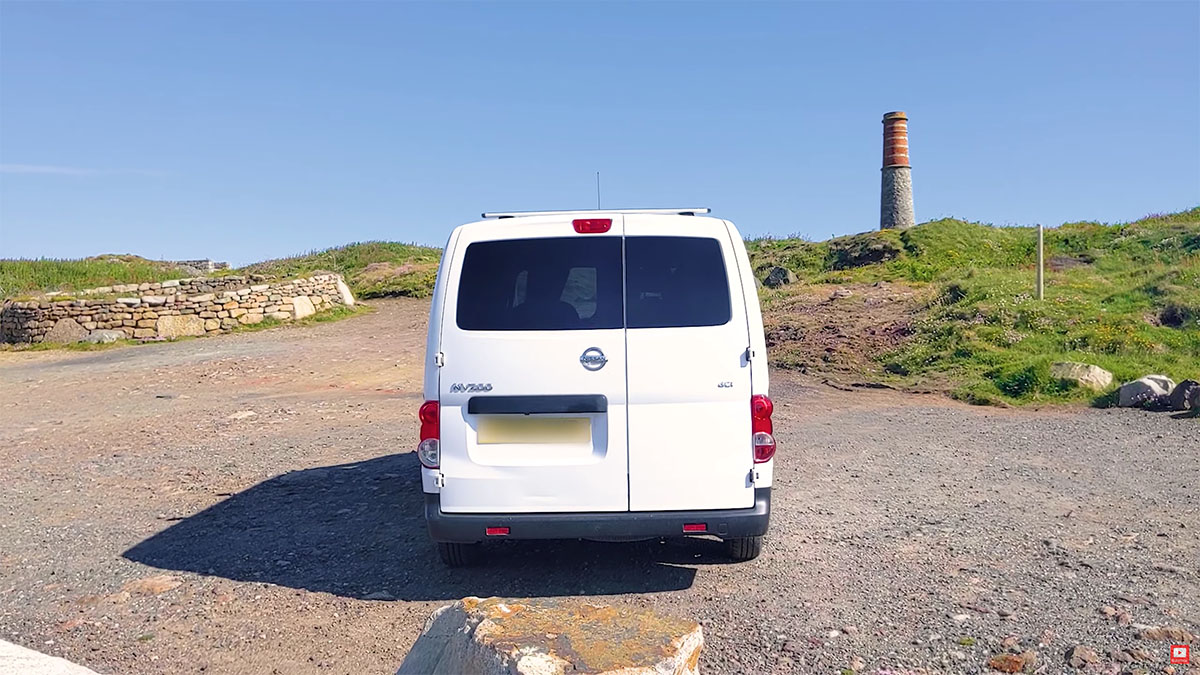
The finished, waterproof windows
So finally, after a lot of hard work then stress and worry, I can sit back and enjoy the benefits of having windows in the back of my Nissan NV200 van conversion – hopefully leak free for years to come!
If I had to do this again, or wanted to install other windows, I would definitely consider getting a professional to do it, or at the very least cut the holes myself and then have them attach the windows.
What’s your van windows story?
So this is my van window story and I’d love to hear what you think and what problems you’ve faced with installing van windows? Let me know in the comments below!
If you want to see more of my camper van build in action, please CLICK HERE.
(Affiliate links which help support this website)
