
This article is a written account of a video from the Lens Of James YouTube channel. Watch the video above and subscribe if you like what you see!
This article contains affiliate links to relevant products I have used in my videos. By buying through these links, I receive a small percentage of the sale at no cost to you which helps me support and grow my website and YouTube channel, so I can create more content like this in the future. Thank you for your support.
In this article…
- It starts with an empty van..
- Insulating the van walls
- Insulating the van ceiling
- Carpeting the van
- Carpeting the van doors
- Making door card pockets
- Installing a vinyl floor to the van
- Creating a 3 section pullout bench/bed
- Adding a cab divider blackout curtain
- Building a wheel arch storage box
- Creating a secret storage cupboard
- Building a floating wall mounted table
- Making thermal window covers
- Extra van accessories
- A converted van…
In this post, I’m running through my ENTIRE van build from start to finish; insulating & carpeting the van, as well as building furniture and adding tons of accessories to make it a unique build. I’ve turned my Nissan NV200 from a small, empty panel van into cosy, comfortable, affordable tiny camper conversion.
Don’t want to read it all? Watch the build here
It starts with an empty van..
This is Yogi, my (2015) Nissan NV200
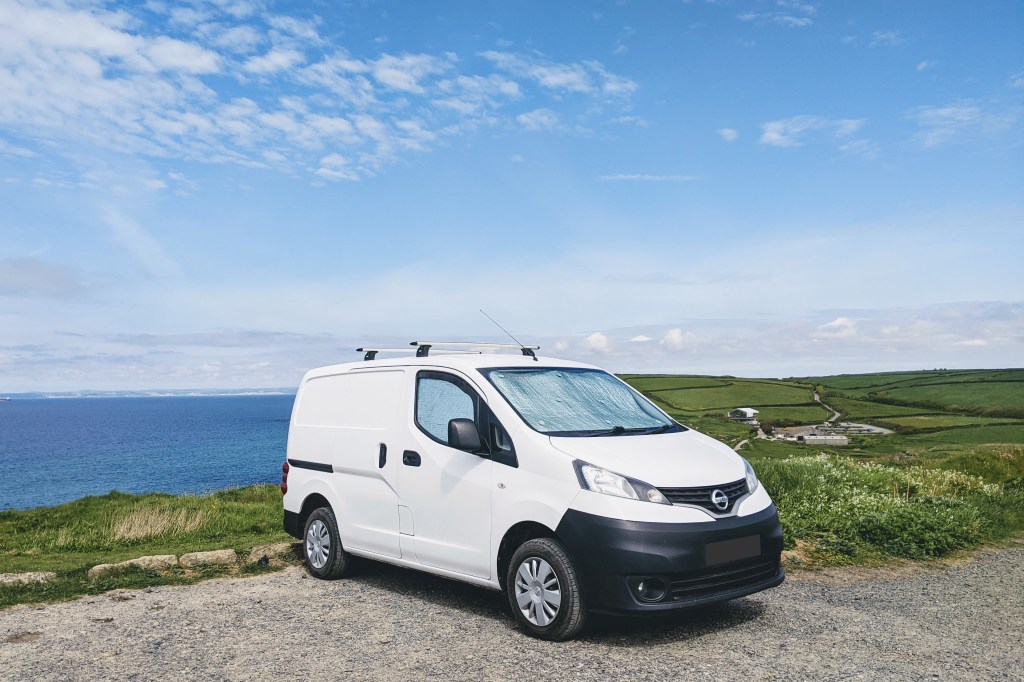
Let me show you how I turned him from an empty panel van into a custom, cosy, comfortable tiny camper for two.
Insulating the van walls
I began, as most van conversions do, with the insulation. Having removed the door cards, I used a combination of silver foil bubblewrap insulation and recycled plastic bottle loft insulation to insulate the van. The silver foil was great for covering areas I would be carpeting over later and the thicker loft insulation filled the cavities in the walls and doors nicely. I then covered these cavities over with the silver foil insulation before replacing the door cards.
I also used silver foil insulation under the plywood floor (more on that later), on the upper wall panels in the back, and under the headliner of the cab, as these areas just had thin metal and picked up a lot of condensation when staying overnight in the van. I should say at this point that I had stayed in the van overnight quite a few times before converting it properly, so had a good idea of where condensation gathered, where I should be insulating and how effective the silver foil insulation is in stopping condensation.
Insulating the van ceiling
To insulate the roof beams, I used some expanding spray foam insulation, which looks really easy here, but got very messy when it started seeping out of the many holes in the beam.
After that, I added more silver foil insulation to the ceiling – another area suffered from lots of condensation – and then I carpeted the beams.
Four plywood boards were cut to fit between the beams, and I screwed (eBay affiliate link) in very thin plywood and insulated up here so as to maximise the headroom, as it’s only a small van and anything thicker would have meant I couldn’t sit upright, defeating my purpose for having a camper van. Later I varnished the ceiling boards to protect them from dirt and condensation.
Carpeting the van
With the van fully insulated, I could start carpeting. Beginning at one end on the drivers side, I worked my way along sticking the smoke grey 4-way stretch automotive carpet to the walls with Trim Fix high temperature contact adhesive.
It was my first time carpeting a van, and it was a lot of work but after about 2 days of carpeting I had both sides done, and was really happy with the result.
I could then carpet the rear edge by the back doors to complete the walls of the van.
Click to buy your own…


(Affiliate links which help support this website)
Carpeting the van doors
Next up was carpeting the doors. I wanted to carpet them as I really liked the look, and wanted to make them as neat as possible so chose to stick rubber u-channel around the perimeter of the doors with a silicone adhesive. I was a bit apprehensive about whether it would hold the rubber firmly to the doors, but I’m pleased to report that the rubber is still stuck solidly. The rubber edge also helps divert rainwater away from the carpet in wet weather.
With the rubber down, I carpeted all four doors with the same smoke grey carpet I had used on the walls, and I could then tuck the cut edges of the carpet into the channel of the rubber for a really neat finish.
Making door card pockets
Using some leftover carpet scraps and a bit of lockdown creativity, I fashioned pockets into the door cards, creating some very cheap but useful storage in the van.
The pockets were made by cutting a double-sized piece of carpet, sticking a bit of thin card in the middle for rigidity, and then folding the carpet over. Excess flaps could then be tucked into slits cut in the door cards and glued from the back, so the mess will never be seen.
I made pockets of various shapes and sizes on all six of the door cards and they’ve been very useful since.
Installing a vinyl floor to the van
The plywood van floor was a mess and needed covering. I unscrewed it from the wood batons I stuck down before I properly began my conversion and removed it from the van, ripping a few holes in the foil bubblewrap insulation beneath, but nothing that couldn’t be patched up with some foil tape.
With the floor out, I trimmed it to a better fit, as the carpet would be tucked underneath the floor, and spent ages sanding all the dirt, grime and contact adhesive overspray off, so I could get back to the wood ready for covering it.
After carpeting the rear edge of the van to neaten it up, I began covering the plywood with a wood-effect vinyl (eBay affiliate link). I had some trouble finding an adhesive that worked well, but in the end a standard contact adhesive did the trick and the floor not only looks great, but is much more durable for use as a camper.
I added a rubber edge to the side nearest the door to smarten it up, and created some circular rubber edges for the load ring holes to protect them.
We’re also on Instagram!
Check out yogi.the.van to keep up-to-date with all our adventures in the van!


Creating a 3 section pullout bench/bed
Sadly I didn’t film my bed build, but what you need to know is it’s a 3 section pullout bench/bed with a built in draw underneath. When it’s pulled out, the bed is a king size and very comfortable!
The reason it’s in 3 sections is because I keep a 9 foot surfboard in the van most of the time, which needs to fit between the front seats, and this was the easiest way I could think of.
The bed is attached by turnbuckles on the floor load rings, which makes it very easily removable, which was a function I was keen for all my van furniture to have.
The draw was also built off-camera, but lives in the gap under the bed behind the front passenger seat. It’s a really useful space for housing day-to-day items, but gets messy quickly, so I created a custom divider system so everything we use has its own space and is easy to access and store.
Adding a cab divider blackout curtain
For the cab divider curtain I drilled two holes on either side of the van, popped some rubber grommets in and, using an extendable curtain pole, hung my blackout curtain. I sewed some magnets into both sides of the curtain so the edges could create a light-tight seal to the metal. It’s a very simple curtain, but has proved very effective.
Building a wheel arch storage box
My next bit of van furniture was a storage box to sit over the wheel arch. Not only does it provide vital storage in the van, but it also provides extra support to the bed when it’s pulled out. The box doesn’t have a back, as the wheel arch and van wall are in this area, and has an upward-opening lid which is attached with a long piano hinge. I added a soft-close mechanism so it doesn’t slam, and magnets so the lid if held firmly shut when travelling.
Like the bed, it’s attached to the van with turnbuckles tensioned onto the van load rings from inside the box, so can easily be removed.
Creating a secret storage cupboard
I had an empty void behind the driver’s seat and thought it could be useful for storing some smaller items, so I took a bit of scrap wood from the wheel arch storage box build, cut it to size, refined it a little, added some hinges (eBay affiliate link) and I now have a small but useful storage cupboard. I bought a couple of large magnets (eBay affiliate link) to hold the door firmly closed when driving.
Building a floating wall mounted table
The furniture which took the most effort was definitely the wall-mounted folding table and storage unit. I started by building the front section, then cutting the table out of it, which I would re-attach later. I then made the sides so they would sit flush with the many contours of the van walls. After that, I could add a base, numerous shelves for storage and then I attached the table into the vehicle, using some built-in threads in the van wall, with 5 high-tensile M6 bolts (eBay affiliate link). The table floats on the wall so that when you use the bed you can still enjoy the full width, as the bed goes under the table with ample room.
The table folds down on a piano hinge and is held up by 2 hanging it with metal wires. Whilst it might appear on first glance that these would get in the way, they don’t really, and are very strong so you can always unclip one to free up more space. The table locks in place with a latch, but also 2 strong magnets to stop it banging when the van’s moving.
The hole in the side is for my handy battery pack which charges all of my appliances, including the ceiling lights, my phone, laptop and head torch. I purposely bought a battery pack which has all the ports facing on one side so I could build it into my table, and I added a door at a later date to protect the ports from the elements, as it’s near the sliding side door of the van.
Making thermal window covers
To help reduce condensation at night and keep the sun out during the day, I created a set of thermal window covers out of leftover silver foil bubblewrap insulation. I stuck 2 layers of this together, and then carpeted one side with leftovers from the van build. To neaten them up, I glued on a fabric edge, which was a bit fiddly, but I don’t have a sewing machine so this was the best option. To hold the covers to the windows, I sourced some suction cups (eBay affiliate link) with little handles that I could push through holes in the covers, and they do a great job of both blacking out the van at night and reducing condensation.
Click to buy your own…


(eBay affiliate links which help support this website)
Extra van accessories
I’ve also added tons of accessories to the van.
My favourite is the nifty door pole which stops the back doors from slamming when it’s windy. It’s a fairly simple construction, but it does a great job by locking into the door latches. It lives out of sight under the table unit when not in use.
I also installed some wind deflectors. As I haven’t added a fan to the van, they help keep the rain and wind out when I’ve cracked the window ajar for ventilation.
I mentioned that the van was cosy, and adding fairy lights really helped with that! I got a 12 metre-long set of usb-powered fairy lights and strung them around the perimeter of the van ceiling twice, and these neatly plug into my battery pack and are used more than my ceiling spotlights.
Finally, I added a ceiling net which is perfect for storing light objects – especially things you need easy access to at night. It attaches to 2 metal eyes screwed into some threads above the back of the front seats, and to 2 mounting points screwed into one of the roof beams.
A converted van…
So that’s my van build, and if you’ve made it to this point, you’re probably wondering ‘how much did all this cost?’ Well, I’ve done a whole cost breakdown video, so do check that out on my YouTube channel.
Also, if you want to see more from my van build, then I’ve got individual, detailed videos on everything I’ve put in my van. There’s a link to my entire van build in the description, or you can check them out on my channel.
If you want to see more of my camper van build in action, please CLICK HERE.
Click to buy your own…

(Affiliate links which help support this website)
