
This article is a written account of a video from the Lens Of James YouTube channel. Watch the video above and subscribe if you like what you see!
This article contains affiliate links to relevant products I have used in my videos. By buying through these links, I receive a small percentage of the sale at no cost to you which helps me support and grow my website and YouTube channel, so I can create more content like this in the future. Thank you for your support.
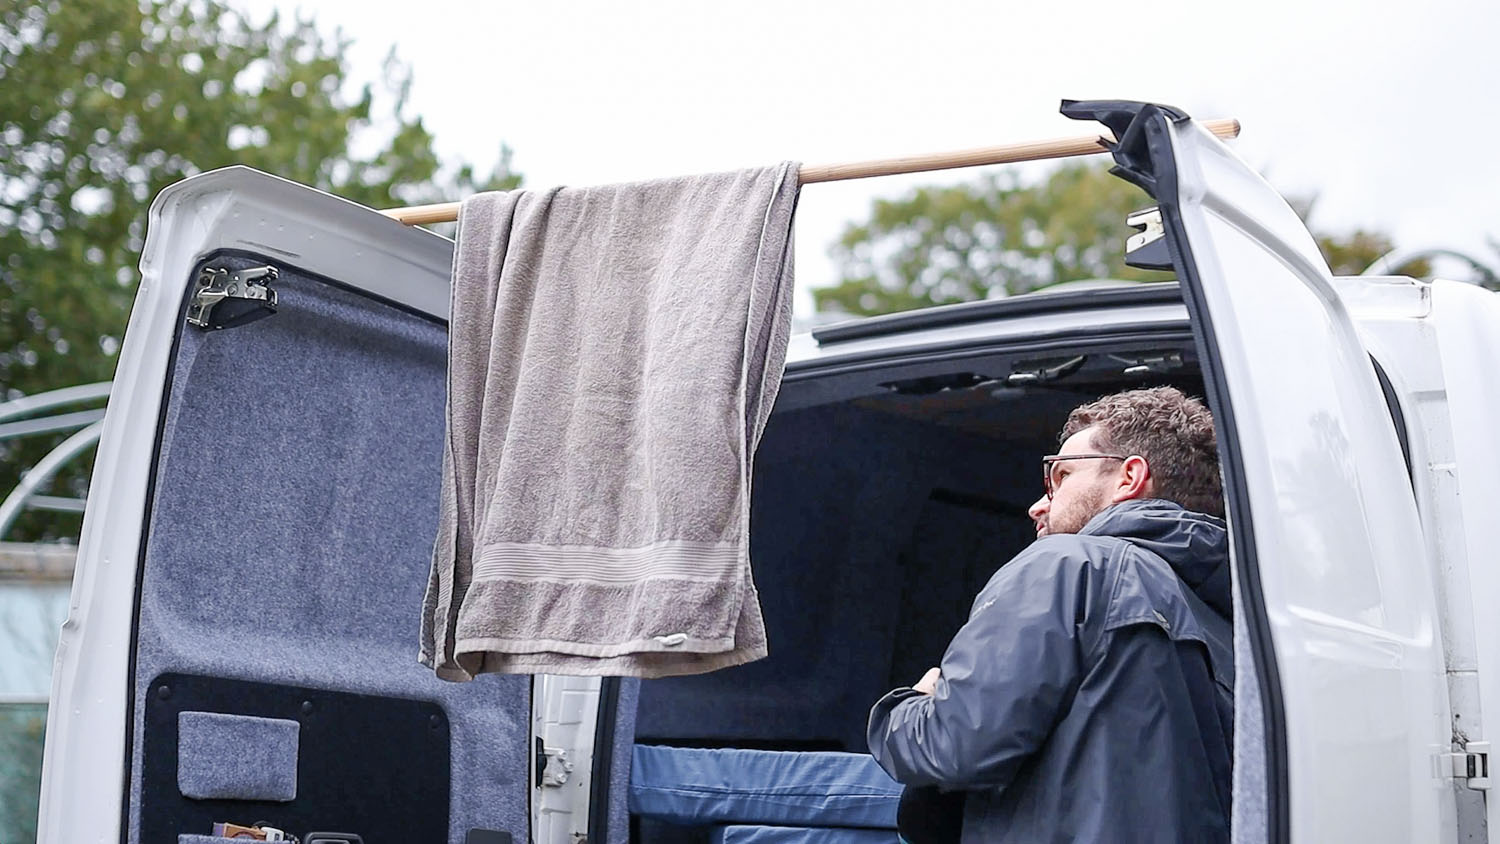
If you’ve ever had your rear barn doors slam on you, you’ll know it’s an irritating, sometimes painful and always frustrating facet of owning a van or car. So, I’ve created a door bar to stop this from happening…and it costs under £25!
Door Bar Prototypes
If you’ve been following my van build, then you’ll know that I’m not new to door poles, and I featured my original one in my Van Essentials video, which was just a broom handle with notches cut in the ends and magnets holding it in place on the van paintwork. Perfectly useful for hanging things, but not good enough to withstand serious wind and it was difficult to store too as it was one long piece of wood.
Before landing on my final design, I tried a two piece pole using a hardwood broom handle which I cut in half, which solved the problem of storage as it was short enough to be tucked away easily. To connect the two pieces, I drilled recesses in the ends and epoxied a bolt into one and a nut into the other. Screwing this design together took way too much time and effort, and the combined lack of accuracy and strength at the join meant that this wouldn’t be suitable either. After a little bit of testing, it soon broke!

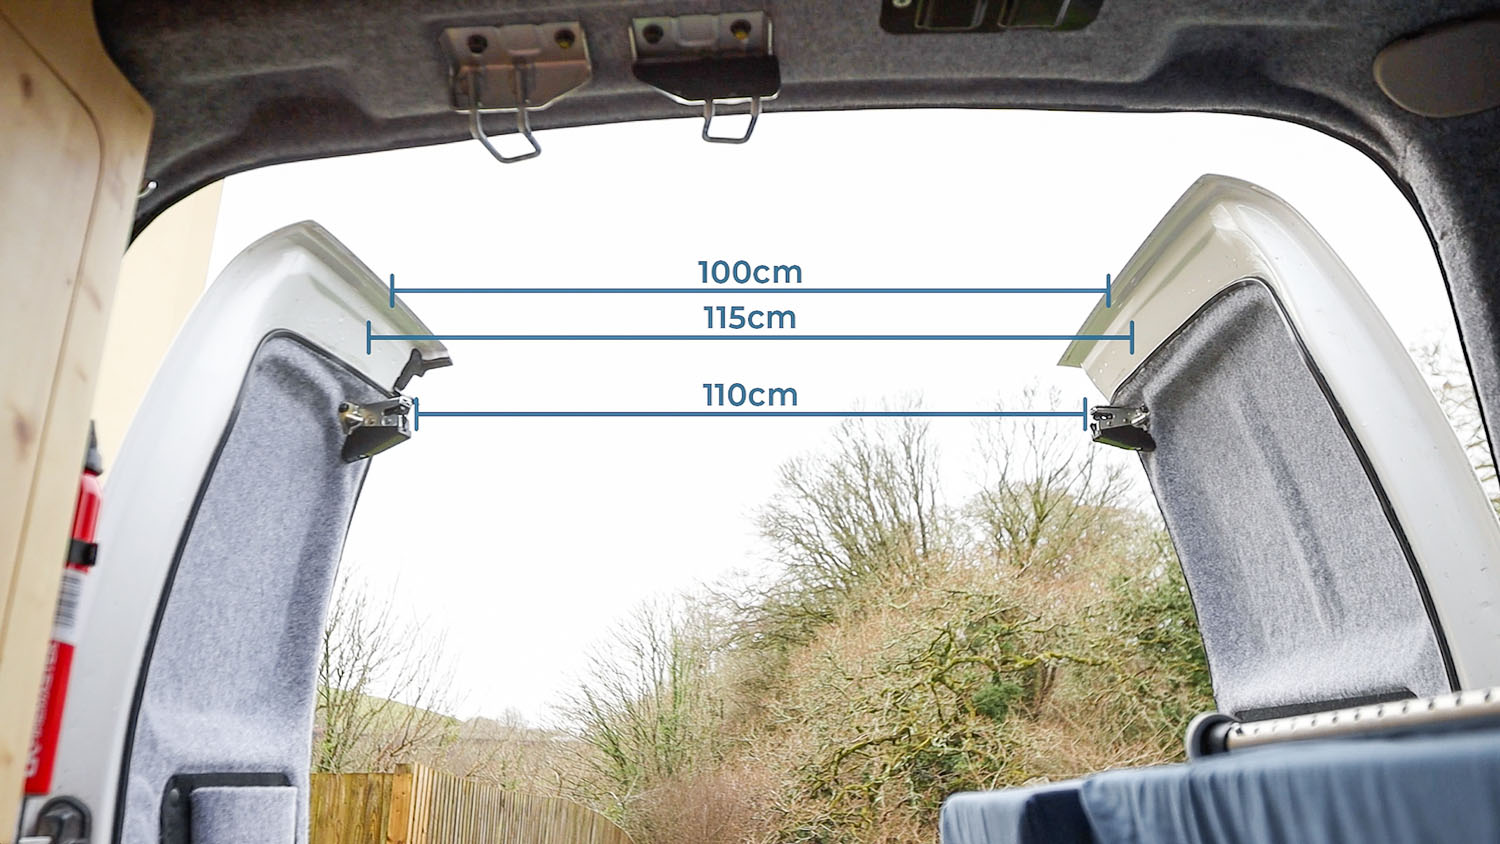
Nissan NV200 Rear Barn Door Measurements
To get my third – and hopefully final – version underway, I first measured the van doors to see what I was working with, and I’ve put the measurements below in case they’re of use to anyone.
Door Bar Materials
After doing a good deal of research into what products might already be out there I started looking into extendable poles, with a view to adapting one into a door bar. I had seen a really interesting idea on a van forum which tackled the same problem and they had utilised the door latches as a secure way to hold the bar in place.
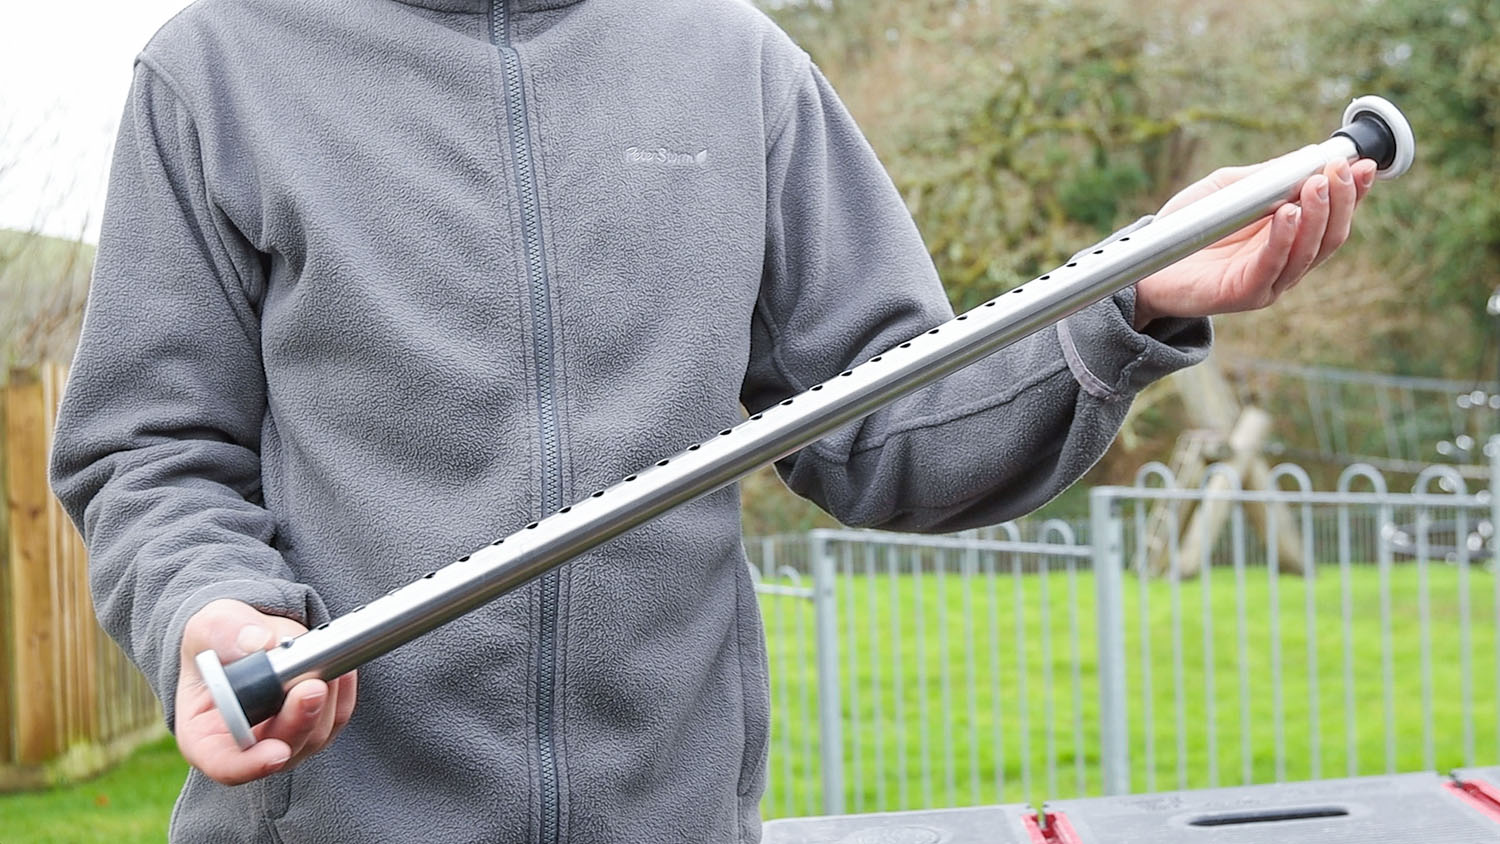
I found this shower rail on Amazon and the 70-110cm version was a good length for my van and a good price too.
Click to buy your own…


(Affiliate links which help support this website)
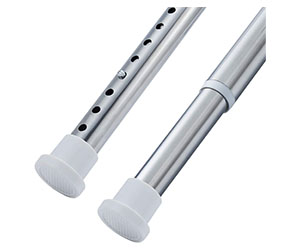
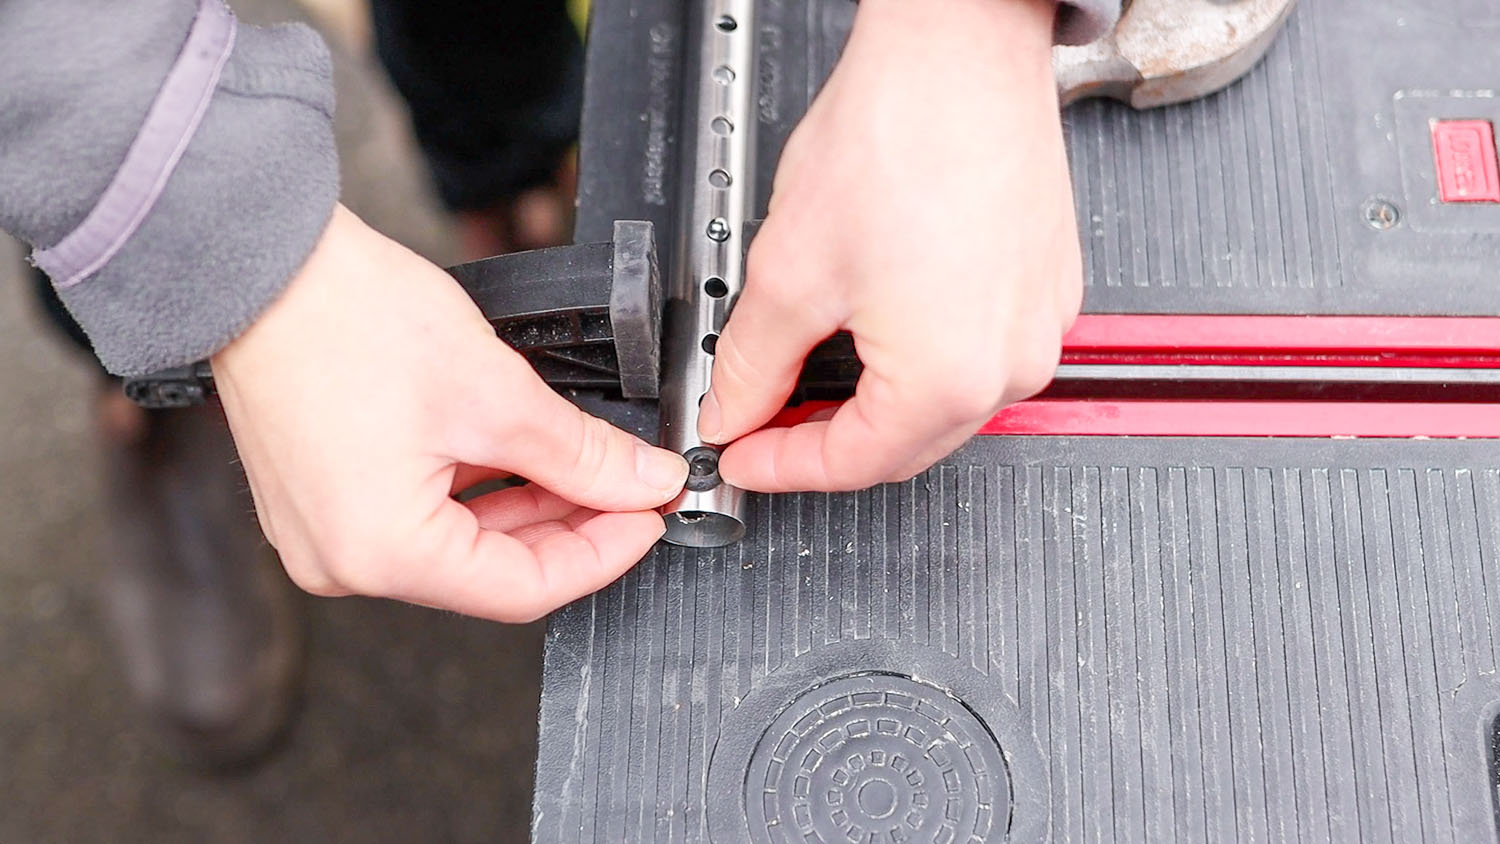
First, I could remove the end caps as I wouldn’t be needing them. As you can see, it has pins instead of a twisting tensioning mechanism, which I figured would be a quicker way to extend the pole.
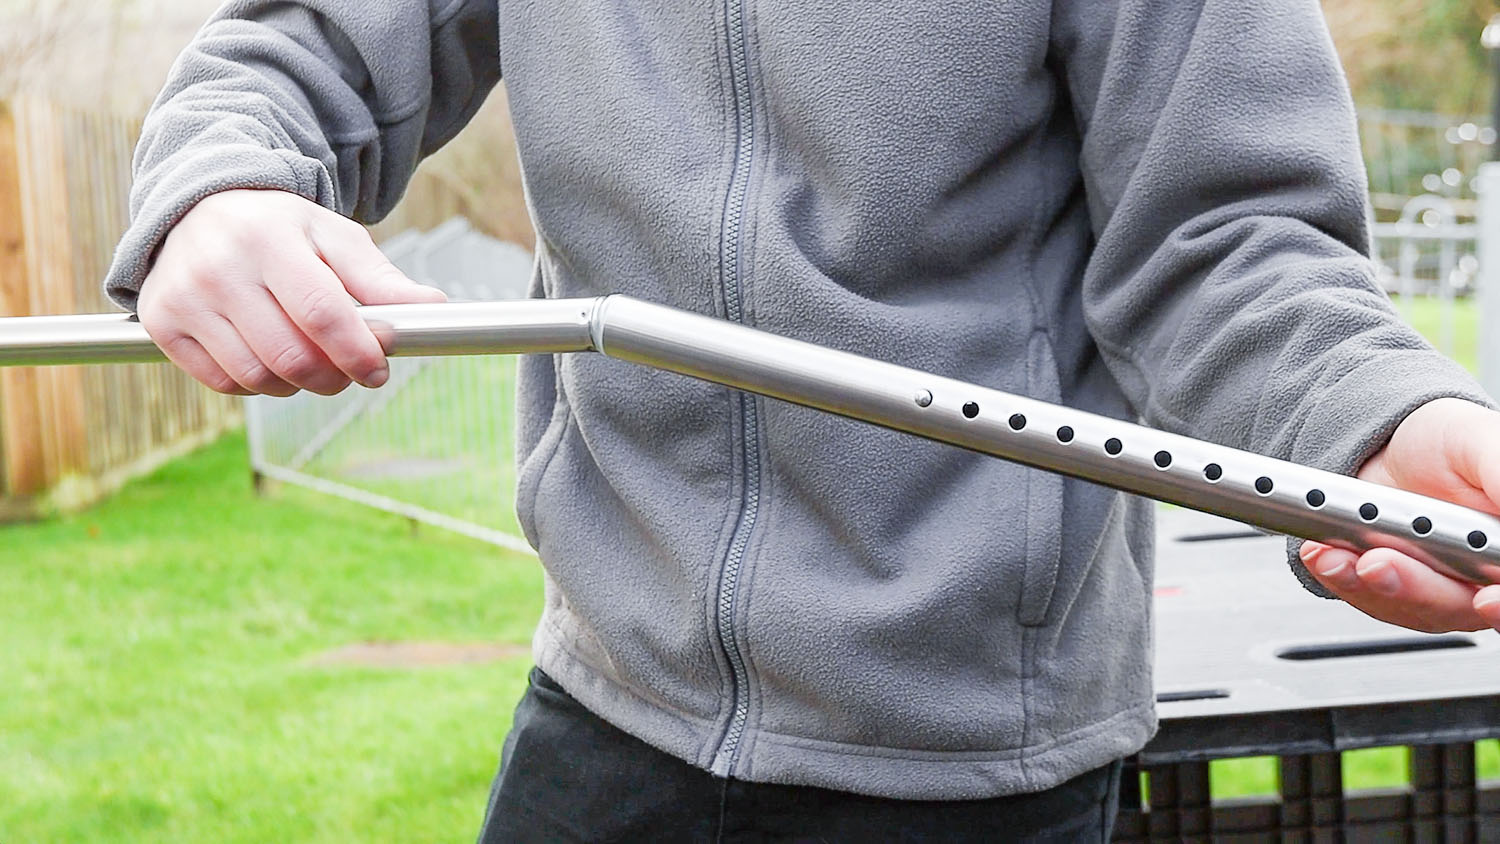
It was very sturdy when extended to the length I needed it, which was the 6th hole from the end, however if you did use the final hole then it gets very flimsy very quickly!
But before I begin turning this shower pole into a van door pole, let me explain what I’ll be doing.
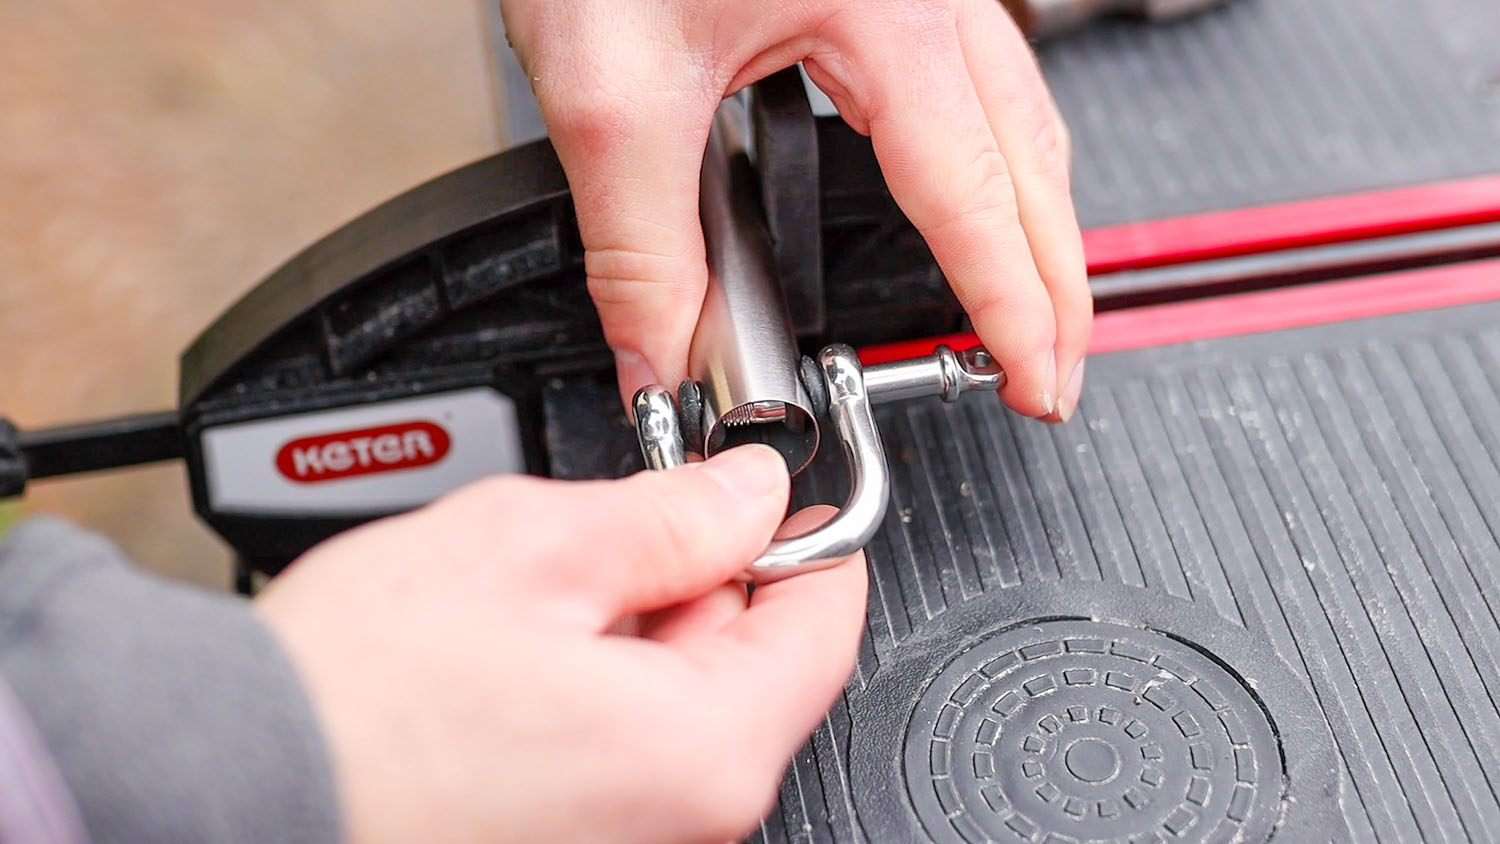
My aim is to find a way to allow the pole to attach to the van’s rear door latches, and that can be achieved using something like these D-shackles.
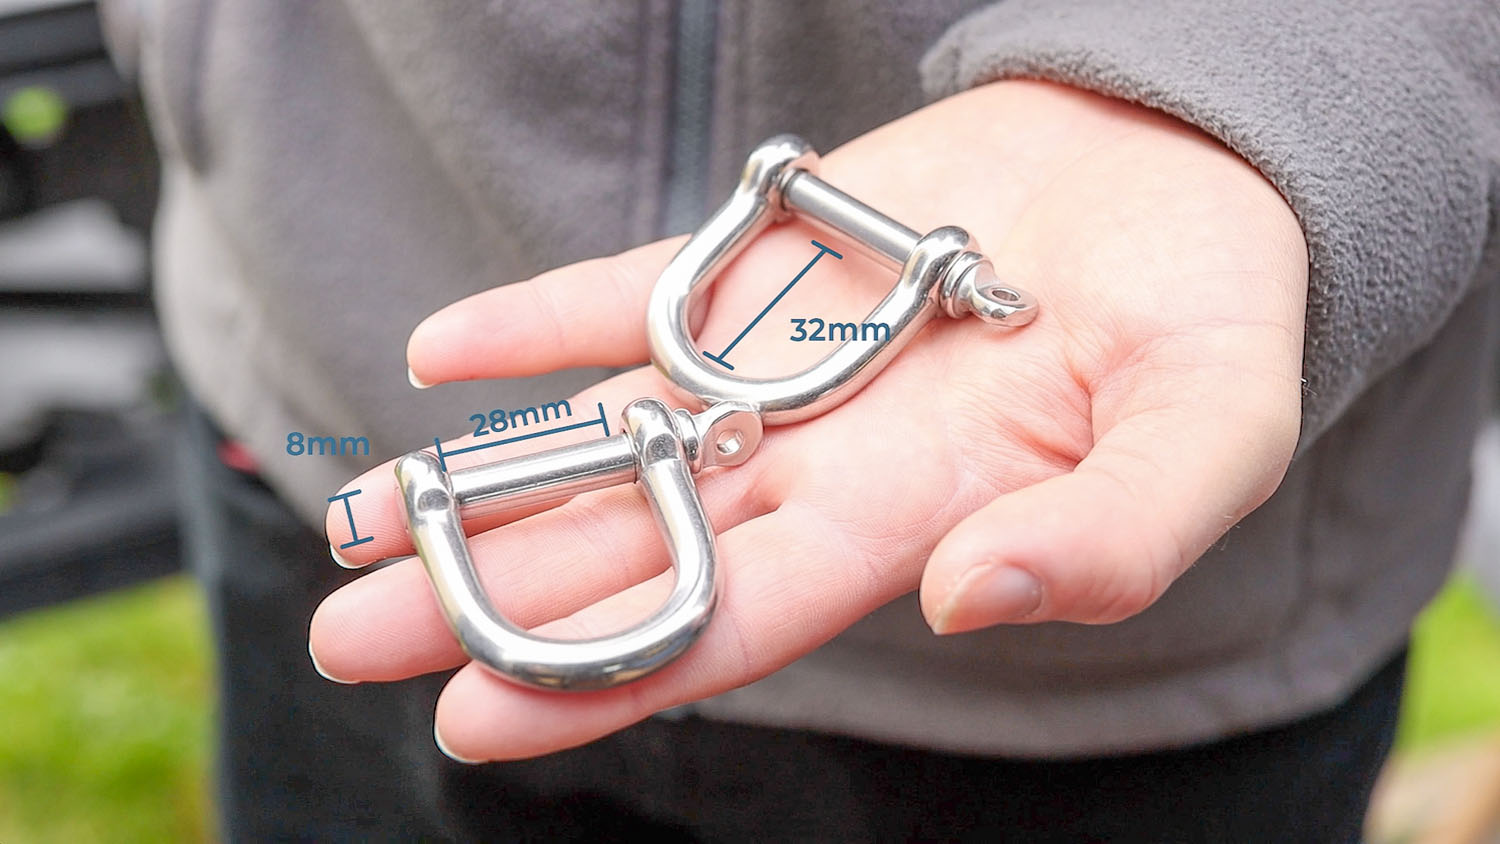
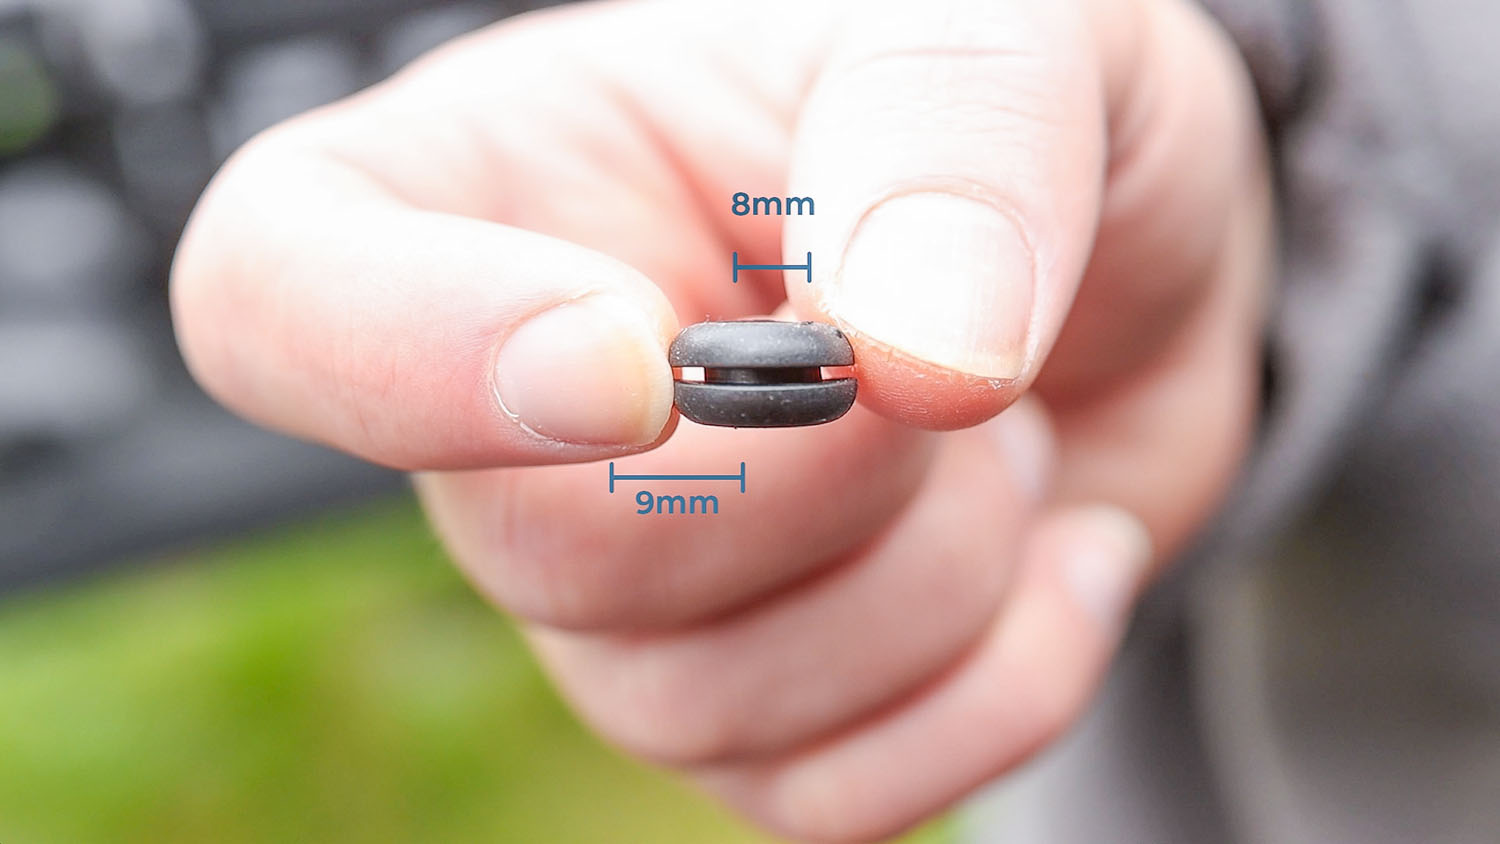
In order to attach them to the pole, I’d have to drill a couple of holes in each end, and that’s where rubber grommets come in – to cover up any sharp metal and stop the shackles from rattling around when I’m driving.
Building The Van Door Bar
I punched a mark for the first hole and, using my trusty step drill bit which has been super handy throughout my van build, I drilled my first hole to fit the grommet, which was meant to be 9mm, but turned out to be 10mm as the drill bit goes up in 2mm increments, but that didn’t matter in the end.
Happy with it, I could then drill another hole on the other side, and then flipped the bar to drill two holes to the same diameter on the other end using exactly the same method.
And they turned out pretty good. I tried to get rid of the burrs but the grommets – which I could now add – covered any remaining metal up nicely.
I could then screw on the D-shackles which went through easily and then I could test the pole out.
We’re also on Instagram!
Check out yogi.the.van to keep up-to-date with all our adventures in the van!


Testing The New Door Bar
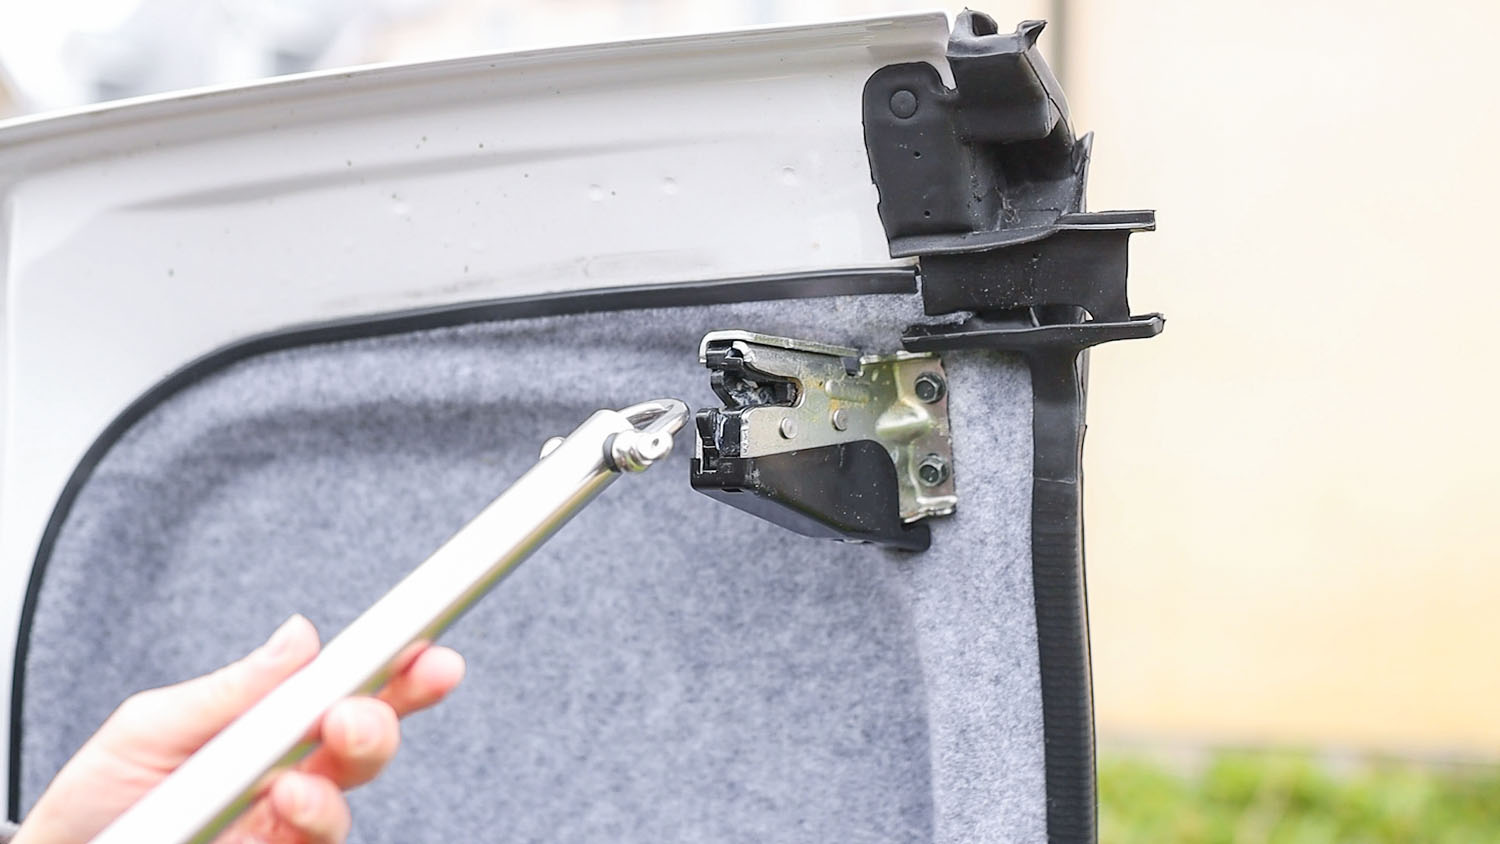
The shackles fit in the latches really smoothly and they can easily be removed by pressing the inside or outside door handles of the van’s back doors.
Storing The Door Bar In The Van
I could now turn my efforts to where to store the pole. I originally wanted to attach it to the underside of my wheel arch storage box lid, but the space in there is too valuable, so after some thinking I decided to attach it to the underside of my new folding table unit.
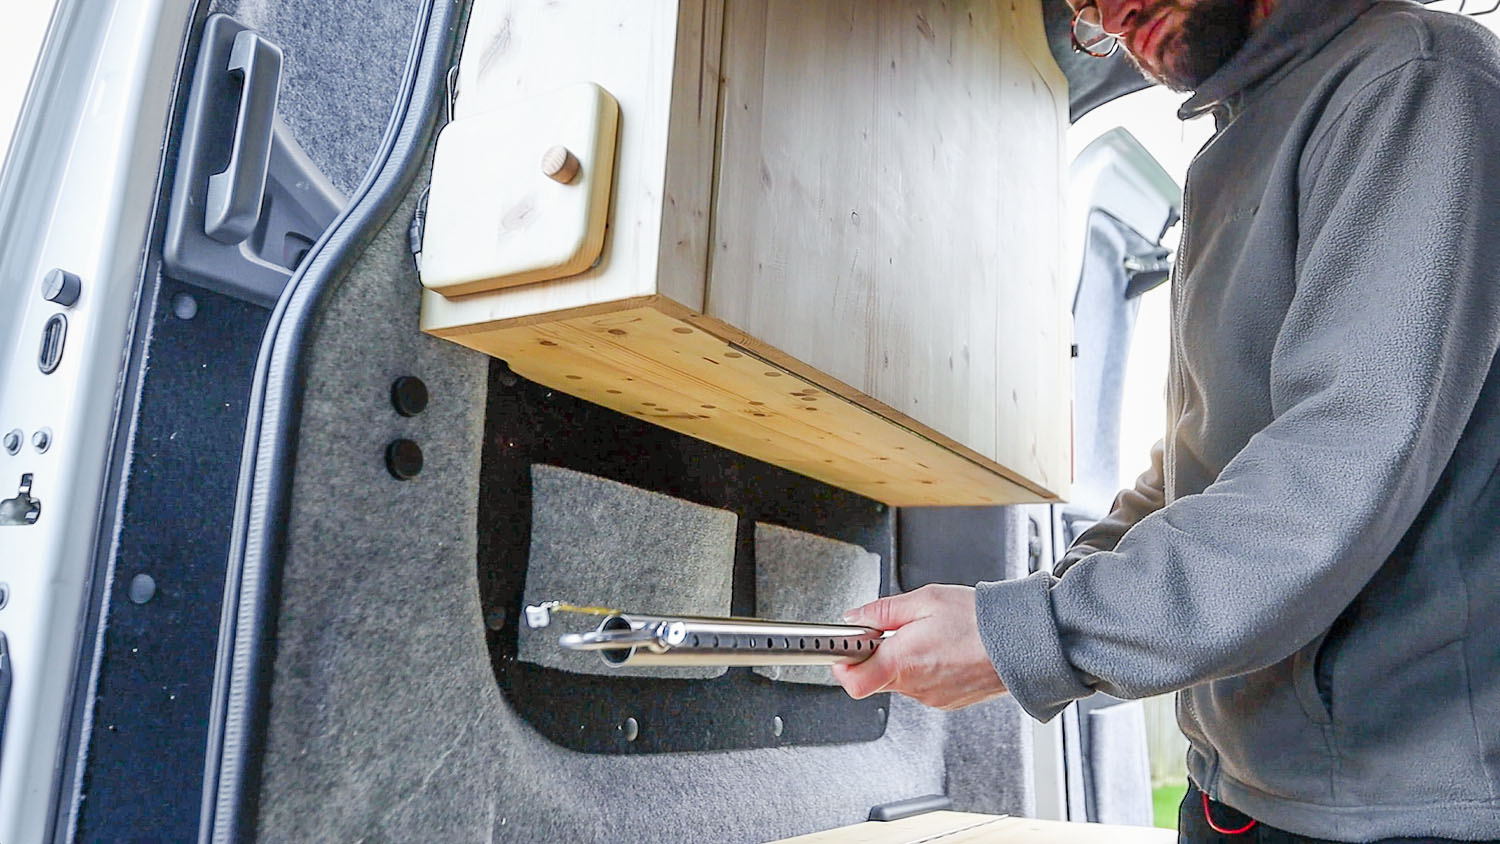
It’s out of the way and out of sight here and although there are a couple of pockets on the wall, I only really use them for storgage when sleeping in the van, plus there’s still adequate access to them in any case. And talking of sleeping in the van, I did pull my 3 section bed out to make sure the pole wouldn’t interfere with sleeping room!
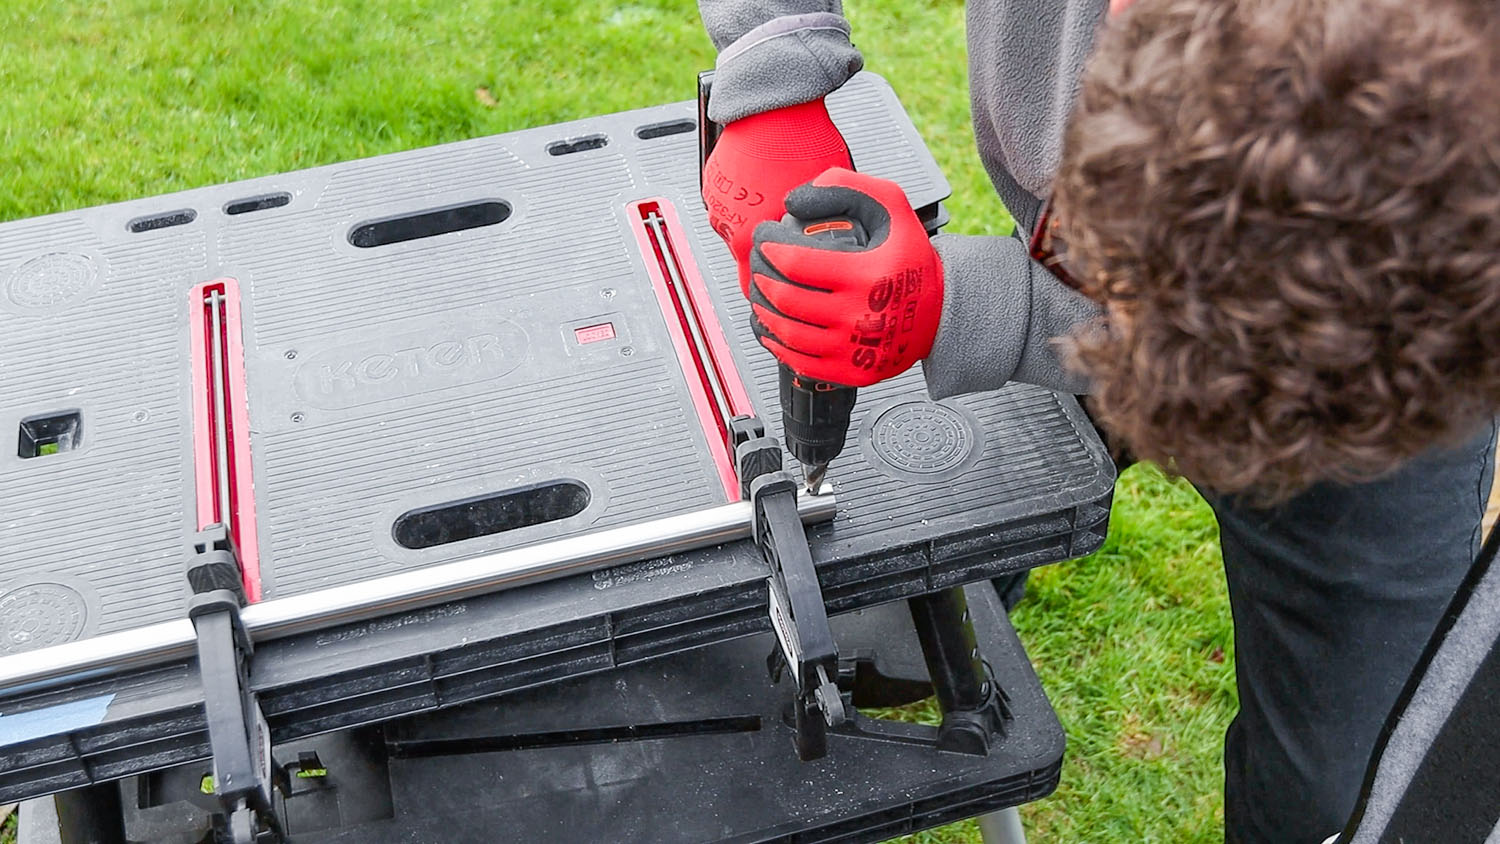
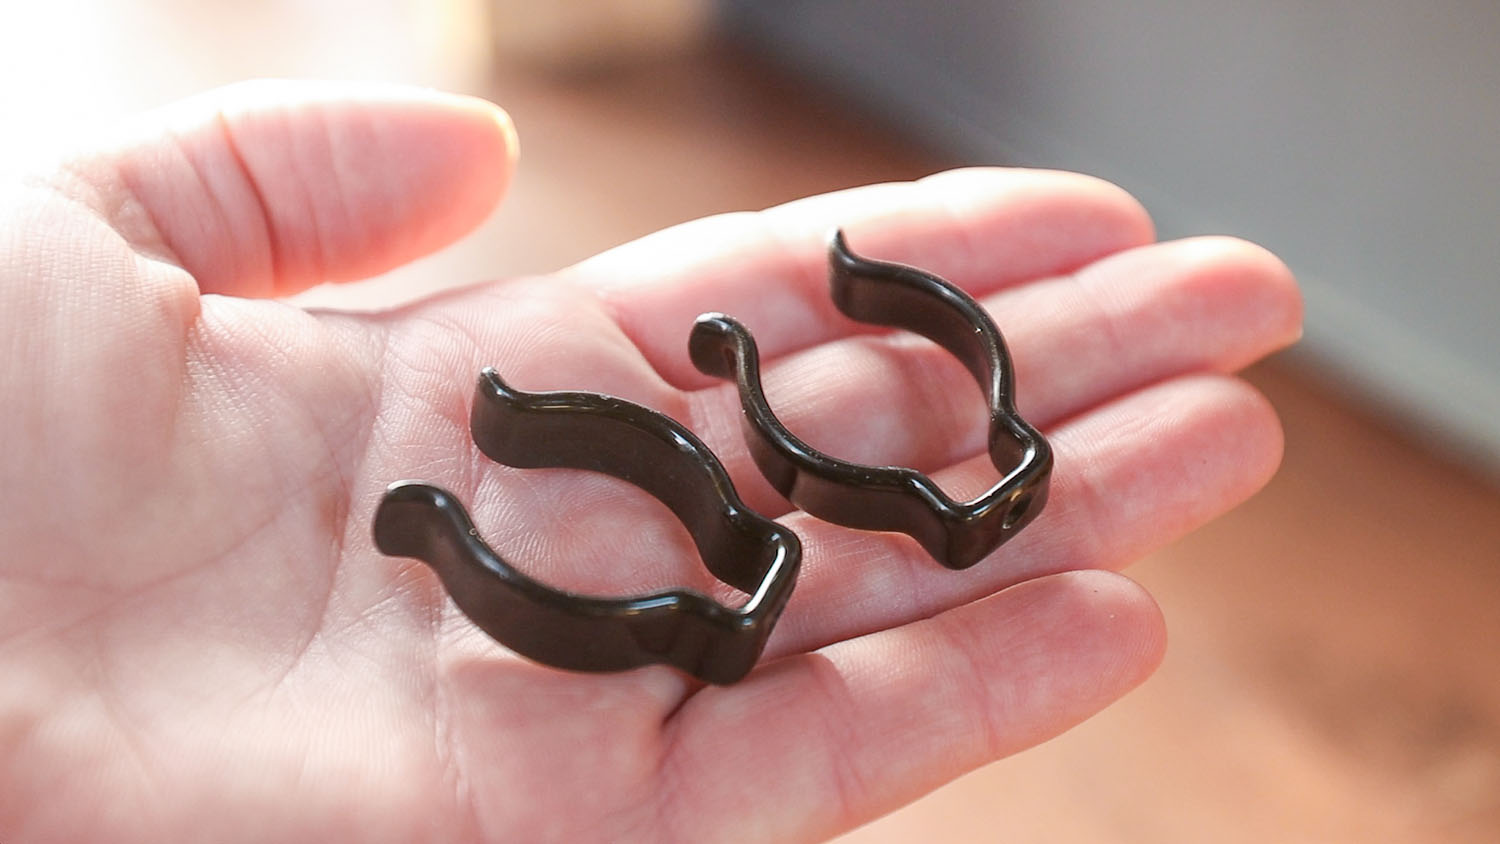
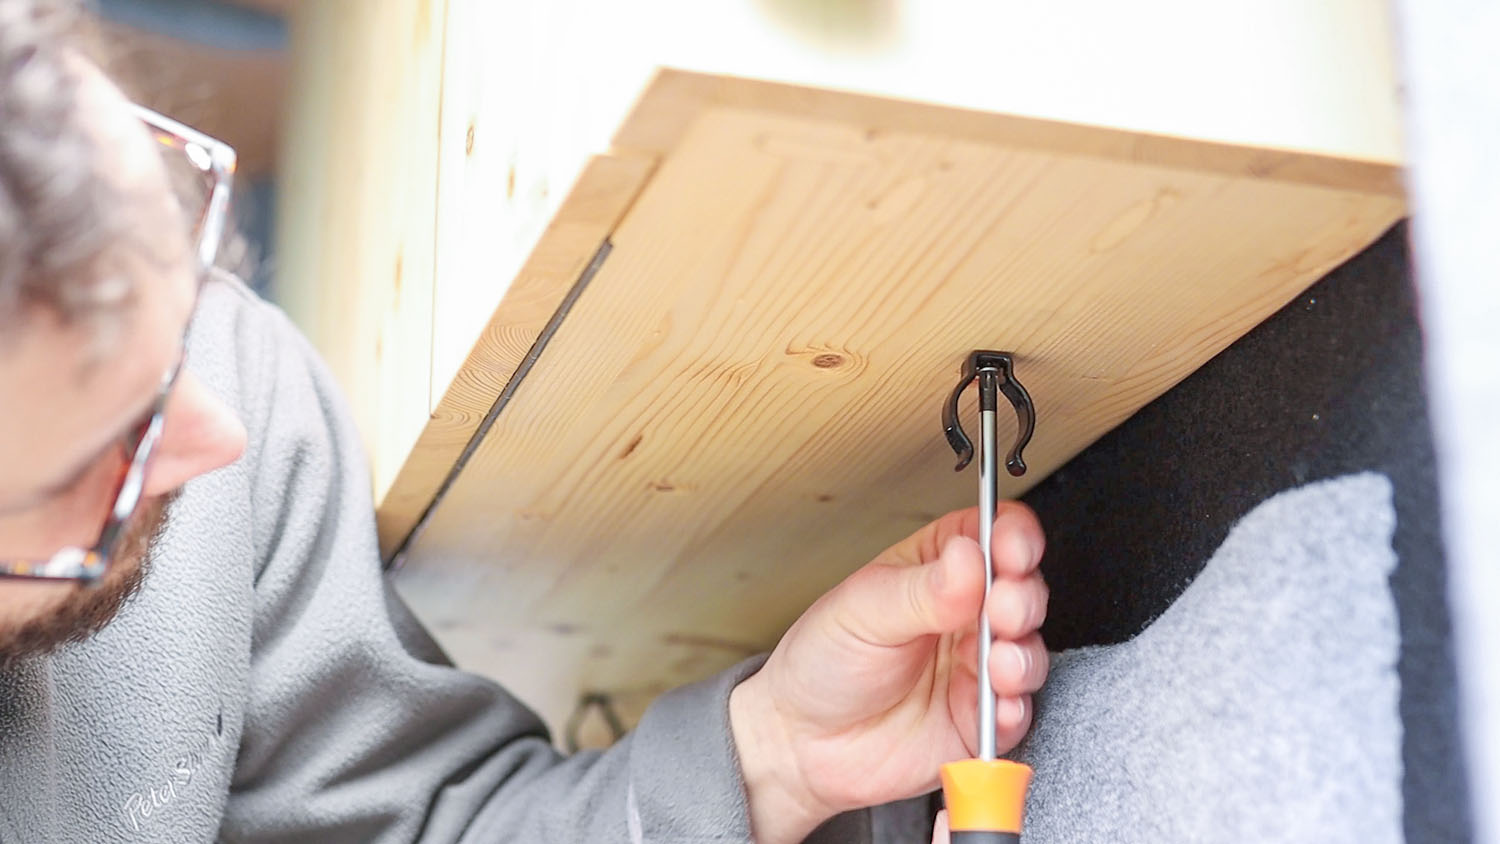
With the space measured up, I could think about fixings; I got these plastic-coated tool clips off eBay and they fit perfectly and don’t rub or rattle the metal.
Once I had decided where these would fit, I drilled pilot holes and screwed them both in and finally I could install the pole!
The pole sits under the table unit really well. It’s shorter than the length of the table, so is nearly completely hidden.
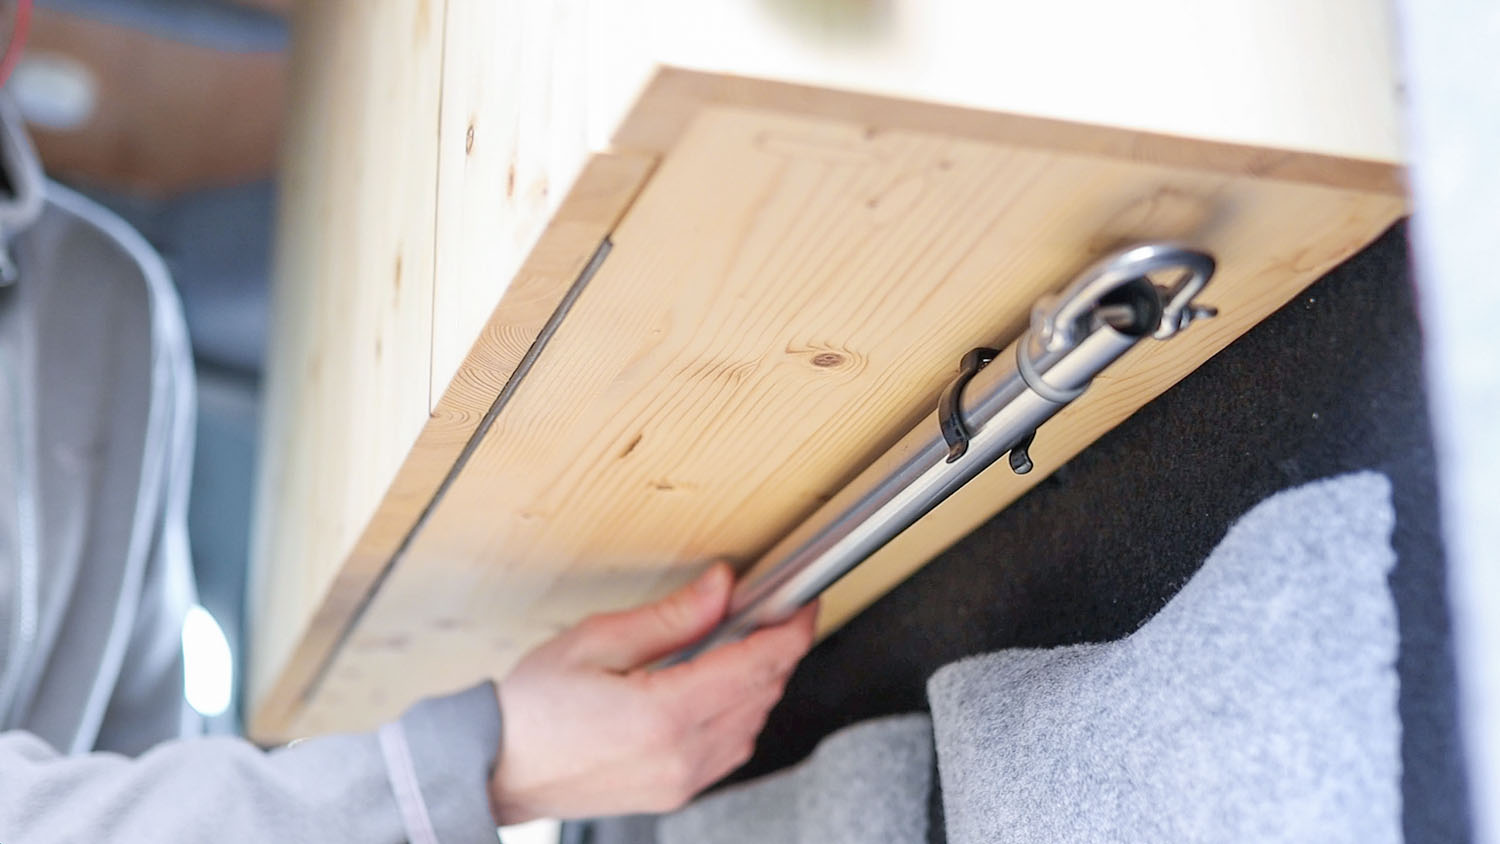
As a whole, the pole looks really smart and meets all of my criteria – easy to store, quick to assemble, strong and won’t damage the door.
I think the door bar will be incredibly useful for my van, and the fact that the whole thing only came to about £25 is a bonus.

If you want to see more of my camper van build in action, please CLICK HERE.
Click to buy your own…
(Affiliate links which help support this website)
