
This article is a written account of a video from the Lens Of James YouTube channel. Watch the video above and subscribe if you like what you see!
This article contains affiliate links to relevant products I have used in my videos. By buying through these links, I receive a small percentage of the sale at no cost to you which helps me support and grow my website and YouTube channel, so I can create more content like this in the future. Thank you for your support.
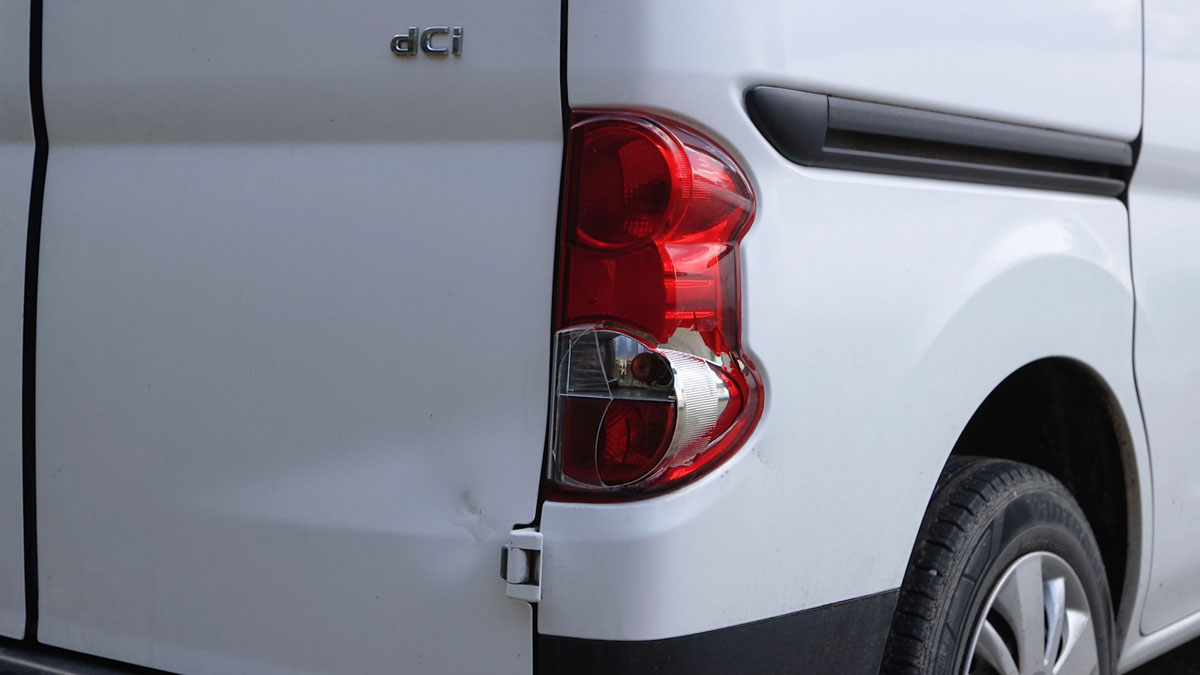
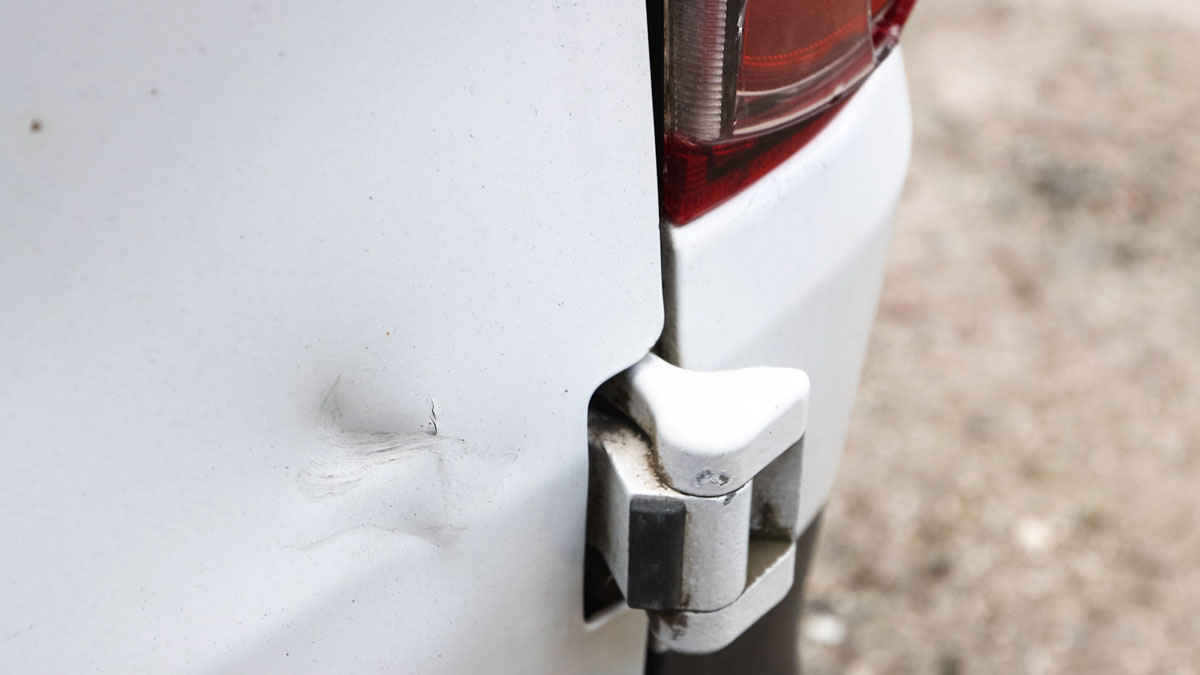
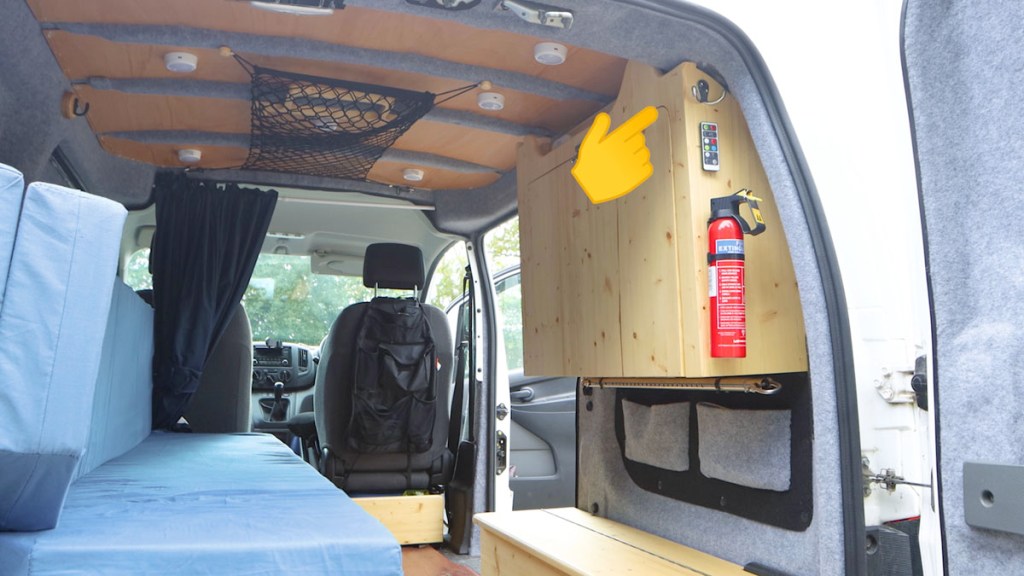
Someone hit my van!
Yogi, my beloved Nissan NV200, which I’ve painstakingly converted into a tiny camper was parked outside my house when a girl came whizzing down the street on her bike and straight into the rear light, braking it and causing damage to the paintwork either side whilst putting a dent above it.
The girl was fine, thankfully, but whilst going through the arduous back and forth of getting the damage paid for and fixed, I thought…if this was to happen again, it’d be really nice to have some evidence…maybe I should look into getting a dash cam! Of course, it’s pretty much impossible to film all angles of the van at all times but given the time, money and energy I’ve put into converting my van into a custom camper, I figured it was time to install a dash cam.
I had a pretty extensive list of specifications that I wanted to have including:
- GPS
- Dual cameras
- A parking mode
After doing some research, I reached out to Nextbase, a leader in the dash cam market, and they kindly sent me their 622GW dash cam with a couple of awesome extras to try out.
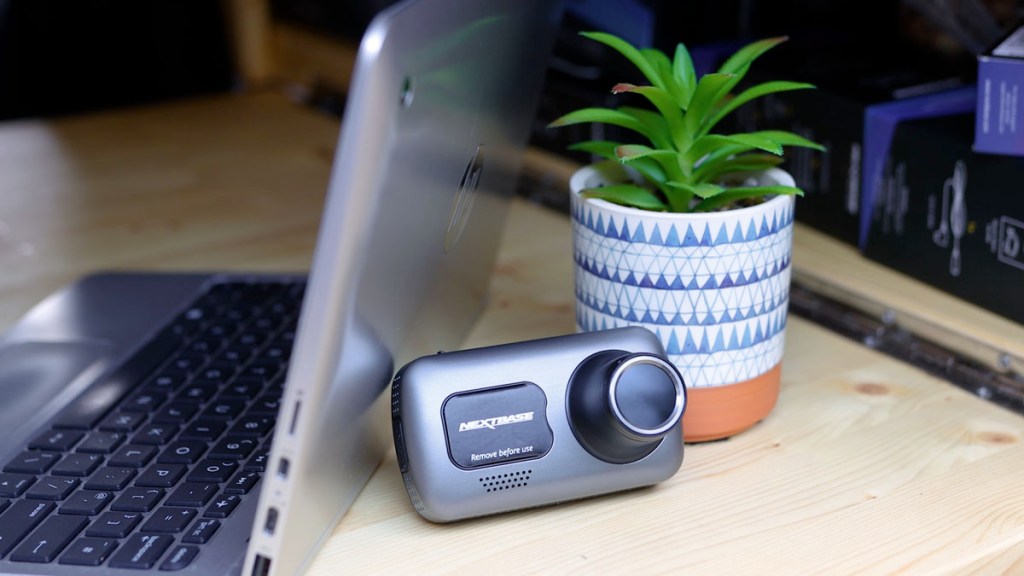

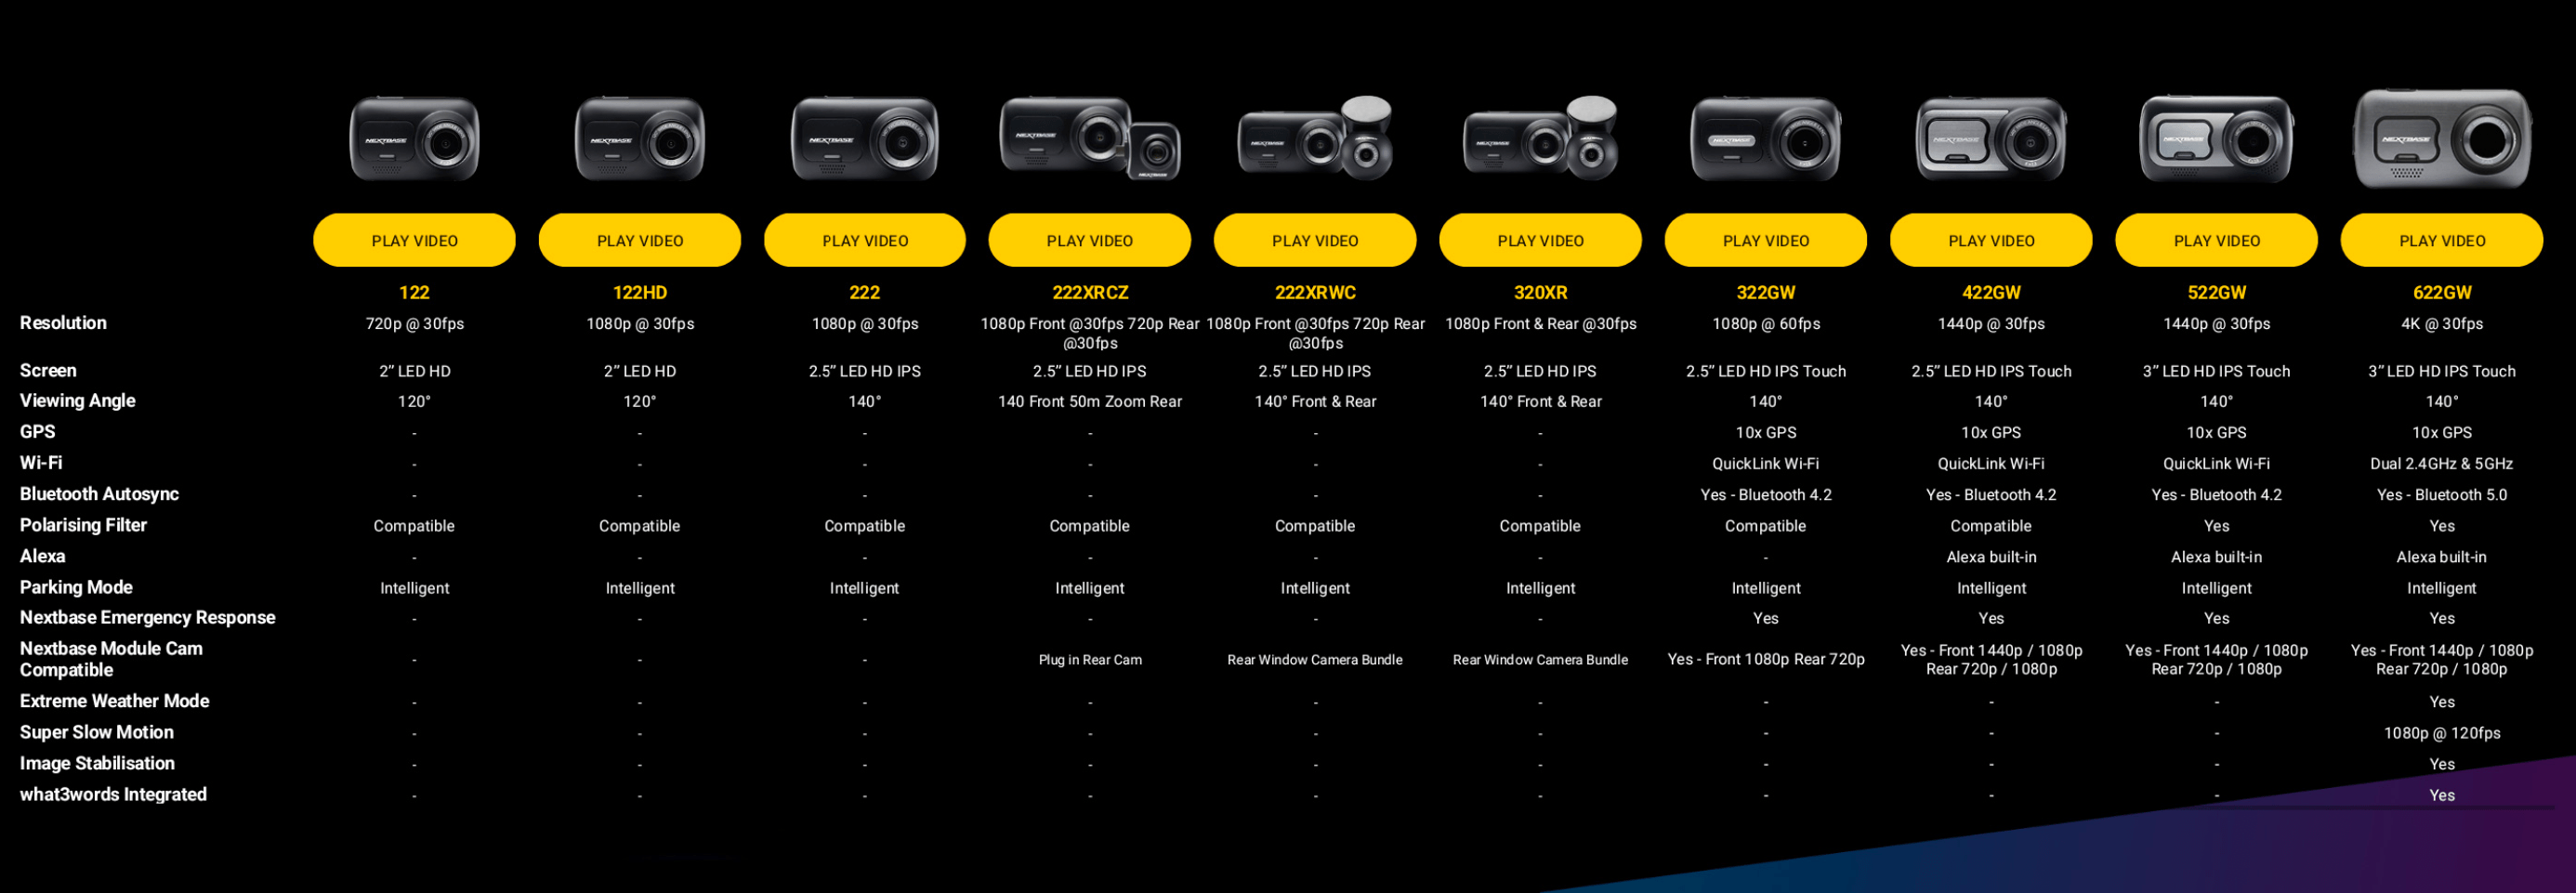
The 622GW is a 4k dash cam, jam-packed with useful, practical features that I can’t wait to share with you, but first let’s quickly go through the dashcam, what you get in the box and what I’ll be featuring in this article!

What’s in the box

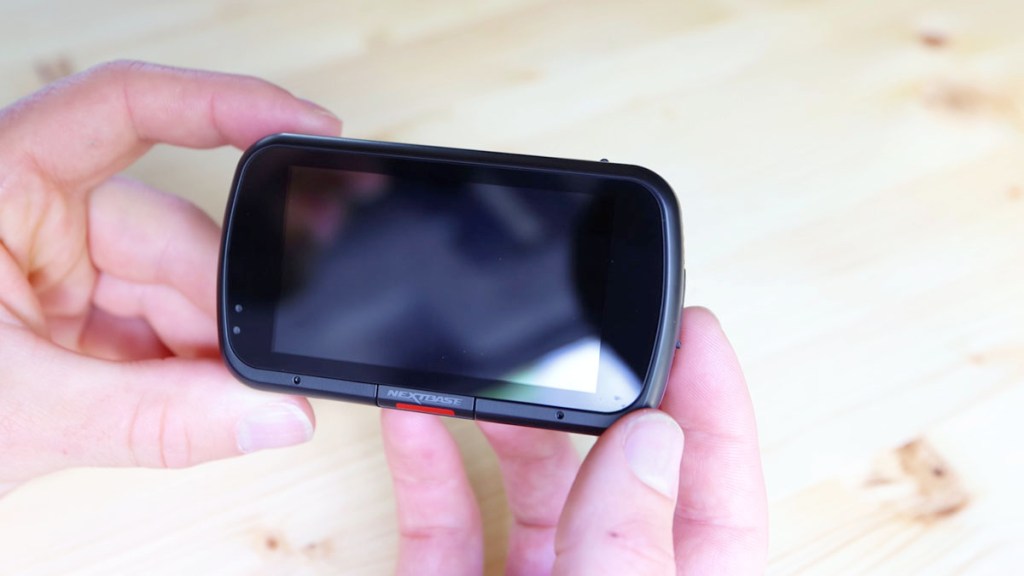
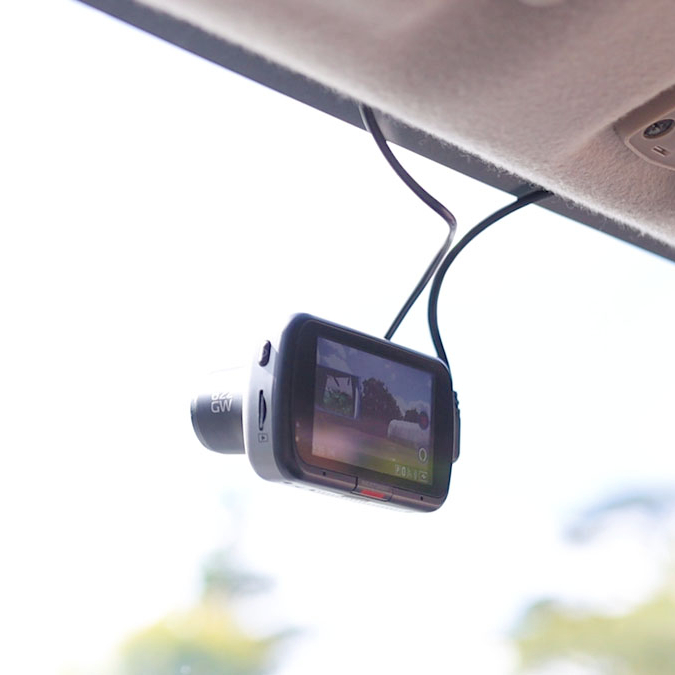
When you open the box you’ll find a very nice looking camera with a matte grey plastic finish.
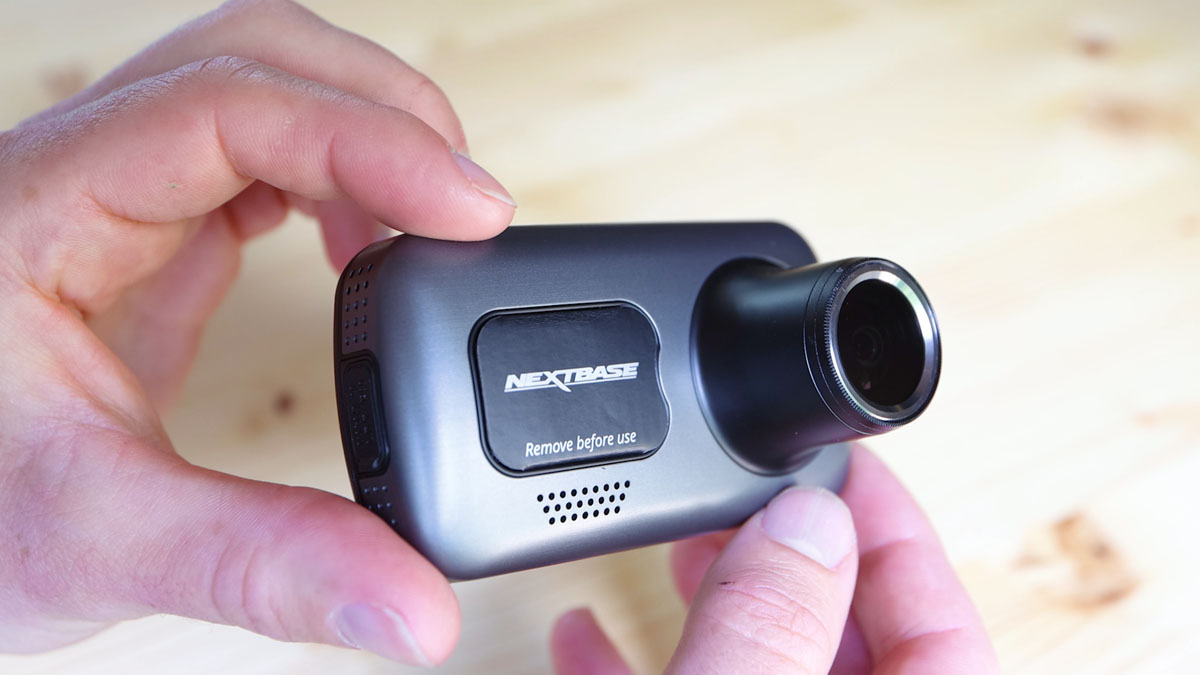
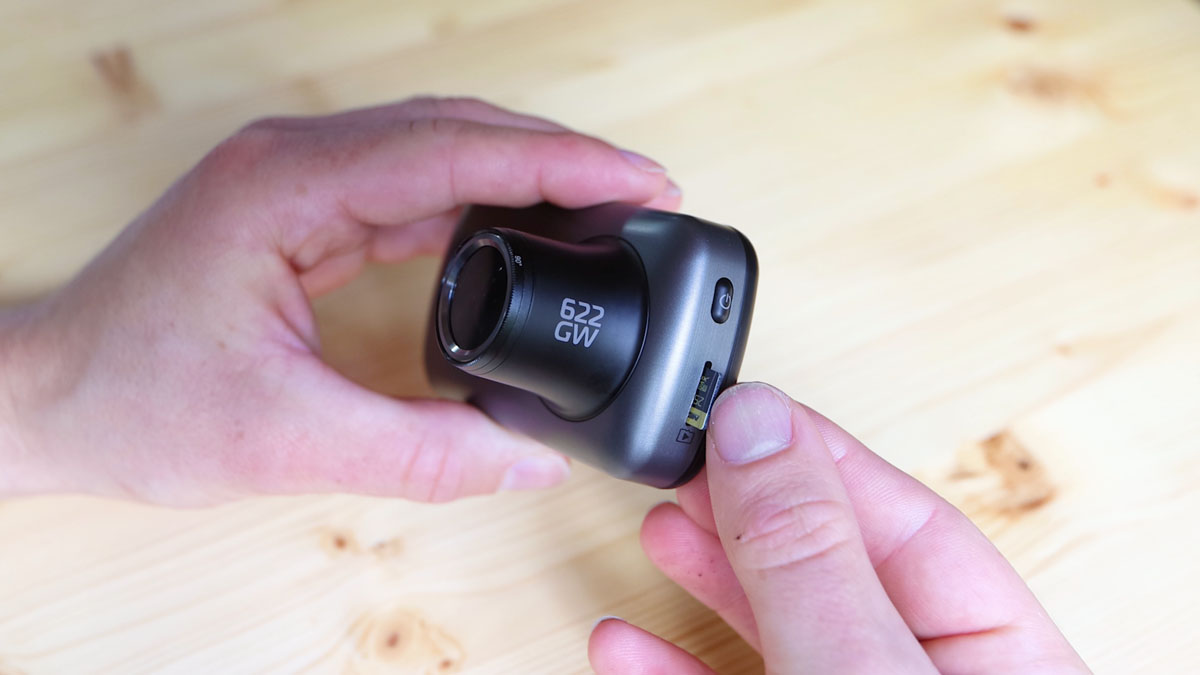
It has a large ultra wide 140 degree lens with an aperture of f/1.3 and a built-in polarising filter. It utilises an Ambarella H22 chipset and an Omnivision 8MP sensor, providing 4k footage. The panel on the front with the logo on is just a bit of card covering where the windscreen mount will sit and below that is a speaker.
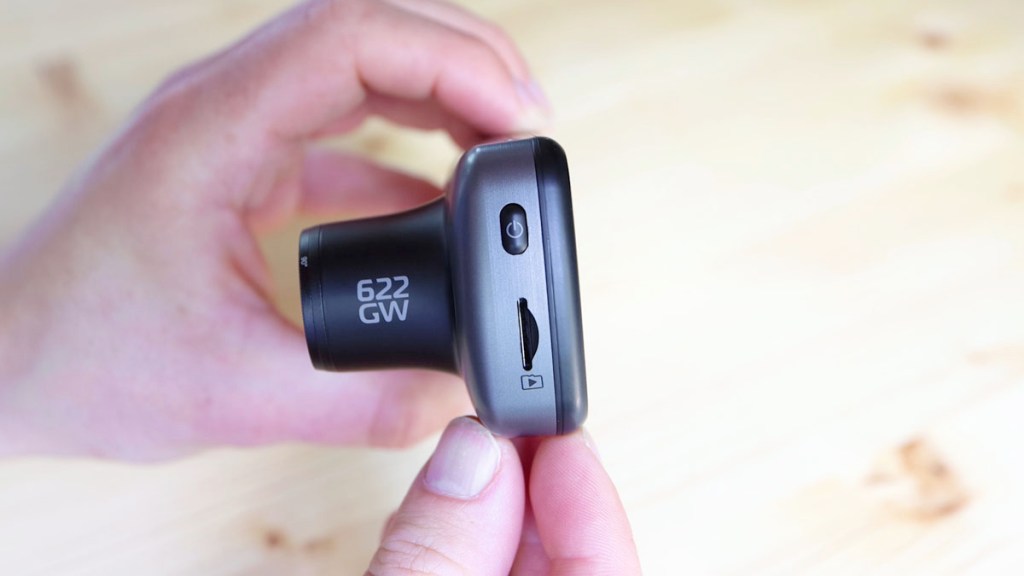
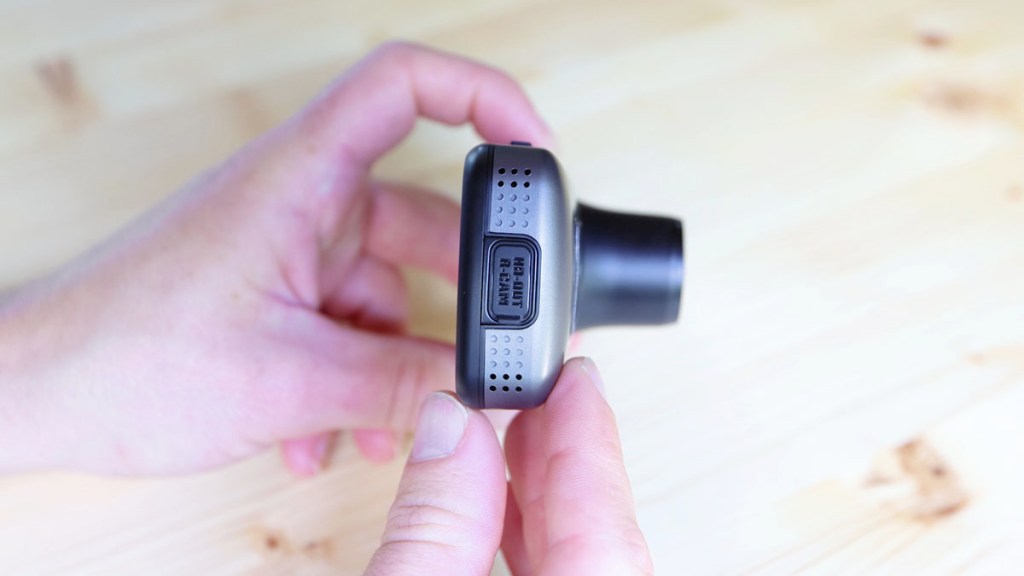
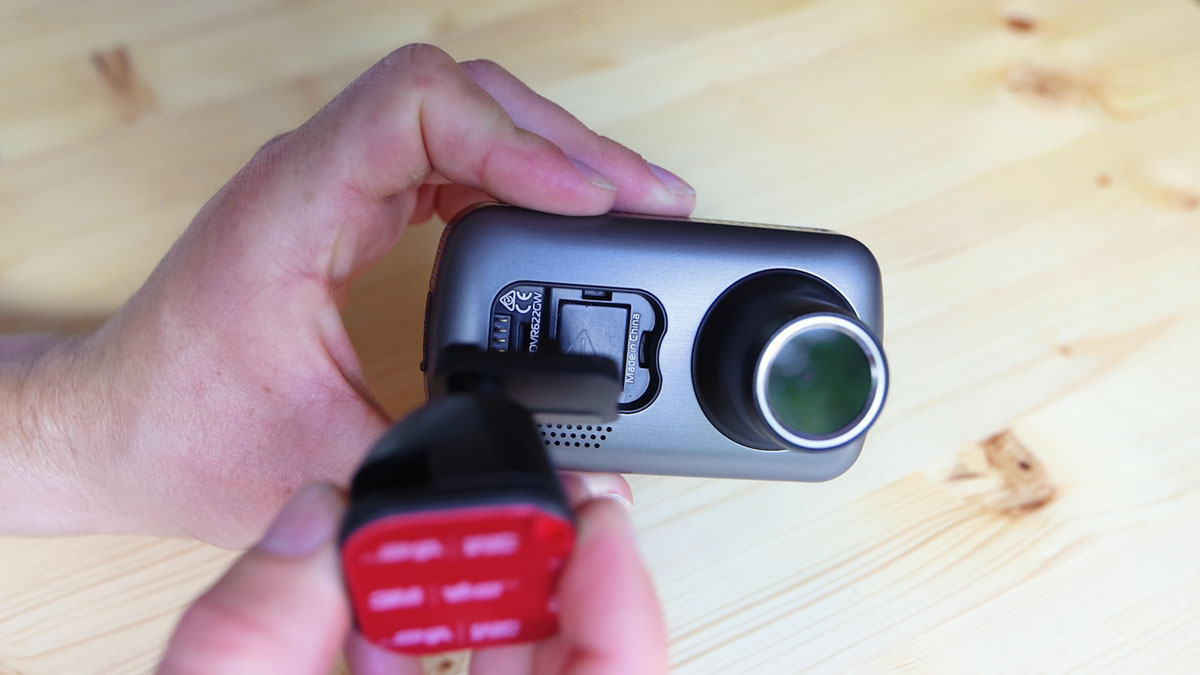
On the side next to the lens is the power button at the top and below that is the micro SD card slot. On the back is a nice big 3 inch touchscreen. The red button below is the protect button which, when pressed, immediately protects the current file so it can’t be lost. Either side of the protect button are microphones and on the left of the screen are 2 LEDs which show when the dash cam is charging or recording. On the other side is the rear camera input. Up on the top is a USB Mini B port and on the bottom is a reset button and a light sensor.


So that’s the dash cam itself, but what else comes in the box?
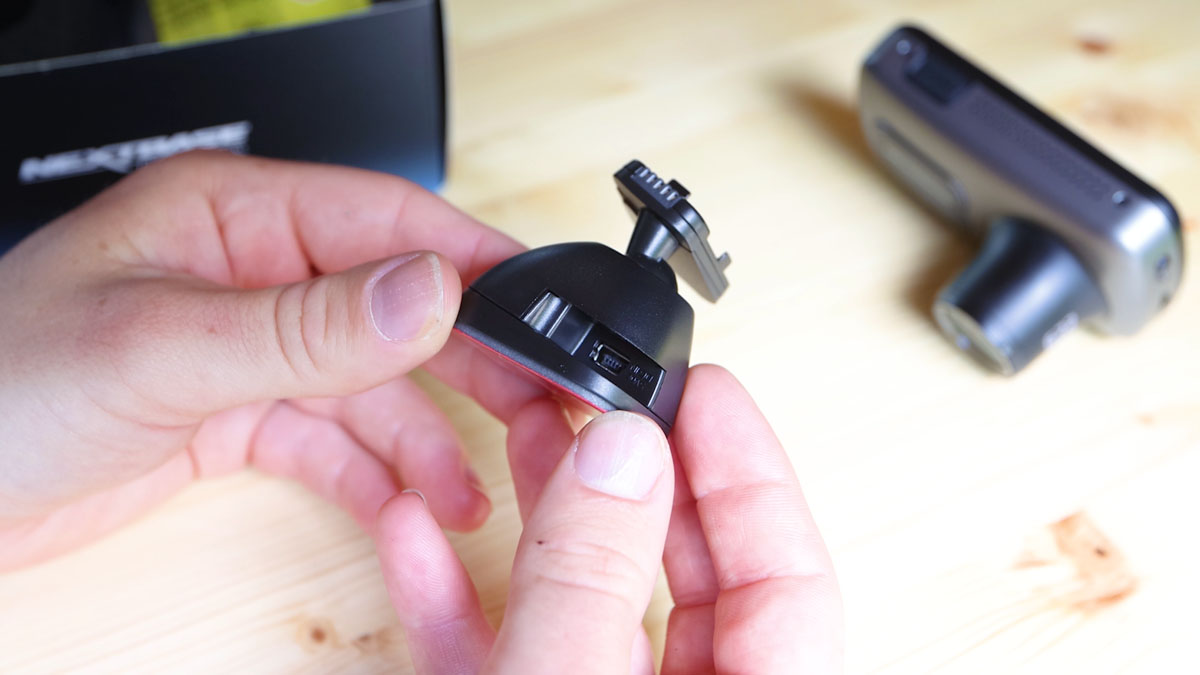
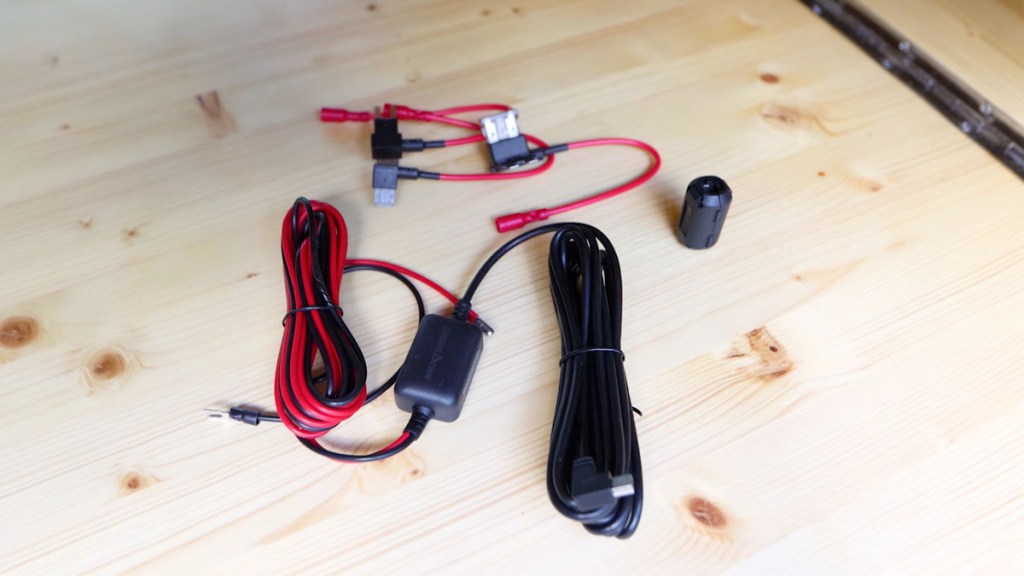
Well there’s a window sticker, a quick start guide and a help card. Then, there’s the magnetic Click & Go windscreen mount which has power input and a removable base with a 3M sticky pad on the bottom.

Up next is a short USB A to USB Mini B cable for charging the camera prior to use, as there’s a small battery in the dash cam to allow the parking mode to activate when the vehicle isn’t on – and then there’s the 4m long 12v to USB Mini B cable which powers the dash cam from the vehicle whilst it’s running. There’s also a spare base and 3M sticky pad, in case you want to use the dash cam between two vehicles and lastly a spudger to help with cable tidying. That’ll come in use later!
So let’s get this dash cam up and running!
I’ll start by inserting a micro SD card, and then I can remove the insert on the front to reveal the magnet and connectors for attaching the Click & Go windscreen mount. It finds its way in very easily and is a really strong hold – in fact it was actually quite difficult to pull it out again!
The first thing is to charge the dashcam for at least 2 hours before first use. I’ve already done this, so am all ready to go.
Click to buy your own…

(Affiliate links which help support this website)
Setting up the dash cam
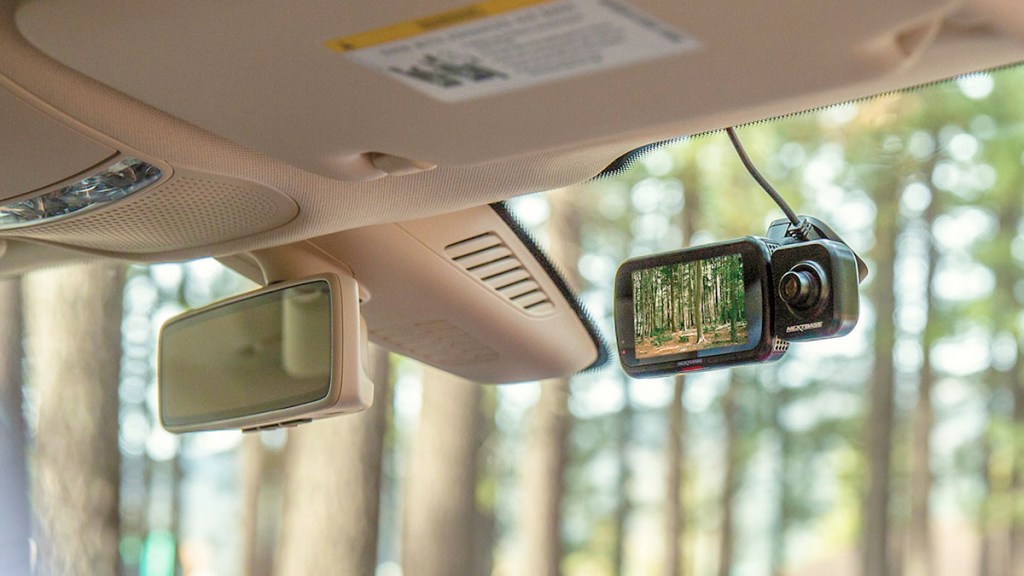
Although it has a built-in battery, I’m plugging it in via the USB Mini B port on the top. As I understand it this USB port is for mains charging and connecting to a computer and the port on the windscreen mount is for powering the dash cam via the vehicle. The dashcam immediately starts up with the Nextbase logo and we can begin the setup.

Choose your language, location, speed units, time and date, and then it’s time to link the dash cam to your phone if you wish to. As you can see from the screen in the last photo below, it has Amazon’s Alexa built-in and an emergency SOS feature, which gives you and your family help if you have an incident and can’t call for help, but I’ll go into that in more detail later, so keep reading!


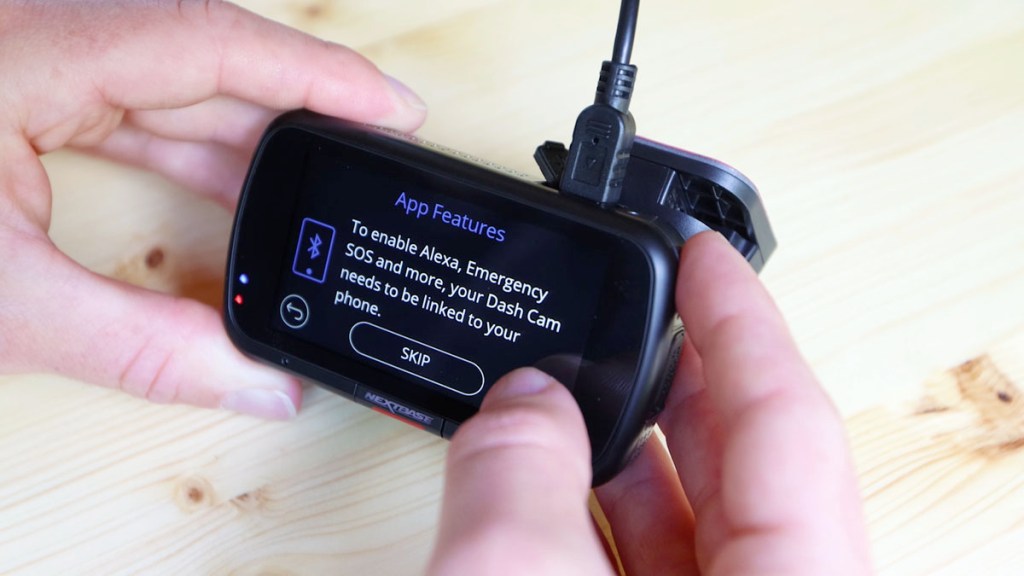
By downloading the Nextbase app you’re able to view your dash cam videos quickly on your phone, edit and crop your videos and automatically sync them to your phone in the event of a collision, as well as utilising Alexa and the emergency SOS mode. You can also upload the files to the Nextbase cloud, free for all series 2 dash cam users, and your files are stored for 30 days.
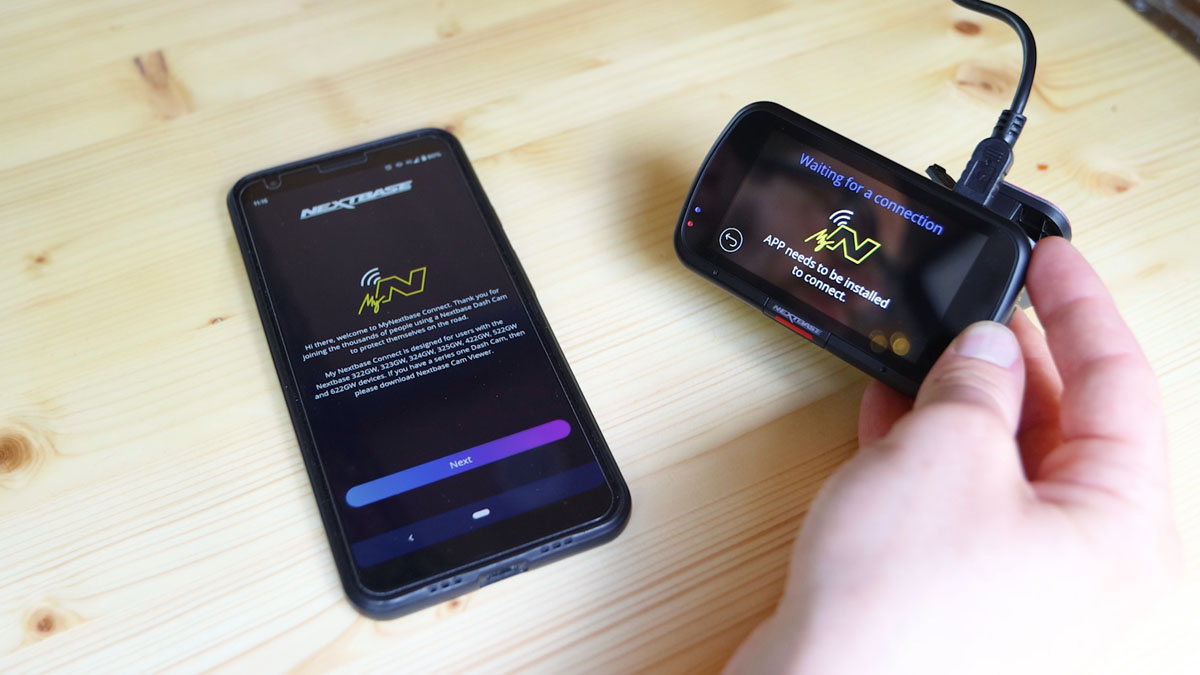
After a couple of minutes of initial set up, I can now live-view the dash cam through my phone – pretty cool!

Rear cameras
In addition to the main dash cam, Nextbase also kindly provided 2 rear facing cameras to try out.
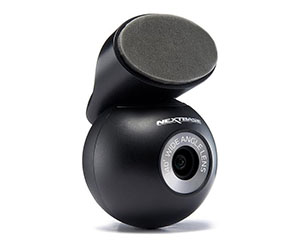
The first is this nifty cabin view camera. Simply plug it into the port on the side of the dash cam and you can film all the goings on in the cab as you drive. Perfect for taxis and rideshare drivers, but also an awesome, easy to capture way to capture your next road trip!
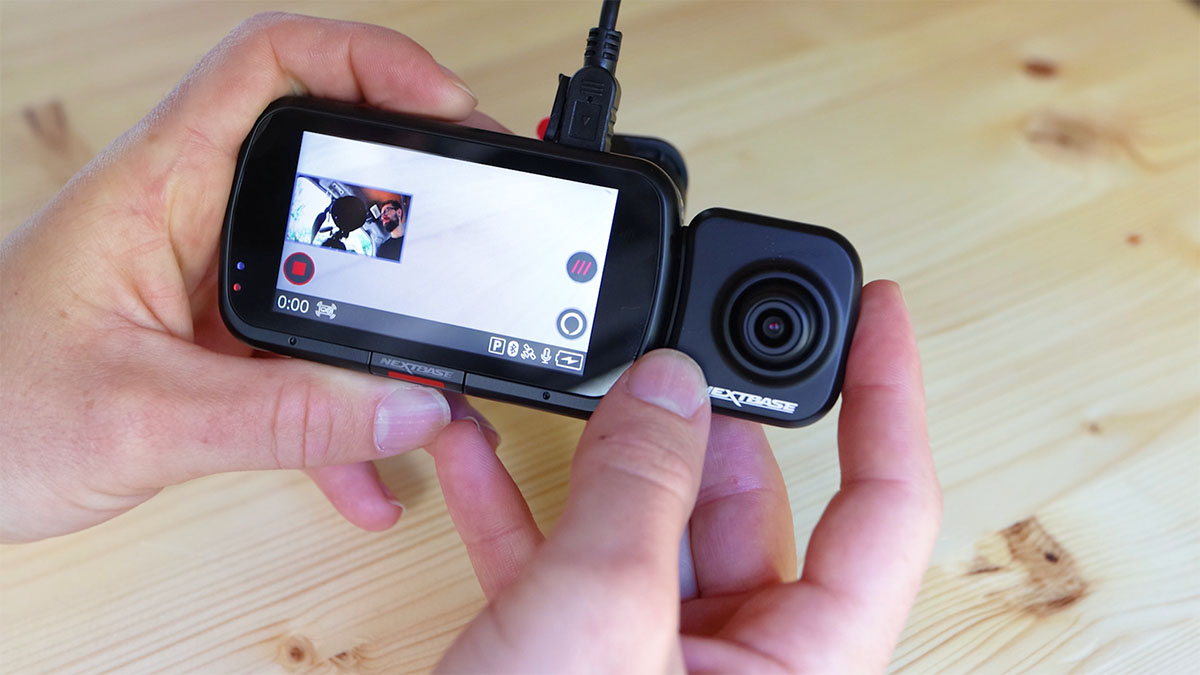
The only thing to bear in mind is that, as the port is on the right of the dashcam (if you’re looking at the touchscreen), then if you have the dash cam installed behind the rear view mirror, the cabin view may get blocked. That said, a bit of careful repositioning of the camera on the windscreen should take care of that. This is really just an issue for right-hand-side driving vehicles however.
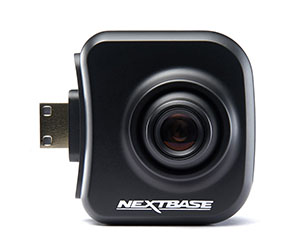
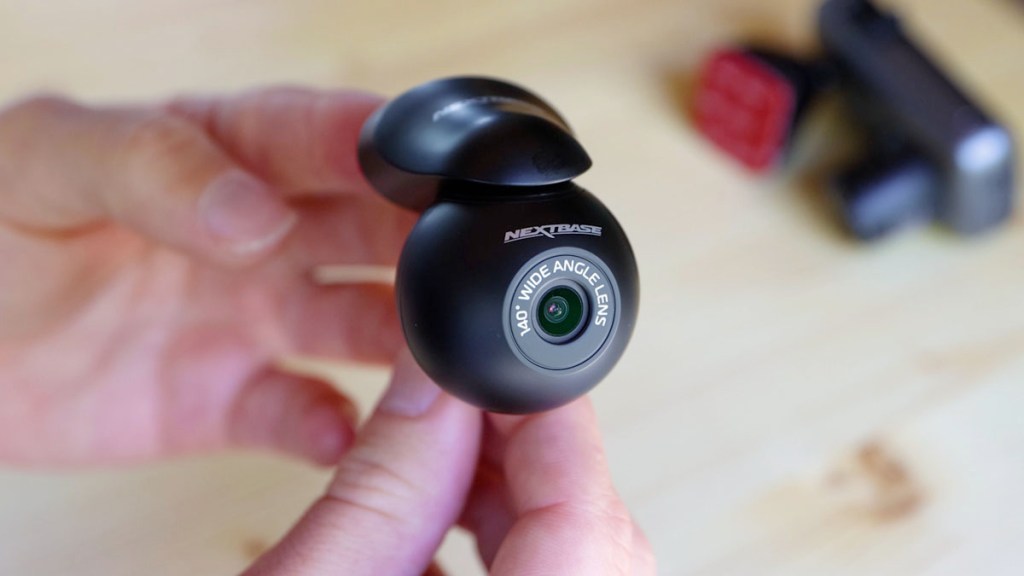
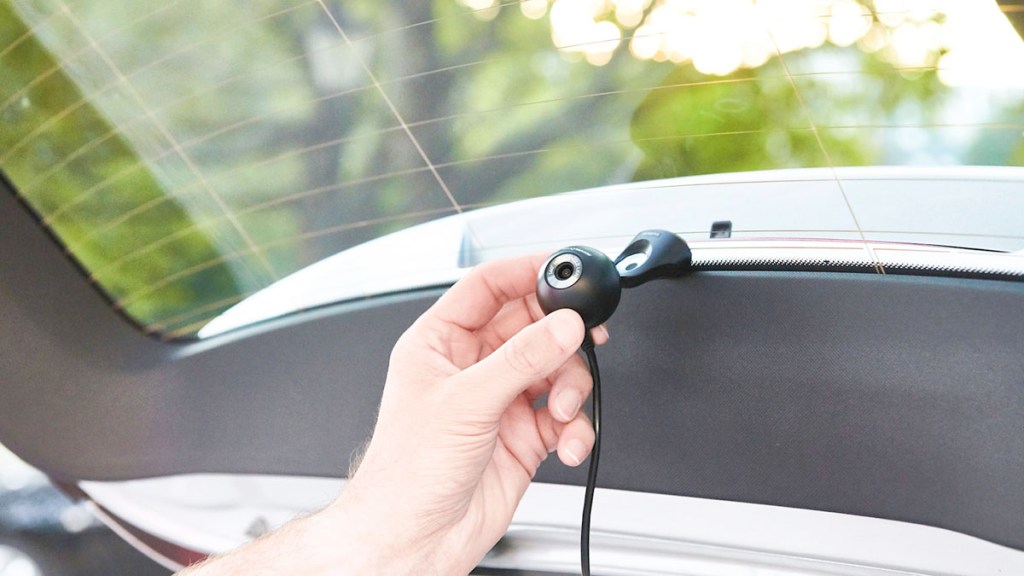
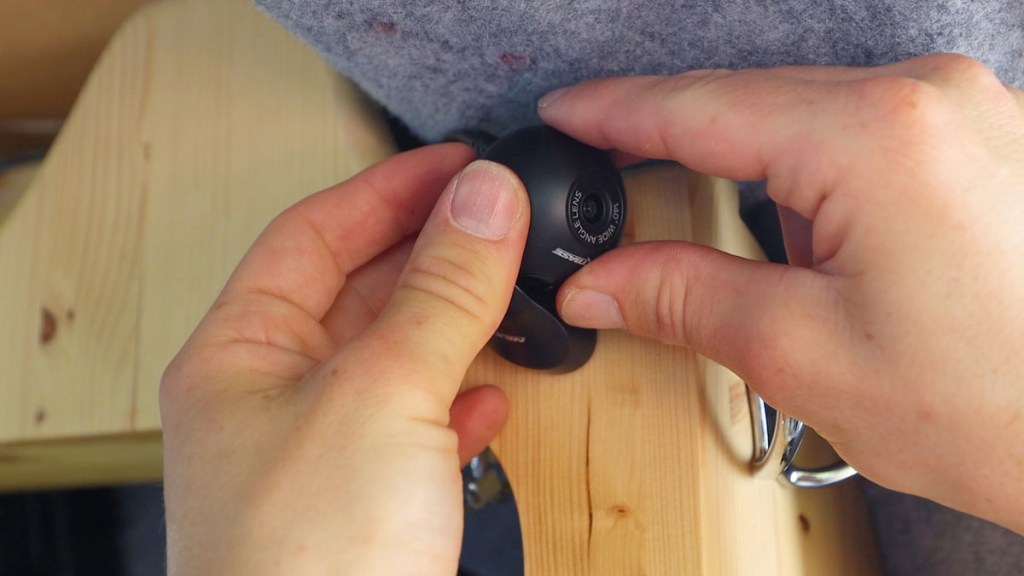
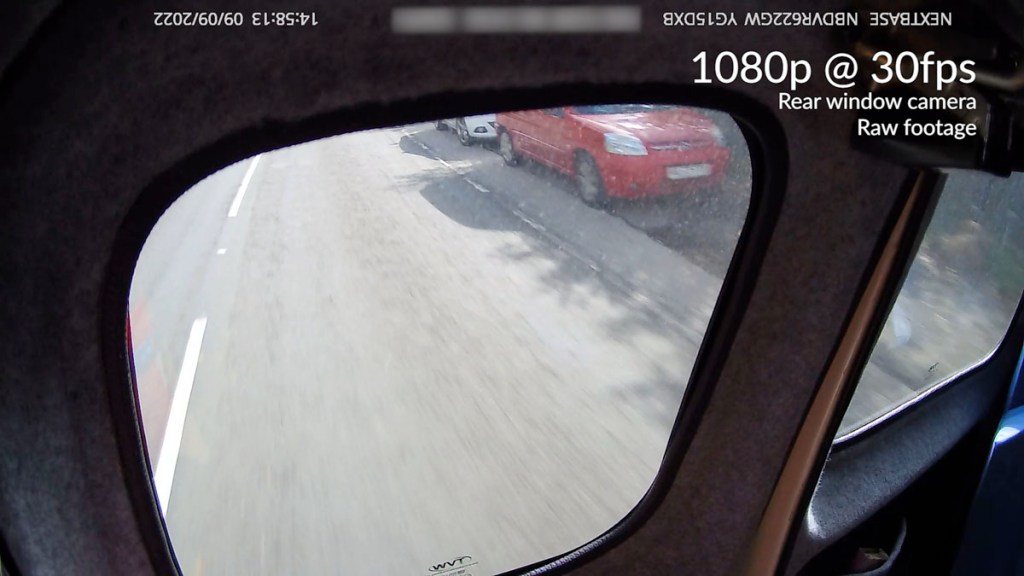
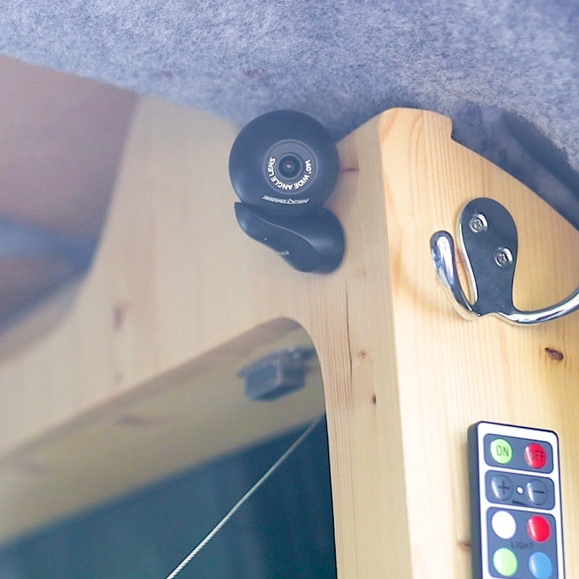
The next option, and the one which suits my own needs perfectly, is the wired rear view camera – ideal for protecting the end of the vehicle you don’t often look at. It’s a small, unobtrusive camera with a 140° ultra-wide viewing angle that films in full HD and features a really practical magnetic mount onto its base which again utilises a 3M sticky pad and swivels to nearly any angle; perfect for all kinds of car set-ups. It comes with a 6 metre cable for connecting the front dash cam with the back of the vehicle.

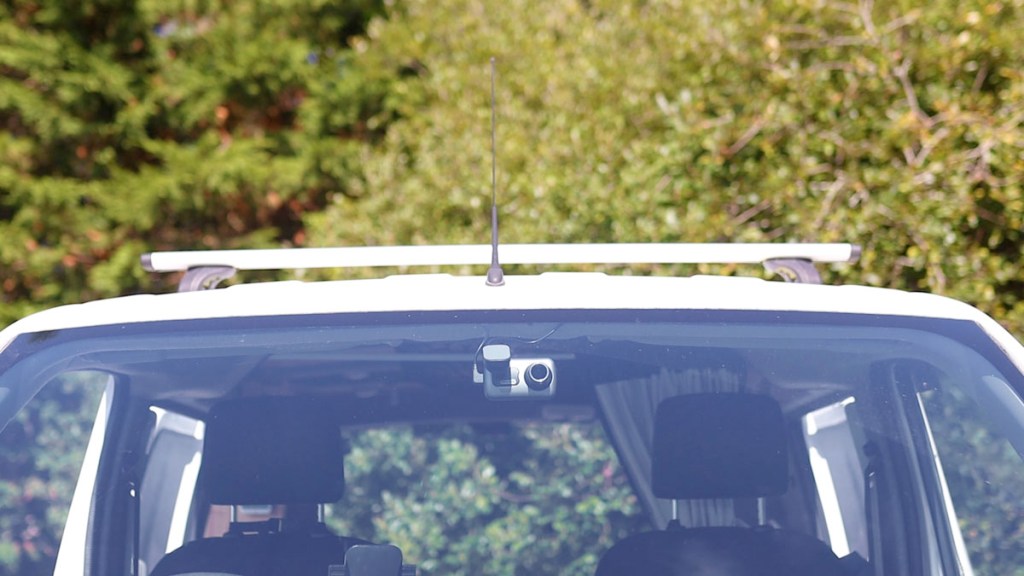
As I’ve mentioned, I have a van and it has rear barn doors, so sticking a dash cam to one of the rear windows wouldn’t be very practical as the wire would get pulled a lot when the doors open. This wouldn’t be a problem for standard boots – or trunks for my readers from across the pond – so I’ve decided to stick the rear view camera on the top corner of my floating wall table unit, so it can see out of one of my tinted rear van windows onto the road at all times.
And if you’re interested in how I made anything you’ve seen in the van, be sure to check out the rest of my YouTube Channel, where I’ve got the full van build as well as tons of other content about vans and conversions.
Nextbase also have a third innovative rear camera option which, given the door situation just mentioned, wouldn’t be as suitable for me – a rear view camera module. Almost identical to the wide angle cabin camera, this instead has a 30° telephoto lens which views directly from the cab out of the back window. A perfectly simple solution for anyone wanting to keep an eye on tailgaters whilst avoiding dealing with all the wires that come with dash cams!
Click to buy your own…

(Affiliate links which help support this website)
Installation of front and rear dash cams
So those are all the options for a Nextbase dash cam set up – let’s get installing the cameras in the van!
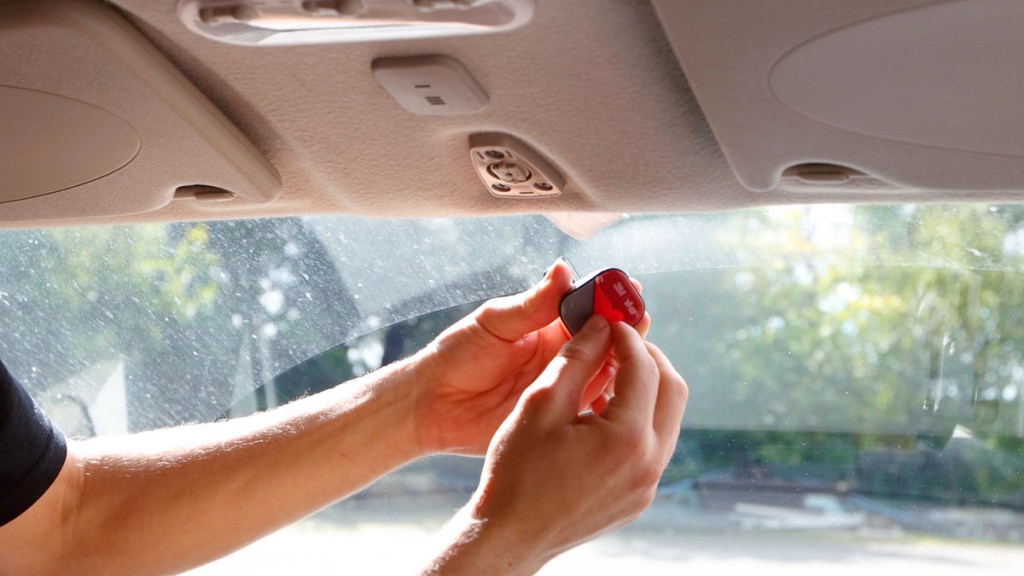
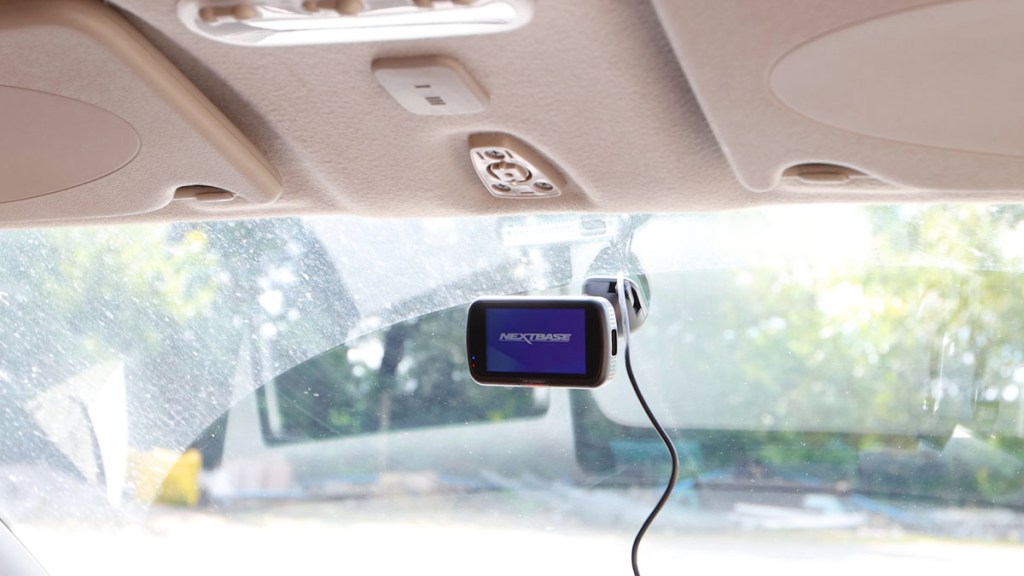
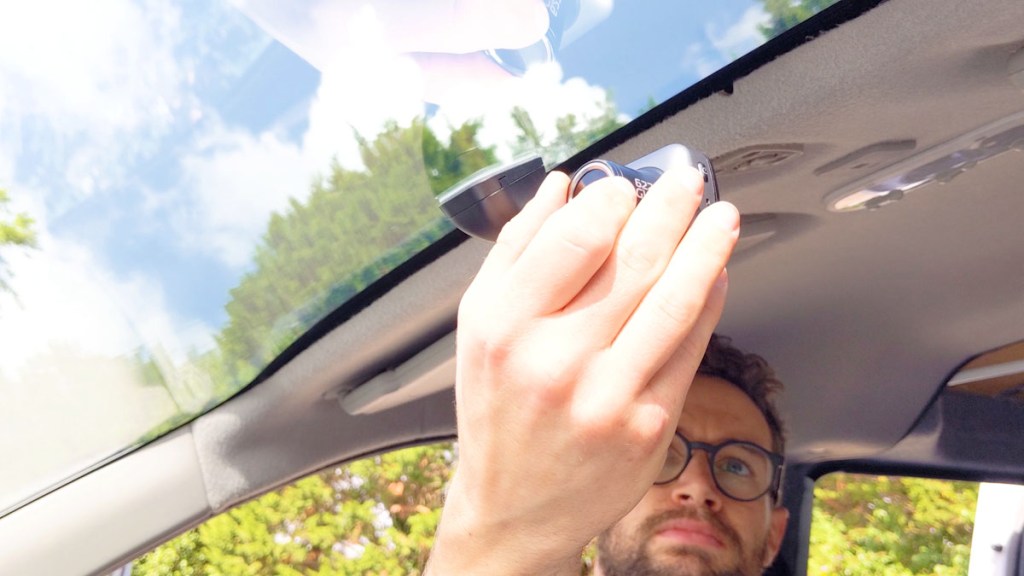
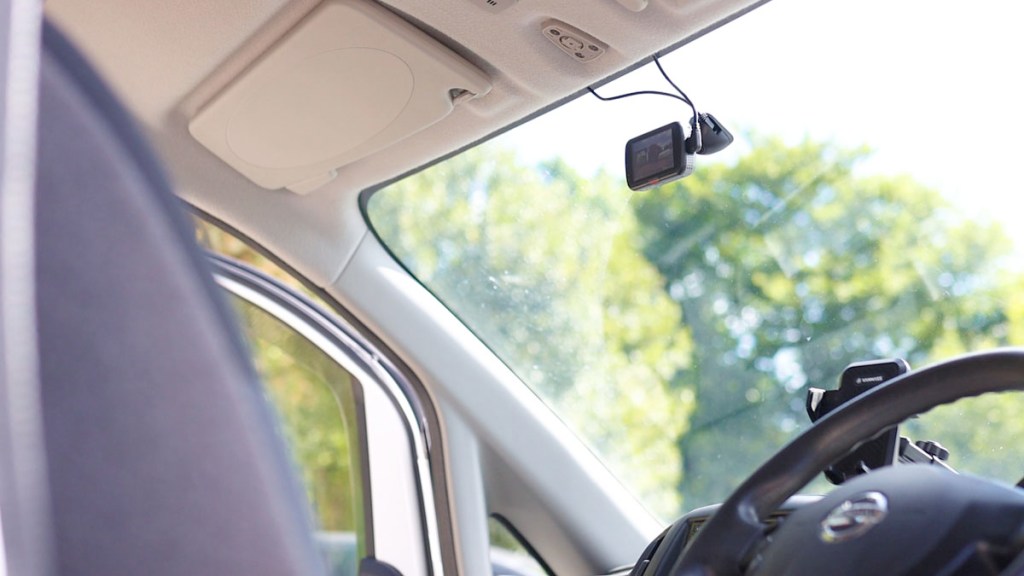
The first step is to clean the glass and then think about where the dash cam is to go. You may have noticed that I’ve removed my rear view mirror, and this is just so I can film the dash cam install a bit better. I want the dashcam to be fairly central but within the region that the windscreen wipers reach on the glass, so that visibility isn’t obscured on rainy days. After finalising the location, I can remove the 3M sticker cover and firmly place it on the windscreen, applying a bit of pressure so it sticks well.

I can then attach the dash cam to the Click & Go mount, plug it in and we have a functioning dash cam!
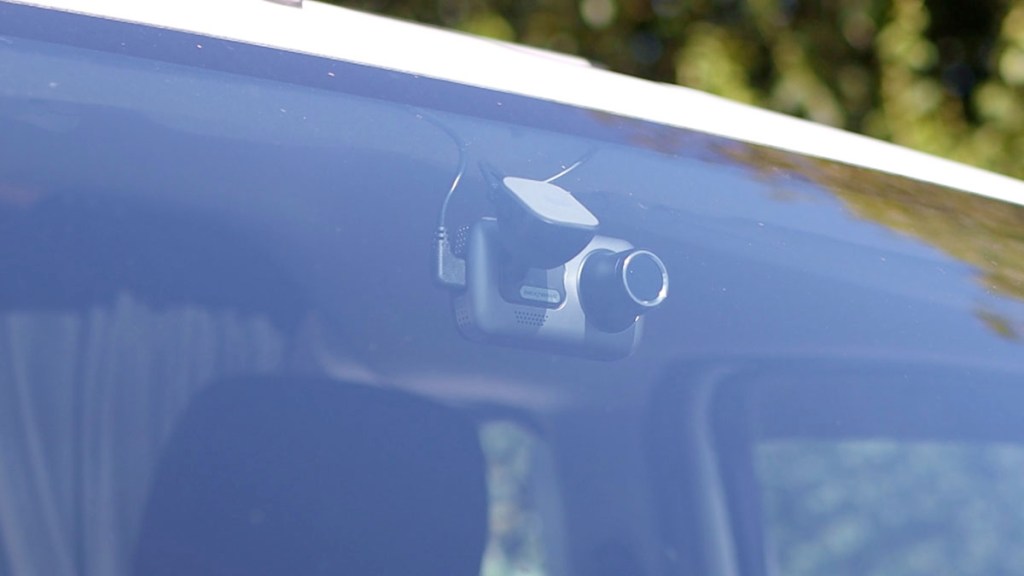
One of the really cool features of the dash cam which can now be sorted is reducing the glare on the camera. As I mentioned earlier, this dash cam has a built-in polarising filter on the front of the lens which, when turned, completely eliminates any glare or reflections on the windscreen – amazing!
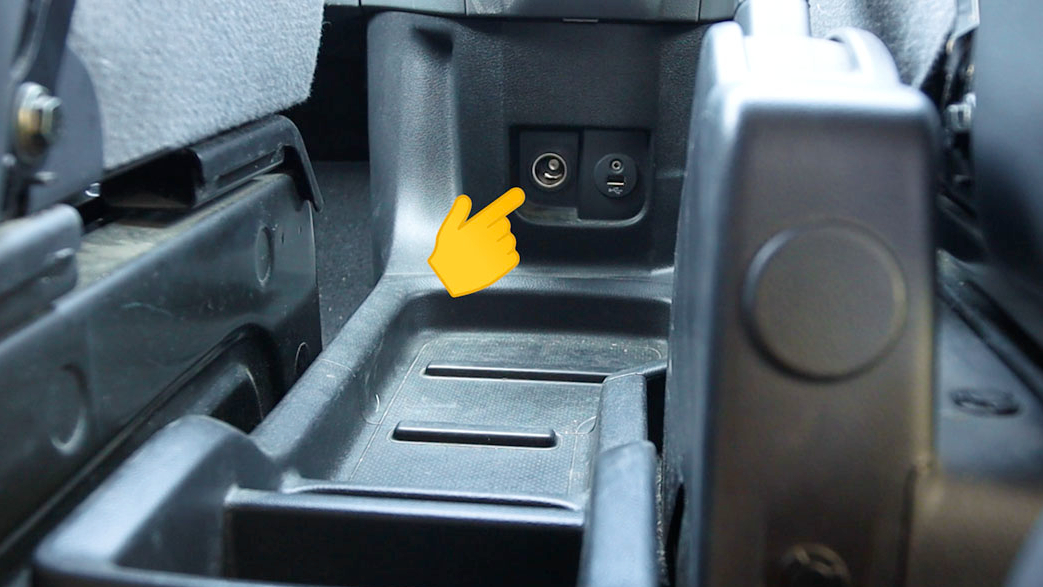
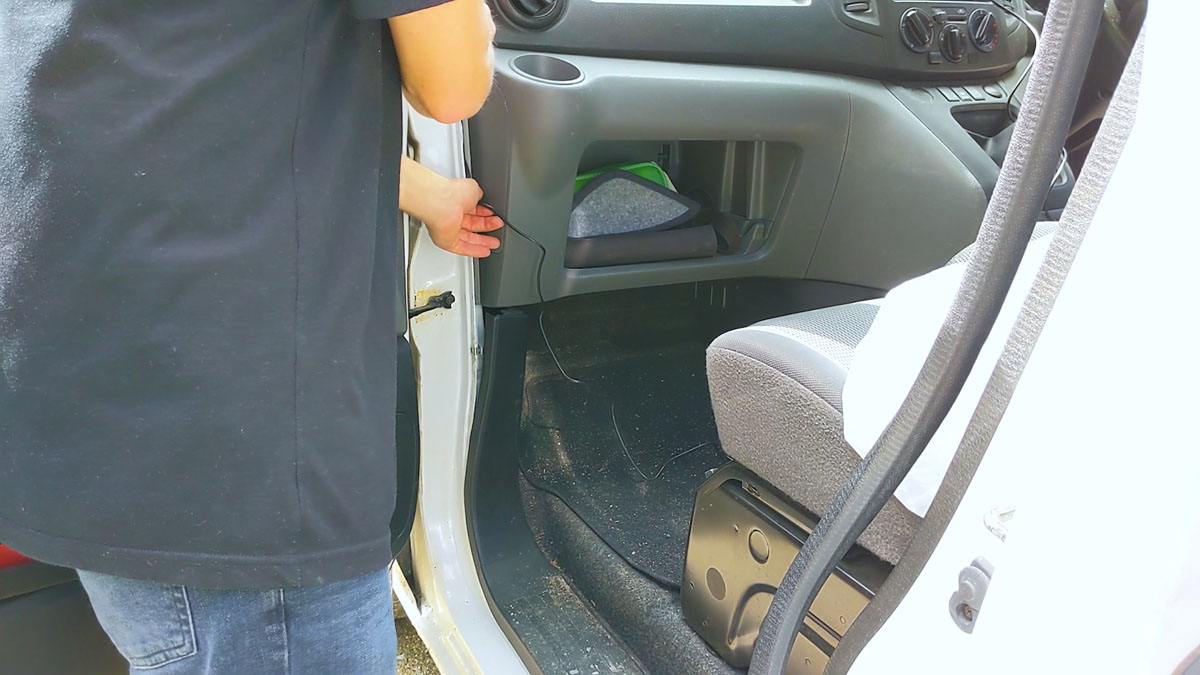
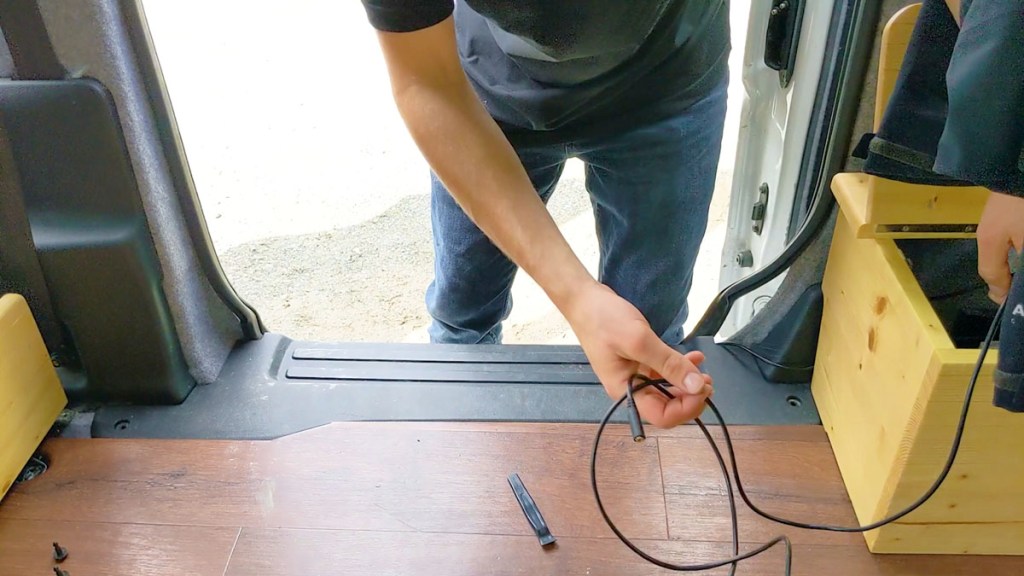
Now it’s time to hide the wires. As the power will be coming from the 12v port, which on my van is between the front seats near the floor, I’m going to route the cable around the windscreen and down the door frame on the passenger side, so as to avoid the driver’s pedals.
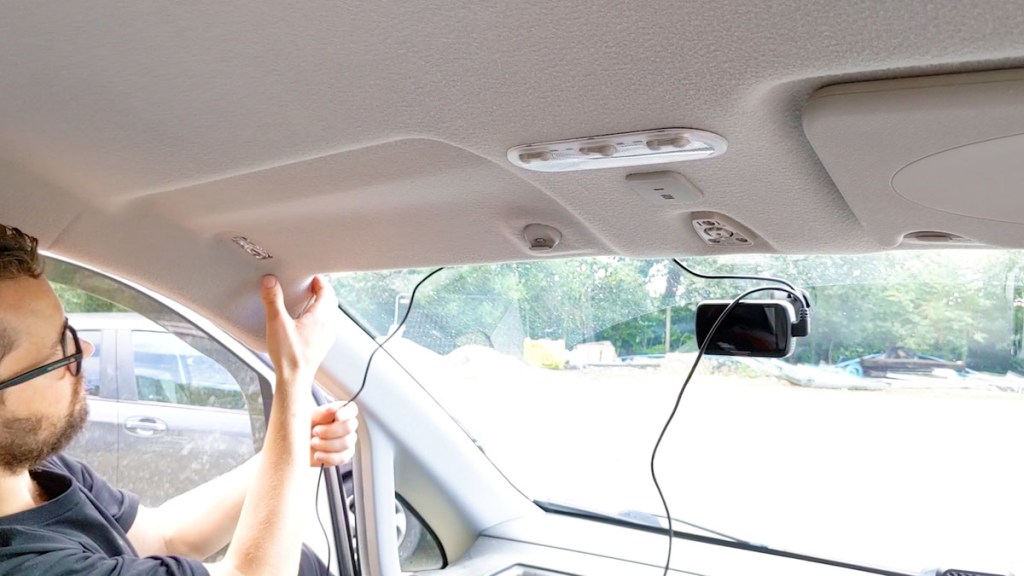
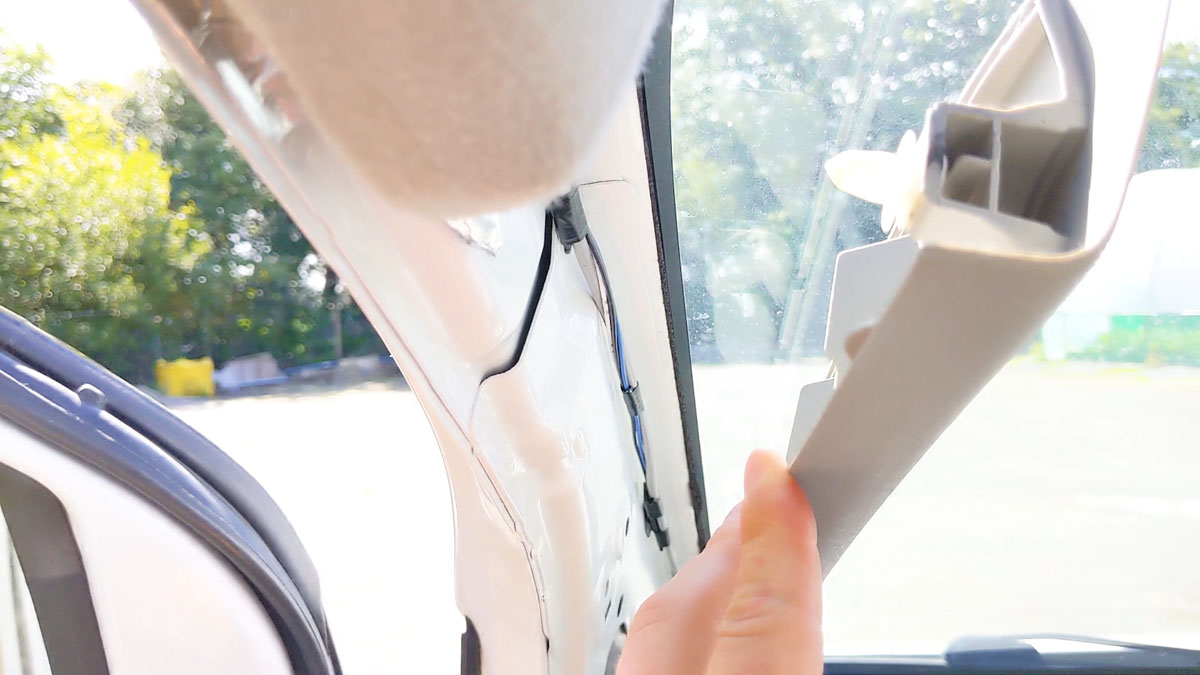
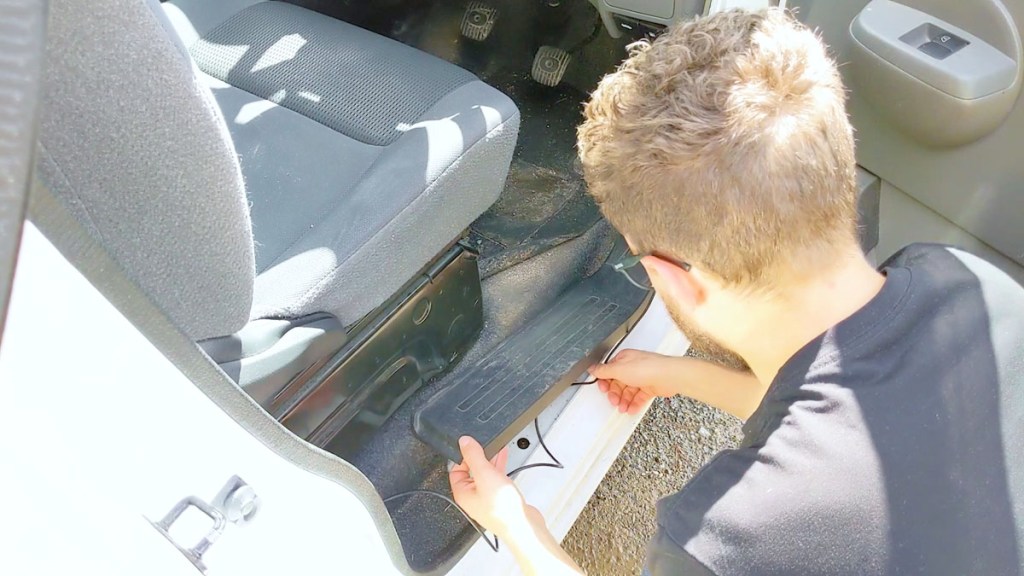
The first step is to get the cable up into the headliner. I removed the sun visor as pushing the cable above it will help to stop the wire falling from the headliner. I then passed the wire along into the door frame. Panels like this are generally just firmly clipped in and come away with a tug, but if you’re not sure, go gentle, or ask someone who knows what they’re doing. I pulled out the rubber door trim too, for easier access.
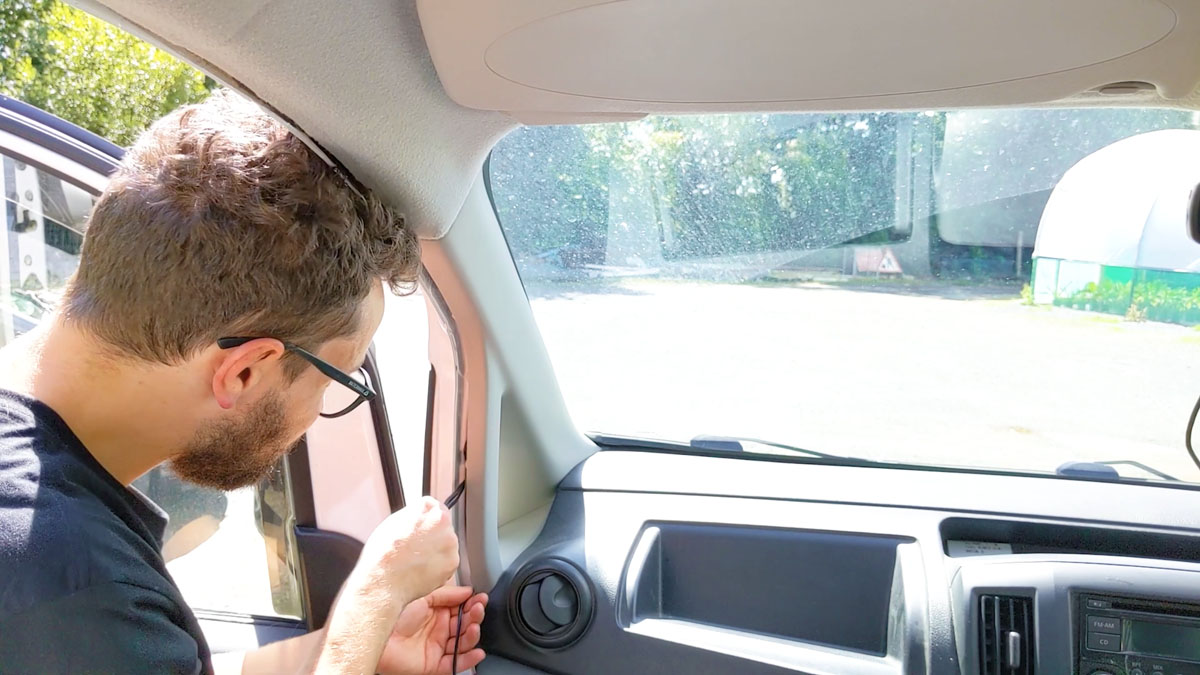
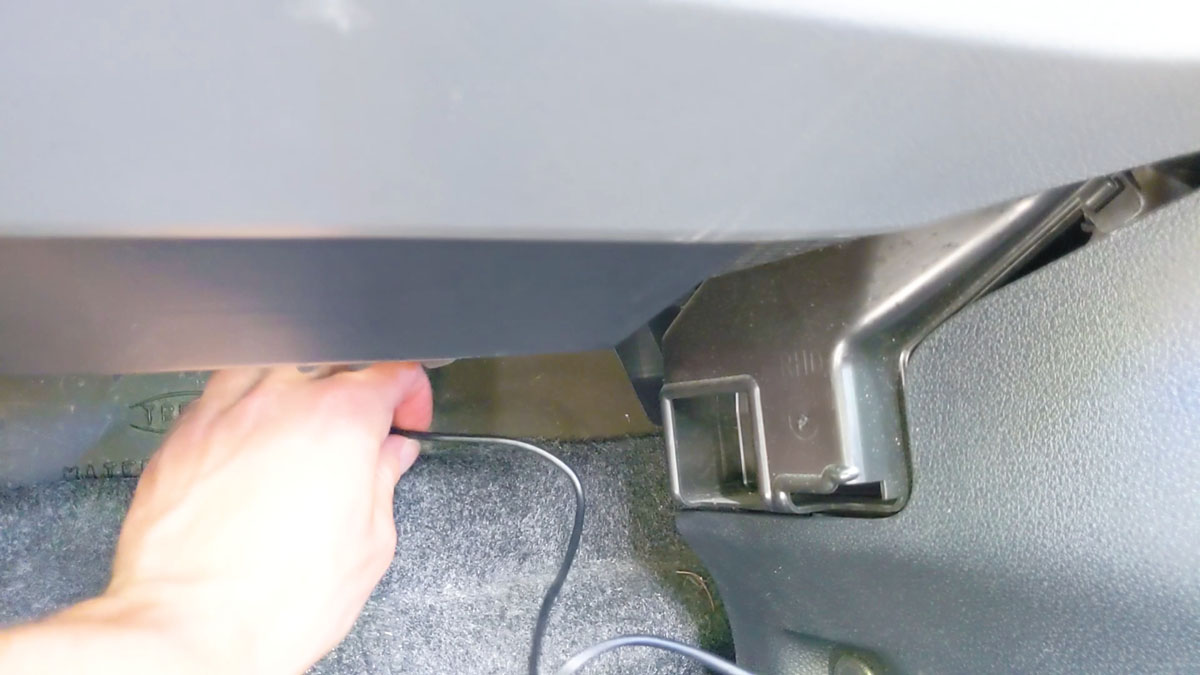
The door frame trim already has wires running underneath it so I tried my best to get this wire running along with them. Working my way down, I tucked the wire away wherever I could until I reached the start of the floor. I could then tuck the wire behind the carpet in the footwell, working my way round until I made it to the 12v port.
Once plugged in, any excess wire can be tucked into the trim for a really neat look. I replaced the trim and that’s the wire for the main dashcam dealt with.
Setting up the rear dashcam
For the rear window camera I started, once again, by removing the sun visor and feeding the wire above it. I then pulled out the door frame trim and replaced the sun visor to keep the wire in place. I then fed the wire down towards the floor and, this time, removed the panels at the bottom of the door frame and fed it under there. I could then work it back further under the carpet by the driver’s seat before replacing the trim.

Into the back of the van, I popped up the side door frame trim just enough to wiggle the wire underneath and got the wire into my wheel arch storage chest.
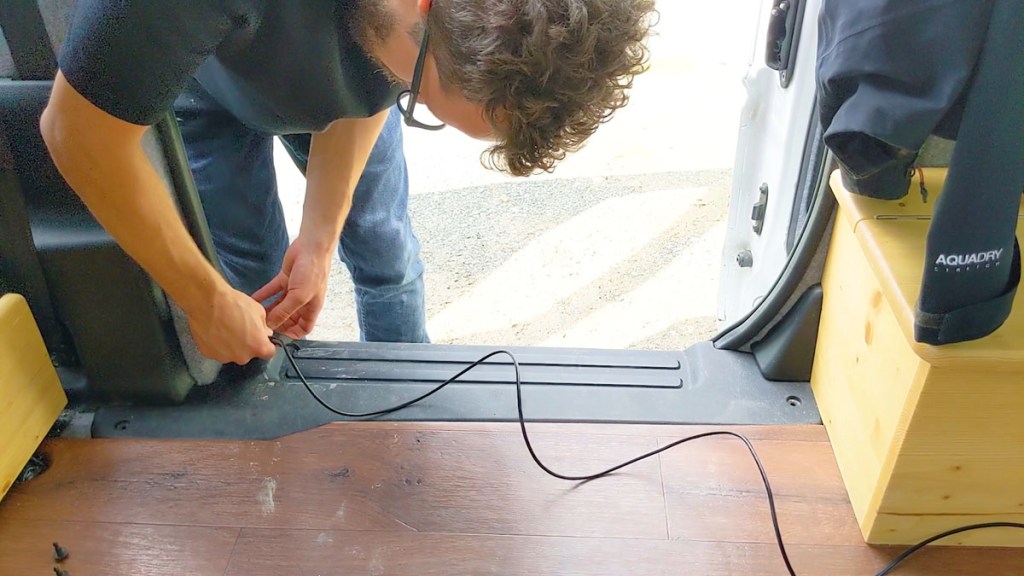
I could then feed the wire up to my floating table unit, to the top shelf, and then along to the back door. Once there, I could connect the rear camera and think about positioning.

With the highly adaptable mount, I settled on a position that can see out of the small rear window nicely, whilst hiding the wire behind the table. I should point out that the camera is actually upside down here, and that’s just because I have an unusual set-up in my van. It’ll be easy to mount it up the correct way in a car and that’s just testament to the flexibility of the design.
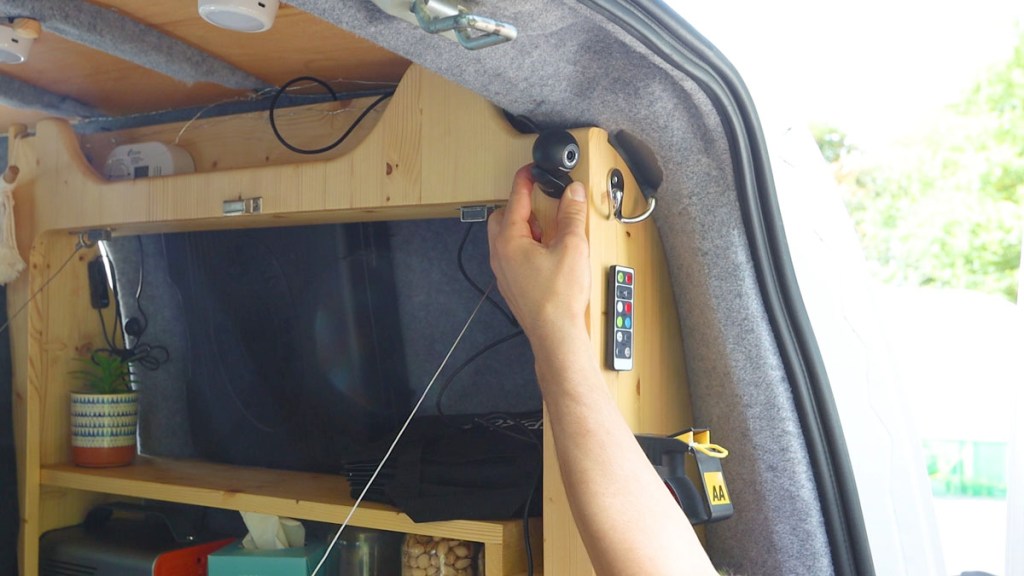
Once stuck on, I went back and hid the rest of the wire behind the table unit and in the storage chest. Like the main dash cam, the rear camera has a really nice design and is also very discreet, tucked away in the corner of the table unit. So that’s the cameras installed and I’m ready to hit record…so let’s now have a look at the all important video quality.
Video resultion options for the 622GW are 4k at 30fps, 2k at 60fps, 2k at 30fps, 1080p at 120fps, 1080p at 60fps or 1080p at 30fps. That’s a lot to choose from but I suspect I’ll stick with 4k as you get that bit of extra resolution, or 2k at 60fps to capture more detail in the video.
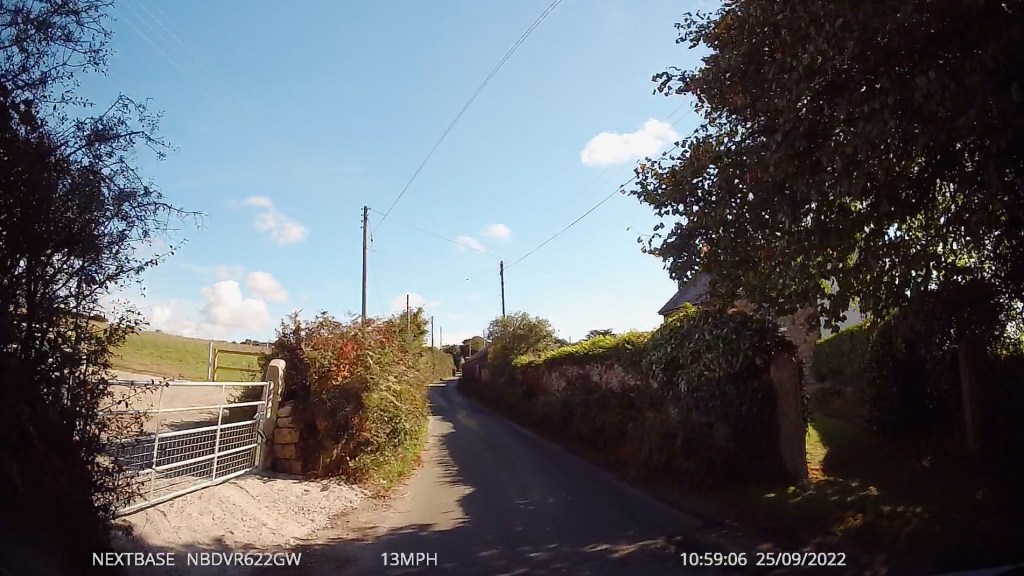

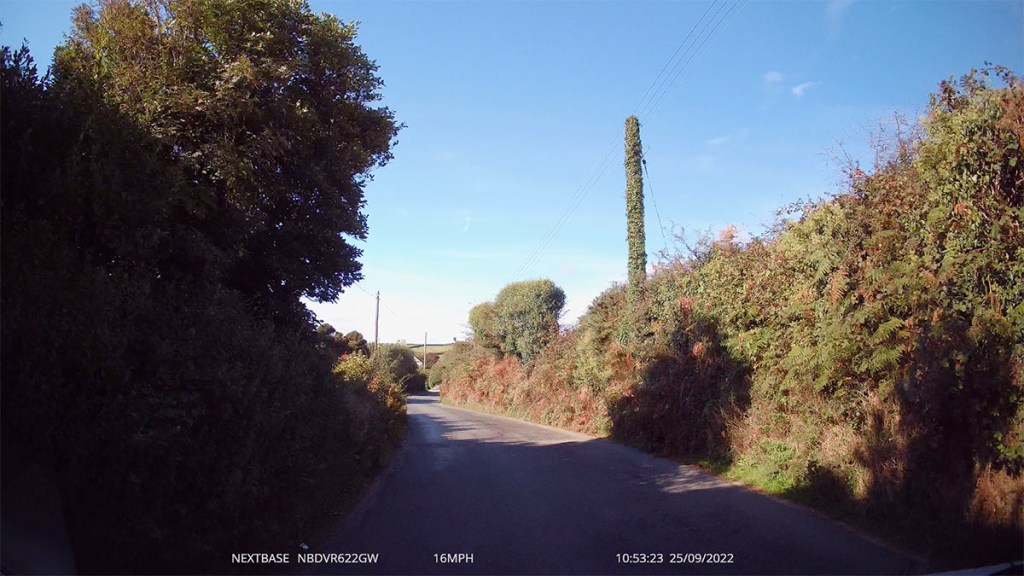
I have to say that I’m very impressed with the quality of all the footage, and filming an incident in super slow motion at 120fps could be VERY useful. Is it as good as a digital SLR or phone camera? No, but it’s not meant to be. A dash cam has a very specific role to fill and this footage seems to have a certain clarity and sharpness to it, making number plates and signs very clear.
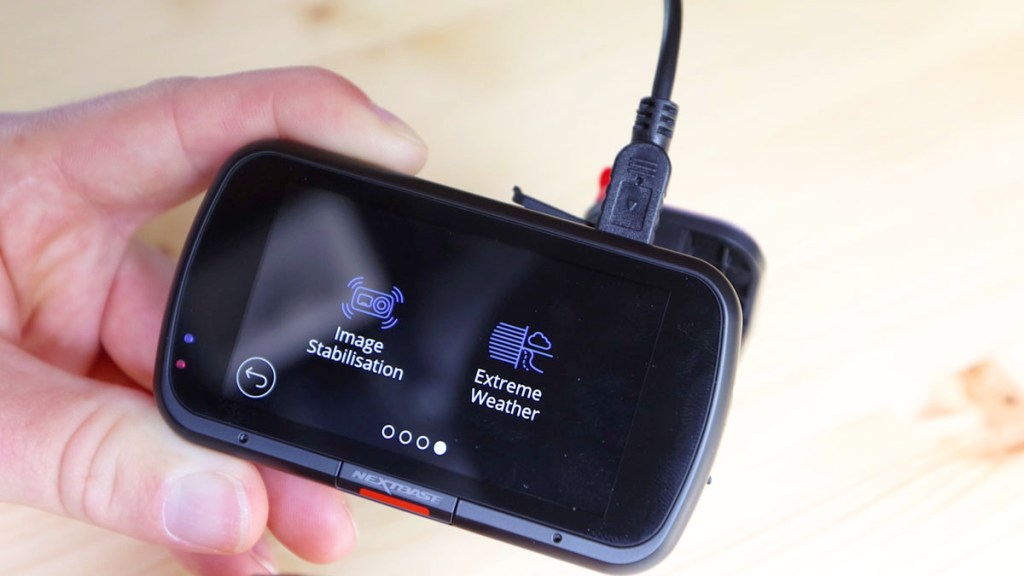
The image stabilisation option is really good and does a great job of stabilising the footage. It’s worth noting that when stabilisation is on, 2k video at 60fps and 1080p at 120fps will no longer be an option, and if a rear camera is also attached then 4k will no longer be an option. Image stabilisation only works on the main dash cam and not any rear cameras.
And lastly, here’s footage in 4k at night and footage from the rear view camera at day and at night. Please note, these rear windows are tinted so the footage is darker than than it would actually be.

If, like me, you’re interested in what other features there are and what all the settings do, keep watching as I’ll explain all…because so far I’ve only shown the tip of the iceberg!
We’re also on Instagram!
Check out yogi.the.van to keep up-to-date with all our adventures in the van!


Camera settings run-through
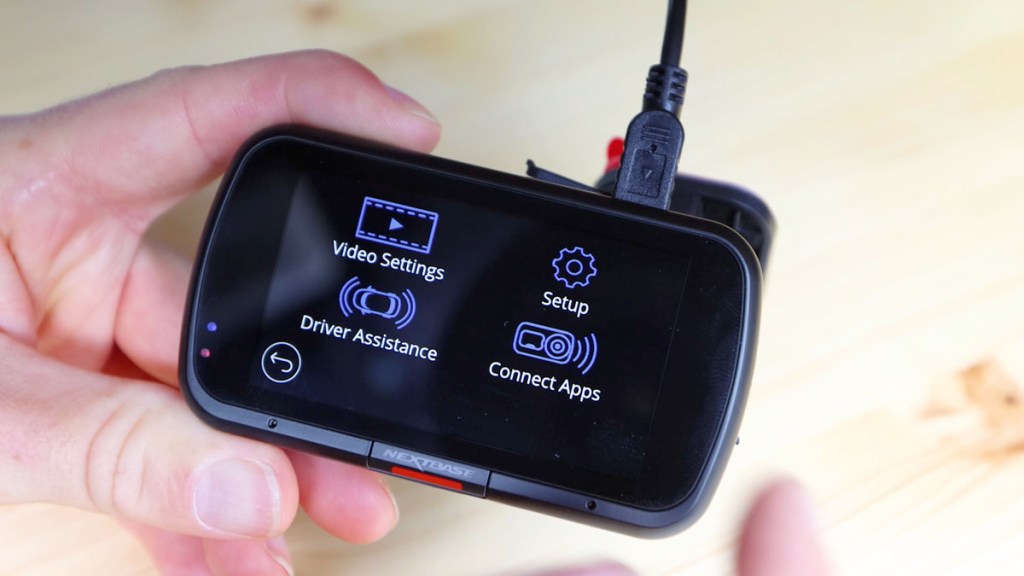
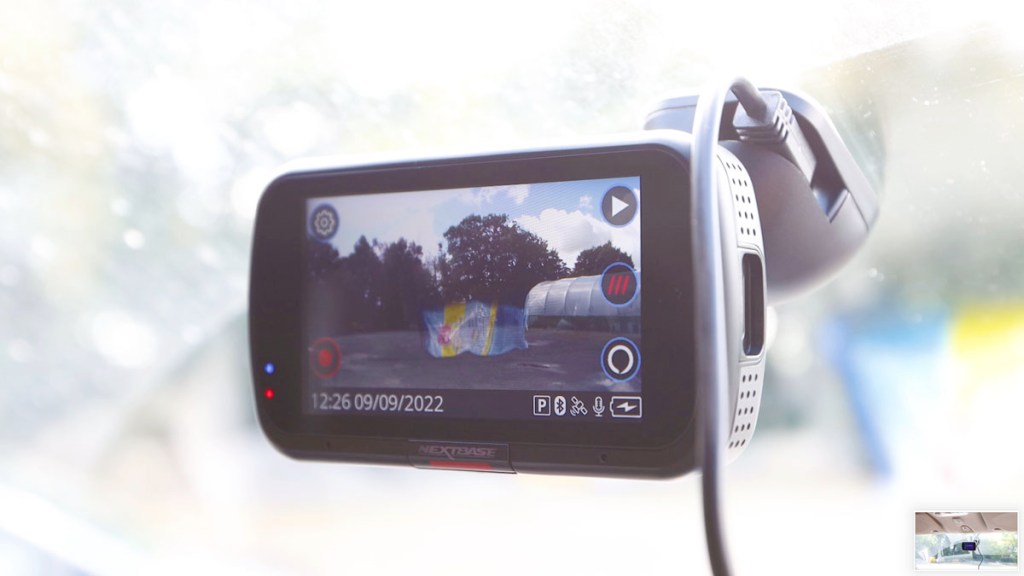
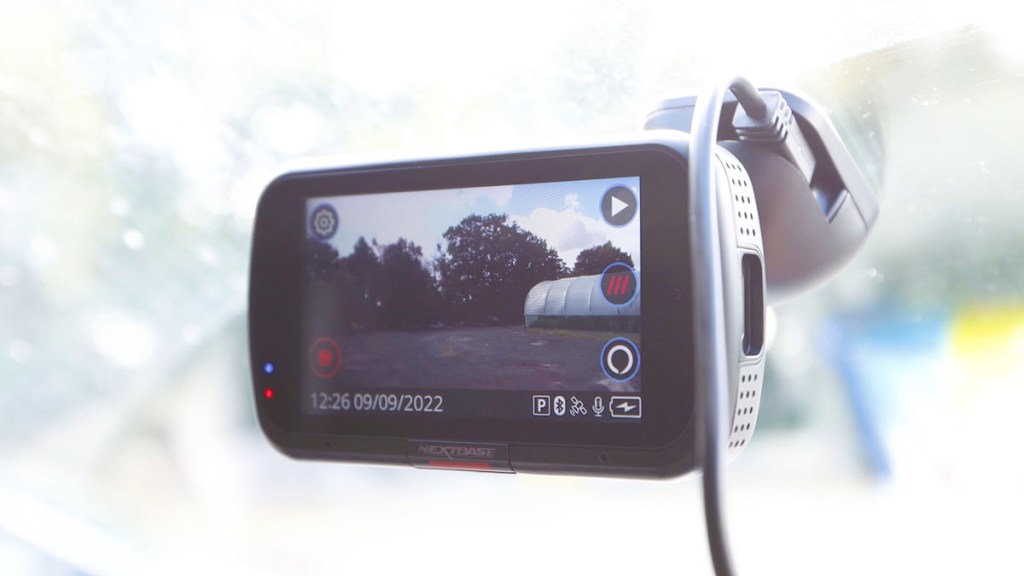
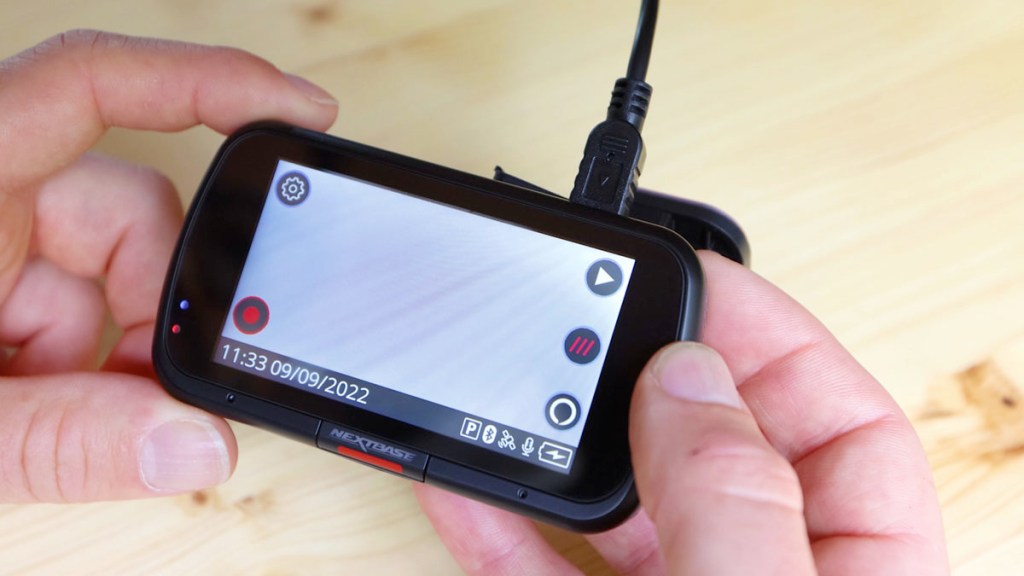
By pressing the cog, you’re taken to the menu. We’ll start by diving into the video settings and the first option is to adjust the resolution and frame rate you film in, as per the options mentioned above. You can then adjust the exposure to ±6 stops to suit your recording environment and choose how long you want your video clips to be – 1, 2 or 3 minute long clips. If I choose 1 minute, then the recording of my 15 minute car journey will be recorded as 15 one minutes clips. That way, files can easily be overwritten by the camera when the memory card is full. Next is audio, and you can choose whether to record audio with the built-in microphones from inside the vehicle whilst the dash cam records or not.

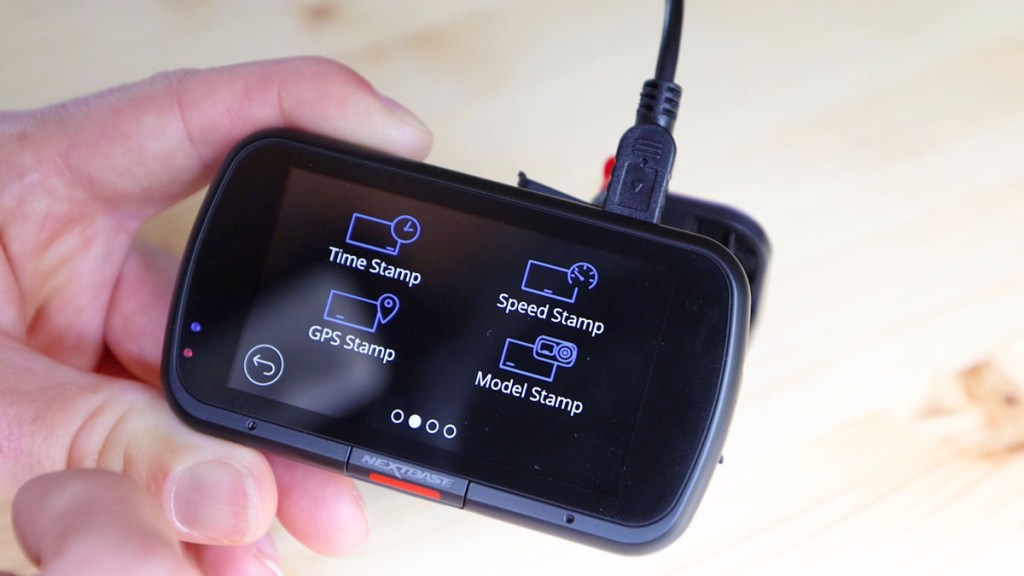
Moving onto the next screen, you can set whether you want time, speed, GPS or dash cam model stamps to appear on the bottom of your videos – all really useful data to have recorded.
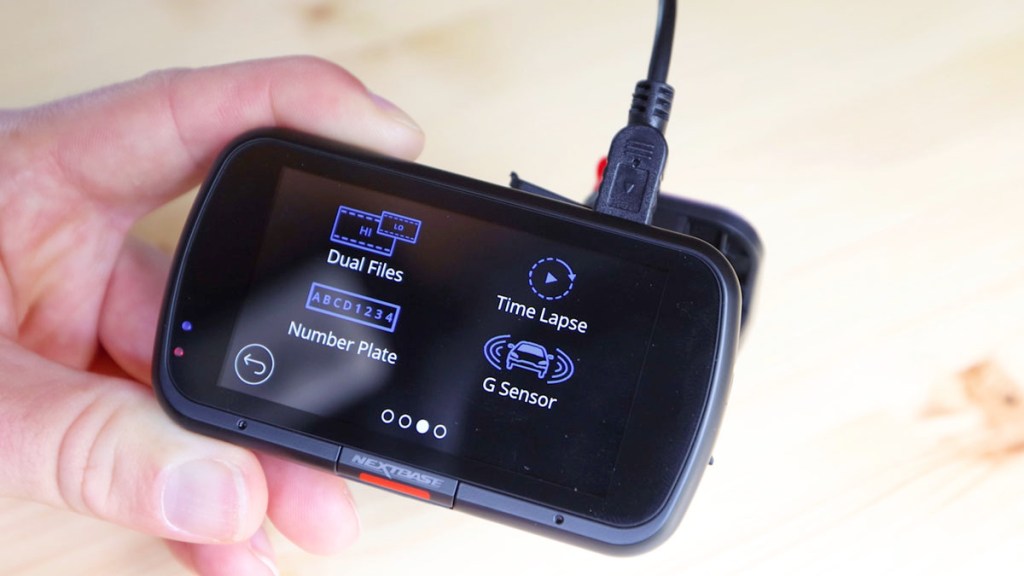
The ‘dual files’ setting creates 2 clips, one large and one small, which is needed for transferring files to the Nextbase app whilst retaining the higher quality file for when you need it. You can also film time lapses with the camera, which is not recommended for normal driving conditions, however it can be a really fun way to record part of a car journey! The 3 minute function records for 3 minutes and plays it back as a 30 second clip, the 30 minute option records for 30 minutes and also plays back as a 30 second clip. You can input your number plate to show on the video too and adjust the G-sensor sensitivity, i.e. how much force is needed before the dash cam registers an incident.
The extreme weather mode is an interesting feature which, quote, “is able to more accurately record in foggy and misty conditions.” I haven’t tested this feature yet, but I’m keen to, when the British weather inevitably presents an opportunity.
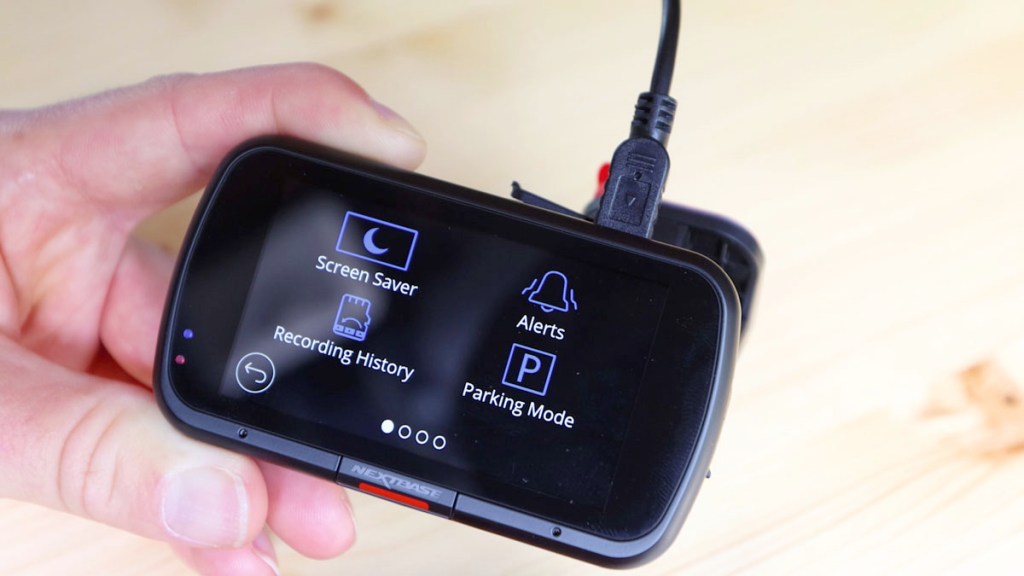
Next, you can set a screensaver and I quite like the option of having the current speed showing, though just setting it to ‘on’ will turn the screen off after 30 seconds. Setting it to off will keep the camera screen on for the duration of filming. You have the option to turn alert sounds on or off, as well as adjusting how many clips are stored. Turning on minimum keeps just four unprotected 1 minute video clips at any one time. The parking mode is a really interesting feature and one that was high on my list. With it on, the dash cam enters standby mode when the vehicle is parked, relying on its built-in battery, but if movement is detected the camera records 45 seconds of protected video. If no further movement is detected, the camera returns to standby mode. And it’s really effective and has even triggered when I’ve been washing the van!
On the next screen you can adjust the language of the camera to one of a number of options, select or change your location, select your time zone and change the time and date. It’s worth noting here that the built-in GPS automatically picks up the date and time for you.

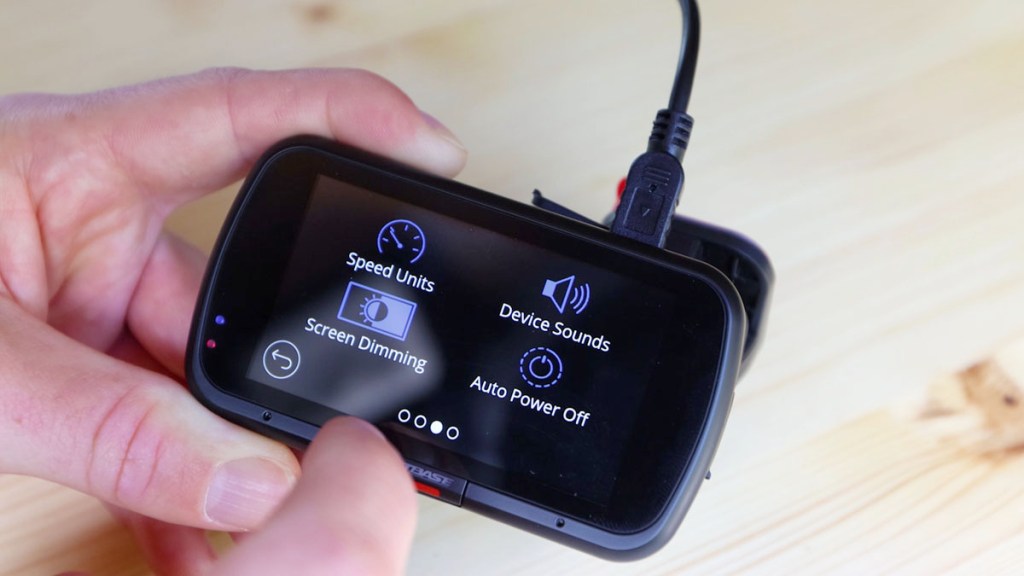
Next are options for the speed units, device sounds and screen dimming, whilst the auto power-off option, when turned on, keeps the camera recording for 30 seconds if the unit loses power.
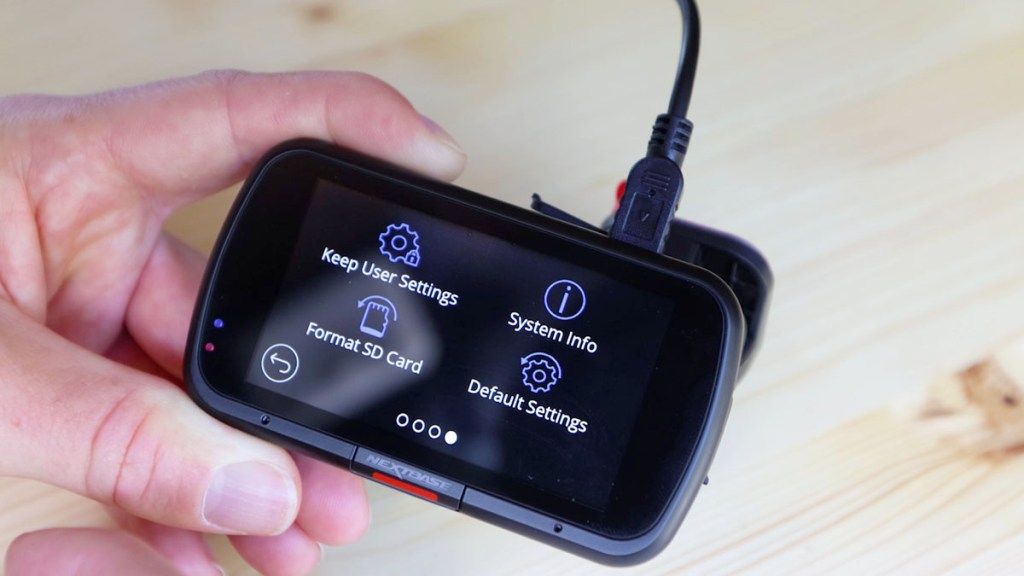
On the final screen, you’ll find the option to keep user settings or not after an update, the system info, how to format the micro SD card and how to revert to default settings.
Phew, that was a lot, but there’s just a little bit more to discover. Tap ‘Driver assistance’ on the main menu and you’ll have the option of setting up Emergency SOS, a reversing camera and What3words.
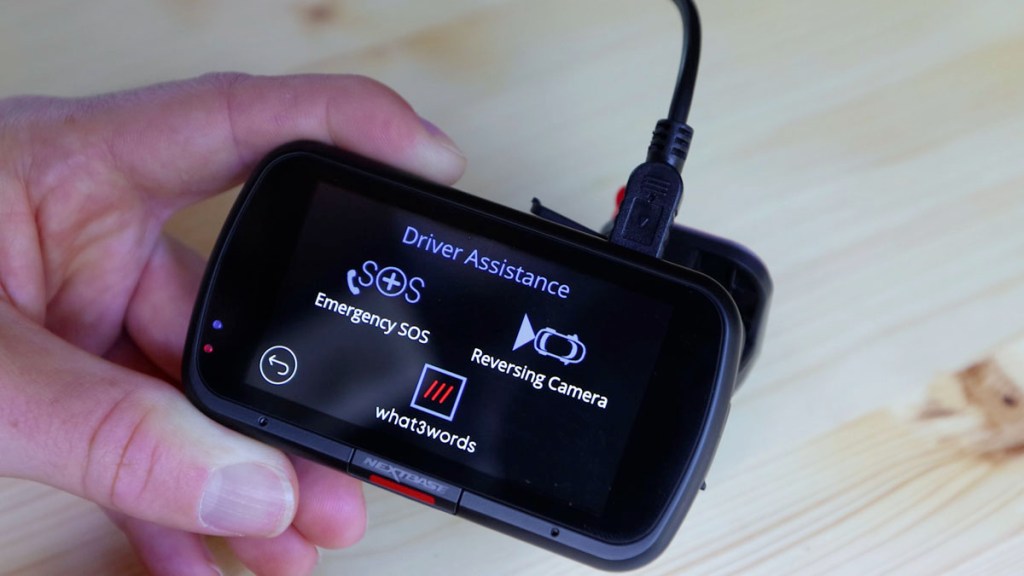
Emergency SOS is done through the app and automatically connects you to the nearest ambulance service in the event of an accident. How? According to Nextbase, if your dash cam detects a crash, the app monitors key sensors in your phone and starts a countdown on said phone. If it’s a false alarm you can stop the countdown but if you’re unable to stop it – say you’re unconscious – then emergency services are automatically alerted and your medical details can be provided to them as well, if you opt-in for this. There are a number of safeguards in place to stop inadvertently calling the emergency services and it’s a pretty cool feature which could save lives!
Back with the settings and the reversing camera option simply flips the image of a plugged in rear view camera so you can use it while reversing and What3Words enables you to instantly pinpoint your exact location to share with others; another brilliant safety feature.
The final menu option is ‘connect apps’ and having already connected the Nextbase app, it’s time to set up Alexa. Having Alexa built-in is a really great feature as you can use the command functions whilst keeping your hands firmly on the wheel.
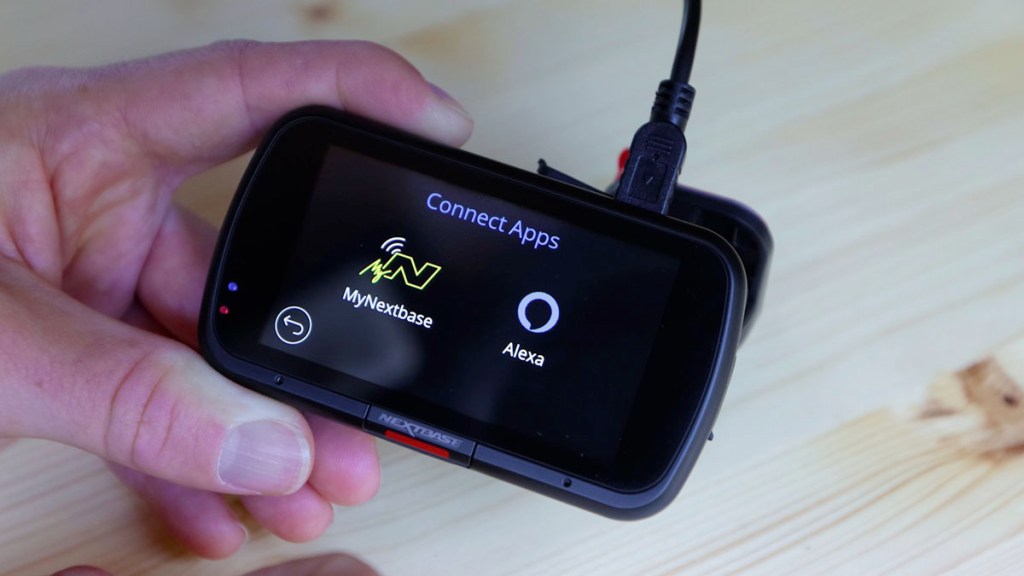
To set this up, you’ll need the Alexa app, but first open the Nextbase app and select ‘set up now’. Follow the instructions on screen and you’ll be taken to the Alexa app where you can log in with your Amazon account. Select your settings and before long you’ll have Alexa talking back to you!
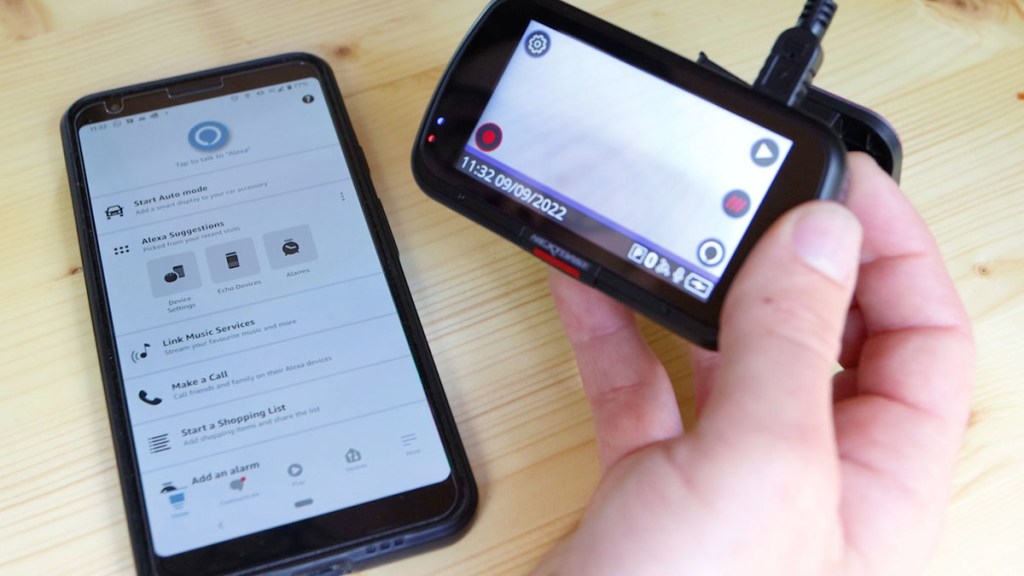
Back on the home screen, you’ve got a number of symbols showing what settings you’ve got switched on at a glance, including GPS, bluetooth, wifi and audio.
So what are the other options and accessories available for a Nextbase dash cam?
Well first off, there’s a neat little carry case, ideal for protecting the dash cam if you use it between different vehicles.

And then there’s the hardwiring kit which enables you to power the dash cam from the vehicle battery, freeing up your 12v port in the process. This isn’t something I’m going to be doing as the functionalities of the dash cam, coupled with the brilliant parking mode, are ideal for my purposes.
Wrap up
So that’s a run down of the Nextbase 622GW and accessories.
I’ve been so impressed it and, although there’s a pretty huge dash cam market out there, in all my research I’ve not seen any others which tick as many boxes and provide as much functionality as this one, particularly the additions of Alexa and the Emergency SOS mode. It really is jam-packed with features to keep the family and car safe and I’m super excited to use it more when we’re out and about, to record our adventures in the van.
Finally, you may be wondering how much this dash cam will set you back? The 622GW retails at £269 at the time of writing, and whilst that’s on the higher side, you are getting a premium dash cam with a TON of features – and can you put a price on safety?
But if that’s too much, Nextbase have a wide range of other dash cams, with their standard model starting at just £60 (at time of writing). You can check them all out HERE.
If you’re interested in finding out more about Nextbase dash cams, be sure to click HERE and if you’ve got any questions about my experience with the dash cam or my van build, drop me a comment and I’ll do my best to answer them.
If you want to see more of my camper van build in action, please CLICK HERE.
Click to buy your own…
(Affiliate links which help support this website)
