
This article is a written account of a video from the Lens Of James YouTube channel. Watch the video above and subscribe if you like what you see!
This article contains affiliate links to relevant products I have used in my videos. By buying through these links, I receive a small percentage of the sale at no cost to you which helps me support and grow my website and YouTube channel, so I can create more content like this in the future. Thank you for your support.
In this article…
- An Introduction To The Carpodgo T3 Pro
- Unboxing the Carpodgo T3 Pro
- How to install the Carpodgo T3 Pro
- Apps & Connectivity on the Carpodgo T3 Pro
- A Look at Android Auto on the CarpodGo T3 pro
- How to install a Carpodgo T3 Pro rear view camera
- How much is the Carpodgo T3 Pro?
- Should you buy the Carpodgo T3 Pro?
An Introduction To The Carpodgo T3 Pro
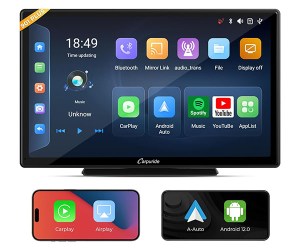
This is the CarpodGo T3 Pro, a dashboard console which will easily put Apple CarPlay or Android Auto in any vehicle with just a 5-minute install, providing an instant tech upgrade at a fraction of the cost of new cars.
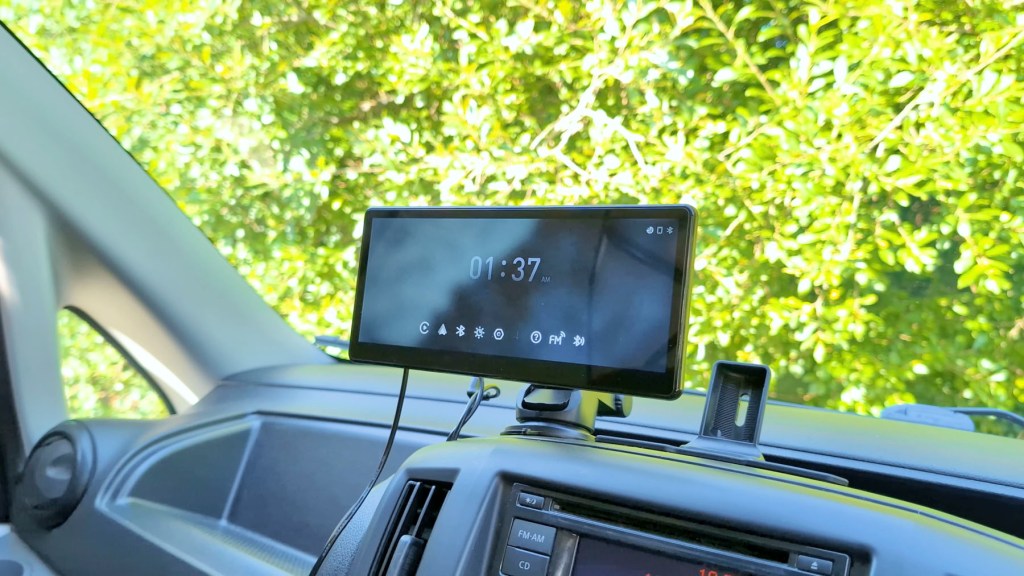
The T3 Pro boasts a quality 8.9 in 1920×720 pixel screen which runs at 60 frames per second, with multiple playback options including display only bluetooth which works with your built-in steering wheel controls for wireless connectivity .

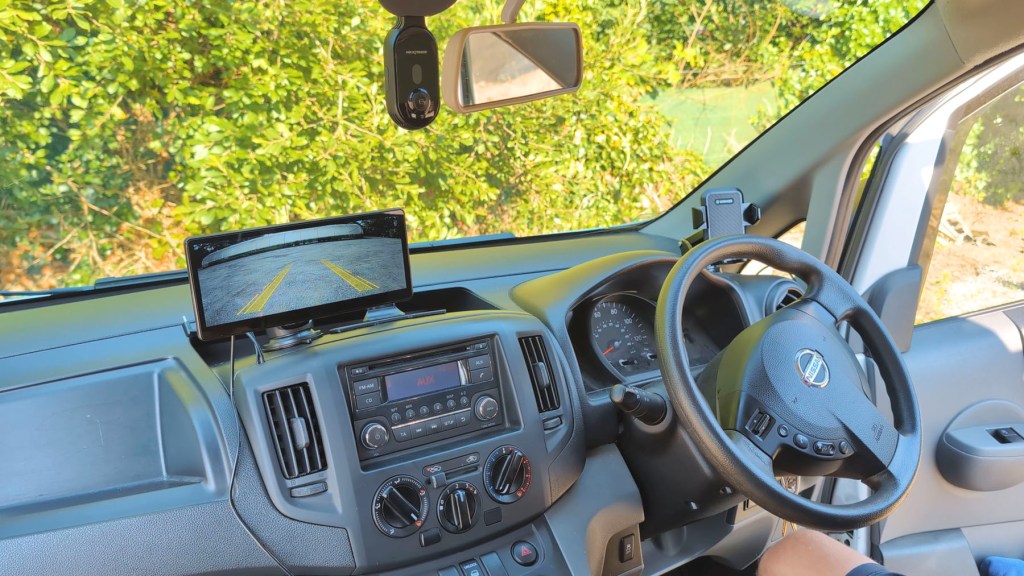
There’s also an optional full HD reversing camera which connects to your reversing light and gives a full screen view of the back of your vehicle.
Whether you’re after clear navigation, a sleek music player or dashboard access to a host of other apps, this could be a portable stereo device for you to consider.
And just so you know, CarpodGo provided the advice for me to make this video, though all the thoughts and opinions are my own.
If you like what you see I’ve affiliate links throughout the article and using the discount code LENSOFJAMES at checkout will get you $50 or around £40 off your order from CarpodGo.com.
Click to buy your own…
(Affiliate links which help support this blog)
Unboxing the Carpodgo T3 Pro
Taking the CarpodGo T3 Pro out of its box you’ve got this sleek 8.9 in screen which looks really modern with nice curved edges which flows into the plastic housing on the back.
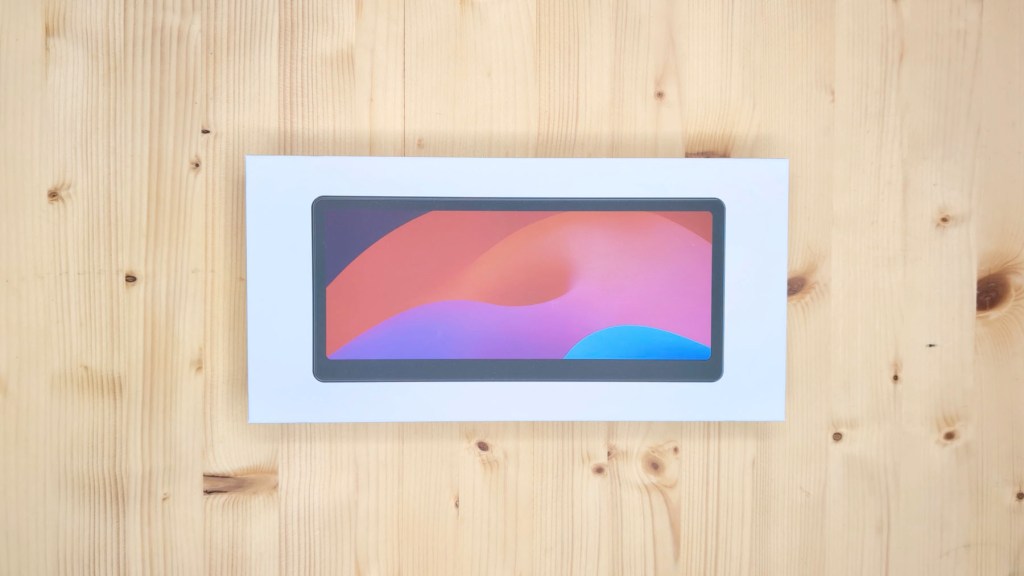
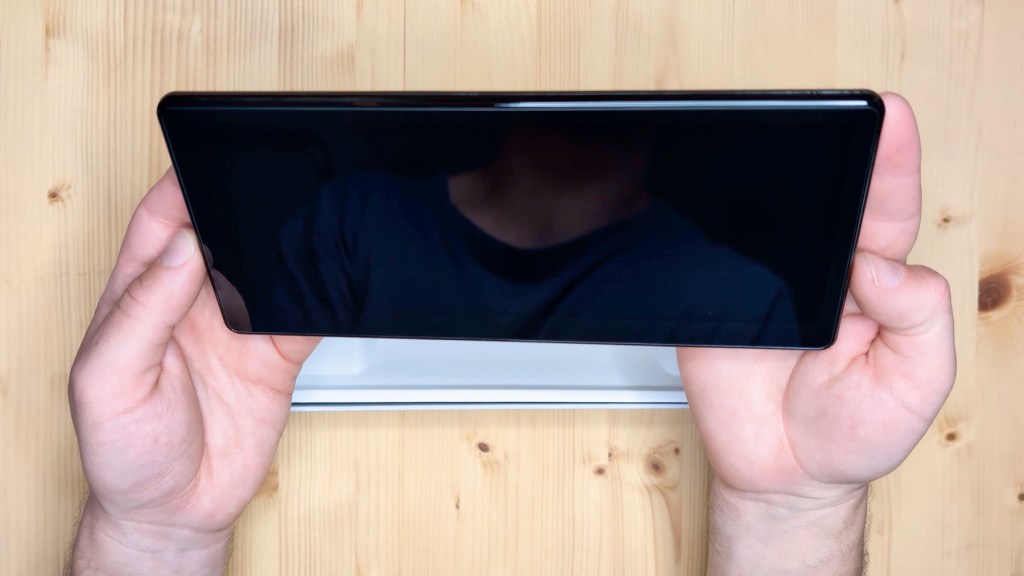
The bezel is slightly thicker on the bottom of the screen and it’s a fully laminated 1920×720 pixel screen which should in theory be very good quality, but we’ll find that out in a minute when we turn it on.
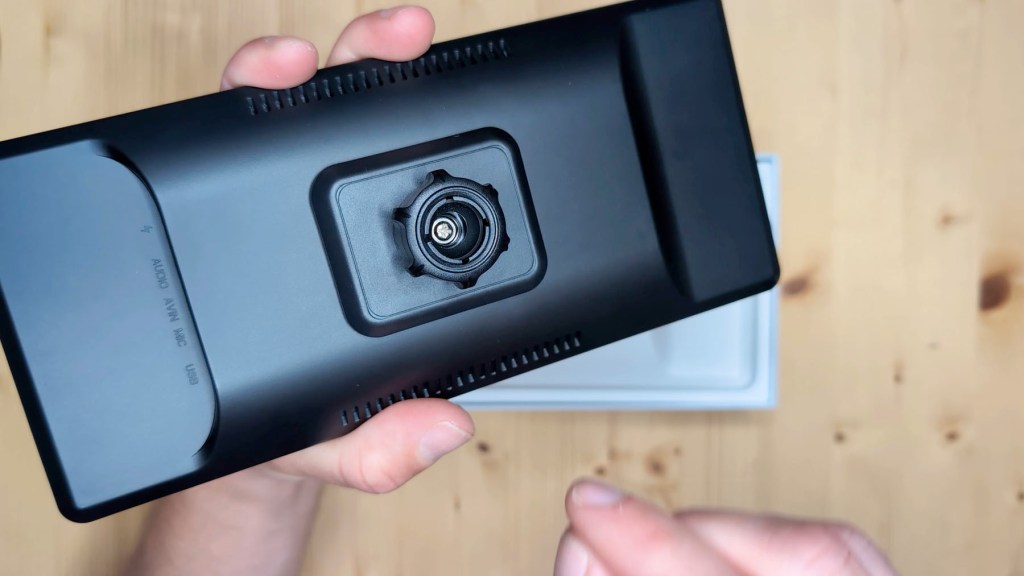
The device is thin and turning it over the curving this continues with a smooth matte back.
On the back you have the speakers as well as a number of ports. First is the USB-C port for power, then there’s the 3.5 mm AUX port for wired audio. Next there’s the 2.5 mm port for the reversing camera and, although it’s not a port, the built-in microphone is next to it, with another USB-C port for installing firmware updates, which are regularly available from the CarpodGo website.

Putting the screen to one side there are a number of accessories which come with it and a few extras depending on whether your car has bluetooth, aux cable or just FM radio playback methods.
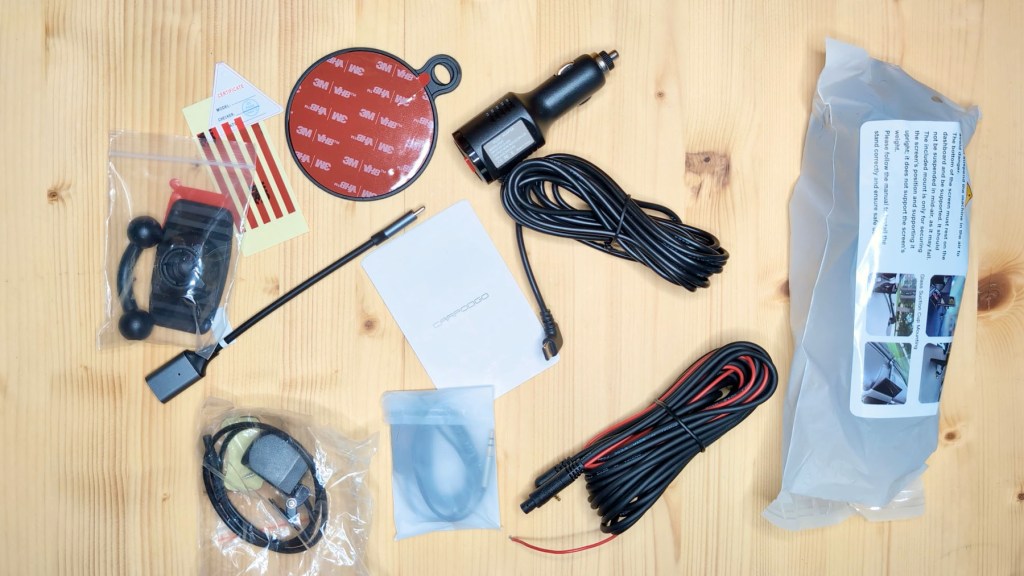
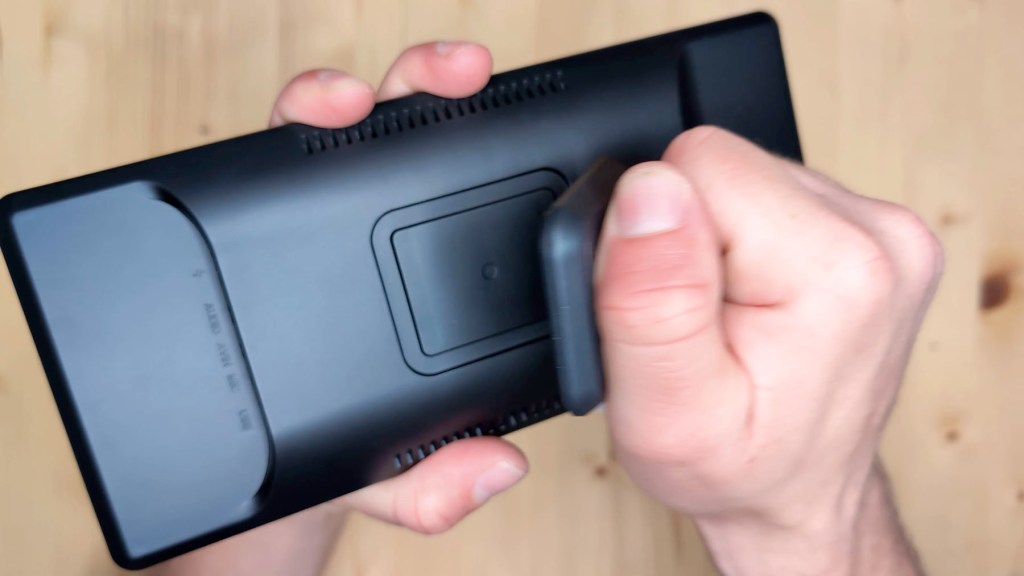
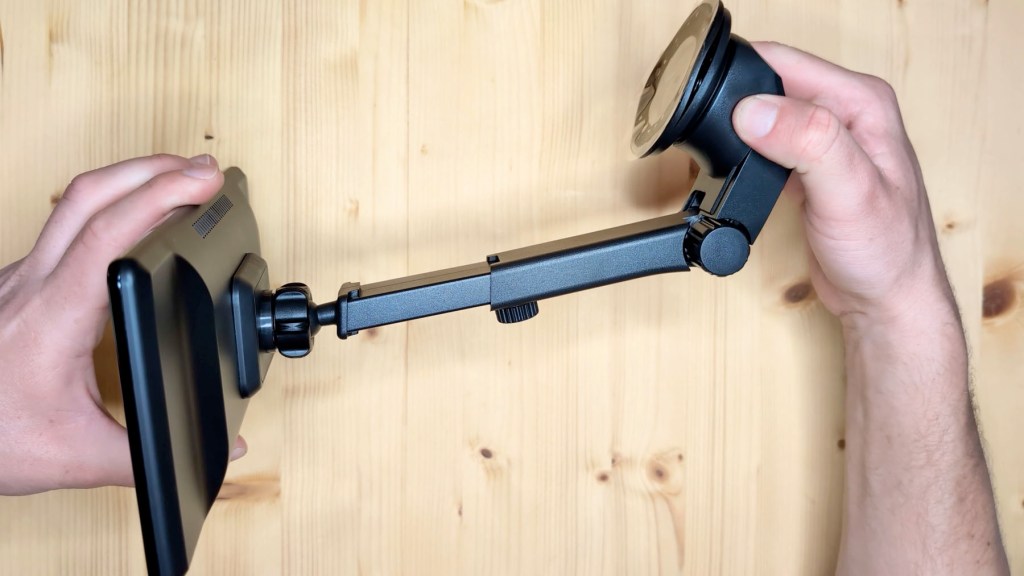
The standard accessories you get with the T3 Pro are; a sticky pad Mount and a spare sticky pad. This is the most minimal mount I’ve ever seen for a dashboard console and it looks to be highly adjustable.

If this doesn’t suit your requirements then there’s another mounting option; the suction cup mount. These types of mounts are sturdy highly adjustable in multiple directions and have a very sticky suction cup, so you can be sure it will stay on your dash or window. It attaches to the magnetic base shown earlier, which is an incredibly strong 8 kg connection, so no chance of it falling off.
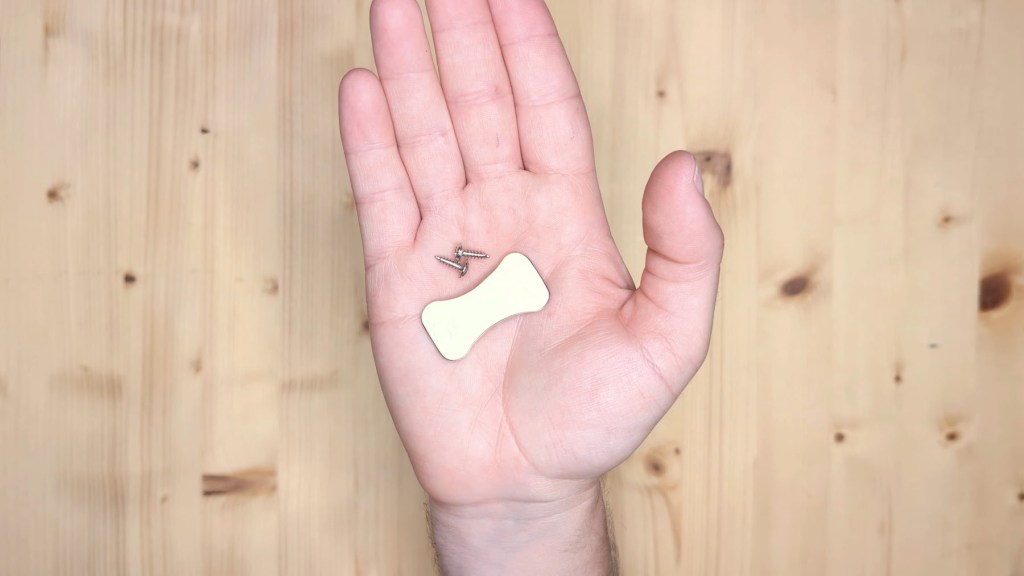
There’s also a flexible mounting plate included to help with trickier surfaces.
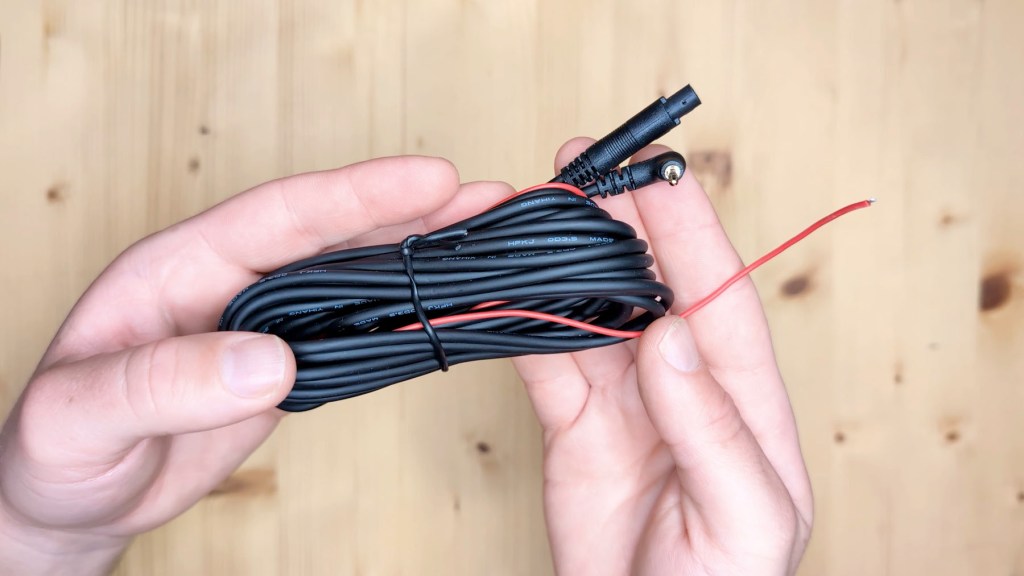
Next is a 12v to USB-C cable to run power to the device. It has a spare USB-A port built in for additional connectivity, as well as an on and off button.
Then there’s a 10cm male USB-C to female USB-A cable in case you need it for the firmware updates, a user manual to help you get set up, and lastly some thin sticker strips should you need them.
There are three optional additional accessories you might want to consider.
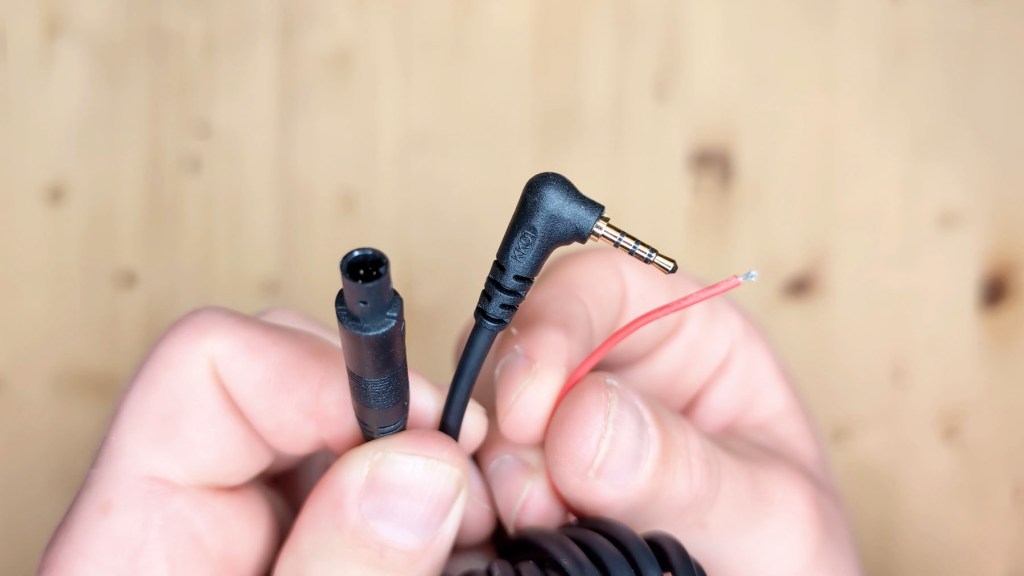
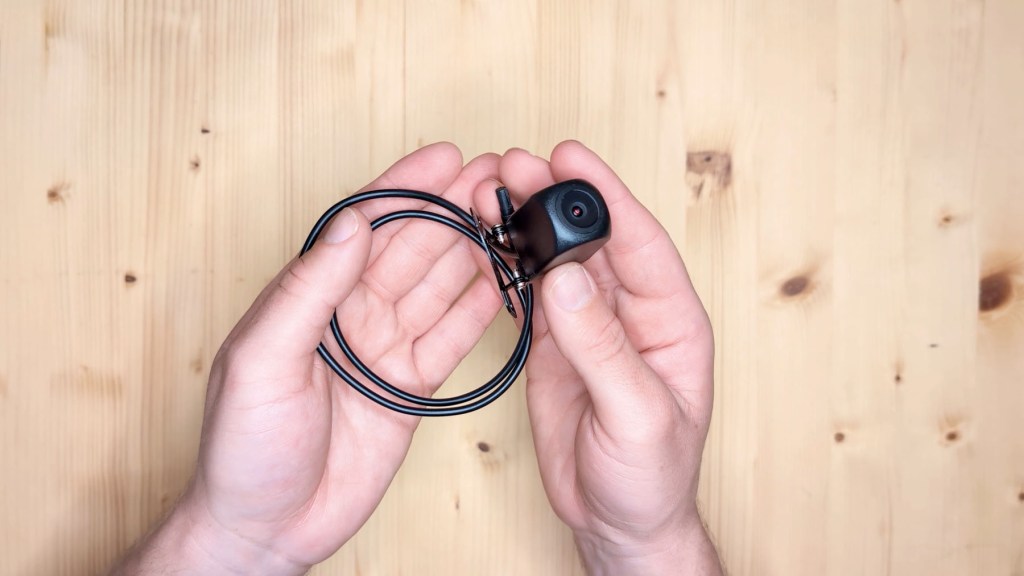
The first is the reversing camera which has a 6m cable making it usable in the majority of vehicles. There’s the four pin port which connects the extension cable to the camera, as well as a 2.5mm jack to plug into the device and a red wire which connects to the reversing light bulb wire, so the camera activates and shows on the screen as soon as you put the gear in reverse. It comes with screws in a sticky pad to secure it to the rear of your vehicle.
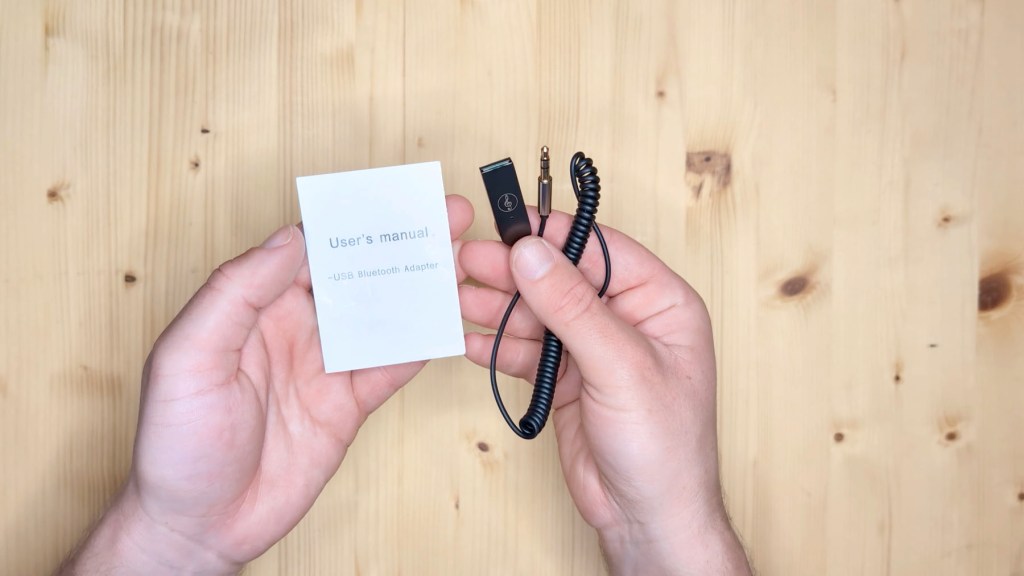
The second accessory is this bluetooth AUX receiver. Plug it into the USB and AUX port of your vehicle and it will emit a wireless bluetooth signal which you can connect to with the device. This is for people with cars without bluetooth but with an AUX 3.5 mm port who want to connect to the T3 Pro wirelessly. It comes with a user manual to help with setup.
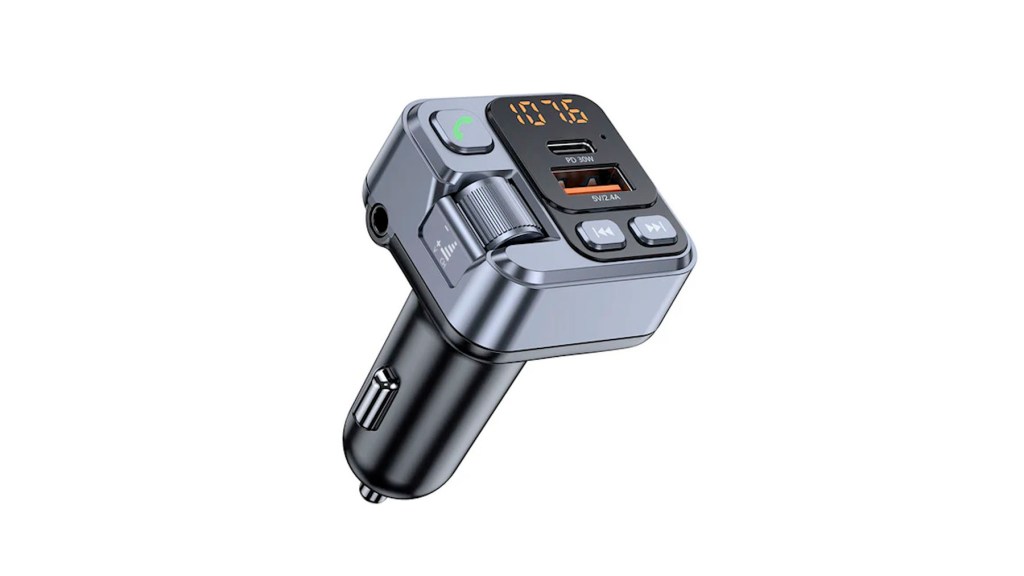
If you have neither bluetooth nor an AUX port in your vehicle, then the third accessory, this bluetooth FM transmitter which I don’t have on hand to review, will emit a bluetooth signal which you can pick up on a radio frequency and achieve wireless playback that way.
Click to buy your own…

(Affiliate links which help support this blog)
How to install the Carpodgo T3 Pro
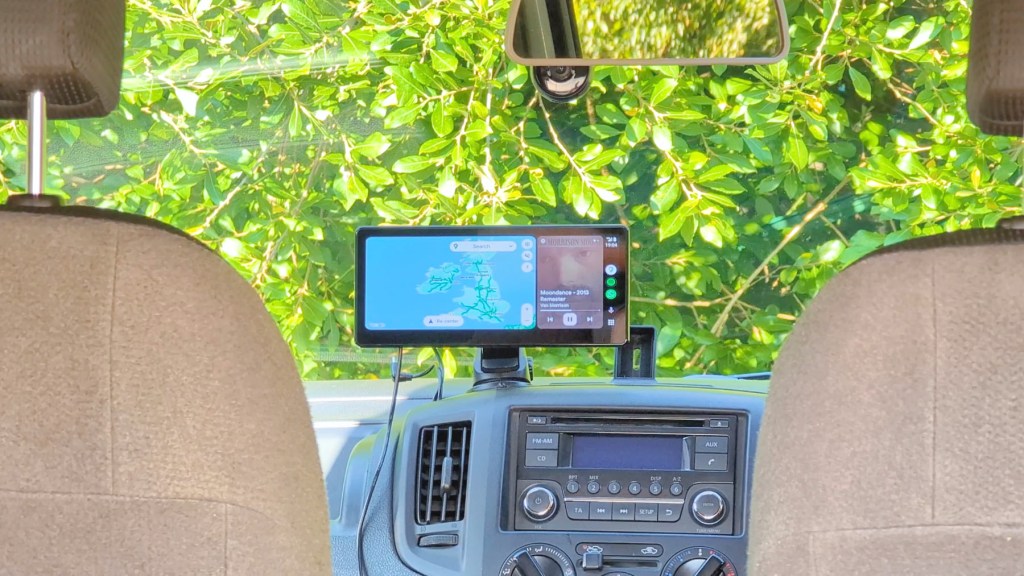
As mentioned earlier there’s just a 5 minute install to get the T3 Pro up and running in your vehicle. Choose either the suction cup or sticky pad mount, attach it to the magnetic mount and then to the device. Next choose where you want to put it; it could be on the dashboard, on the windscreen or overhanging your existing radio.
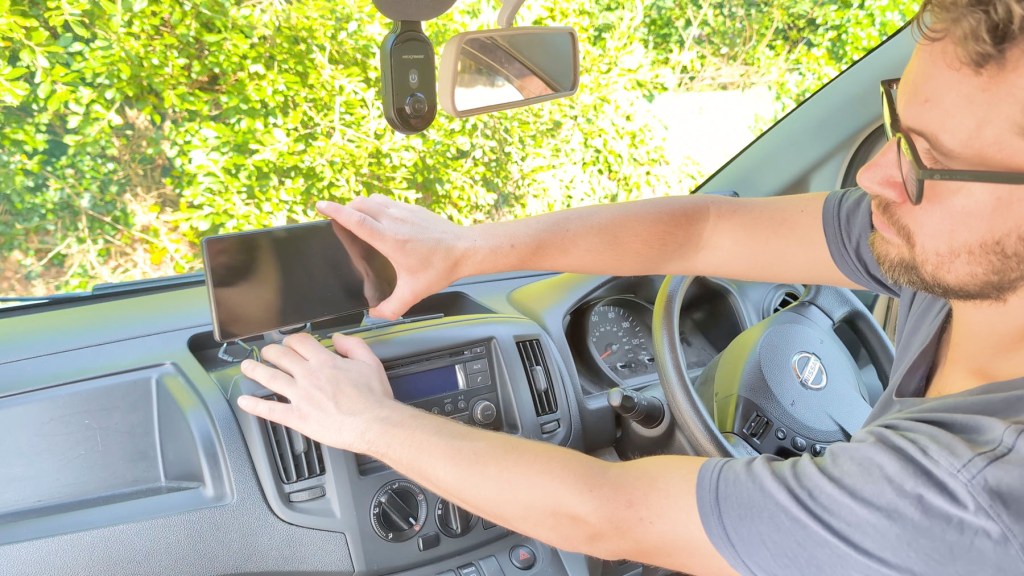
With the mount stuck down, simply push the device in place and plug the USB-C cable into the port with the other end going into the vehicle’s 12v socket. It’s really as simple as that.
Once the vehicle turns on so will the T3 Pro. The only other thing you could do is hide the wires. As you may have noticed I’ve got a couple of wires sticking up from the dashboard from other devices I reviewed.
How to remove the trim is different for every vehicle, but most of it just pops off. Check out this trim removal tool set which won’t damage your dashboard if you want to try this for yourself.

We’re also on Instagram!
Check out yogi.the.van to keep up-to-date with all our adventures in the van!


Apps & Connectivity on the Carpodgo T3 Pro
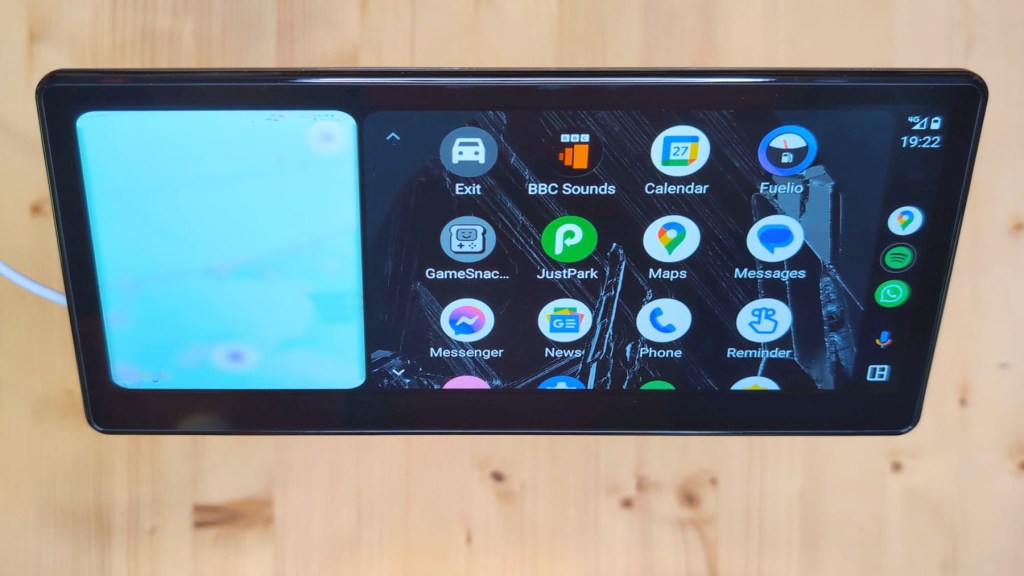
Turning the device on the quality of the screen is apparent it’s crystal clear and, once the CarpodGo logo, loads the home screen is really clean and has a minimal interface the.
T3 Pro takes just 12 seconds to go from off to CarPlay or Android Auto, which is very very fast for these types of devices.
Let’s take a dive into the apps and settings to find out what the T3 Pro offers and, if you’re seeing a few artifacts or lines in the images as we go through the apps, it’s purely from my camera and not the screen display which is bright and sharp and a camera really doesn’t capture its clarity.
Up first is CarPlay and, tapping the app, you’re given instructions for connecting an iPhone, which is also the same process for Androids on the next app; Android Auto.
I have an Android phone so will be setting this up, though it’s a simple process for both systems. First open either the CarPlay or Android Auto app, depending on your device, then head to your Bluetooth settings to find and connect your device.
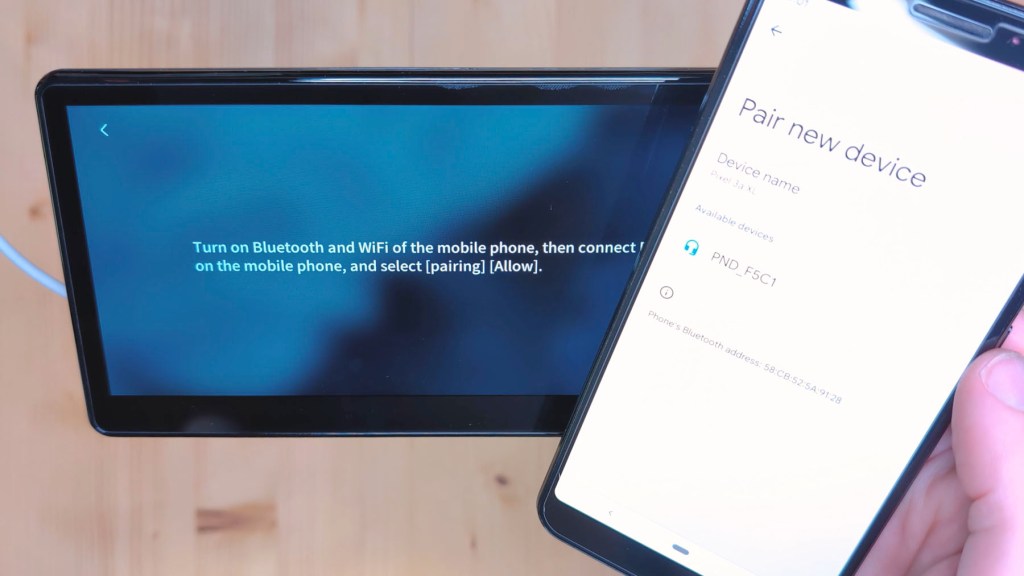
What it doesn’t say on this screen though it does in the small print of the user manual is that after bluetooth pairing a local Wi-Fi network is automatically created and connected to. Although you don’t need to go to your Wi-Fi and connect to this, my Android phone had a notification which required me to allow it in order for the connection process to finish.
After that you’re connected for good and as soon as you start your car the T3 Pro will start up and then automatically connect to either CarPlay or Android Auto.
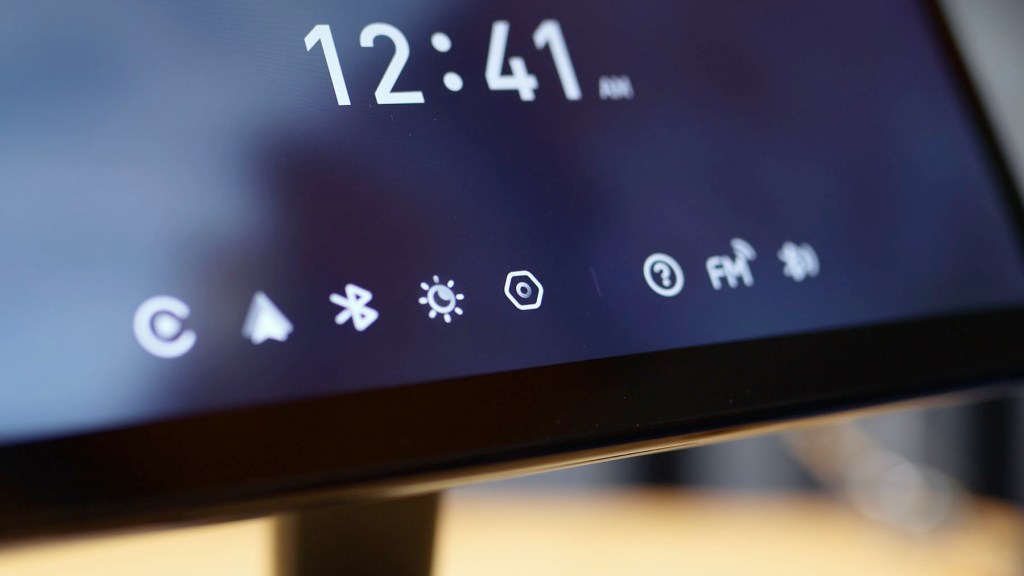
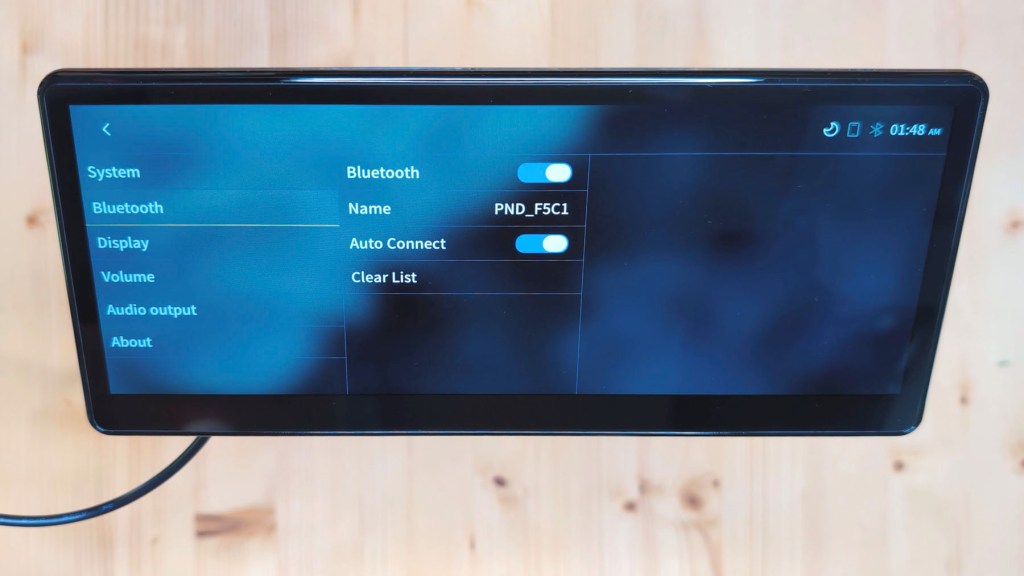
The next app to explore is bluetooth and this takes you into the settings menu. Here you can turn the bluetooth on or off, change the device name, turn autoconnect on or off, and clear the list of connected devices.
Going back to the home screen the next button is display and, back in the settings you’ve got a few display options to play with.
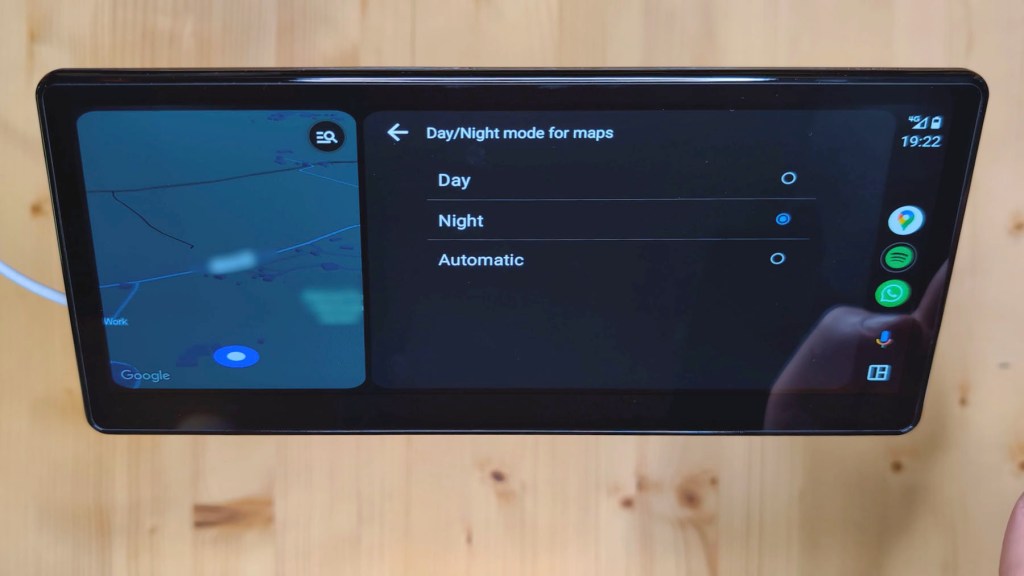
The first is night shift which I’ve never seen anywhere else before and this allows you to set a time window for the device screen to dim slightly, making it less bright during night driving and it also switches your maps over to dark mode so it’s much easier on your eyes.
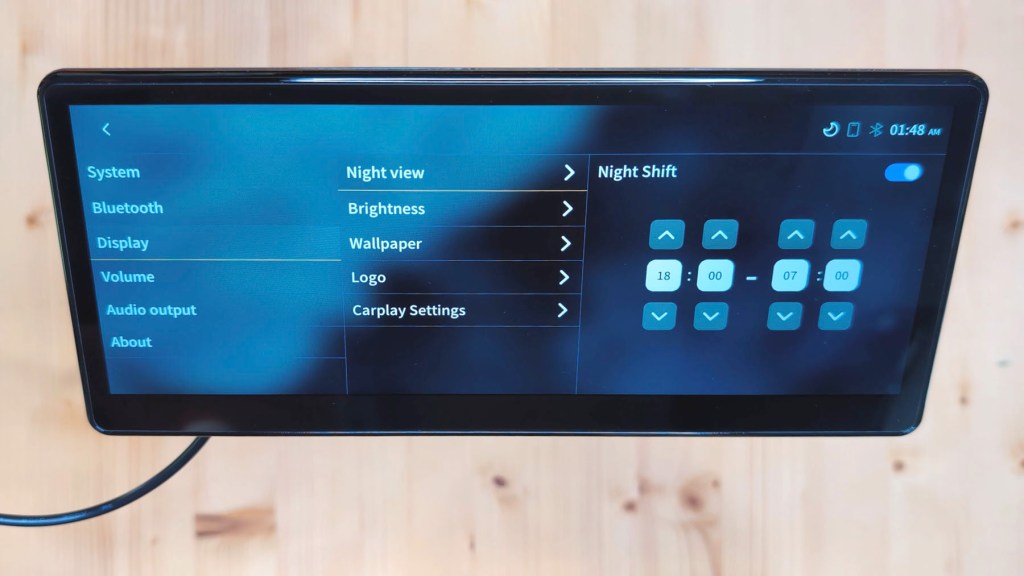
Next is brightness and you can adjust the day and night sensitivity, as well as toggle the light sensor on or off which will allow automatic dimming when the daylight level changes as you drive. The screen has a brightness of 700 nits and is very bright in daytime conditions. Next is wallpaper with three different ones to choose from.
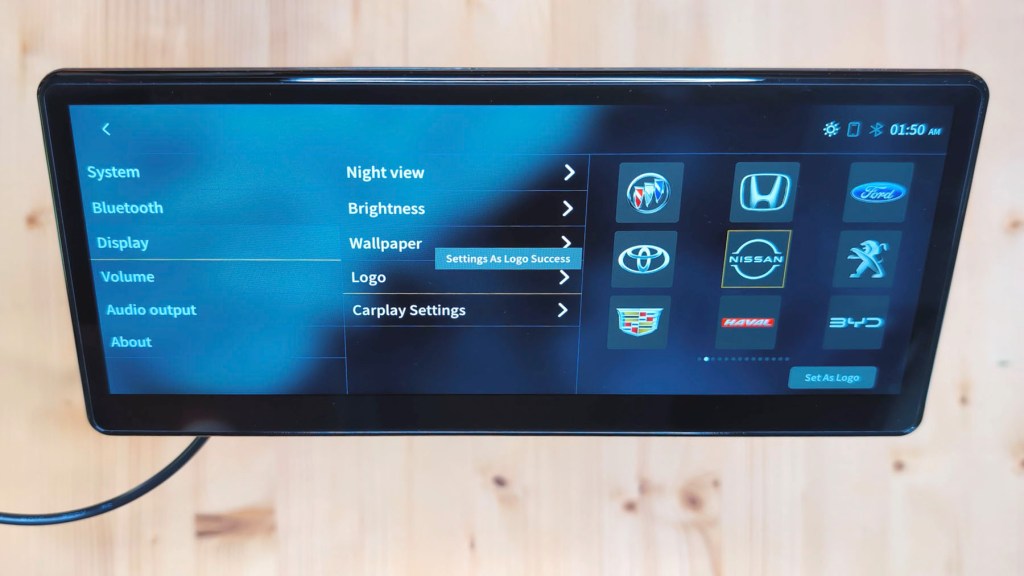
And then you’re on to logo. Here CarpodGo say they have loaded 95% of car logos, so I can find the Nissan one for my NV200, tap set as logo and it will show instead of the CarpodGo logo on startup, which is a nice way to blend the device in with your vehicle.
Lastly there’s CarPlay settings with the option to let your device know which side of the vehicle your steering wheel’s on, toggle on or off the 60 frames per second screen, as well as a 10-second timeout so the home screen returns to CarPlay or Android Auto automatically.
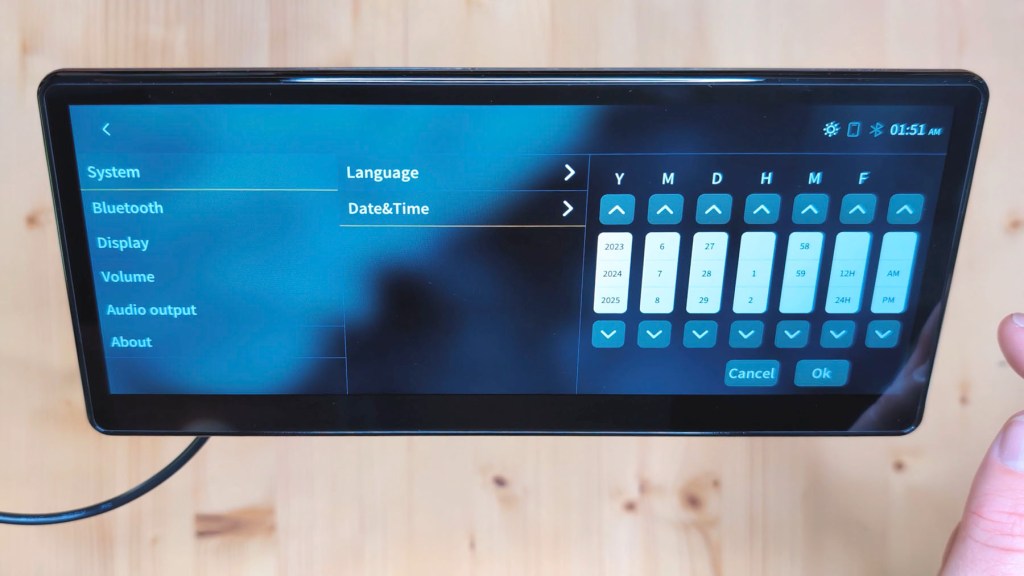
The final symbol in the first set of apps takes you to the start of the settings and in the system menu you can change your language and set your date and time. Scrolling around here is an ideal time to say that the screen is really responsive with no lag at all, and is really a pleasure to use.
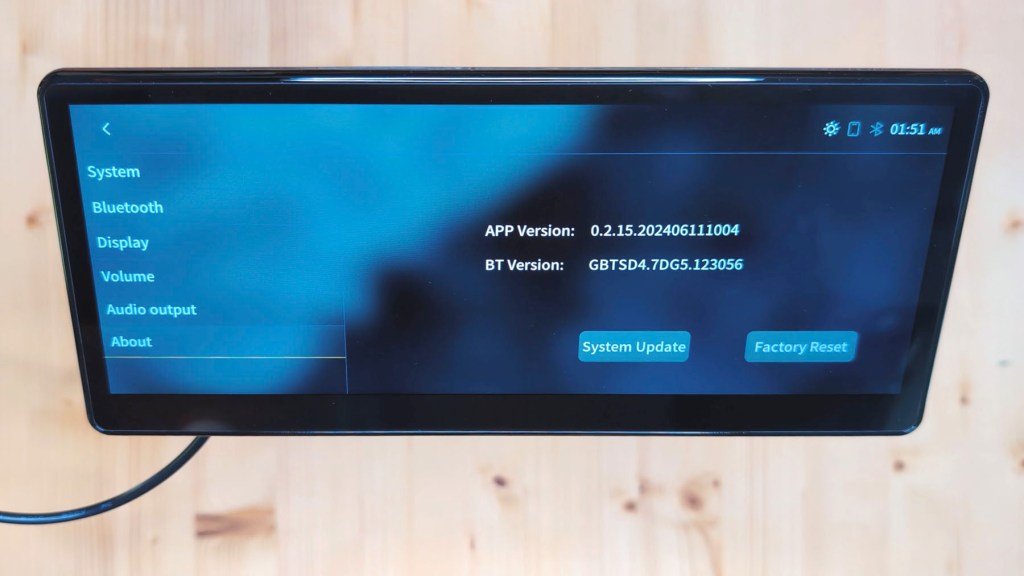
Back on the home screen there’s another set of three apps and the first here is the settings about page. Here you can check your system settings, load an update or do a factory reset.
Next is one of the most important apps; audio output, and there are four ways to listen tomusic on the T3 Pro.
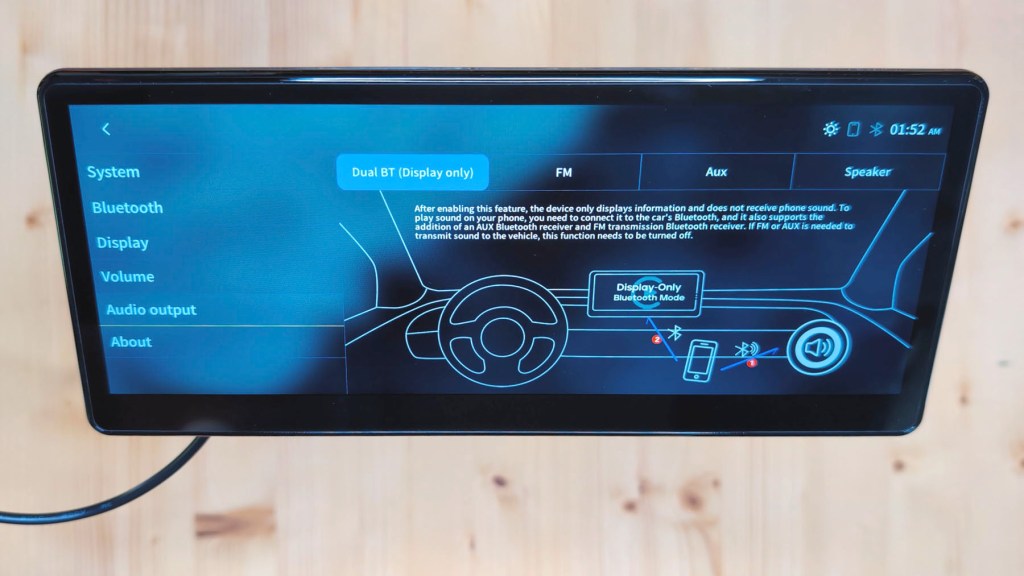
The first is dual bluetooth display only, which the majority of people will probably want to use. This allows wireless playback whilst retaining use of your steering wheel controls.
The trick to this is connecting your phone to the T3 Pro via CarPlay or Android Auto and then connecting your phone to your car’s bluetooth. By doing this your phone is telling the vehicle to play sound whilst telling the T3 Pro what to display; very clever stuff and a fantastic integration of third-party tech into a vehicle.
It should be mentioned that there aren’t many dashboard consoles with this built-in, so it’s great great the CarpodGo have embraced this for the T3 Pro.
The next method of playing sound is FM and this allows play back through your car speakers via a radio frequency. Put both the T3 Pro and your car radio on the same frequency and you’ll hear music.
AUX is a wide method of playing your music and requires a 3.5mm AUX cable to be connected from your car’s AUX port to the port on the back of the T3 Pro.
Note here that for both FM and AUX listening options your hands-free steering wheel controls won’t work and only will on the bluetooth settings.
The final option for playback is speaker and this will just play through the T3 Pro and not your vehicle. If you have any other options selected then you won’t hear sound through the console speakers.
The final button, the bluetooth transmission button, goes to the same place in the settings as the FM symbol.
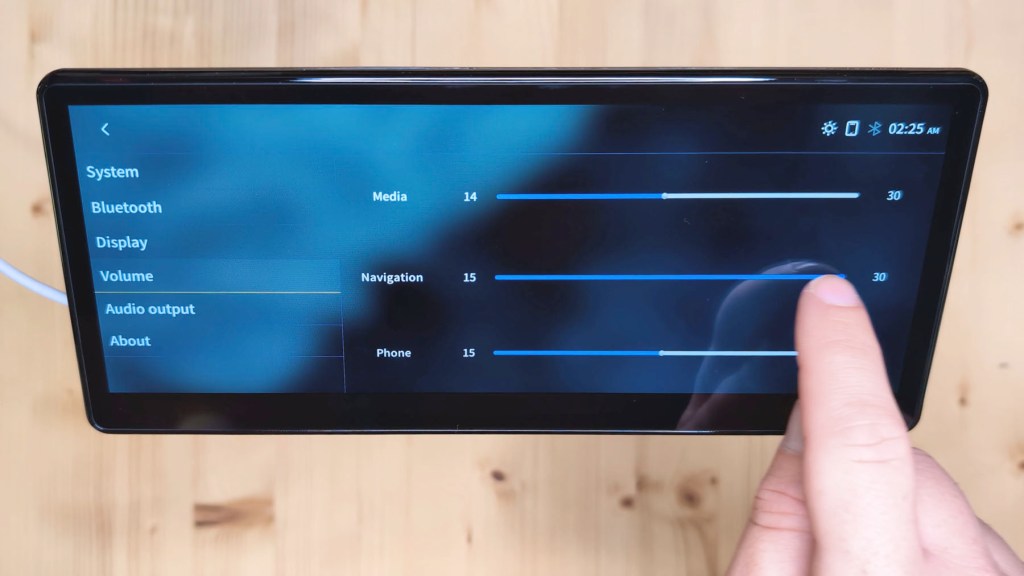
There’s only one setting which isn’t covered by a homepage app and that’s volume. Here you can adjust the media navigation and phone volumes to suit your preference.
Click to buy your own…

(Affiliate links which help support this blog)
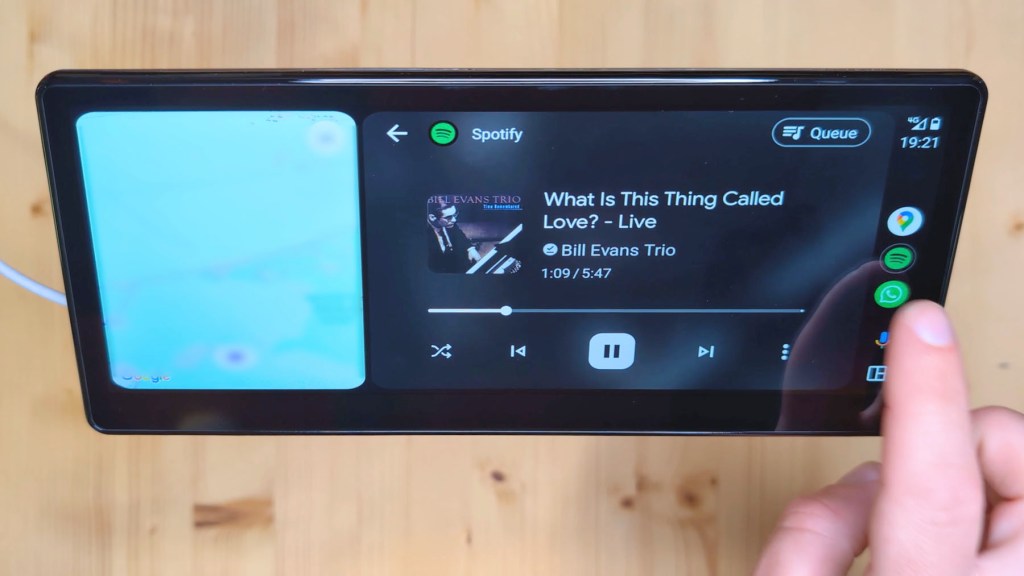
A Look at Android Auto on the CarpodGo T3 pro
One of the main reasons people use dashboard consoles is for CarPlay and Android Auto.
Although I don’t have an iPhone I can show you the Android Auto interface which is made by Google.
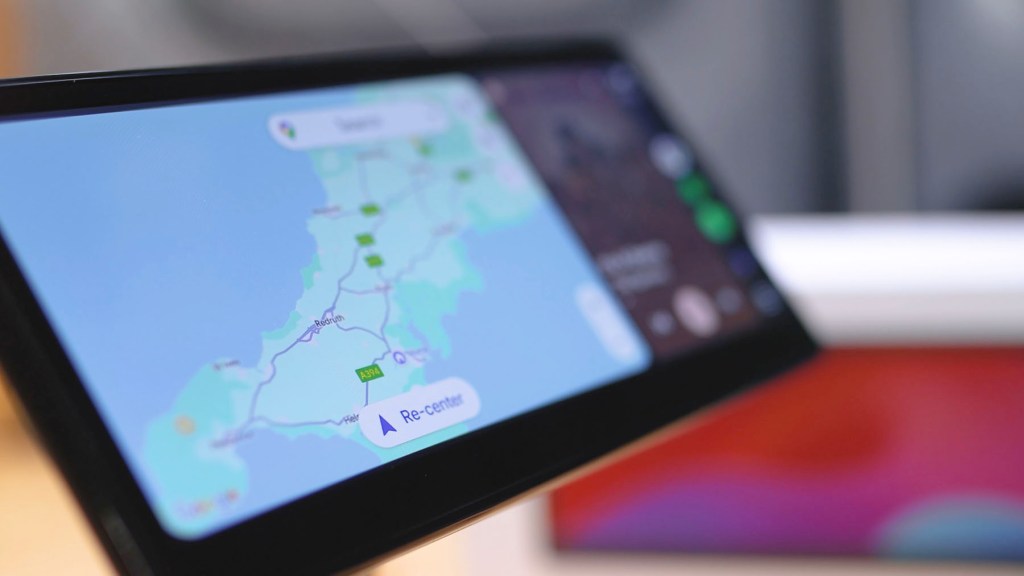
Once connected you can split the screen between your chosen navigation and music player, each taking up either a third or 2/3 of the screen. You can also have full screen navigation which makes maps really easy to follow compared to a phone screen.
If you get notifications during a journey you’ll have the option to have them read out to you and for speech replies, plus you have Google Assistant to ask hands-free questions.
Along the right hand side there’s a menu where you can switch between your commonly used apps and the nine dots in the bottom right gives you access to all the Android Auto compatible apps installed on your phone.
There are also some settings you can adjust, such as whether you want Android Auto to start automatically and whether you want to use night mode on maps, which is a new addition that not many CarPlay devices have at the moment.
With the nice big display of the T3 Pro, everything is really clear and easy to use. The only thing you might be noticing is that on Android Auto the aspect ratio is slightly stretched. I’m not sure why this is but after a bit of use I completely forgot about it so it really isn’t an issue.
How to install a Carpodgo T3 Pro rear view camera
The optional rear view camera offers the ability to have greater visibility behind you when you park. Thankfully the connection style of reversing camera which you get for the T3 Pro is the easiest I’ve come across so far.
As mentioned earlier there’s a 6m cable which connects to the camera via a four pin connector, the 2.5 mm jack plugs into the associated port on the T3 Pro, and then there’s the red wire remaining, which needs to be connected to the reversing light bulb wire. This is so the camera activates and shows on the screen as soon as you put it in reverse gear.
I’ve created a full in-depth step-by-step video on how to do this, but in short you need to feed the long 6m wire to the back, locate your reversing bulb power wire, connect the red wire of the camera to it, feed the long black wire through the inside of the rear door to the outside and screw the camera in place.
Once done and tested, the long wire will need to be hidden in the vehicle and then the camera can be adjusted to get the filming angle right and tightened. It took me a few hours to do all this and although all vehicles are different the principles are the same. It’s really not as bad a job as you’d think and is well worth the effort to get the maximum amount of the T3 Pro.
Click to buy your own…
(Affiliate links which help support this blog)
How much is the Carpodgo T3 Pro?
Prices vary depending on where you look but the CarpodGo T3 Pro could be found for between $230 and $250 at the time of filming, so around £190 or €220.
I’ve got affiliate links to the CarpodGo store which ships worldwide and the US Amazon store where it’s also available in the description below, so have a browse to find the best price and be sure to use the discount code LENSOFJAMES at checkout to get you $50 or around £40 off your order from CarpodGo.com.
Should you buy the Carpodgo T3 Pro?
I’ve used and reviewed a bunch of these dashboard consoles over the years and the CarpodGo T3 Pro is definitely up there with the best of them.
It’s got a really sleek design which will blend in really well with most car interiors and the 60 frames per second fully laminated screen is fantastic quality, and certainly one of the nicest I’ve seen.
The user interface is almost minimalist in design and, again, it’s probably one of the best and fastest I’ve seen too with no lagging.
The firmware is stable and I’ve had no issues at any point during testing and the ability to update it is a huge bonus too, which will keep the device relevant for longer.
There’s not much more to say I found it just works every time as you need it to.
Thanks for stopping by!
Click to buy your own…


(Affiliate links which help support this blog)
