
This article is a written account of a video from the Lens Of James YouTube channel. Watch the video above and subscribe if you like what you see!
This article contains affiliate links to relevant products I have used in my videos. By buying through these links, I receive a small percentage of the sale at no cost to you which helps me support and grow my website and YouTube channel, so I can create more content like this in the future. Thank you for your support.
In this article…
- Introducing the DJI Mini 4k Camera Drone
- Unboxing The DJI Mini 4k
- Installing & Setting Up The DJI Fly App
- How To Fly The DJI Mini 4k Drone
- Complete Flying Controls For the DJI Mini 4k
- Camera & Video Image Quality Of The DJI Mini 4k
- Going In-Depth On The DJI Fly App
- How To Fly A Drone Legally In The UK
- Accessories & Extras To Buy For The DJI Mini 4k Drone
- Should You Buy The DJI Mini 4k Drone?
Introducing the DJI Mini 4k Camera Drone
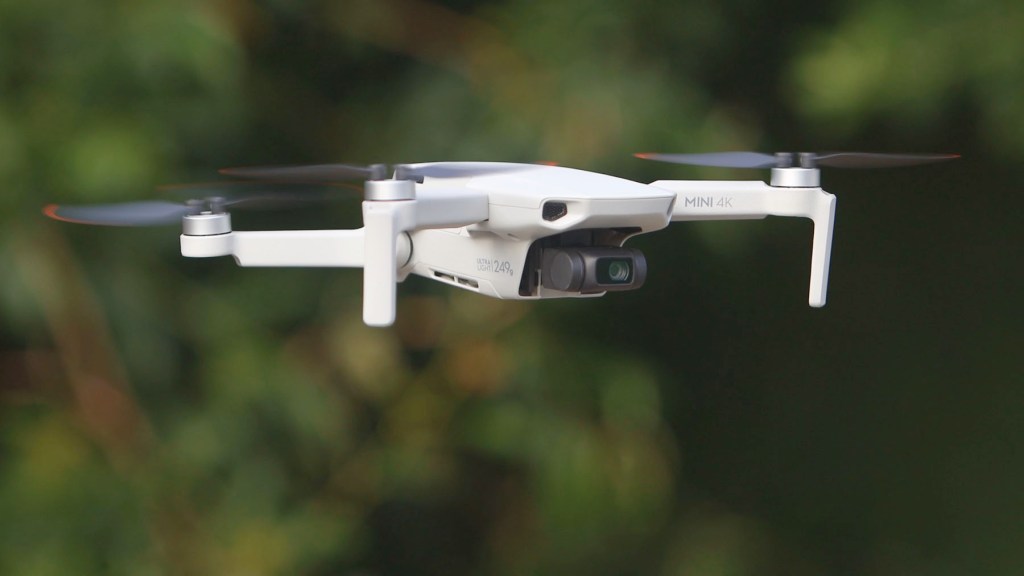
This is the DJI Mini 4K drone and it’s the latest release from the global drone giant.
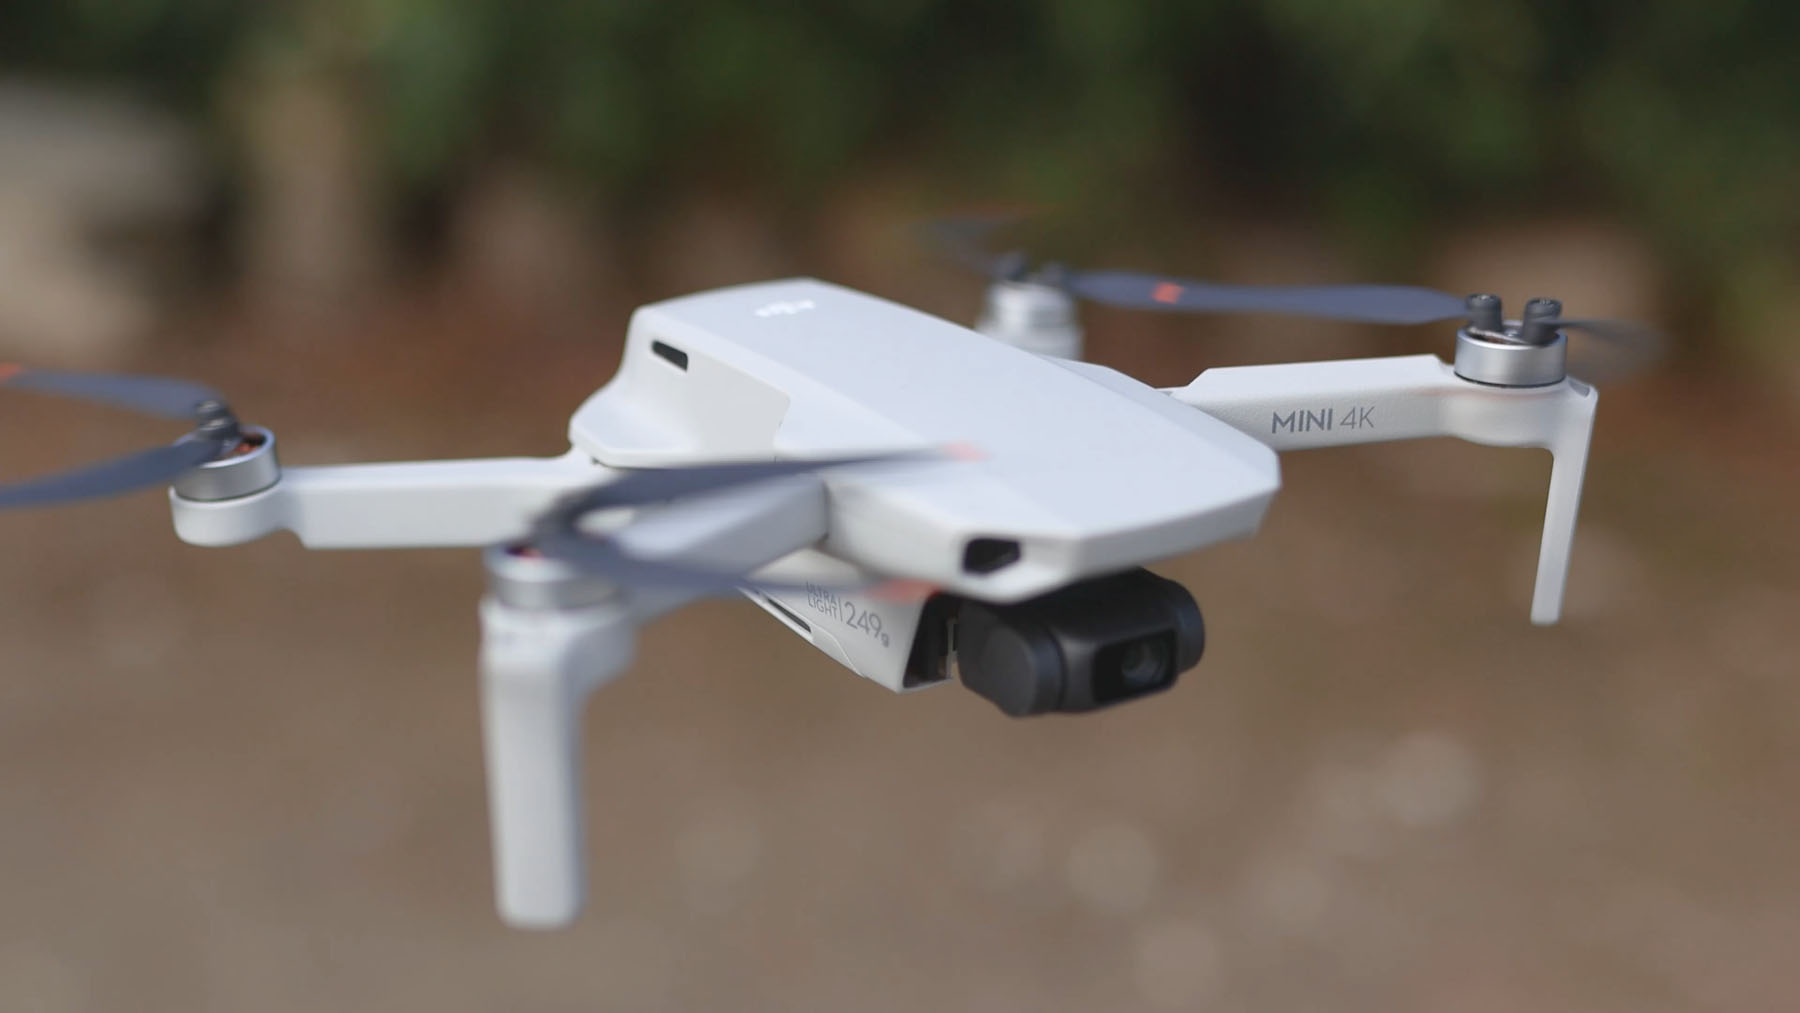
It’s an entry-level drone which was released in mid-2024 and is set to be the perfect first step into aerial filming and photography for beginners, but also for travelers as it’s so compact and light.
It’s essentially the same as DJI’s Mini 2 SE drone, with the main exception being that it films in Ultra-HD 4K at 30fps instead of 2.7k (or Quad-HD) at 30fps on the Mini 2 SE.
It both 3-axis gimbal stabilization, 31 minutes of filming which is more like 18 to 22 when you factor in wind and how fast you’re flying, stable 10 km video transmission which is more than enough for even built up urban areas, level five wind resistance which is a maximum of 19 to 24 mph, and auto return to home to reduce the risk of losing it.
One of its biggest assets is that it’s only £269 or $299 at the time of filming, which I think is fantastic value for a drone with these features and of this quality.
There are a few features this drone doesn’t have though. There are no sensors for obstacle avoidance, the gimbal doesn’t rotate vertically and only shoots horizontal footage, and there’s no tracking or following either though there is the QuickShots capability for limited tracking shots which I’ll go into later.

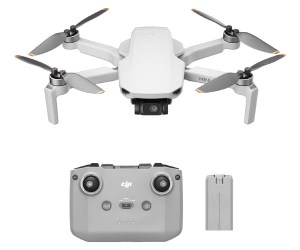
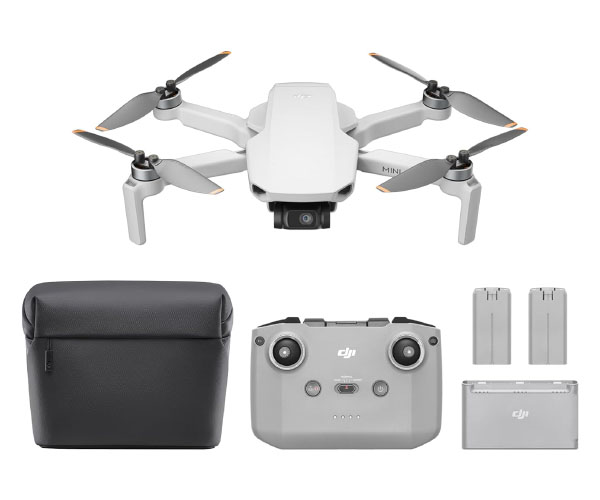
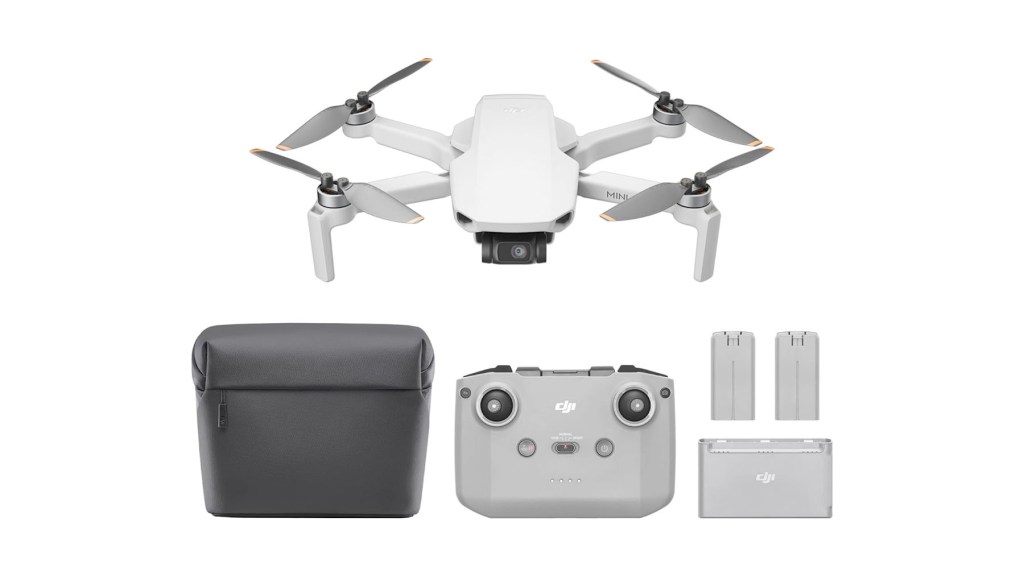
The funny thing about the Mini 4K is that it’s only available on the Amazon website and not the DJI store. You can get the drone and remote control on its own or the Fly More Combo kit with two extra batteries, a carry case and a charging station.
If you like what you see and are interested in getting one for yourself, I’ve got affiliate links to the drone and other accessories below which help support this channel and make videos and articles like this possible.
Click to buy your own…
(Affiliate links which help support this blog)
Unboxing The DJI Mini 4k
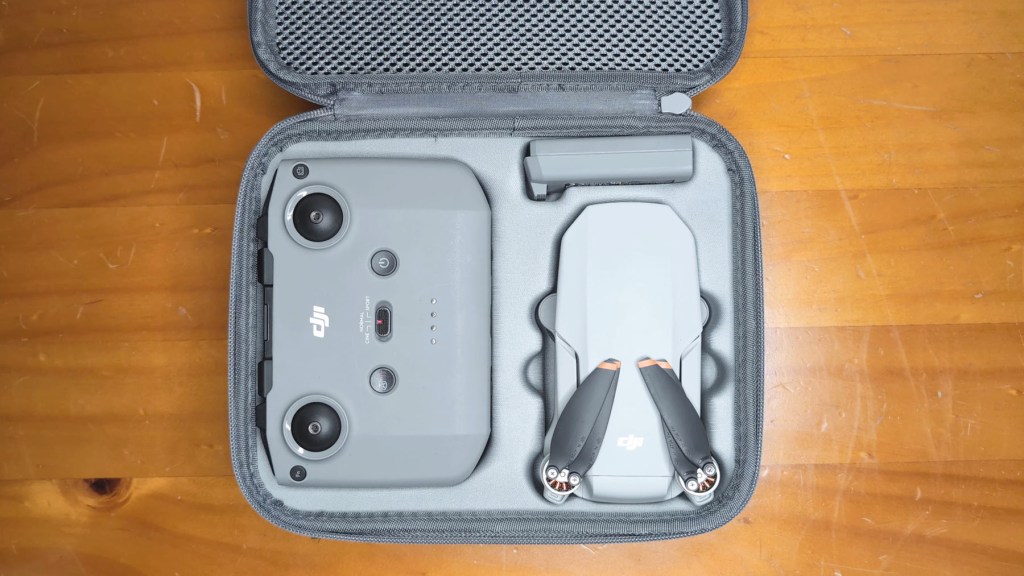
When opening the box I was surprised at just how small it is. Taking it out of the box it’s also much lighter than expected.
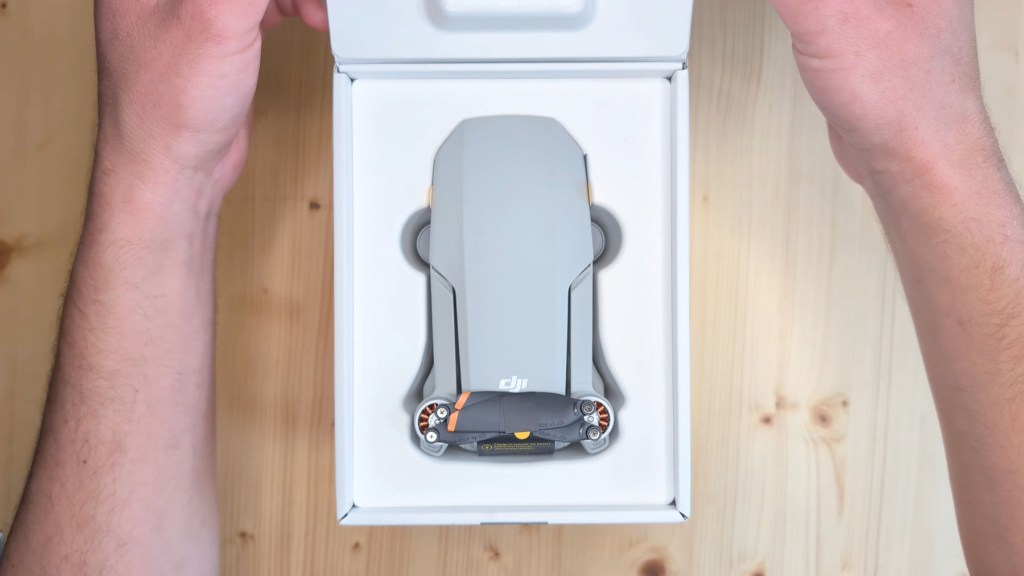
It’s a sub 249g drone meaning there are slightly less restrictions as to how and where you can fly it and when I weighed it it came in at just 240g.
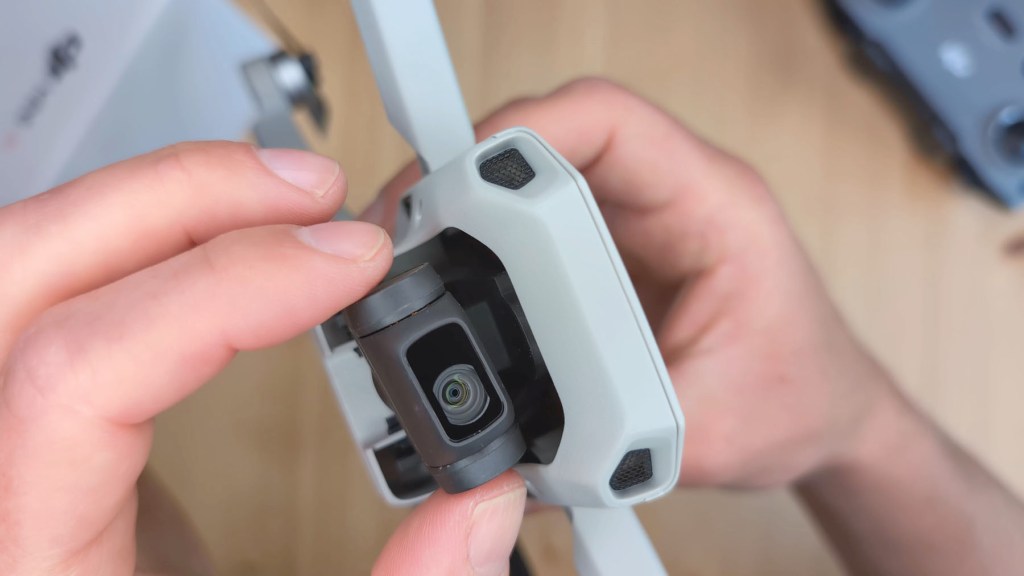
It’s really compact with the arms folding up and the gimbal protected by a cover on the front.
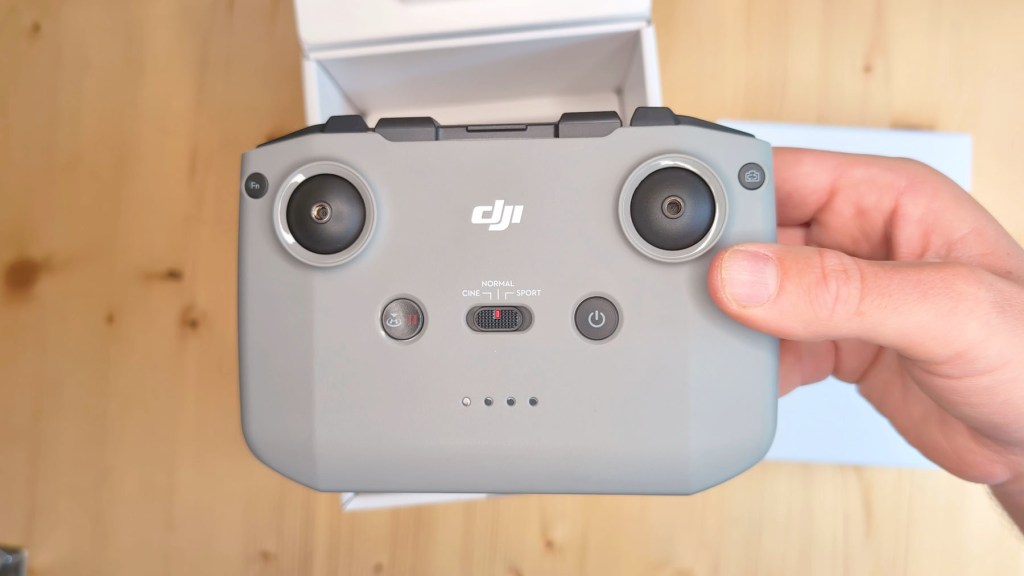
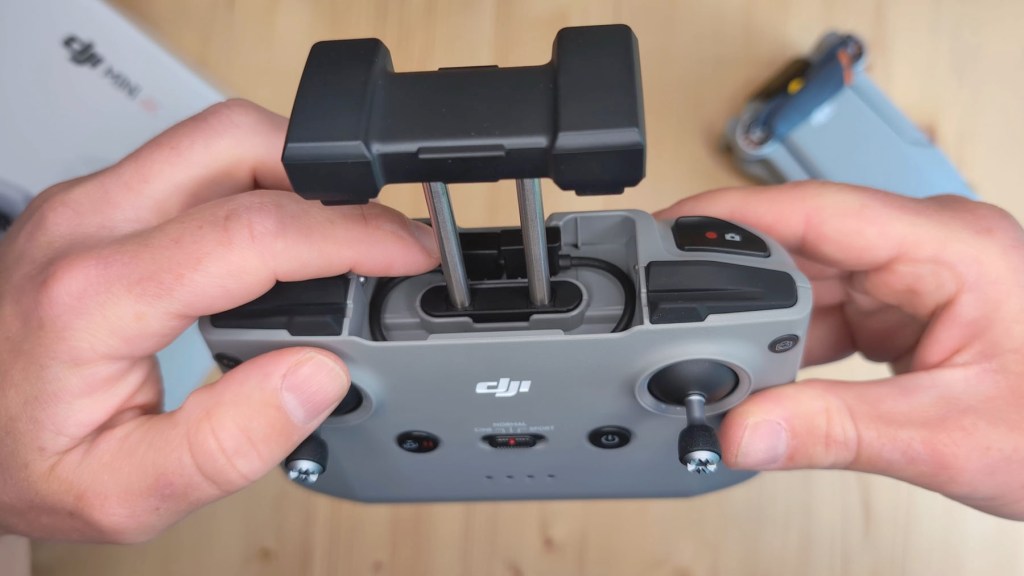
At the bottom of the box is the remote control which is actually bigger than the drone and I’ve got the standard RC -N1c controller here, and it connects to your phone so you can see what the drone sees but I’ll come on to how all that works later.
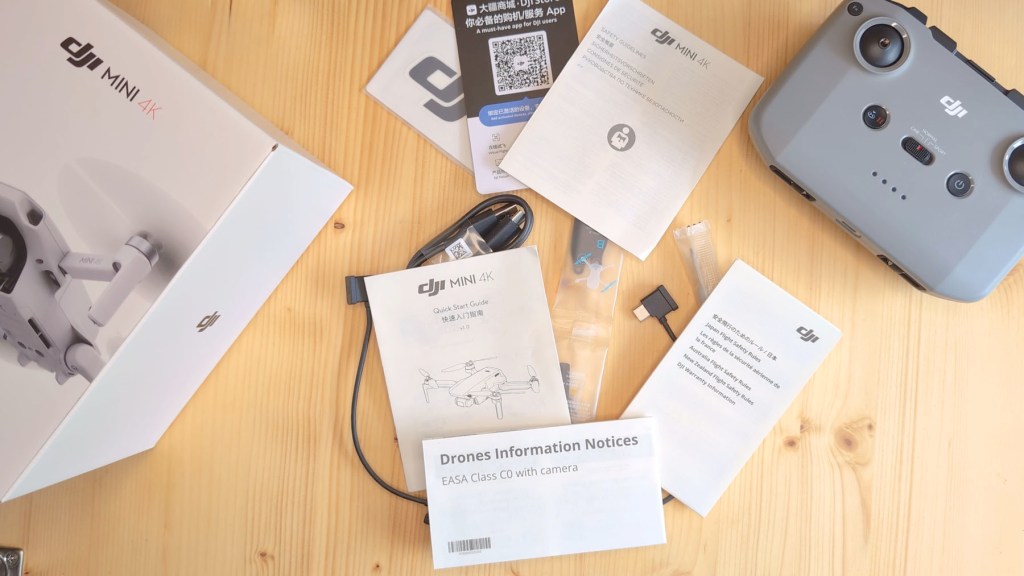
Also included is a screwdriver for changing the propeller blades, four spare blades, a USB-A to USB-C charging cable, a USB-C to USB-C cable a micro-USB to the USB-C cable, DJI stickers, a QR code card for the DJI store, safety guidelines, a quick start guide, safety guidelines for Japan and drone information notices.
Going back to the remote control the control sticks are neatly hidden in the base and can be screwed in.
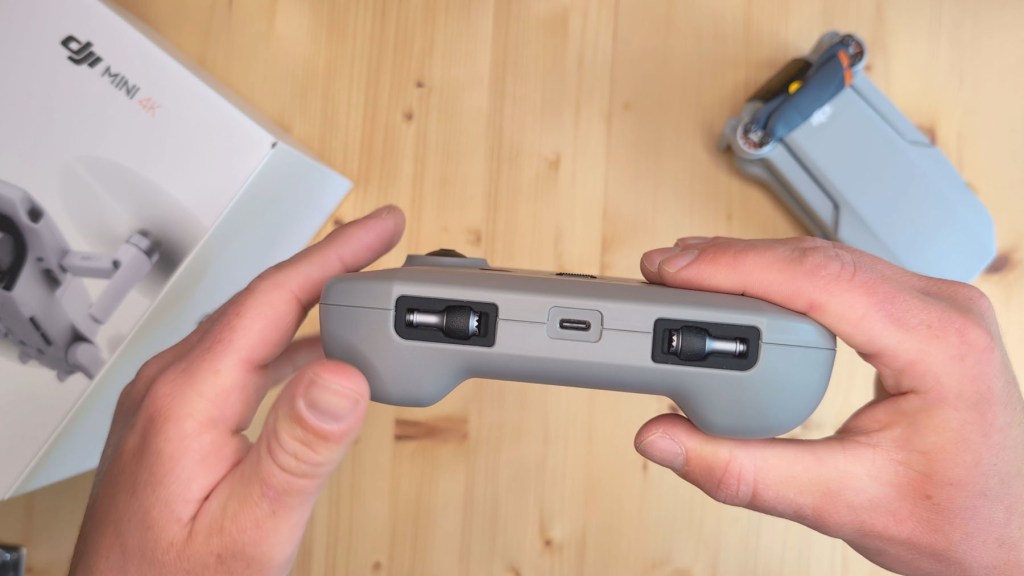
At the top there is a pullout phone holder which is on a spring for different size devices and beneath that lives another cable, this time a Lightning to USB-C cable.
This is to connect the controller to your phone in the DJI Fly App. As I have an Android phone I’ll be swapping out the Lightning cable for the USB-C to USB-C one.
Whilst it’s bulky that’s a good thing and it’s a really nicely designed remote control that sits well in your hands. The buttons and dials have a great feel to them when pressed and the joysticks have a soft spring back into their central position.
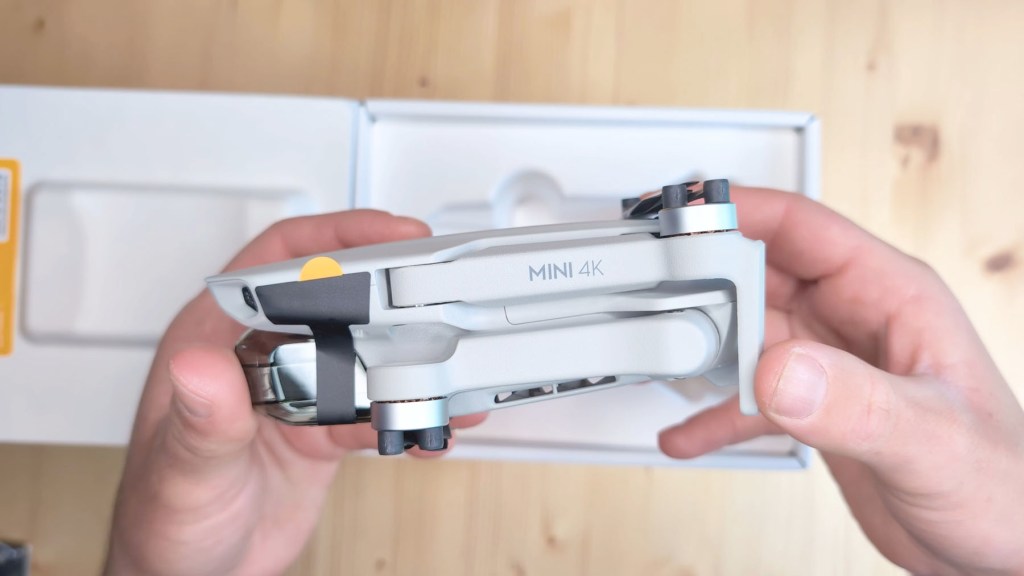
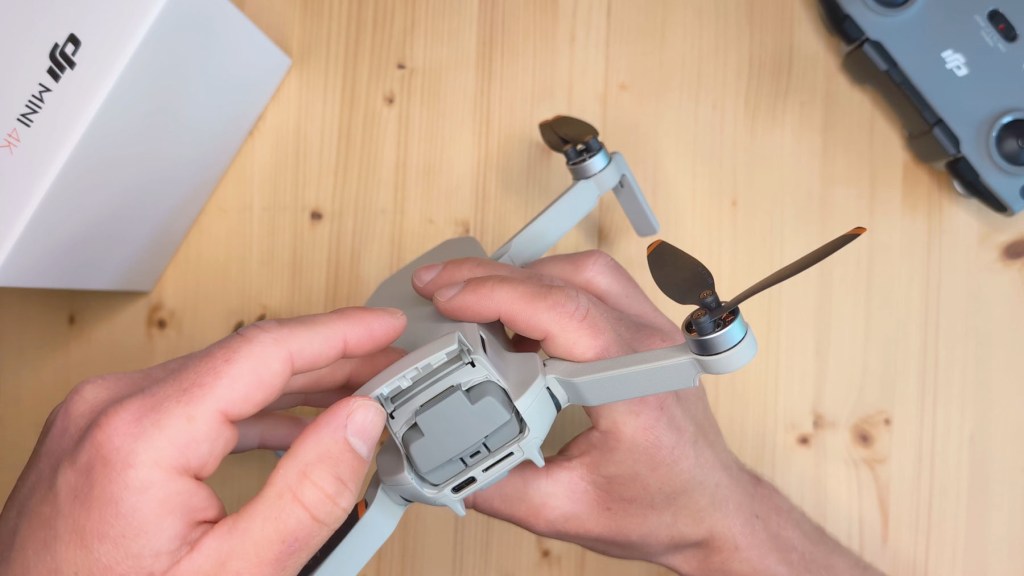
So let’s get the drone unpacked and, after releasing the blades and getting the arms open, you get a much better idea of the size of the Mini 4K.
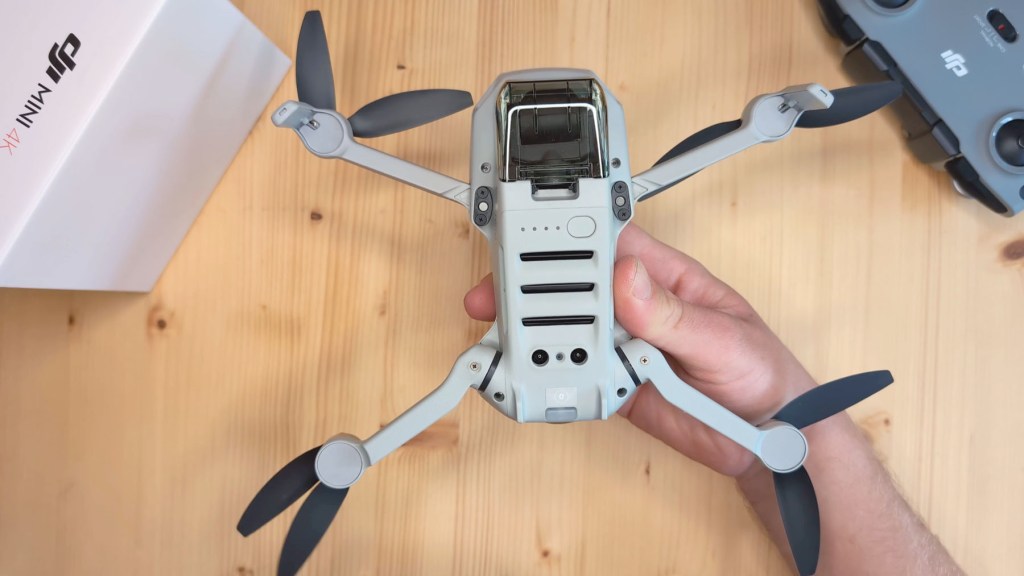
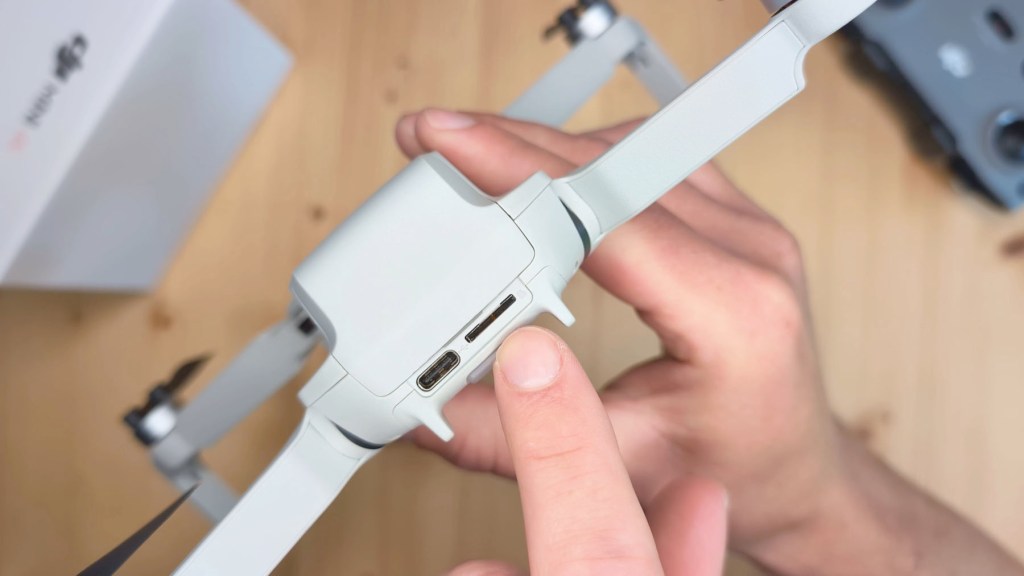
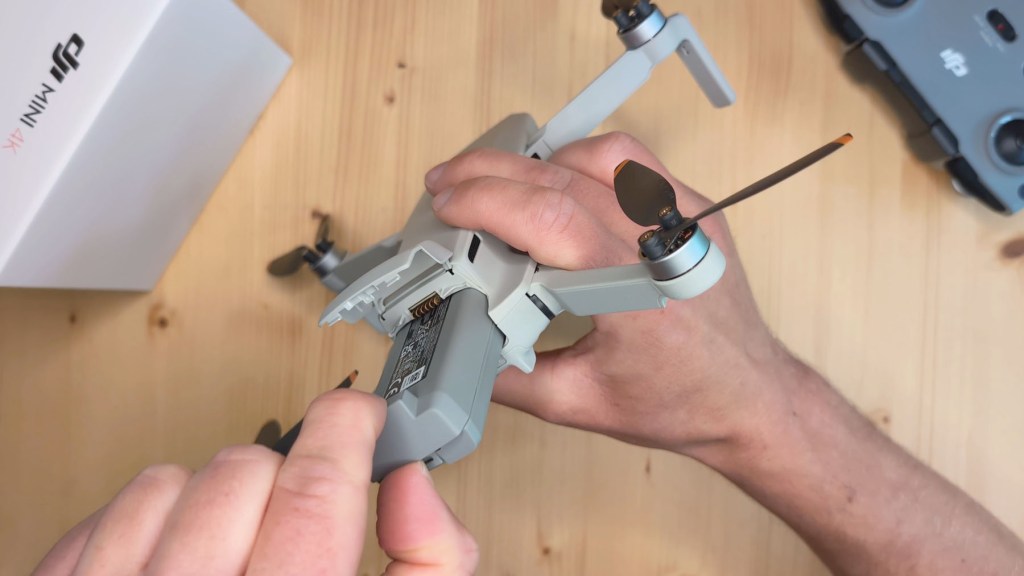
The removable battery sits under a cover at the back end, where you’ll also notice the micro SD card slot and the USB-C charging port. These are open and exposed to the elements so the drone shouldn’t be blown in bad weather.
The battery has to be recharged inside the drone or via a charging hub, which can be bought separately or as part of the Fly More Combo package and utilises fast charging to a maximum of 29w, which should charge a battery to fill in under 1 and 1/2 hours. Extra batteries can be purchased for around £60 or $80.
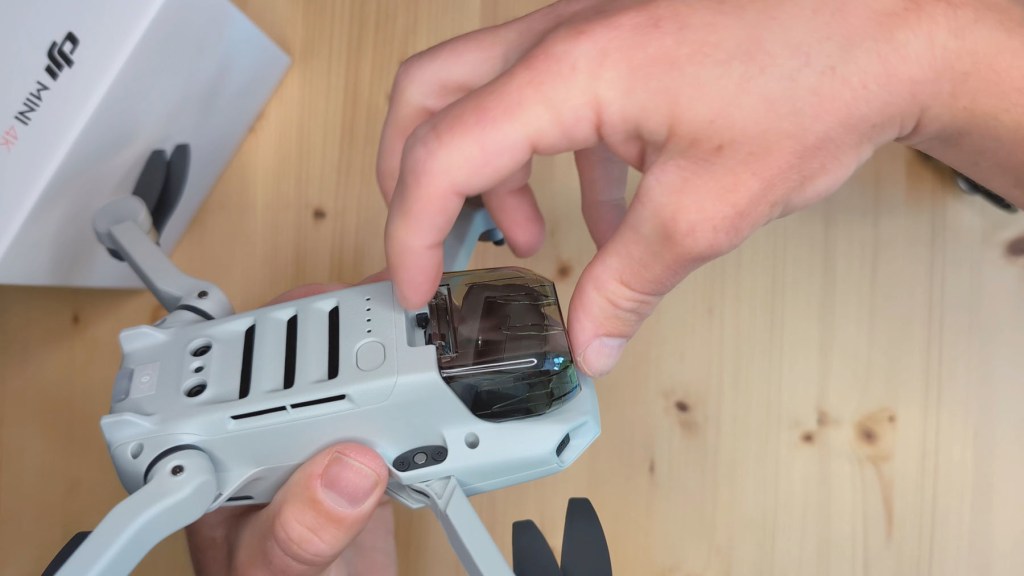
Next up is the camera cover which is quite firmly attached and that provides protection to the three-axis stabilized gimbal when the drone isn’t in use. At the bottom is an LED light and the power button.
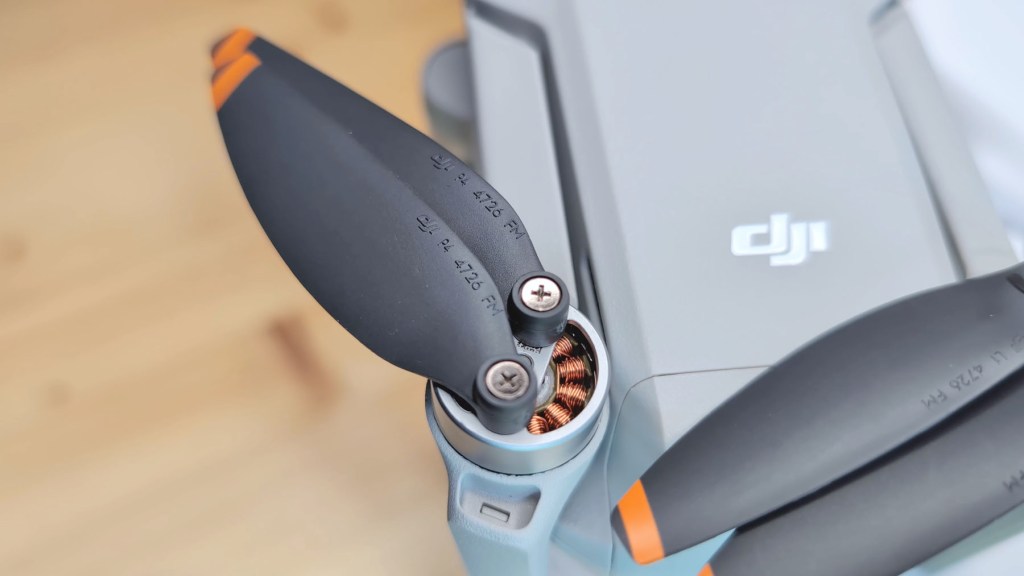
Each arm of the drone holds two blades and you can see the copper coils of their brushless motors at their join.

So that’s the Mini 4K unboxed, now it’s time to get flying.
We’re also on Instagram!
Check out yogi.the.van to keep up-to-date with all our adventures in the van!


Installing & Setting Up The DJI Fly App
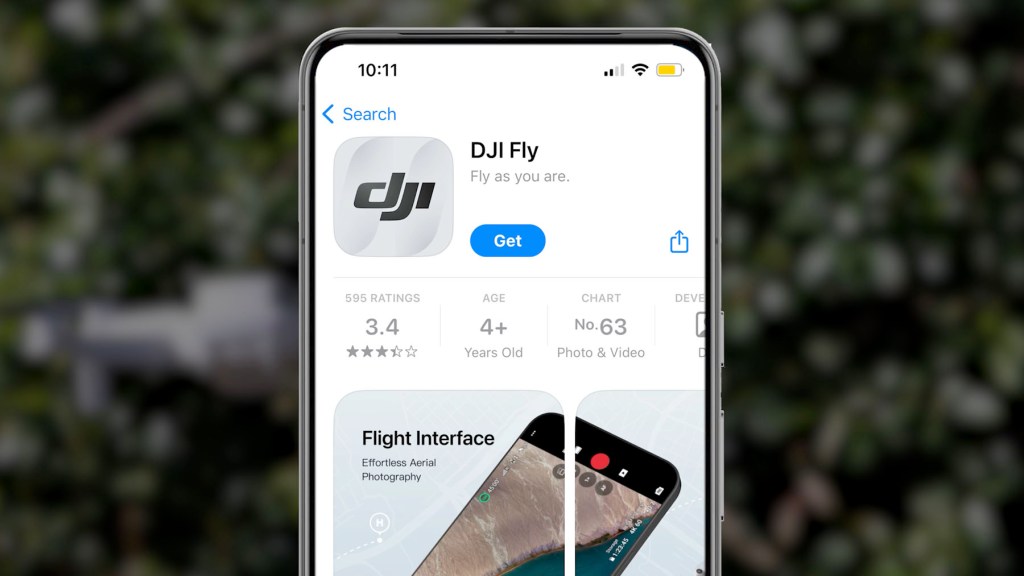
The first thing you need to do to get in the air is download the DJI Fly App.
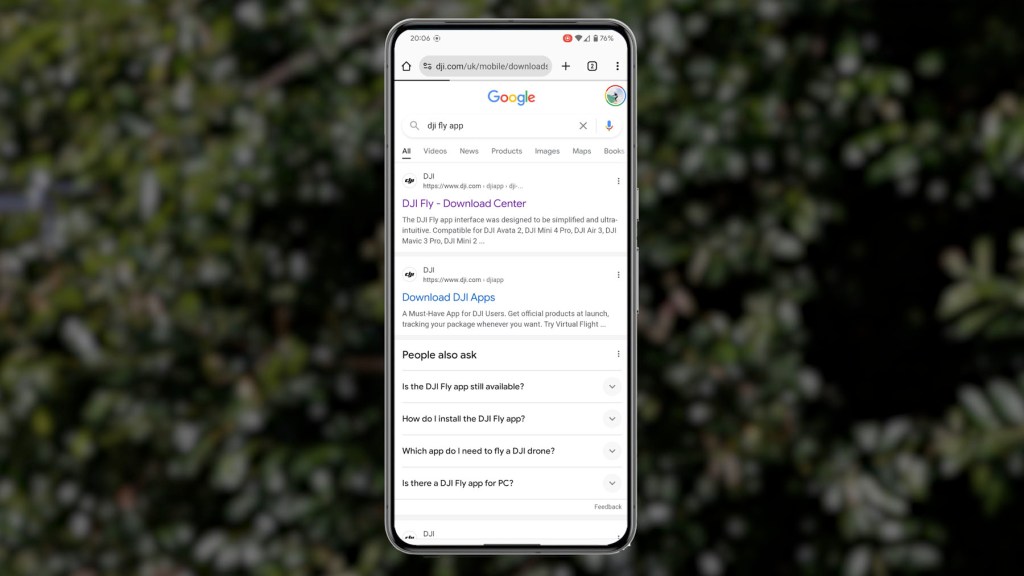
It’s available from the app store for Apple users, though not on the Play Store for Android, but you can easily download it via the DJI website and it works just the same as any other app.
Once downloaded go through the installation and all the relevant permissions, and log in or create an account. You’ll then get three prompts; where to fly, tutorials and instructions to connect and fly. The first two are worth checking out but we’ll head straight to the connection guide.
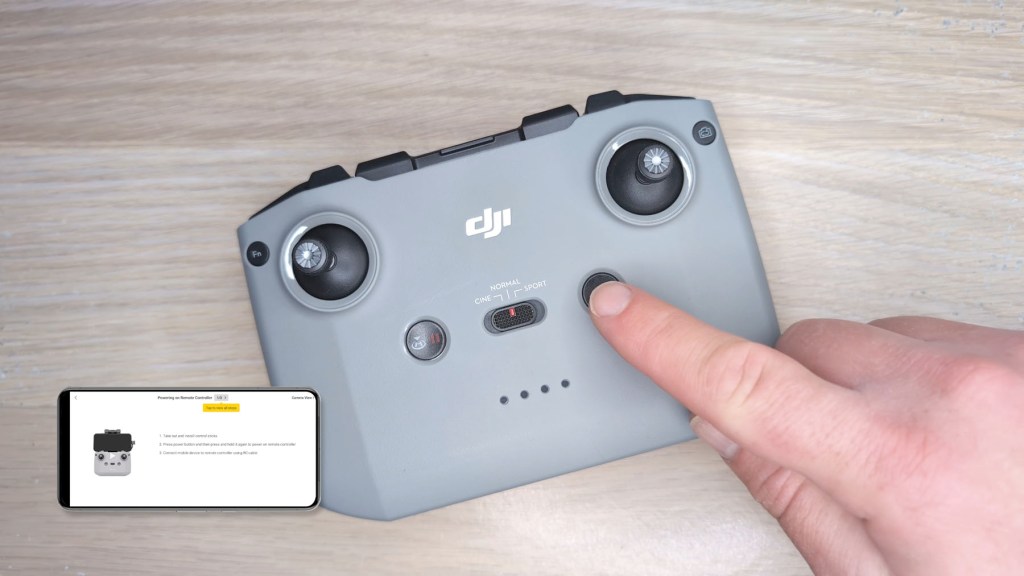
Go through another set of permissions and it’s time to connect your phone the remote and the drone.
First select the Mini 4K drone, then insert the control sticks.
Short press then long press the power button, pull out the holder, remove the end of the USB-C cable, and insert your phone into the holder and plug the USB cable into your phone.

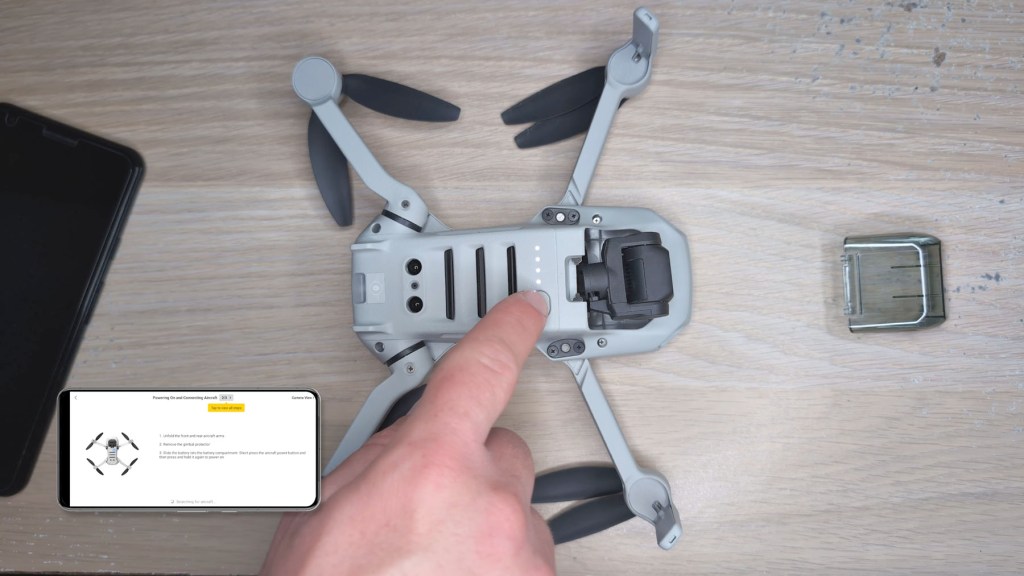
Go through yet more permissions and have the drone ready.
First unfold the front legs out to the side and then the back legs down and out.
Remove the gimbal protector, short press and long press the drone power button and it will show multicolored LEDs at its rear before turning to a flashing yellow light.
Once the remote and drone have found each other you’ll automatically be taken to the flying screen of the app.
How To Fly The DJI Mini 4k Drone
I’ll go into the finer details of the app in a moment but first I want to go through the step-by-step procedure of how to get your drone in the air and how to control it.
With your drone and remote control connected and powered on, make sure you’re in an open safe space, outside and away from any obstacles.
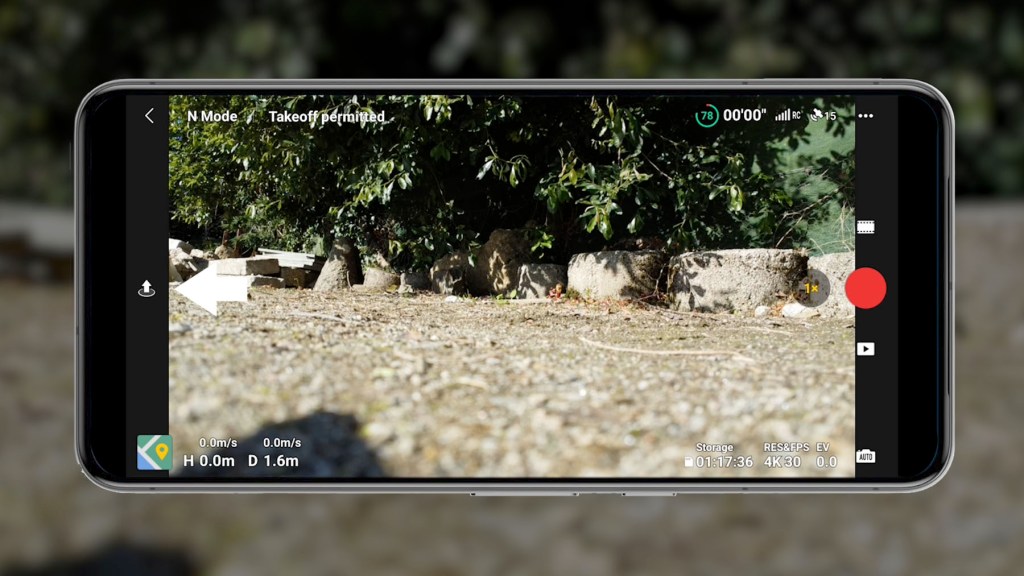
Place the drone on the ground and press the up arrow on the left hand side. This will bring up the auto takeoff screen hold the one tap take-off button until the green circle goes all the way around and the drone will fly to an altitude of 1.2m.
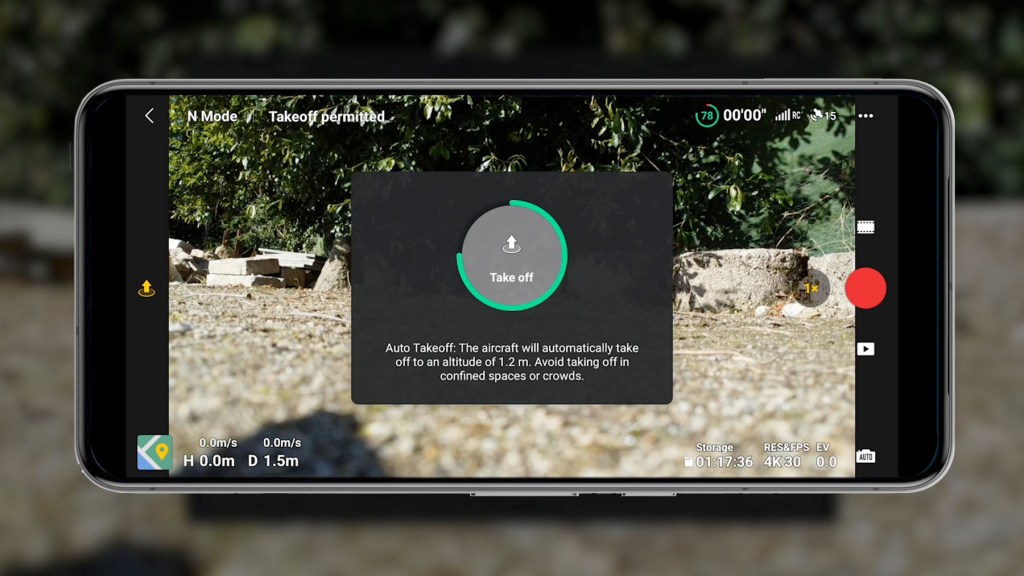
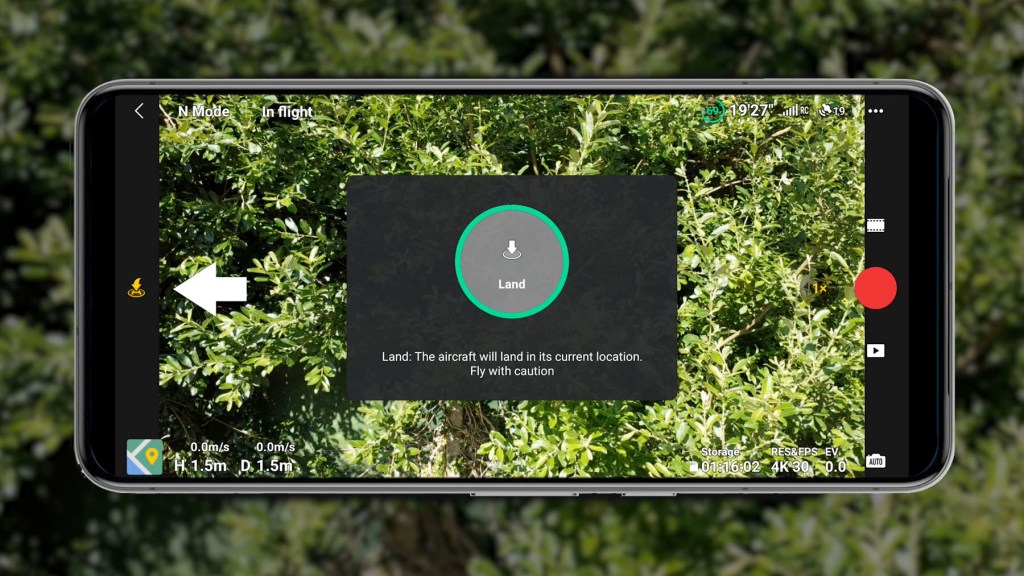
Whilst we’re here if you’re wondering how to get it down again just repeat the process with the down H button on the left hand side of the screen and the drone will land, or just press and hold down with the left hand control stick.
With the drone hovering in the air, you’ll see it holds pretty steadily in the same spot with minor movement depending on the on the wind.
To put the drone up higher press forwards on the left joystick, to lower it press back towards you.
Press the control stick to the left to pivot the whole drone left and press to the right to pivot to the right.
With the right control stick press forwards to move the drone forwards and press back to move backwards.
Press to the right to move the drone along to the right and press to the left to shift left.
And that’s it you’re flying!
Complete Flying Controls For the DJI Mini 4k
There are a few more bits on the remote control that it’s important to know too.
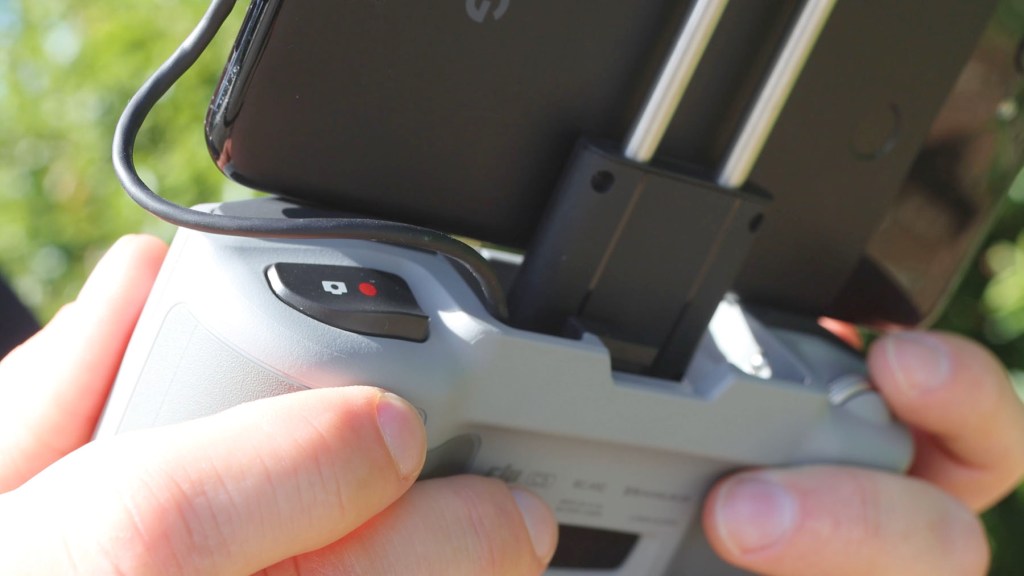
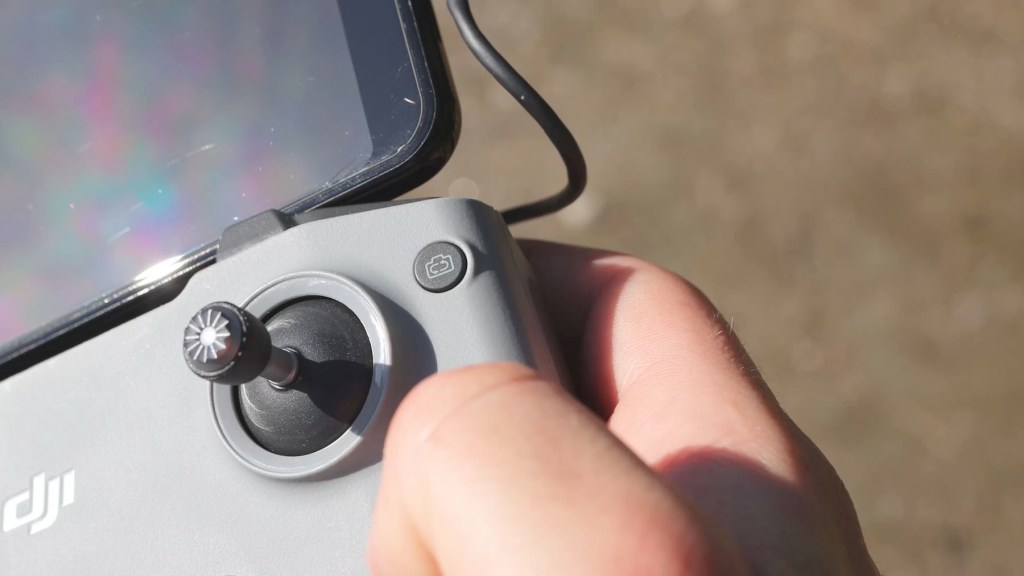
On on the top right of the remote you’ve got the video or photo button which starts and stops recording or takes a picture.
On the left you have a dial and this changes the shooting angle of the gimbal.
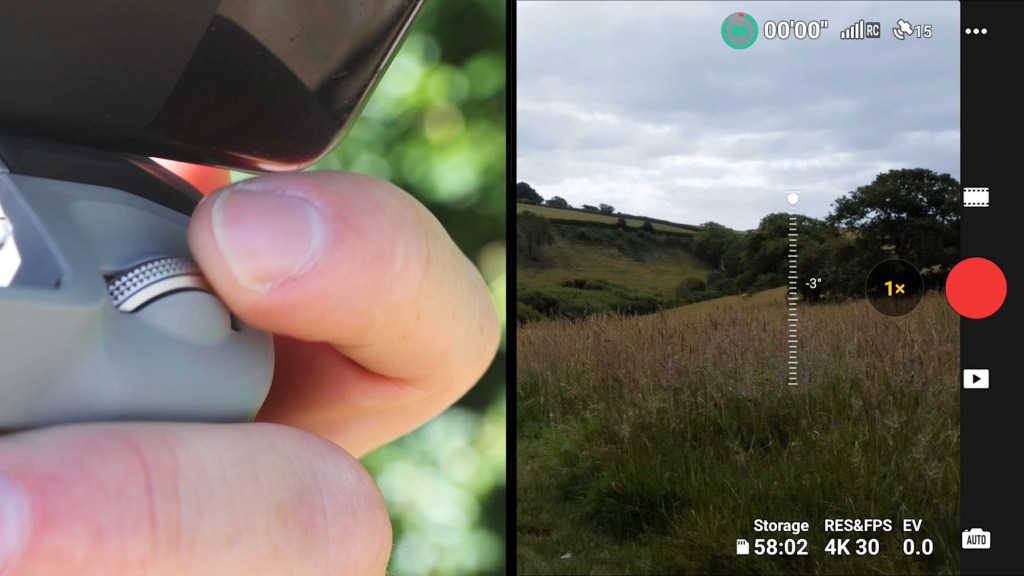
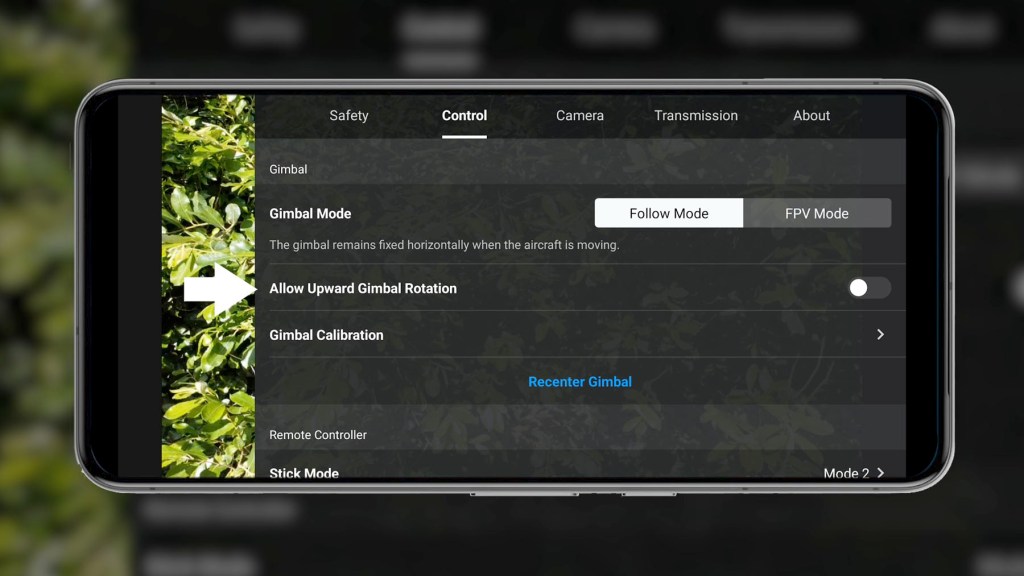
By default it goes down 90° to face the ground, but in the settings there is an option for tilting the camera up too.
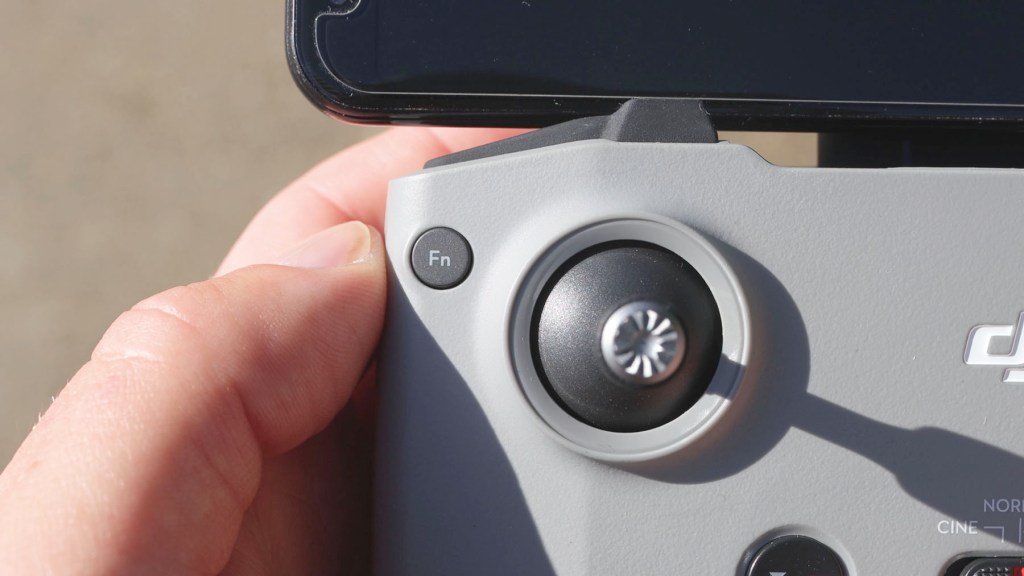
The function button on the left is changeable in the app but as standard it will immediately tilt the gimbal down 90° so you’re facing the ground.
The camera rotate button on the right will switch between filming and photos without having to use the app.
Press the H or pause button once and it will pause the drone in flight, whilst a long press will iniate RTH, or return to home. If the drone is more than 20m away, pressing it will bring the drone safely back to where it started.
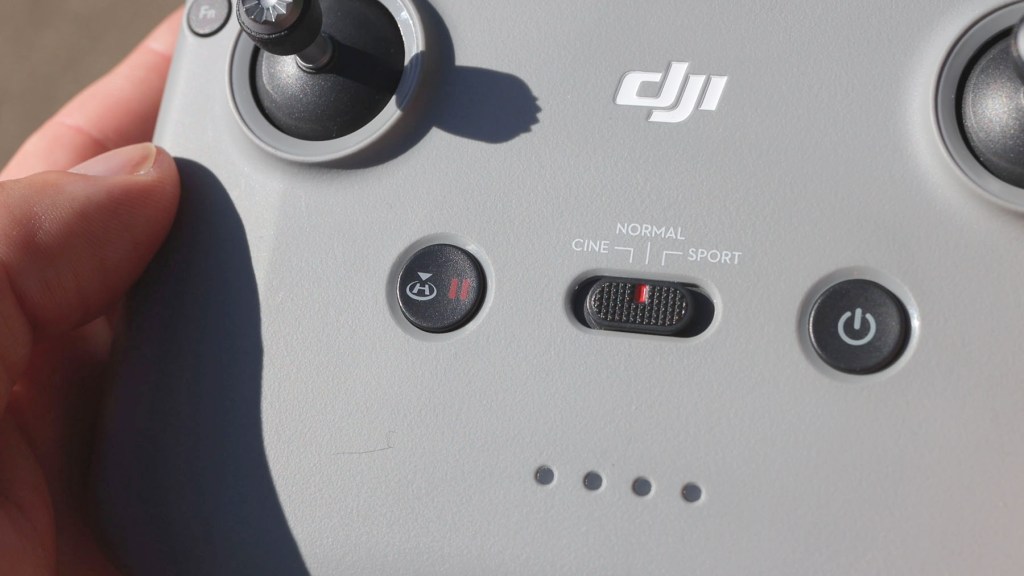

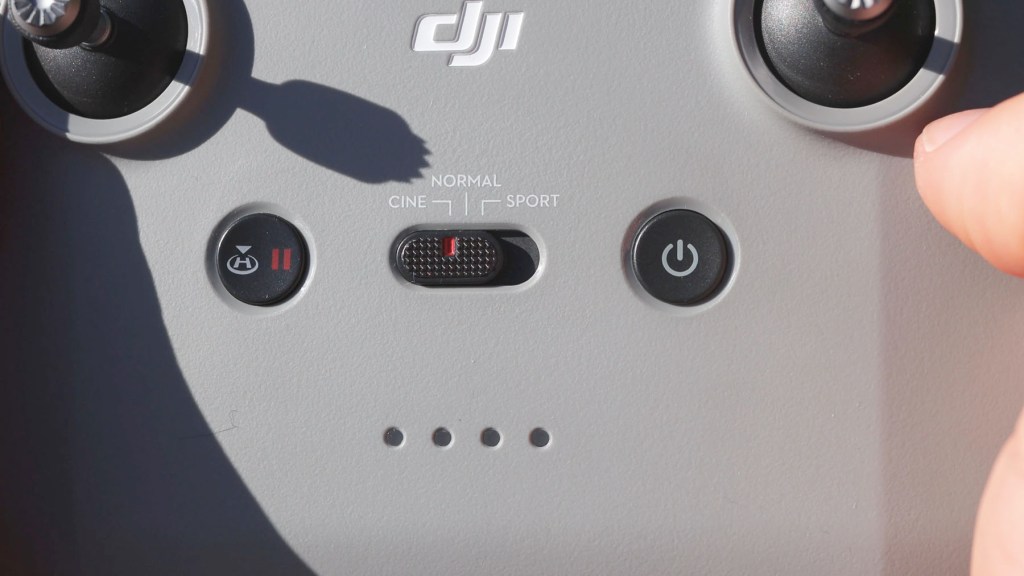
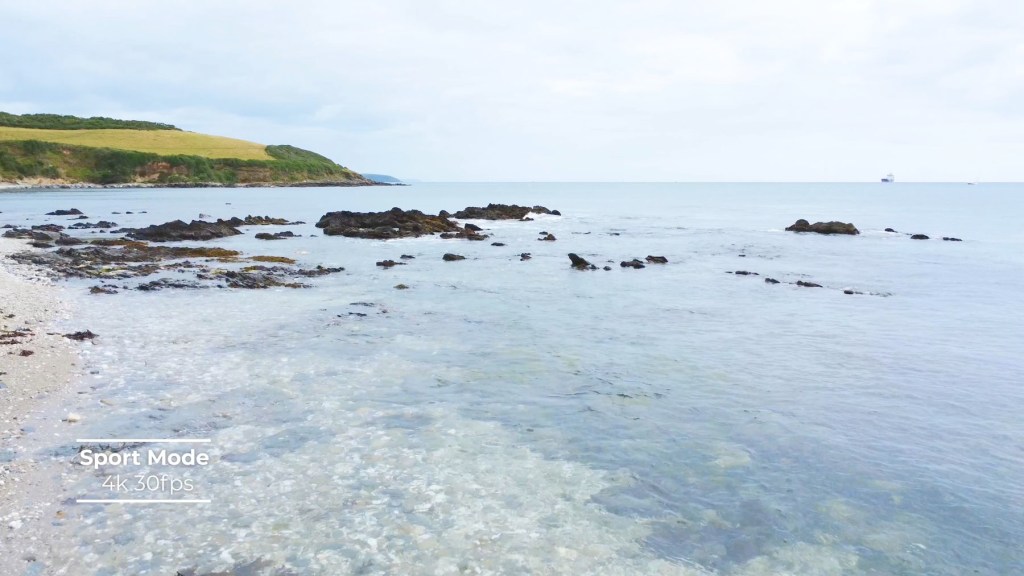
And finally in the centre there are three modes to choose from and these determine how fast the drone will move. Sports mode is the fastest with Normal in the middle and Cinematic slower for those smooth motion shots.
Camera & Video Image Quality Of The DJI Mini 4k
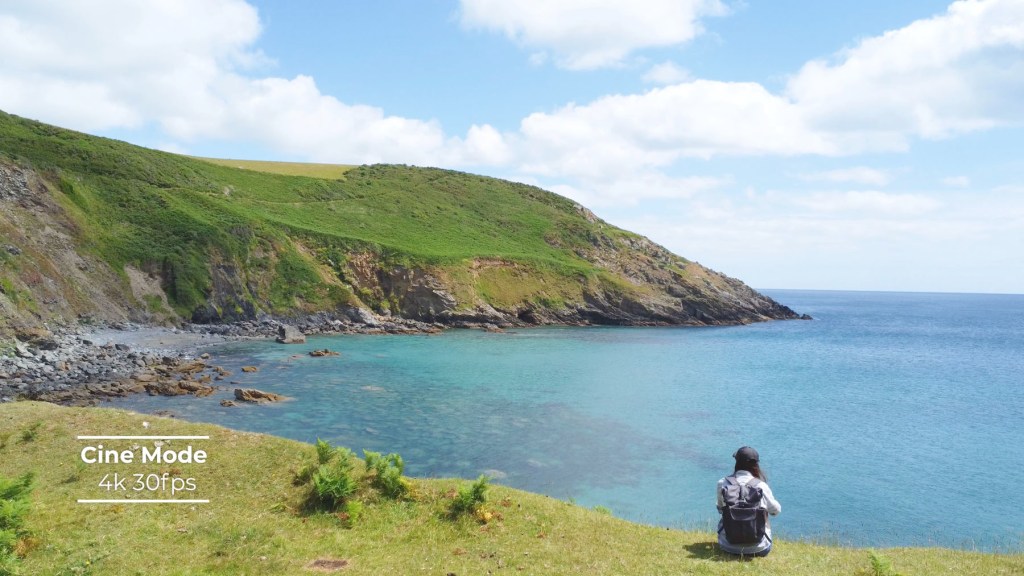
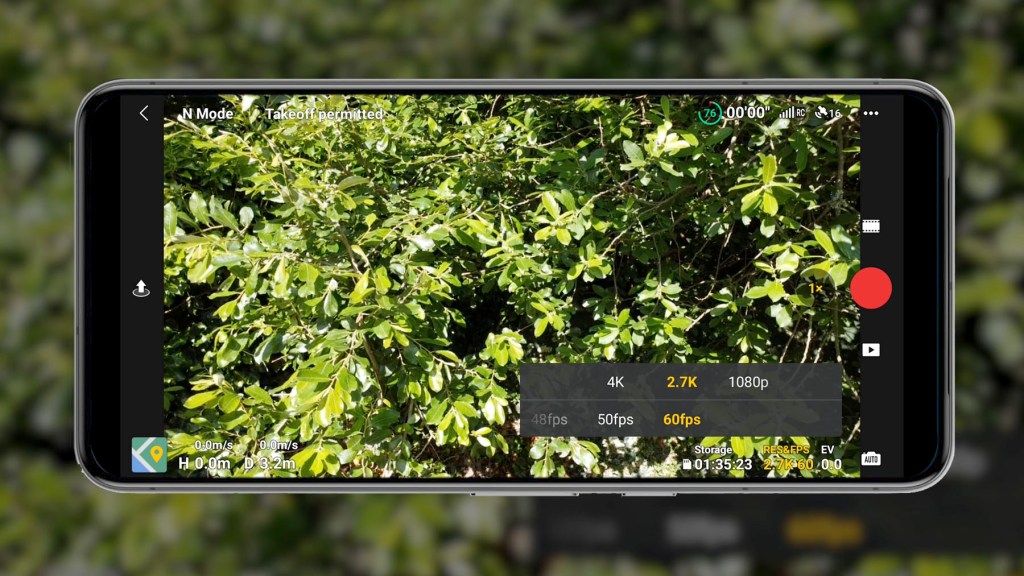
One of the most important parts of this drone is its camera and if films 4K at 30fps, though it does 2.7k at 60fps or lower and the same for 1080 full HD resolution.

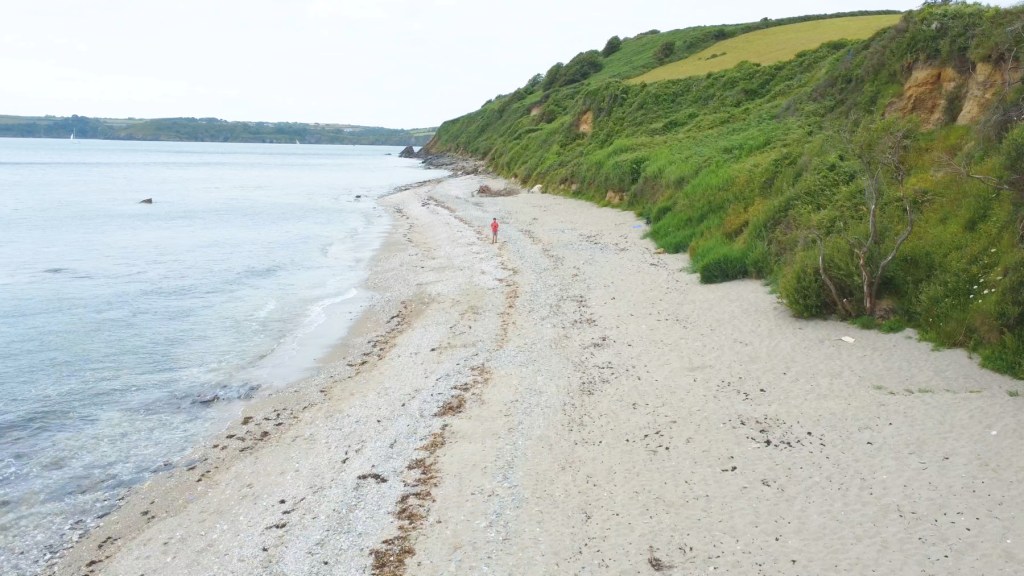
The camera uses a 1/2.3in CMOS sensor, filming at a set aperture of f2.8 and it has fixed focus too. The 4K is really high quality and for personal use or something like YouTube it’s absolutely ideal.

Even the 2.7k is great and the 60fps gives you that extra clarity in fast moving objects, or can be slowed down to 30fps in editing software to give silky smooth footage. When switching to 2.7k at 60fps it crops out a little and then back in again for 1080 at 60fps.
When reduced to 1080 the footage is still very good despite the resolution drop and if this is all you need then you won’t be disappointed.
The 3 axis stabilised gimbal is motorised and does a fantastic job at stabilising the camera whilst the drone is flying, even in strong wind.
Click to buy your own…

(Affiliate links which help support this blog)
Going In-Depth On The DJI Fly App
Moving back to the app once you’ve mastered takeoff and landing there are lots of other settings to explore.
On the Fly screen, starting in the top left corner and going clockwise you have the mode you’re in. Here I’m in N mode, which is Normal, and that will change if you go to Cinematic or Sport mode.
Next to it you have your flight warnings such as GPS availability, restricted areas and if the gimbal is stuck.
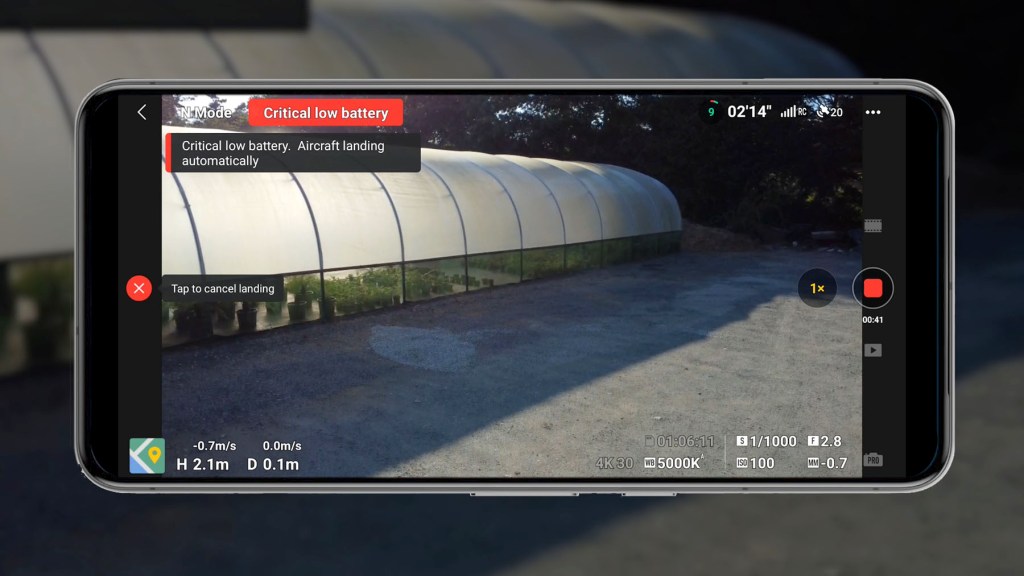
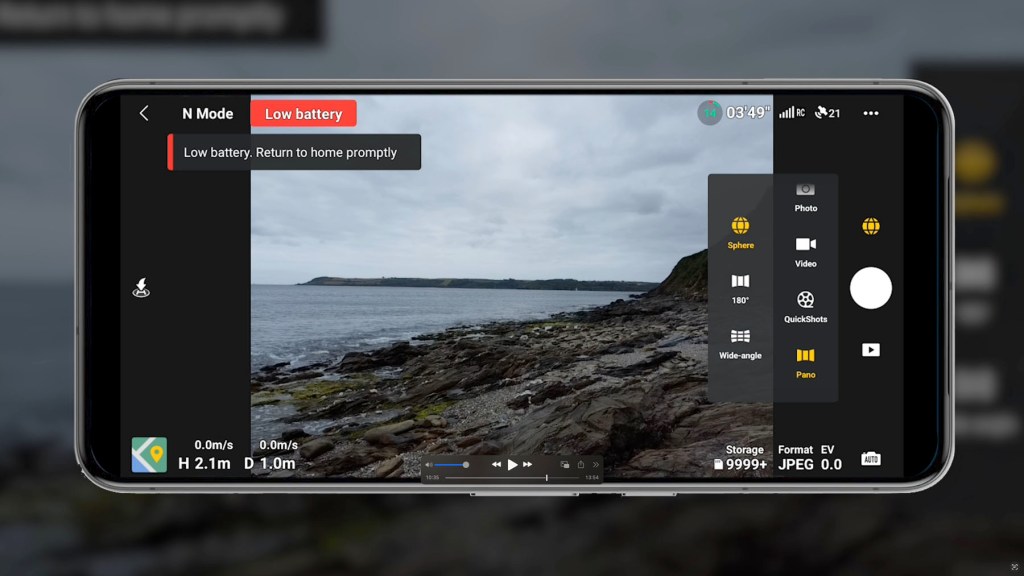
Moving along to the right corner you have the remaining battery. At 20% the remote control will start to beep loudly letting you know you’re on low power and at 10% the drone will automatically return to home and land, which is a really great bit of safety built-in that will stop many an accident.
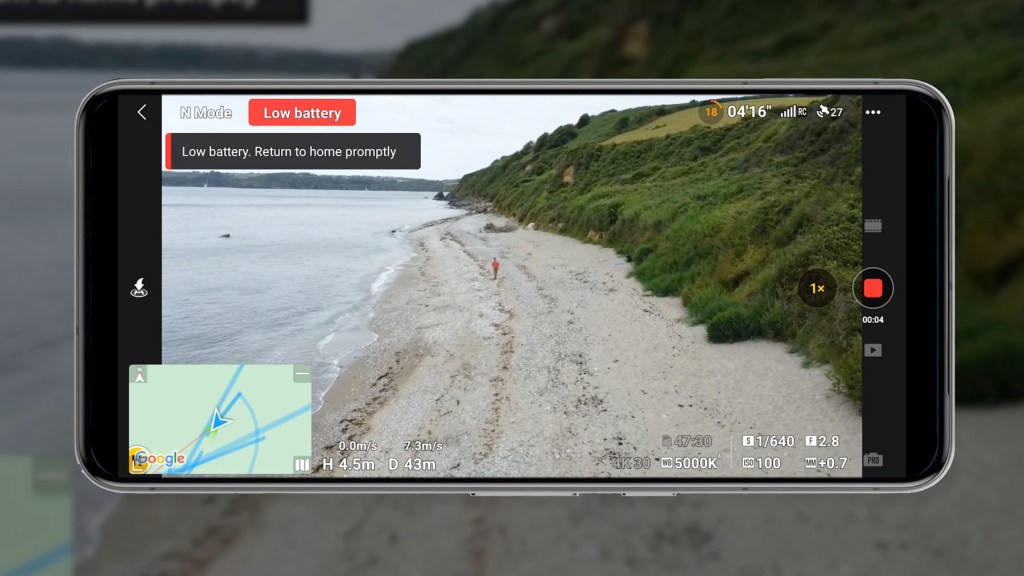
You’ve then got your remote control signal to the drone and the GPS strength and number of satellites available.
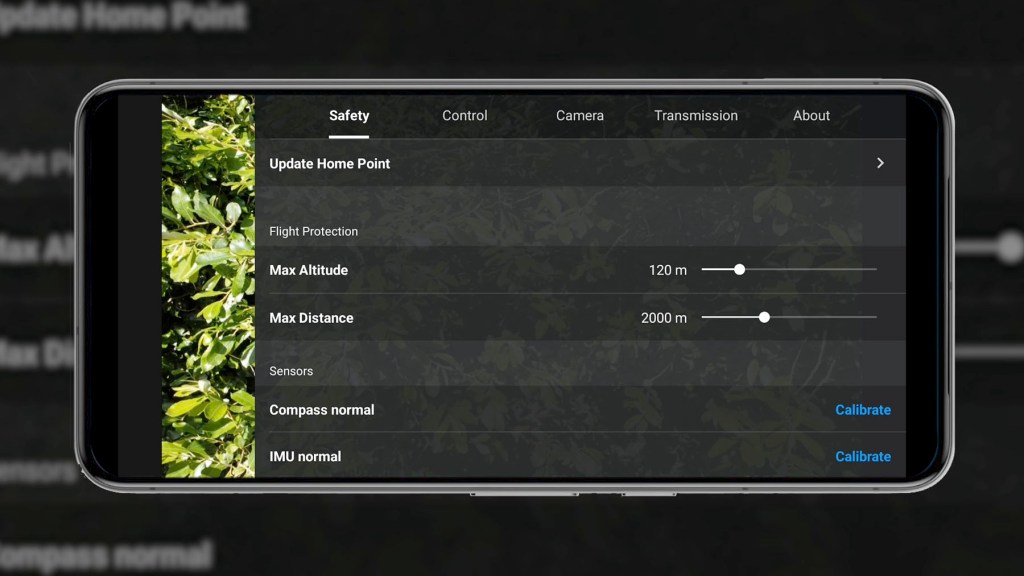
The three dots are the settings and I won’t go through all of them, but here you can adjust things like your safety parameters, customise buttons, format your SD card, change transmission frequencies and update your firmware.
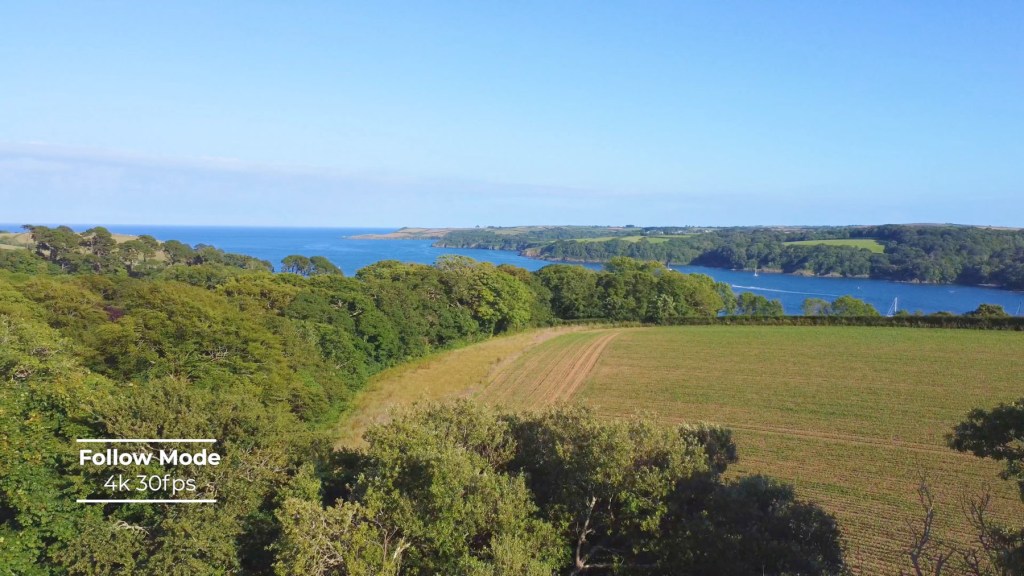
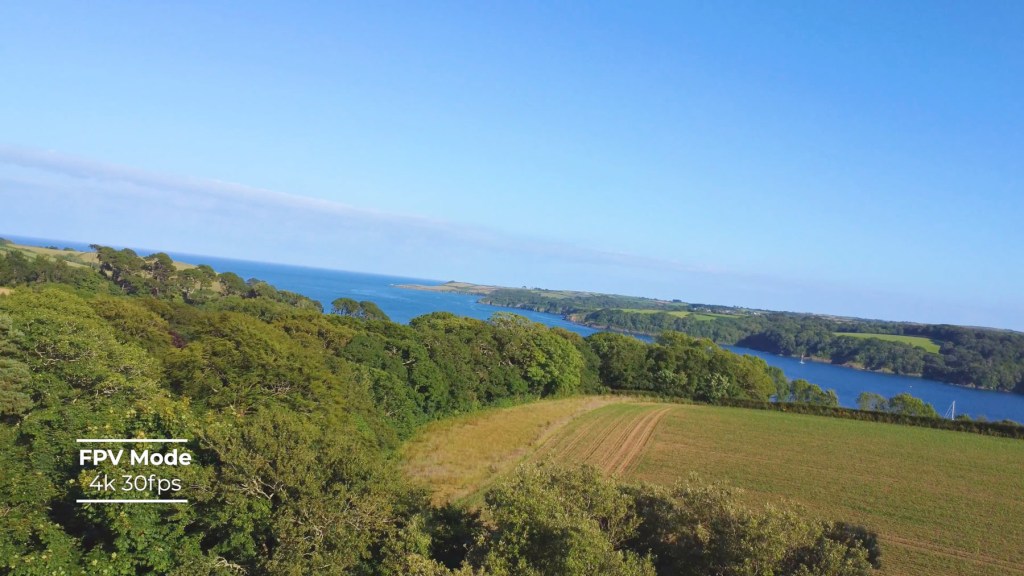
One really interesting setting is the ability to switch the gimbal from Follow Mode to FPV. Instead of keeping the horizon fixed straight, First Person View mode will unlock the gimbal axis to move with the drone and the footage will look a bit like being on a roller coaster.
On the right you have your capture settings and the first is photo.
Here you have the options of single shots three bracketed photos for combining into HDR images and shots on a timer between 2 and 60 seconds.
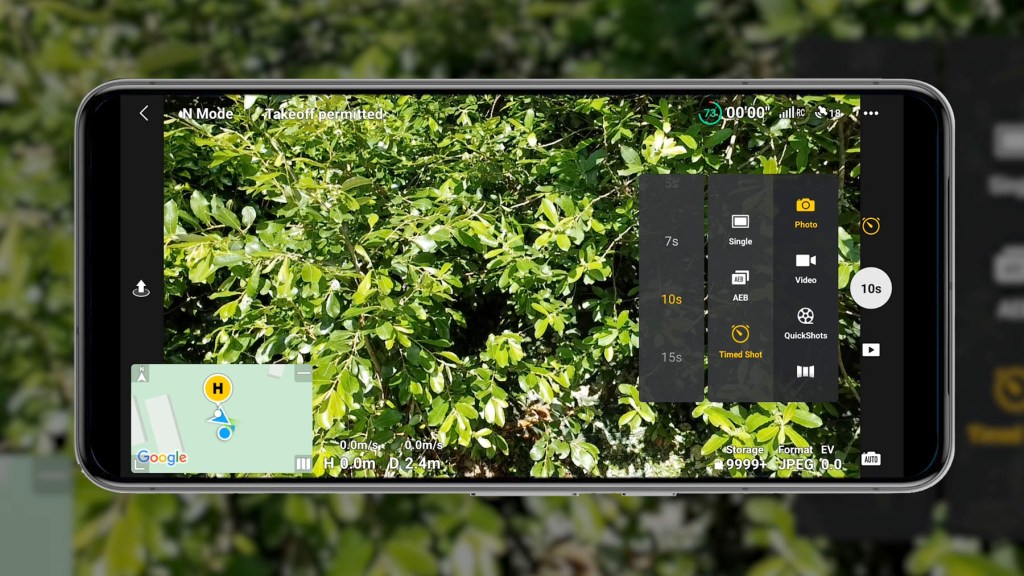
Photos are 12mp and you can shoot when either JPEG or JPEG and RAW.
I covered video resolutions and quality earlier in the article, so on to QuickShots and this has five settings.
Although the Mini 4K doesn’t have tracking or follow modes like others higher up the range do, these are a nice addition which enable some really creative shots.
For each of them you draw a box around your subject, although sometimes it auto identifies them, and it will maneuver in its pattern around what you select.
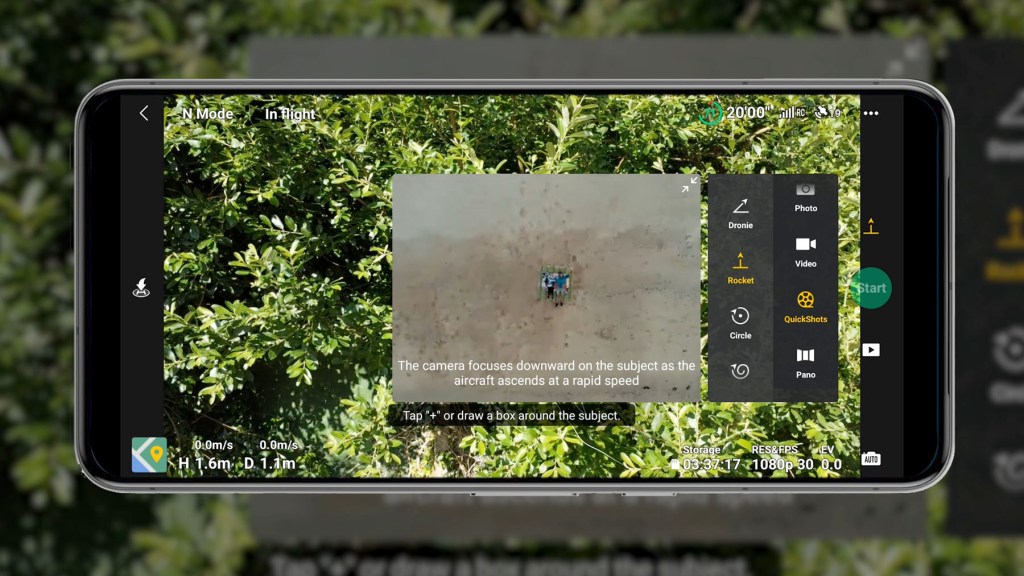
Dronie will ascend upwards and backwards at an incline. Rocket will focus downwards on a subject and ascend vertically at a rapid speed. Circle revolves 360° around the subject at a fixed altitude. Helix ascends while flying in a spiral pattern that expands gradually and Boomerang flies around the subject in an oval shape at an upward incline.
QuickShots film natively in 1080 at 30fps but you can increase that to 2.7k or 4K though there are no 60fps options available for any resolution here.
The Pano options are all for photos. Sphere takes photos over 360° and stitches them all together. 180° takes a horizontal Panorama of a 180° field of view and wide angle takes multiple photos of your view to be stitched together for a much wider image.
As you’d imagine, the big red button is for capture, and then there’s the one times or two times zoom, and it’s a digital zoom so just cropping in on the sensor, and finally you have the gallery.
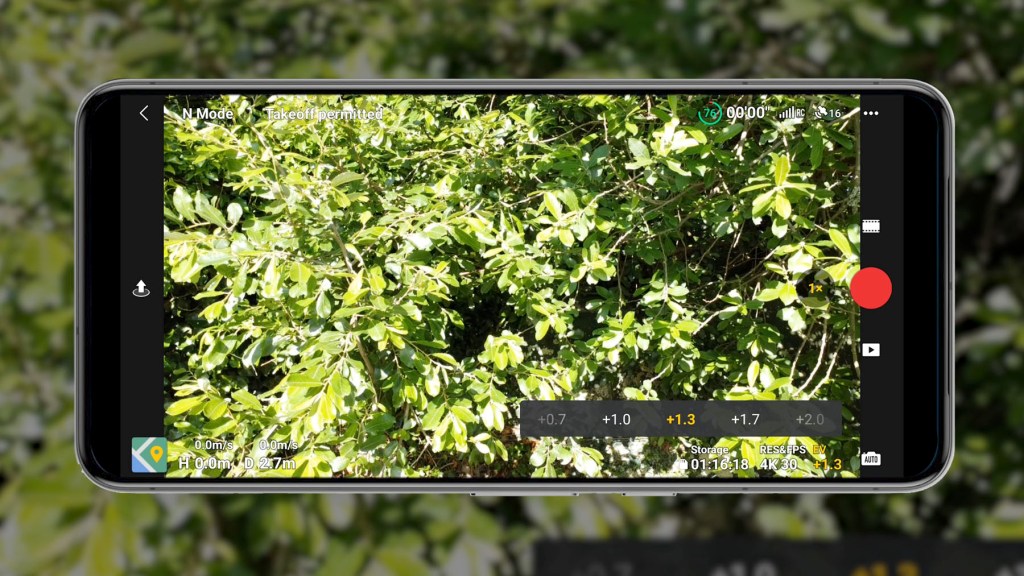
In the bottom right you’ve got your shooting settings and you can choose between Auto and Pro.
Under Auto you can change filming resolution and frames per second and add or remove stops to brighten or darken the image.
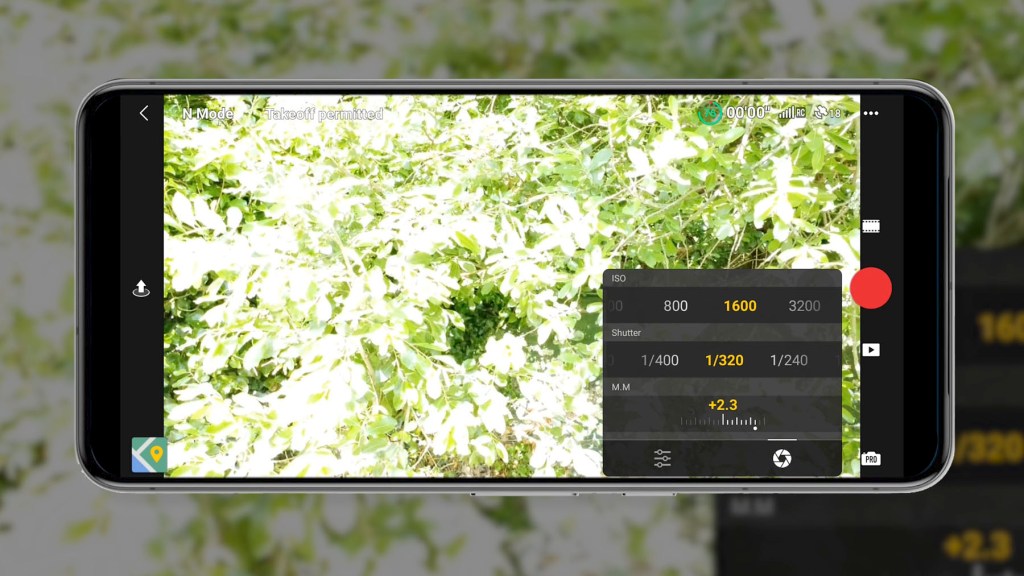
Under Pro you can adjust your white balance resolution and frames per second your ISO and shutter speed. The M.M is manual metering which just shows how much your settings differ from what the camera’s metering shows.
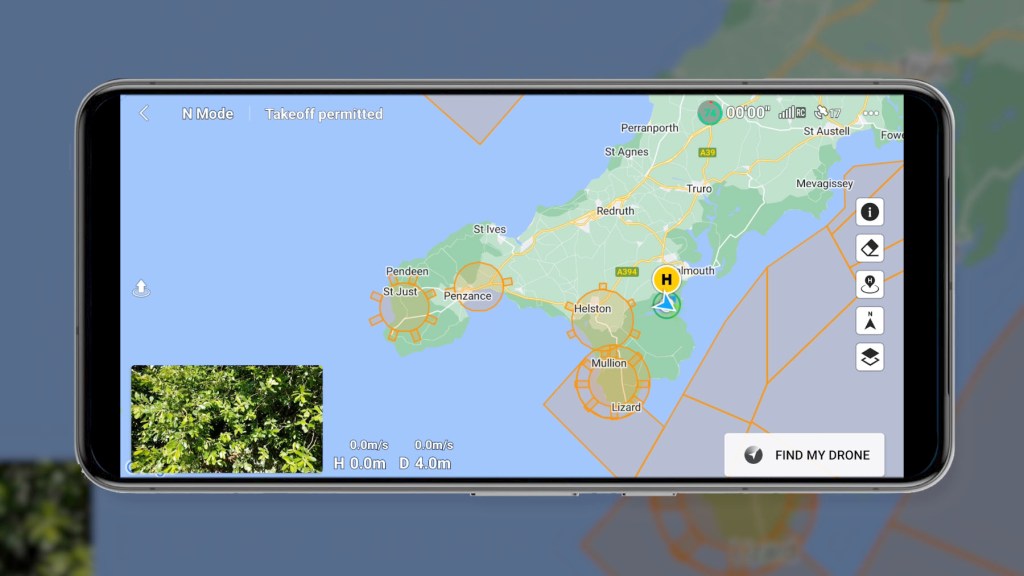
Finally in the bottom left you have your map which can be switched to a compass or enlarge to fill the screen. It will show all the areas you can and can’t fly the drone.
Click to buy your own…

(Affiliate links which help support this blog)
How To Fly A Drone Legally In The UK
Getting flying isn’t always as simple as just pressing the flight button though. In many countries there are restrictions on how and where you can fly.
Always check the regulations in your country before flying, but as the Mini 4K is a sub 249g drone, actually coming in at 240g, it’s less regulated and slightly easier to use.
Rules vary from country to country but in the UK, if your drone isn’t a toy and has a camera, then you’ll need an annual Operator ID from the CAA which costs £11.13 per year and it’s recommended to get a free Flyer ID at the same time too.
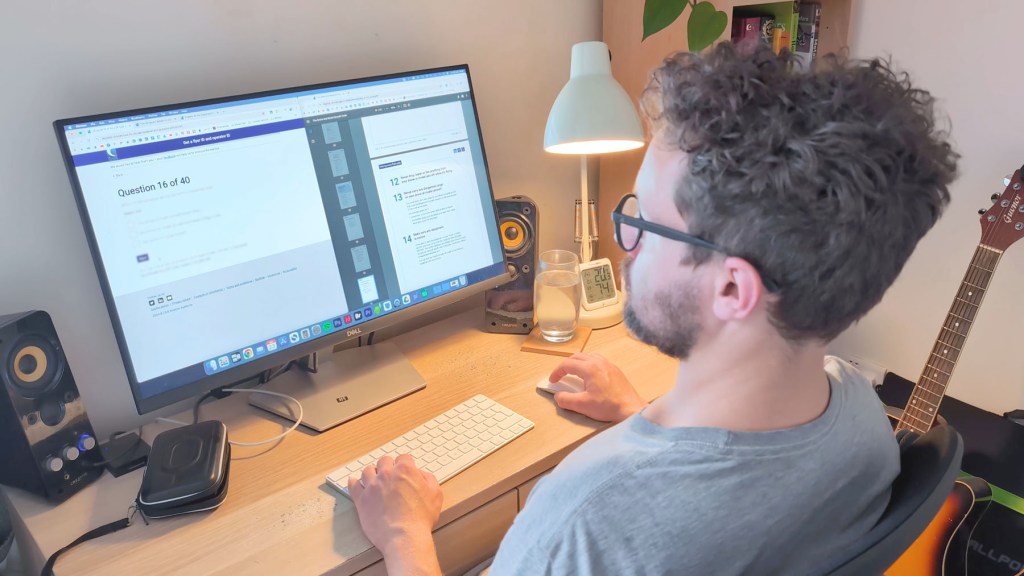
There’s a 40 question online test which takes about 20 to 30 minutes and at the end you’ll get an ID to print out.
Be sure to check out the regulations in your area to find out what you can and can’t do with this drone.
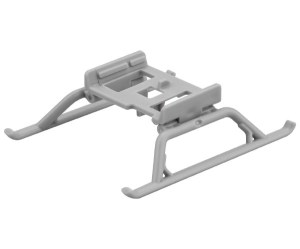
Accessories & Extras To Buy For The DJI Mini 4k Drone
There are a number of extras you could get for your Mini 4K.
With the battery lasting 31 minutes in optimum conditions, chances are you want another one or maybe two spare batteries.

You may want a case too, and I picked this one up for about £15 on Amazon.
As mentioned earlier, the Fly More Combo bundle has batteries, a case and a charging dock and, along with the drone, comes to £399 or a little over $400.
I’ve got affiliate links to all these below so do check them out if you’re interested in building out your drone kit.
DJI also have a care refresh package which is a way to get a replacement drone much cheaper should you have an accident.
It costs £35 or $36 for one year, allowing two replacements at £27 or $29 each or £55, or $59 for two years allowing up to four replacements, also at £27 or $29.
Should the drone fly away and not return then a replacement would cost £105 or $115.
Should You Buy The DJI Mini 4k Drone?
Overall the DJI Mini 4K is a fantastic entry-level drone with stunning camera quality.
In my opinion it’s well worth the price and is a bargain for anyone who wants a top-notch 4K drone.
It’s so easy to fly with the one-tap takeoff and landing and, whether you’ve never flown a drone before or looking for a smaller backup drone to your main one, you won’t be disappointed with its maneuverability and filming quality.

The Mini 4K is clearly well built and the result of years of development and design and, despite being very light, still feels solid. While testing it I had no app or hardware issues and found both to be very reliable.
With DJI being THE name in drones, you’re going to get much more bang for your buck in the Mini 4K than you will with other entry-level 4K drones, even if they cost a few pounds or dollars less.
Thanks for stopping by!
Click to buy your own…


(Affiliate links which help support this blog)
