
This article is a written account of a video from the Lens Of James YouTube channel. Watch the video above and subscribe if you like what you see!
This article contains affiliate links to relevant products I have used in my videos. By buying through these links, I receive a small percentage of the sale at no cost to you which helps me support and grow my website and YouTube channel, so I can create more content like this in the future. Thank you for your support.
In this article…
- An Introduction To Reversing Cameras
- The Carpuride reversing camera
- how This Rearview Camera will be installed
- But doesn’t the Nissan NV200 already have a reversing camera?
- How to find the reverse light wire in your car
- How To Connect A Back-Up Camera Red Wire To A Car Reversing Light Wire
- Finding where to install A parking camera
- Attaching the reversing camera to the back door
- Hiding the excess REar Camera cables in A vehicle
- Reversing camera price, discount code and testing
An Introduction To Reversing Cameras
I recently made a video on the Carpuride 901 Plus, an amazing portable head unit which puts CarPlay and Android Auto in any vehicle and, for the first time, allows you to download apps such as Netflix and YouTube.
It’s quite a device and one of the features is the ability to plug in a reversing camera and, as promised, this is how I installed the Carpuride reversing camera with 3.5mm jack for use with an external head unit, such as the 901 Plus, in my Nissan NV200 van.
This rearview camera install article isn’t specific to just my vehicle though and this article will share how to install a reversing camera for many makes of vehicles.

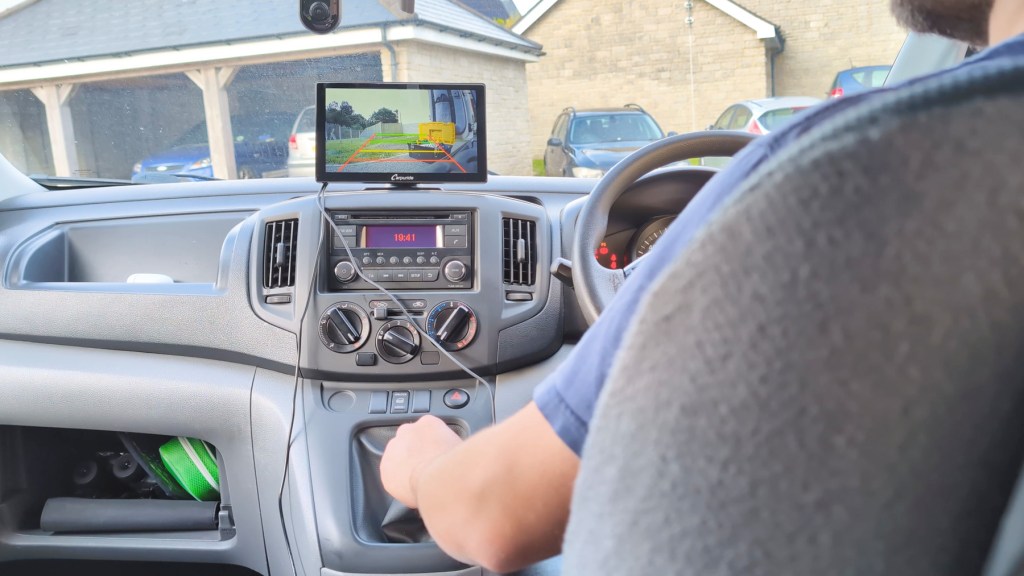
Using one of these touchscreen dashboard consoles is one of the easiest ways to achieve a reversing camera that turns on when you put the vehicle in reverse and requires the minimum amount of wiring too, compared to dealing with wiring harnesses of a built-in head unit.
Bear in mind that this is a reversing camera and not a rear dash cam, so it doesn’t record the footage; it’s just live view when you need it.
Carpuride kindly sent me the reversing camera and W901 Plus to make these articles possible, though all the thoughts and opinions are my own and based on my own experiences. If you’d like to get this set up for yourself I’ve got links below and be sure to use the discount code LENSOFJAMES to get $50 or about £40 off your order from carpuride.com.
Click to buy your own…


(Affiliate links which help support this blog)
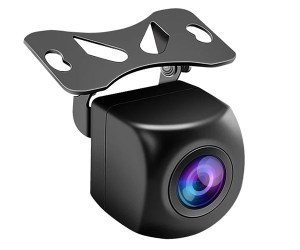
The Carpuride reversing camera
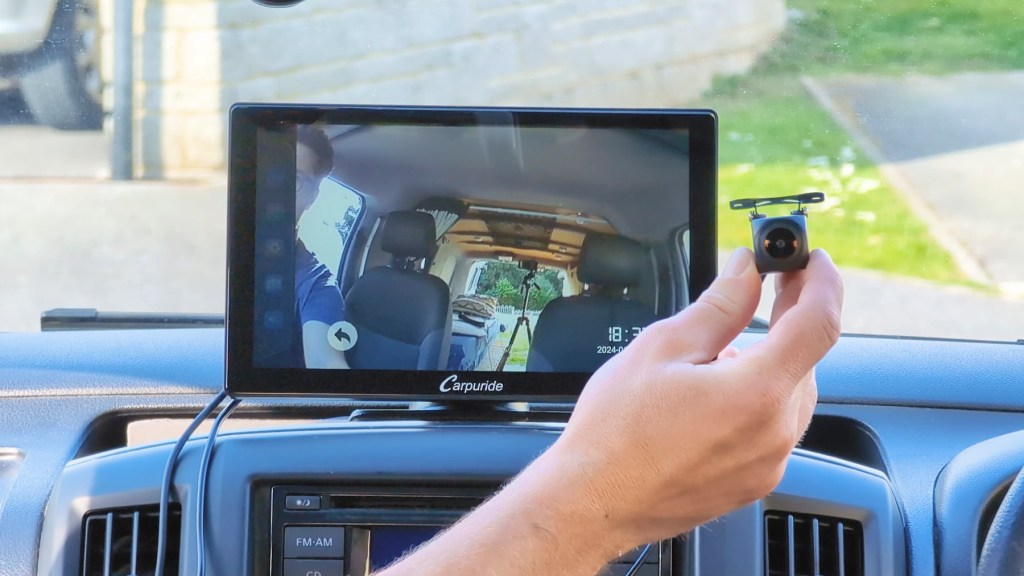
So let’s get started with the install, and this is the backup camera that I’ll be installing. It’s a fairly recognizable shape in the reversing camera world and has a hinging plate so the camera can be adjusted for the perfect angle.
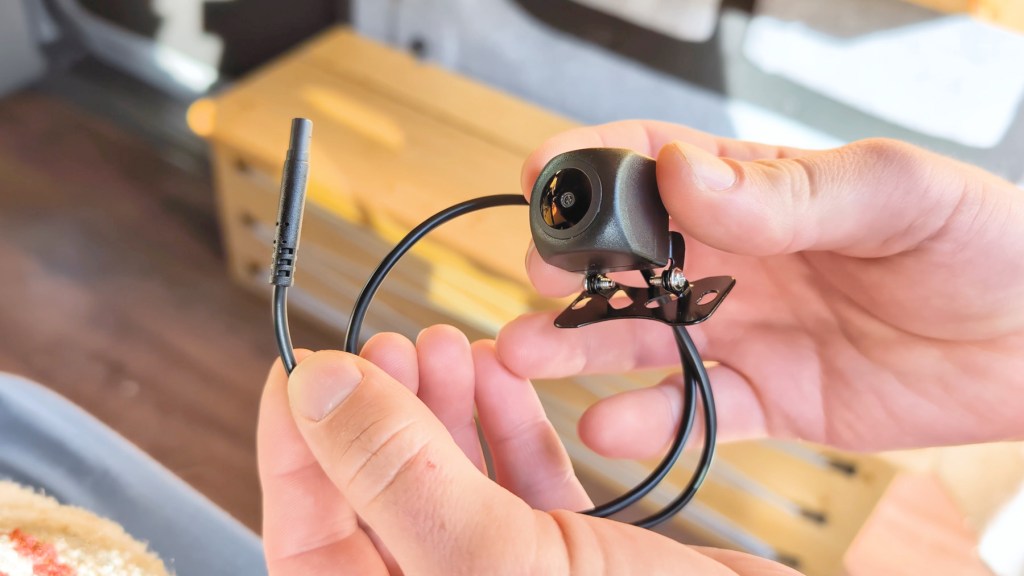
The lens viewing angle is 170°, so very wide, it transmits in 720 HD quality and is waterproof with a rating of IP68.
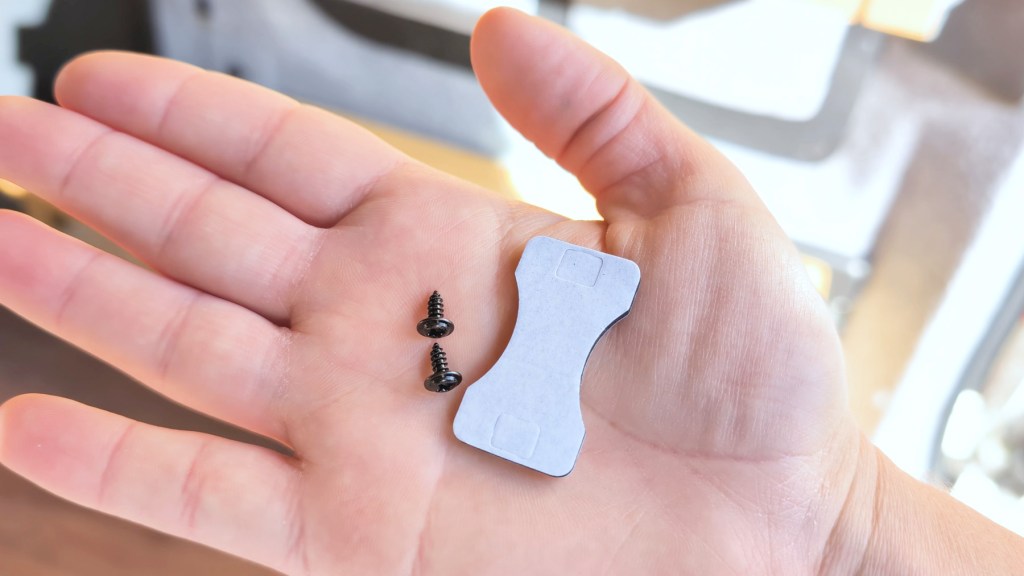
Also included in the box with a camera and cable is a sticky pad mount and two screws for fixing the camera to your desired location on the vehicle.
The camera lead is about half a metre long and connects to a much longer cable at around 6, in length which will cover most vehicles. This extension cable has a connector to the camera and two other attachments.
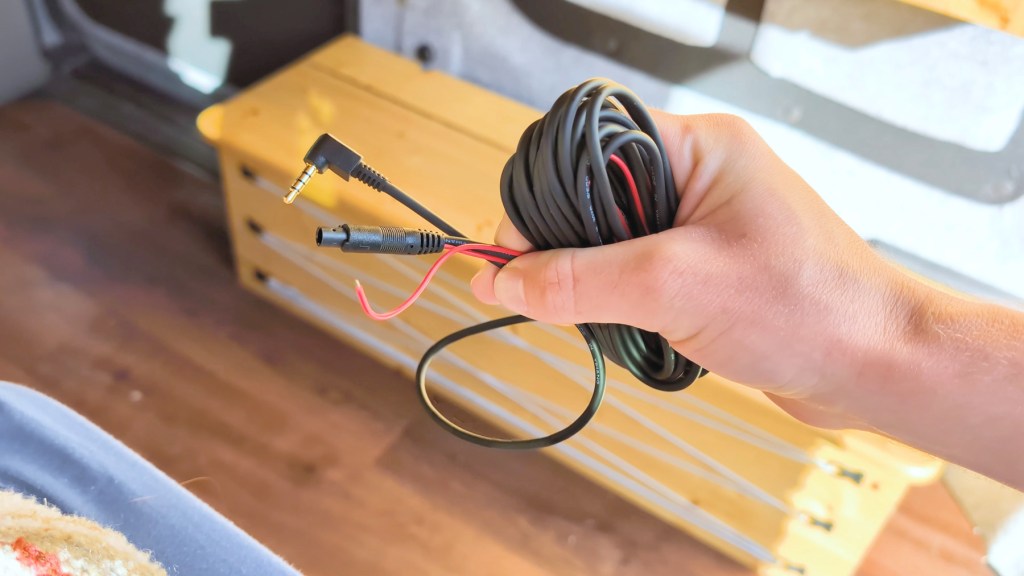
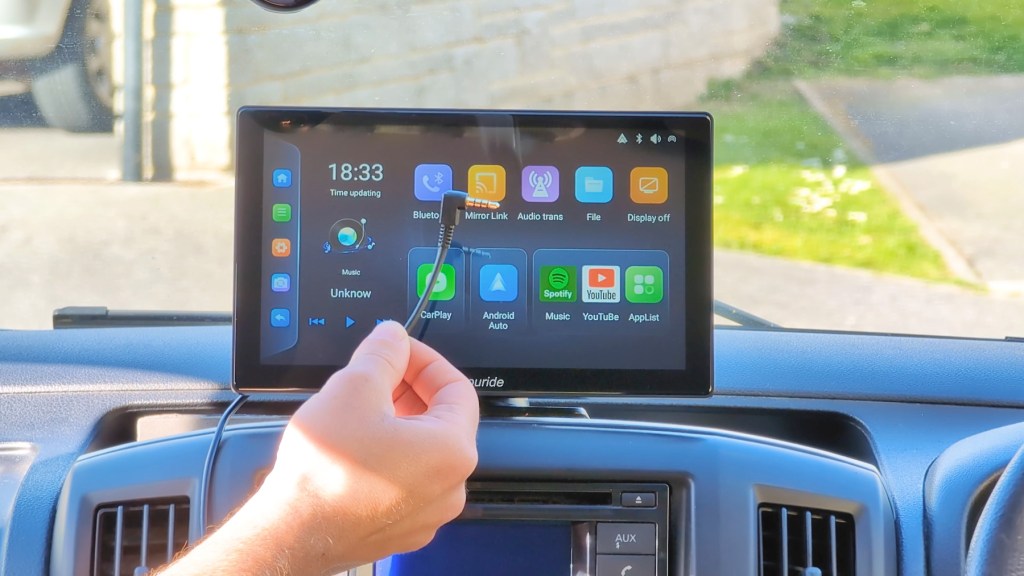
The first is a standard 3.5mm jack, which connects straight into the associated port on the W901 Plus.

If you were to just plug this in and put the vehicle into reverse it wouldn’t work, as the device is no way of knowing what the car is doing, however if when plugged in you were to press the rear camera button on the homepage menu then you can see the camera, albeit it without any reversing lines.
how This Rearview Camera will be installed
If pressing the button manually every time you reverse is enough for you then you need go no further, but the second attachment – this small red wire – is how you’ll get the camera to activate once the vehicle is put into reverse, will also get the reversing lines and makes up the bulk of this DIY rearview camera installation.
It works is by connecting the red wire to the reversing light wire of the vehicle, the dashboard console will know that there is power going to the reversing light so will activate and show the reverse camera on the portable head unit – very clever stuff!
You’ll need to power the device via the vehicle. I tried using an external battery pack to power the 901 Plus and the reversing camera wouldn’t come on, so I suspect that the power cable for the touchscreen dashboard console works as a ground when connected to the vehicle, to complete the circuit.
So that’s the basics of the camera and how it will work, now it’s time to show how to connect a reversing camera to a car.
We’re also on Instagram!
Check out yogi.the.van to keep up-to-date with all our adventures in the van!


But doesn’t the Nissan NV200 already have a reversing camera?
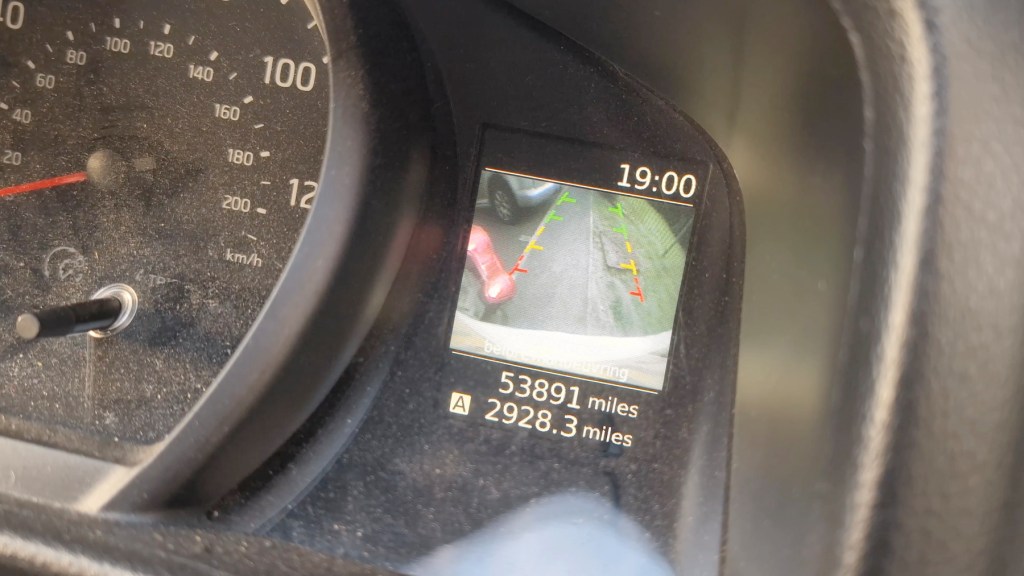
Despite being fairly devoid of technology my Nissan NV200 van actually has a reverse camera already built in, but there’s two reasons for me installing another one.
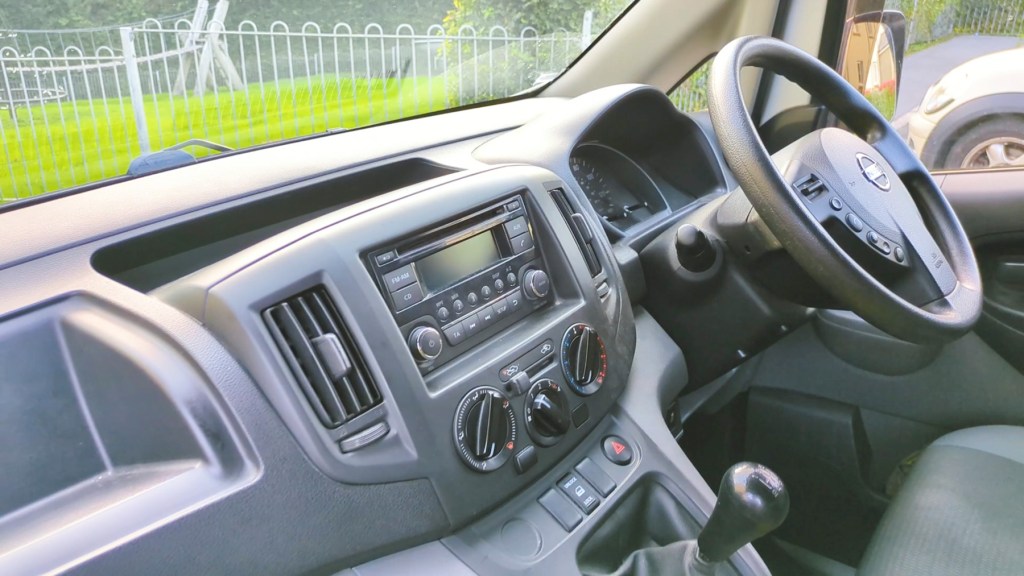
Firstly the built-in reversing screen is really small and it’ll be nice to have a bigger one on the dashboard and secondly, I love making changes and upgrades to my van and that’s kind of what my whole YouTube channel is about, so do check out my videos which show my whole van conversion as well as how-tos and more tech videos.
How to find the reverse light wire in your car
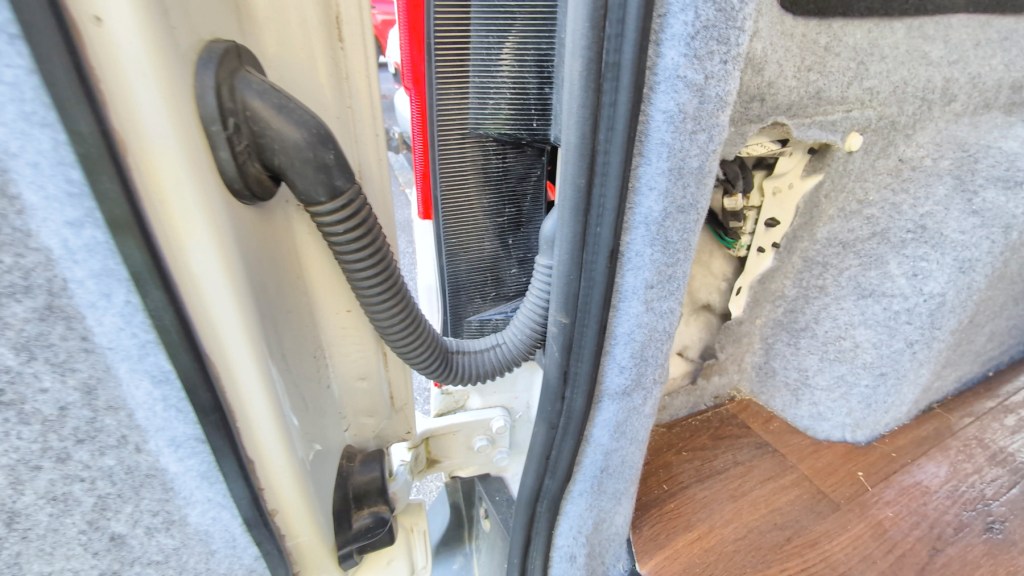
My reversing light is on the rear left of my vehicle so I first need to move the pullout bench/bed out of the way to access the wiring which it covers. In the NV200 the bulk of connections to the rear are found behind this plastic trim.
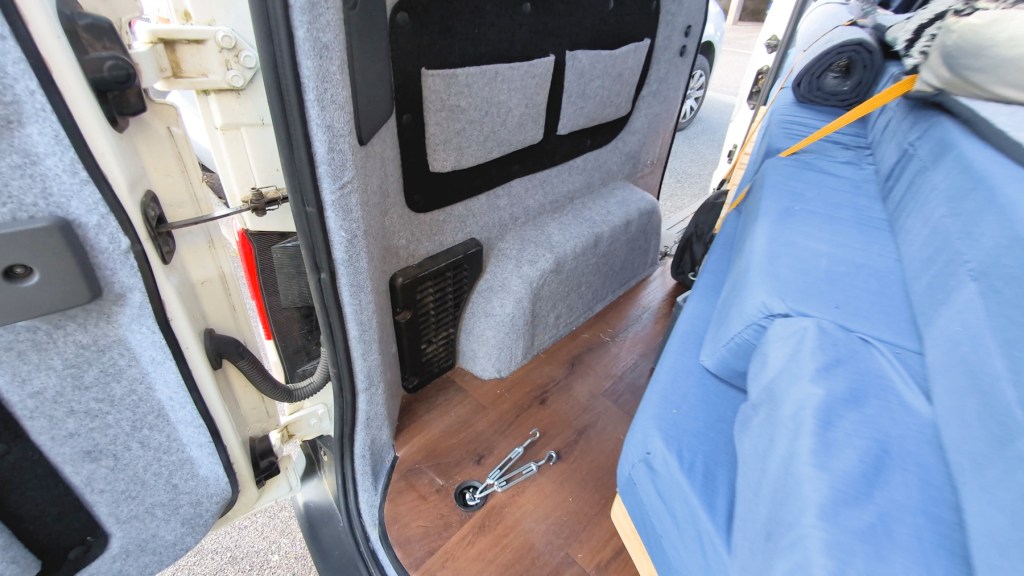
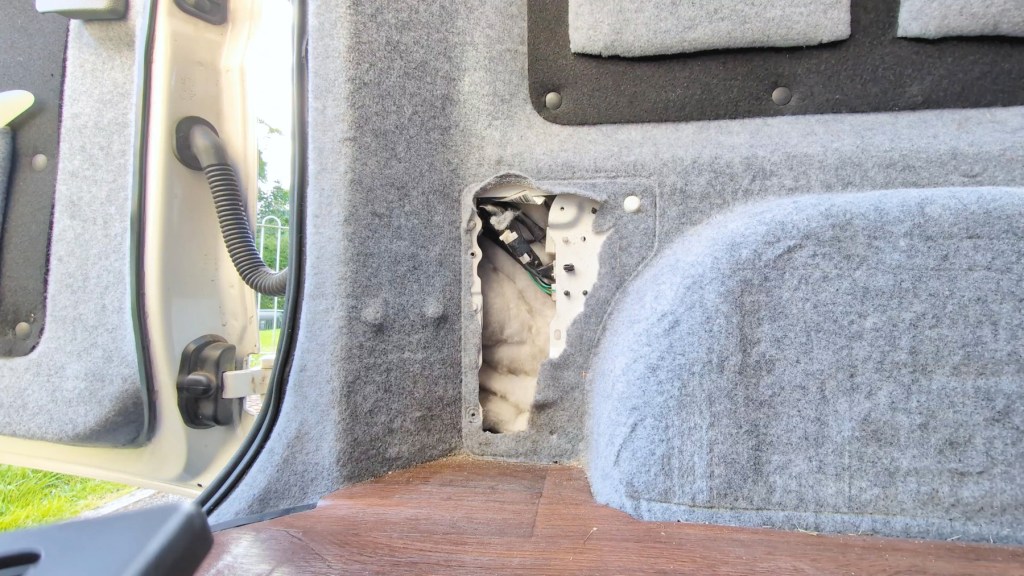
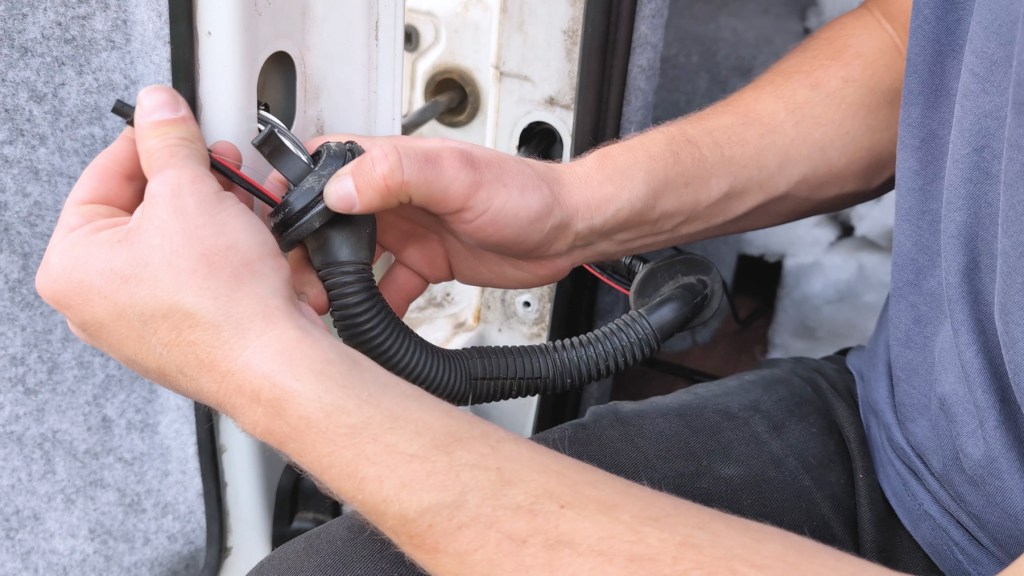
Two screws and a couple of clips hold them in place and once removed you can see that the wires travel backwards, through this rubber hose and into the back door where they spread out into the locking mechanism, number plate lights and reversing camera. Now to find the reversing light cable.
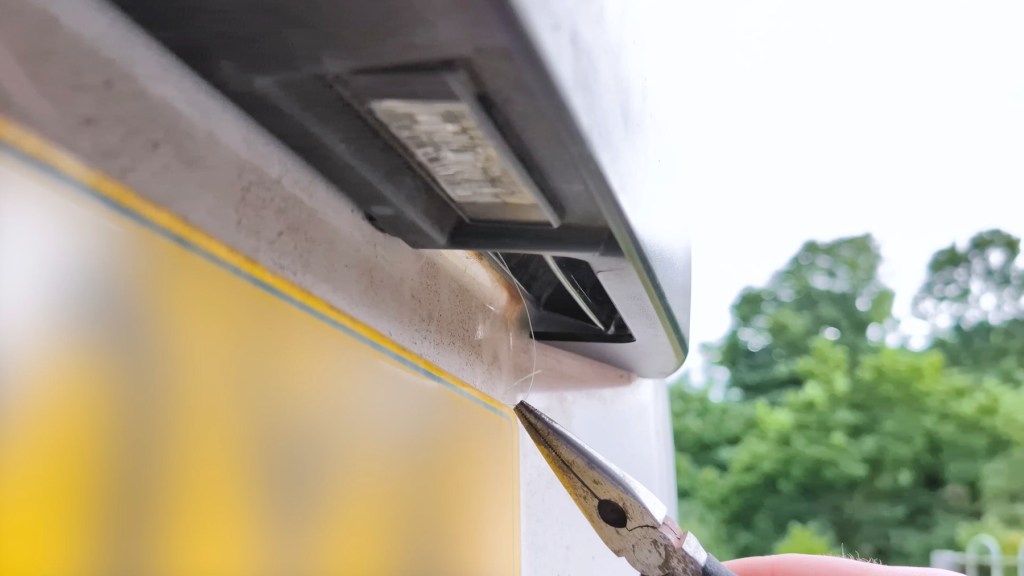
They are usually red with a black ground wire, however not always, so it’s worth being 100% sure before to committing to any work. By taking off the rear light housing I can just about see that the reverse bulb, which is at the bottom of the lighting panel, uses a red cable so it’s a promising start.
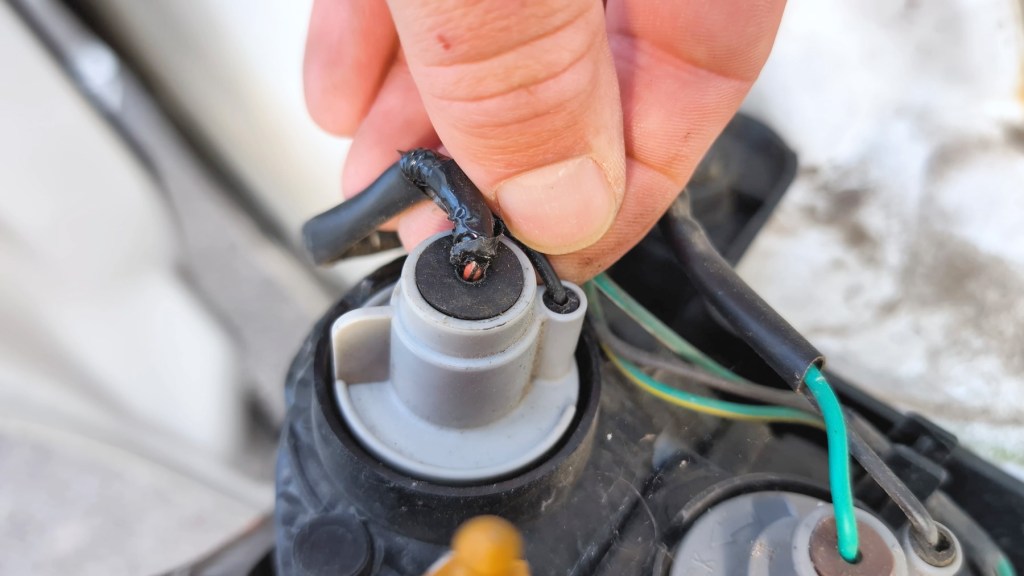
The wire will stop at the rear lights and not go into the door, and by popping off the hose I can see a mixture of white and black wires but no red, also really helpful to know. Now I need to find the red cable within the van so I can tap into the wire.

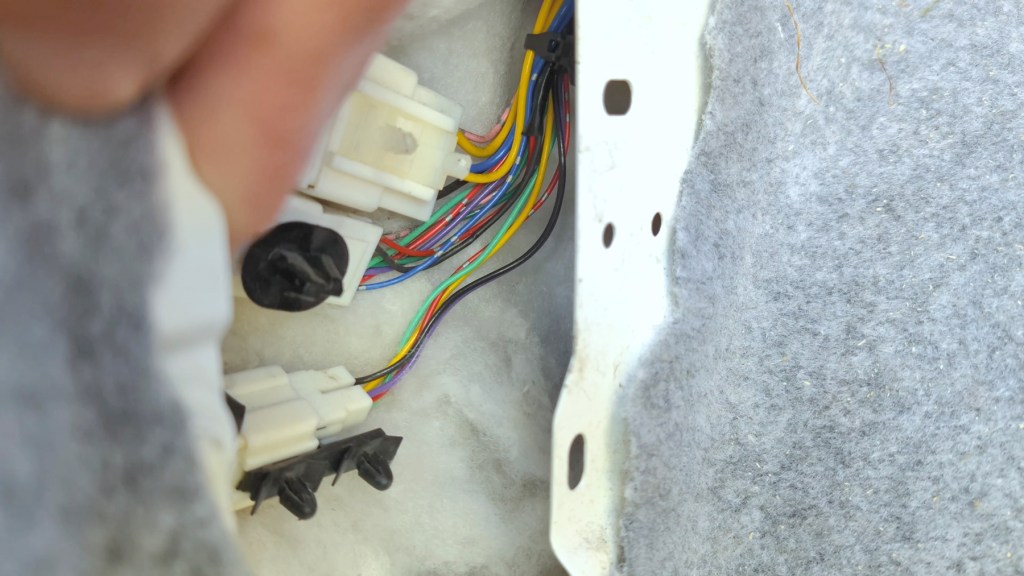
There are a few wiring harnesses bundled together and, once unclipped from the van, I can see pretty much every colour going to the harnesses, but could only find one red wire coming out towards the rear light.

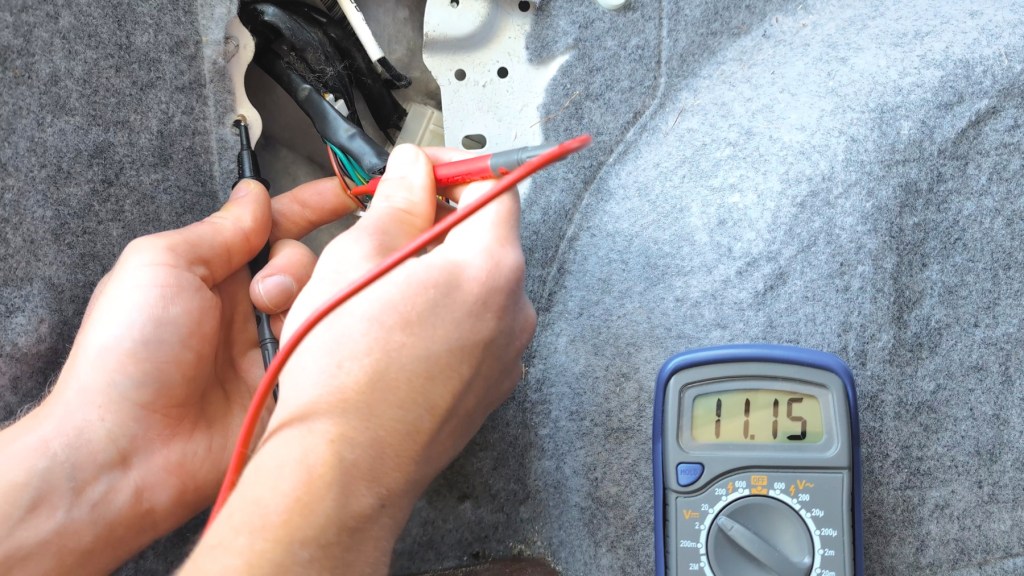
To be 100% sure this was the right wire, I got my digital multimeter out to check the voltage and set it to 20 volts in the DC range.
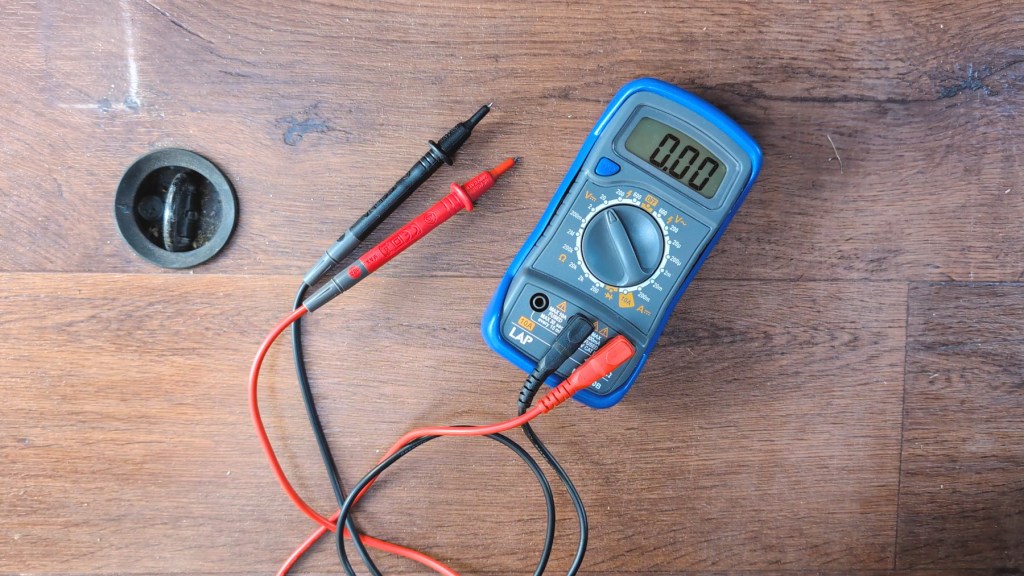
I could then press the positive red probe into the red cable and the black negative ground probe to a piece of bare metal on the van. This showed nothing as it should because the ignition wasn’t on. With the ignition on, I put the van in reverse gear confirming it with the reversing light being on and I could run the same test and this time it showed 11.1v so it is the correct wire. My voltage reading is lower than I expected and should ideally read in the range of 12v plus. I did have some devices connected but it may also be time to change the battery, though the van turns over fine for now.
Click to buy your own…


(Affiliate links which help support this blog)
How To Connect A Back-Up Camera Red Wire To A Car Reversing Light Wire
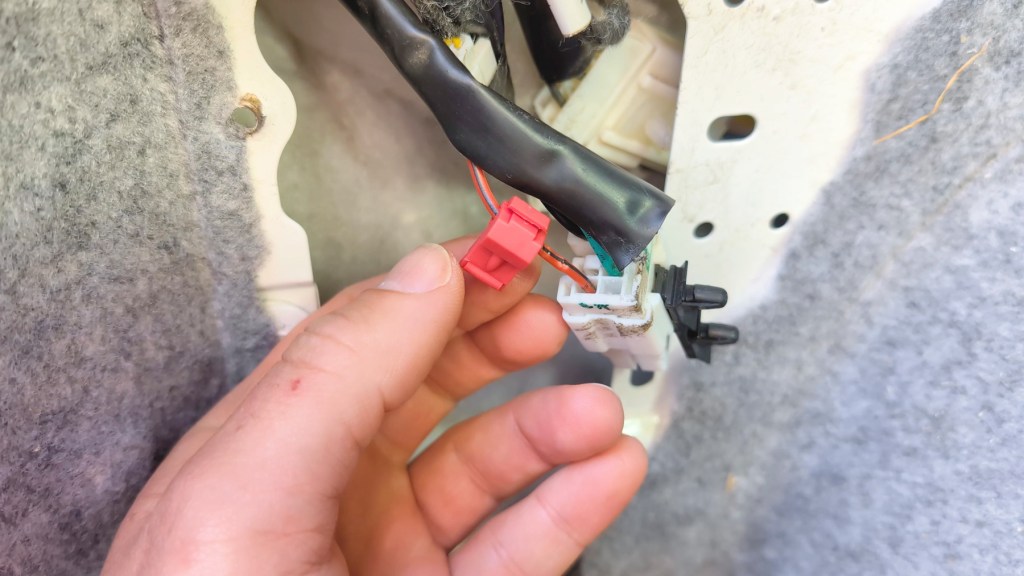
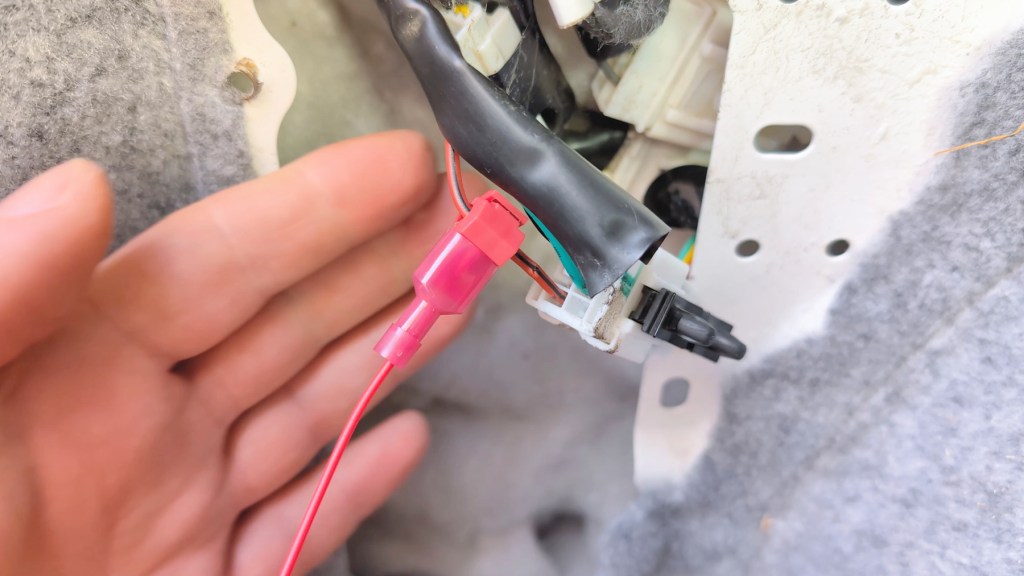
So I’ve confirmed that the red wire of the van is the correct one and now it’s time to attach the red wire of the parking camera onto it. For this I’m using using T-Tap connectors, a really easy way to join one wire to another.

I got my wire strippers and opened up a small amount of wire on the reversing light cable.
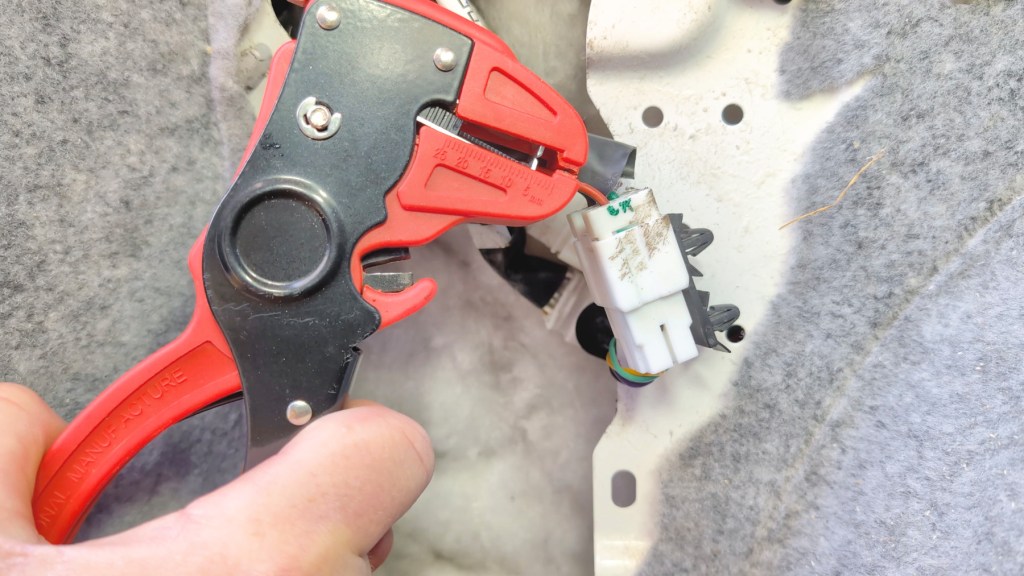

I could then take the hinge part of the T-Tap and close it over the exposed wire making sure it clips firmly in place.
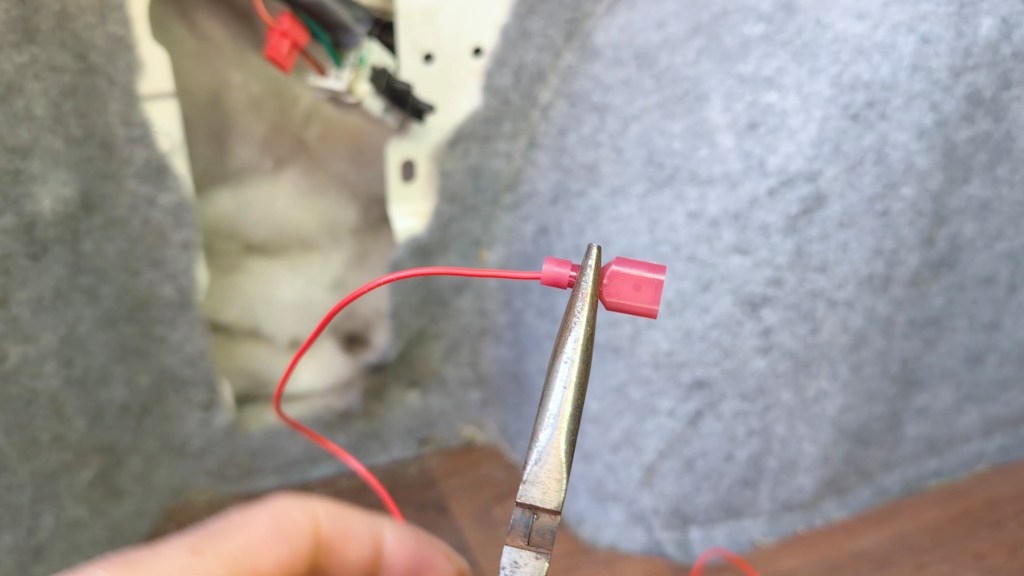
I got the wire strippers again and exposed the fresh end of the reverse camera red wire, slid it into the small opening of the other T-Tap section and crimped it in place. It required quite a bit of pressure but eventually I got it to a point where it wouldn’t come out.
It was then simply a case of pushing the two pieces together and the connection was made without any soldering or taping.
It’s at this point that I could test the camera to see if it worked when I put the van in reverse gear – success! Now I need to fix the camera to the van and deal with the excess cables.
Finding where to install A parking camera
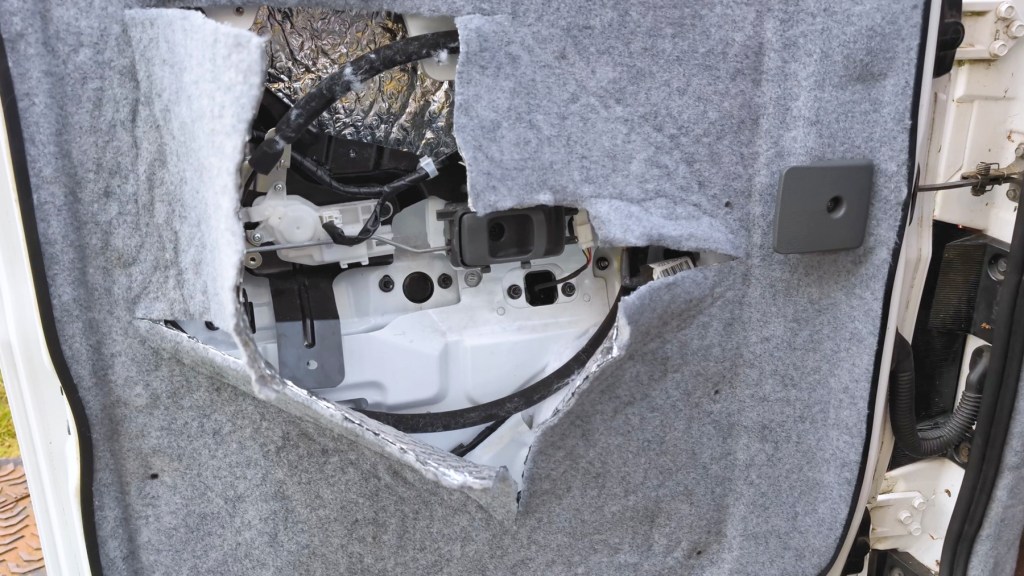
Starting with the camera, I need to move the cable into the back door which meant taking off the door panel and cutting through some of the carpeting and insulation which I did as part of the van conversion.
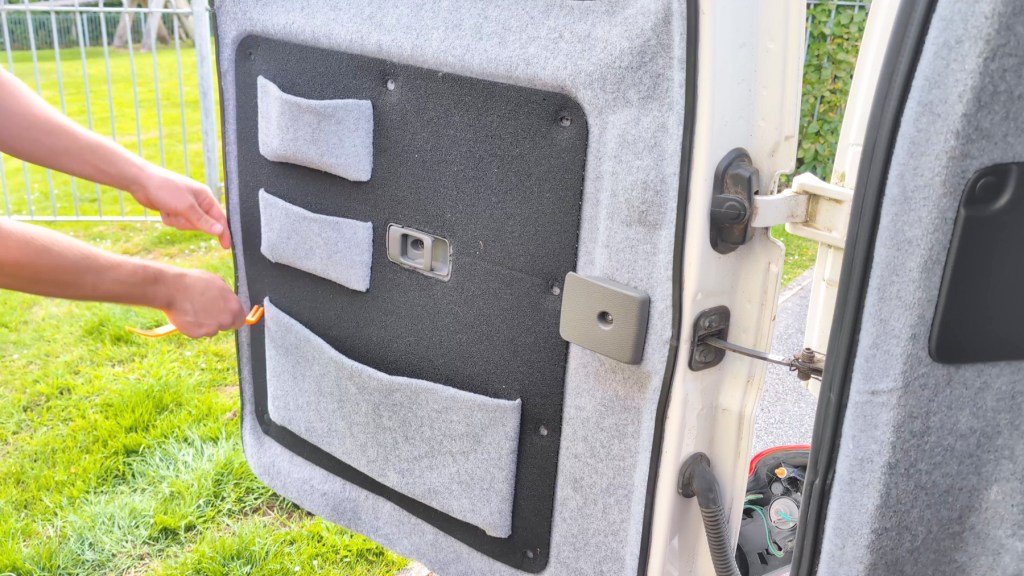
I don’t mind slicing through it at all as it’ll all be covered up again but it’s nice to peek inside the door after a few years and see that the insulation is still in good shape.
The aim here is to get the connector end of the long cable through the rubber hose and into the door cavity so I can connect it to the camera. It was really difficult to do but eventually I managed it by attaching some fishing line to a small pole and, once the fishing line was through, I could tie the connector to it and pull the cables through.
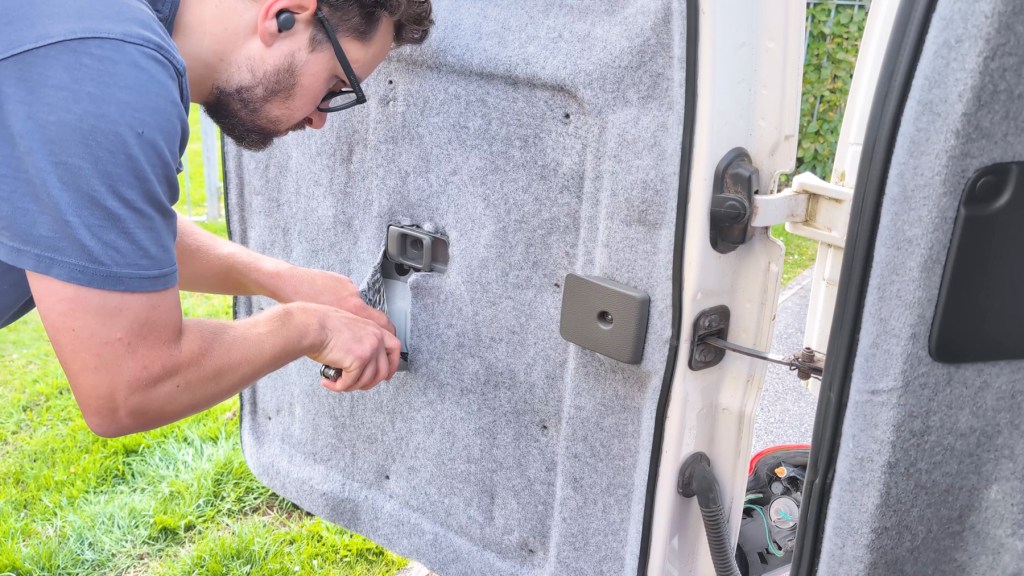
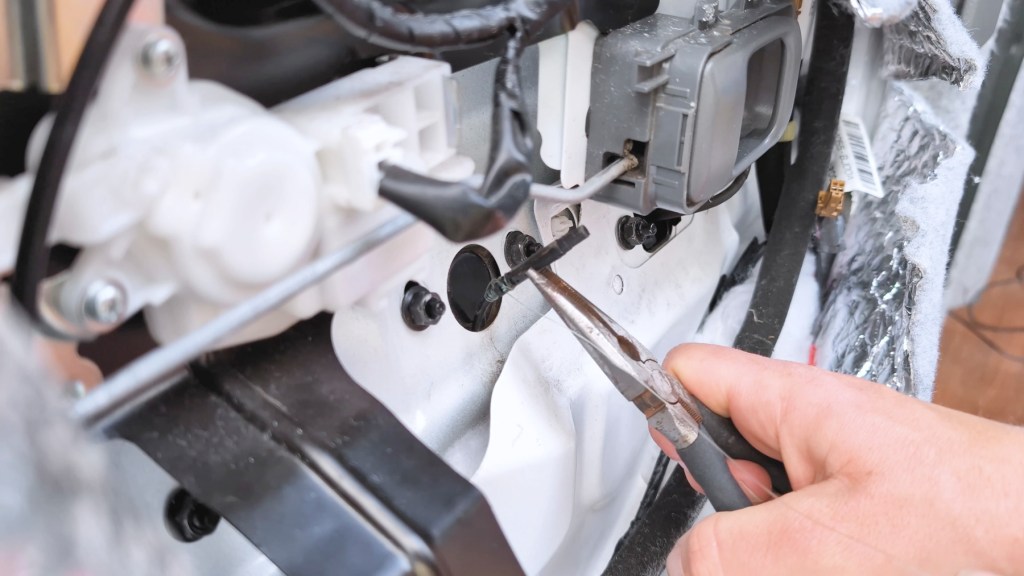
I now needed to decide on where to attach the camera and, by loosening a number of nuts in the door cavity, I was able to loosen the black outer door handle and find a space I could feed the camera wire through from the outside into the door cavity to attach with the rest of the cable. Once I had decided, again I used fishing line fed through from the door cavity to the outside, before pulling it back in and through.
I won’t pretend this was a quick and easy process and I really ummed and ahed about where was best to feed the cable through, and suspect it would be a similar situation for most vehicles, but eventually you’ll find the best place.
I could then connect the cables together once again checking everything was still working and then get to fixing the camera in place.

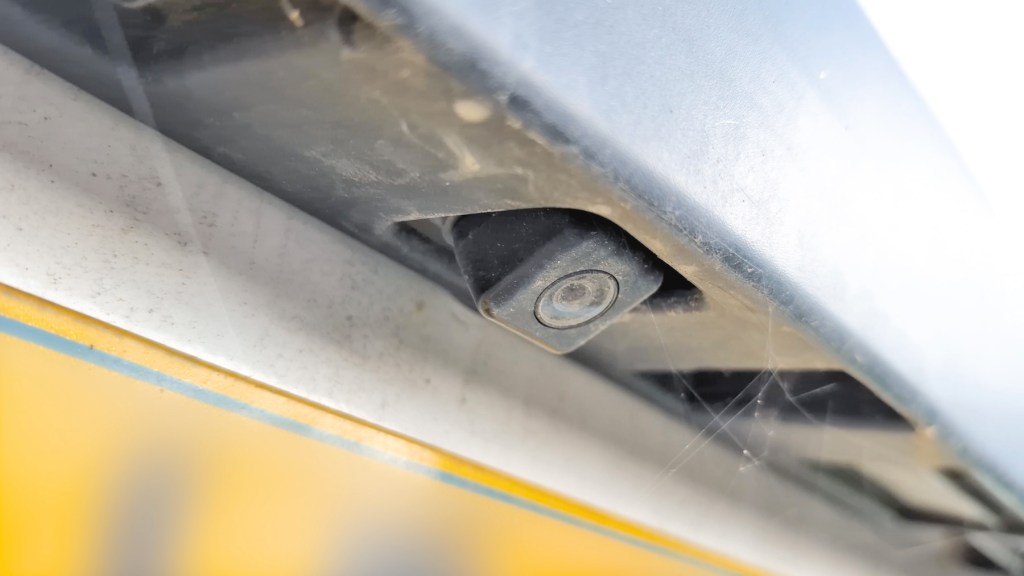
Attaching the reversing camera to the back door
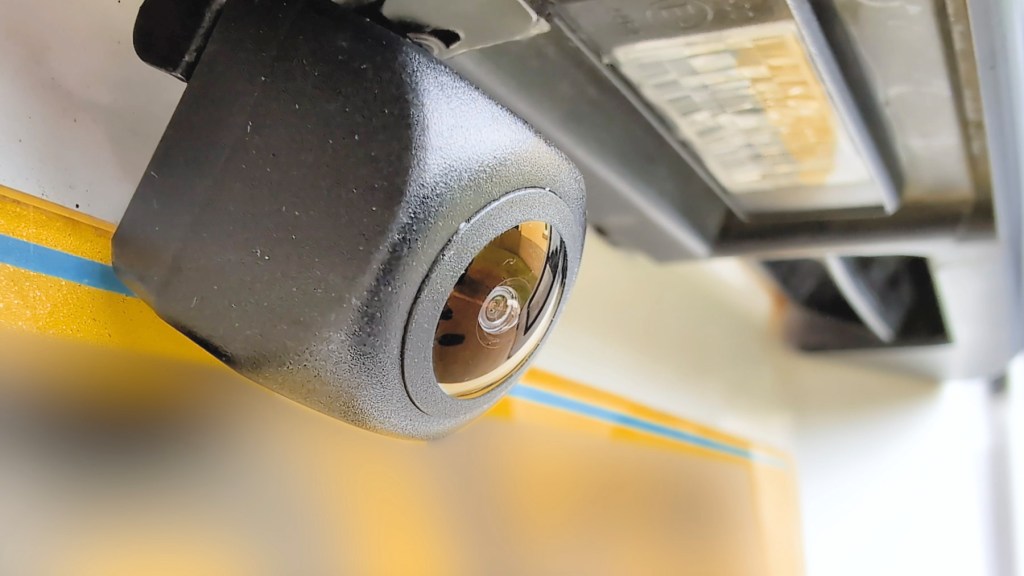
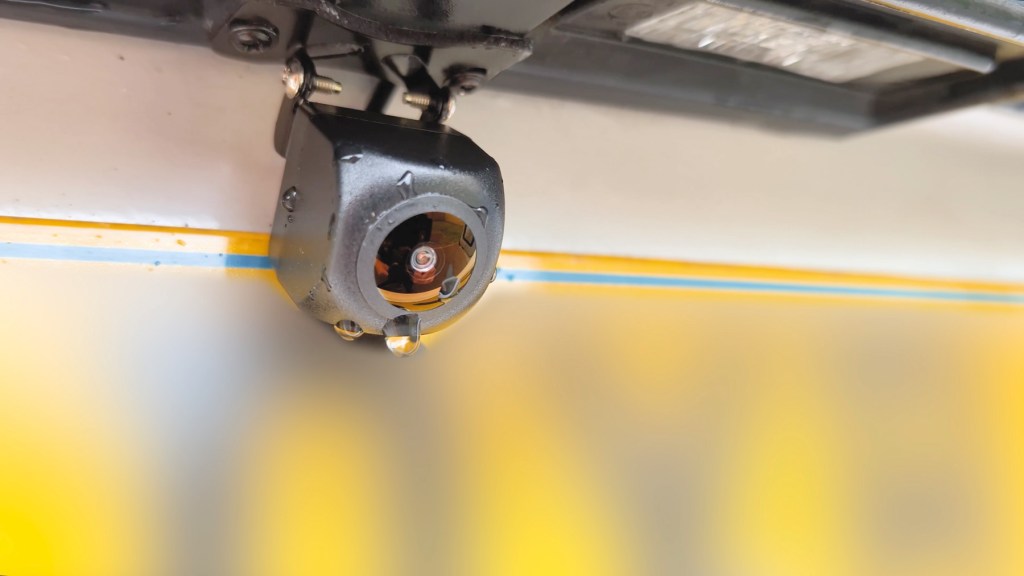
I cleaned the area down and then attached the sticky pad to the camera which was a massive help when it came to holding the camera in place while I screwed it down.
You could in theory just stick the camera down and not screw it in if you didn’t want to screw into your vehicle. It wouldn’t fall off because it’s wired into the door cavity, but it just gives a bit more peace of mind that it won’t come off and be flying around while you’re doing 70 down the motorway.
I could then stick the camera in place and used a drill on a low setting to get the screws in.
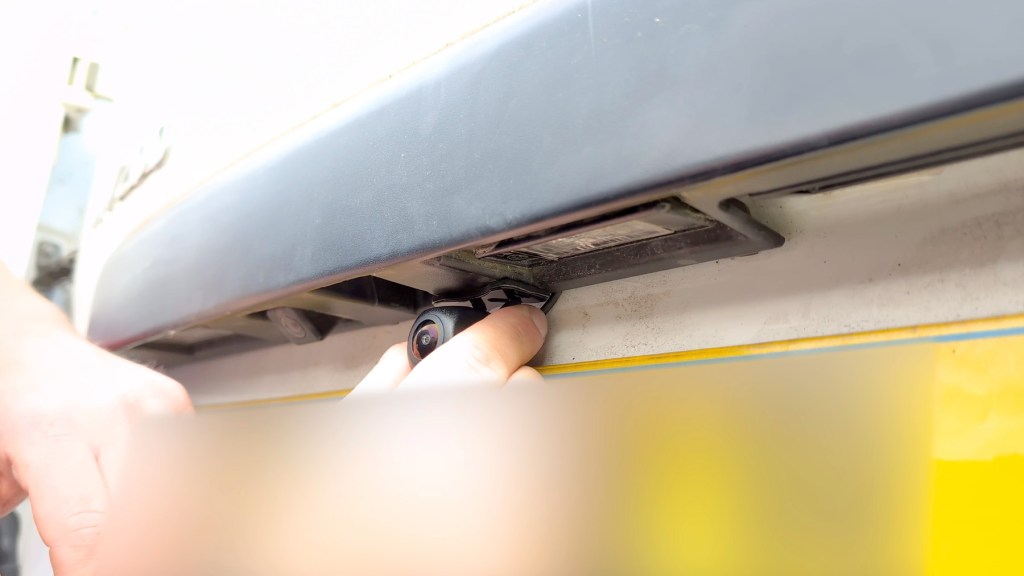
It took a bit of patience but it’s better than going in heavy and having the screws spinning in place.
The final step was to tighten the camera up at an angle I wanted and I could check the screen whilst doing this.

With all that in place, I could tighten everything back up in the door take the door up again and replace the door panel.
Click to buy your own…

(Affiliate links which help support this blog)
Hiding the excess REar Camera cables in A vehicle
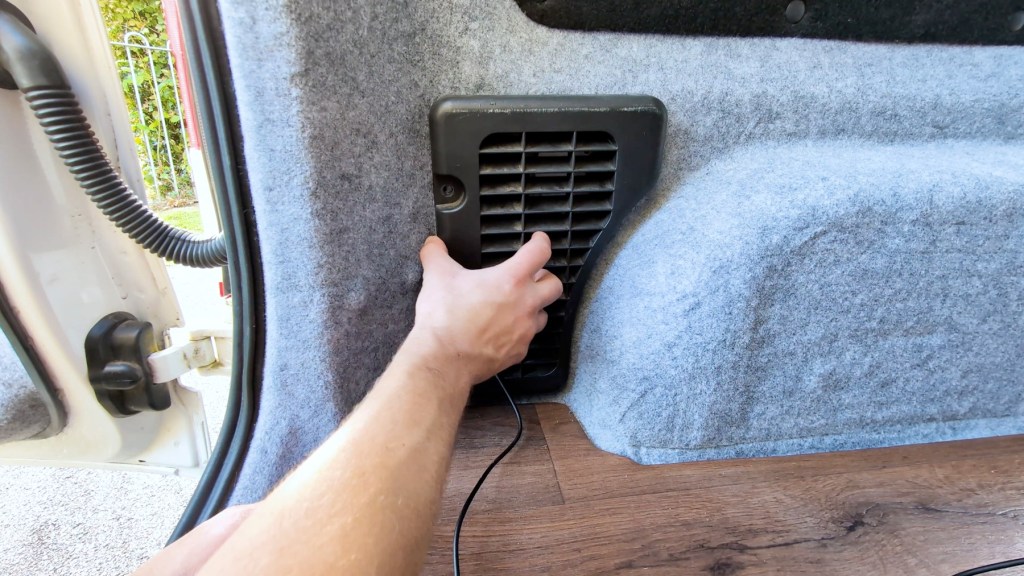
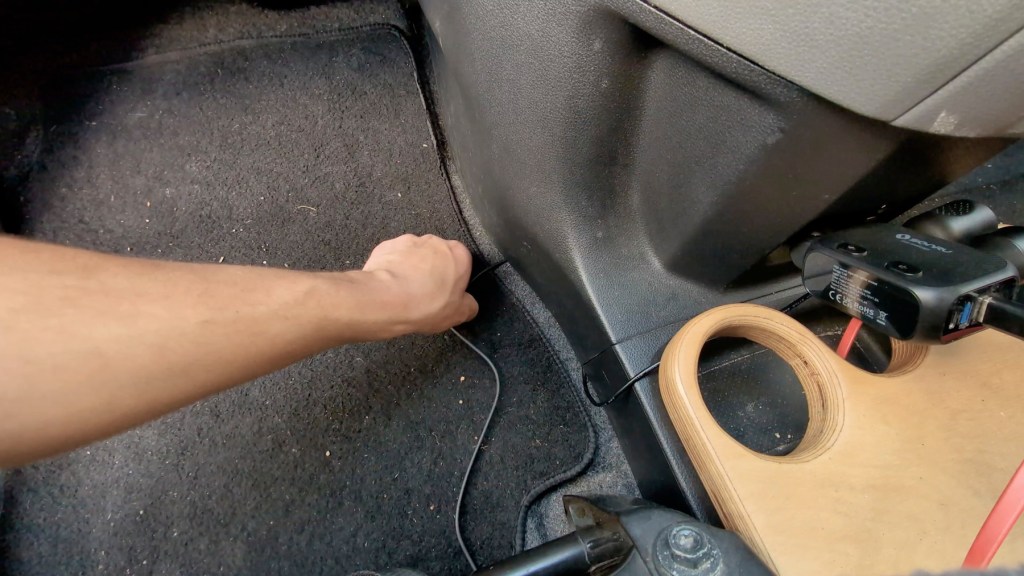
The final step was to hide the cable and this is again something that will be unique to every vehicle. I’m lucky with my van conversion that I have a floor that I can tuck cables under though you could also feed them through the walls though it would take a lot longer and be quite fiddly.
I fed the cable out of the black plastic vent before reinstalling it, and could then tuck the cable along the edge of the floor. When I put the bed back in position it will cover this entire area so it will never be seen.

Once I made it to the front, I fed the cable under the passenger seat in the footwell and then up, through the dashboard of the van into the head unit in the same way I had done with the 901 Plus’s power cable you can see here.
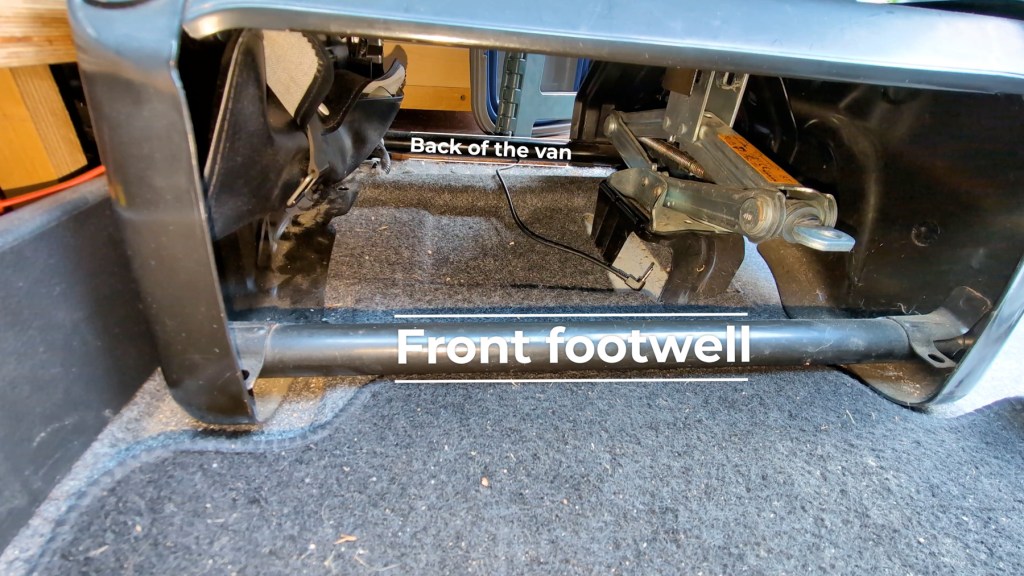

The quickest way I found was just to take the lower and upper dashboard trim off which involves a little prying and removing two screws. If you’d like to know how to do this, check out my radio screen repair video here.
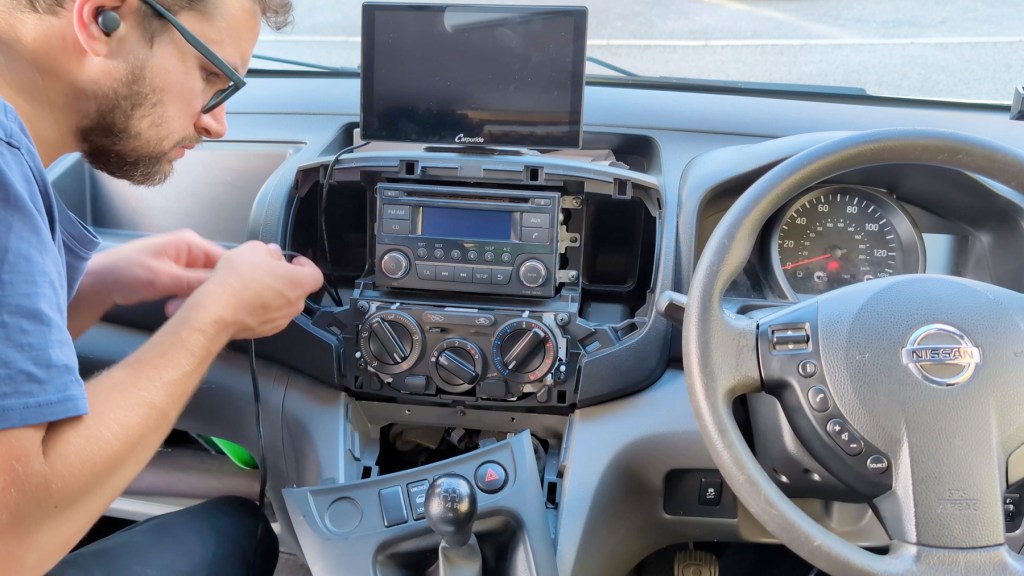
I could then feed a cable down, as fishing line was a little too light to go where I wanted it to in the confined space, and then I tied the reversing camera cable to the cable I just fed down and pulled it up and into position. Down in the footwell I tucked the excess cable away as I know there’s a cavity in there and that was the job done.
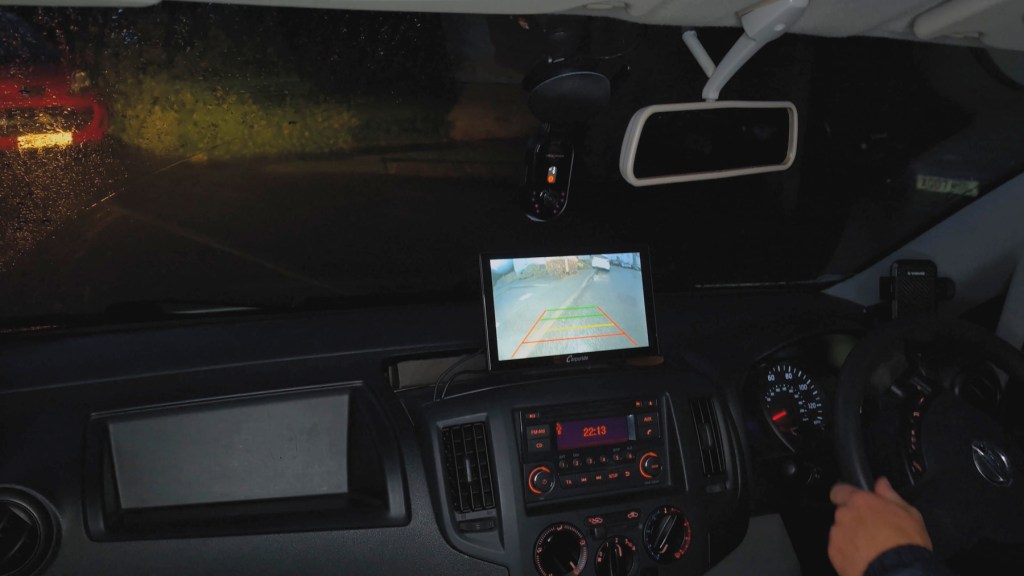
Once plugged in, I could replace the trim and that’s about as neat as I could get a third party head unit to look on my dashboard.
Reversing camera price, discount code and testing
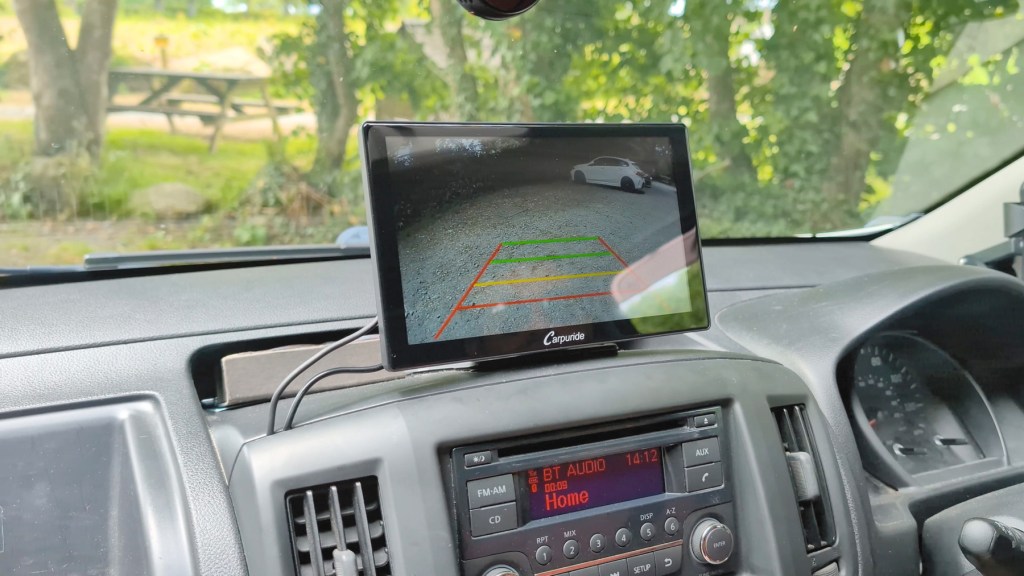
I’m super happy with the reversing camera setup it was a really fun install and, although it wasn’t without its challenges along the way, it was absolutely worth it.
There’s only one wire to connect, so I think that makes this one of the easiest reversing back-up camera installations out there/
It’s really clear in both day and night time footage, and the reversing lines are very helpful in providing depth perception when backing up.
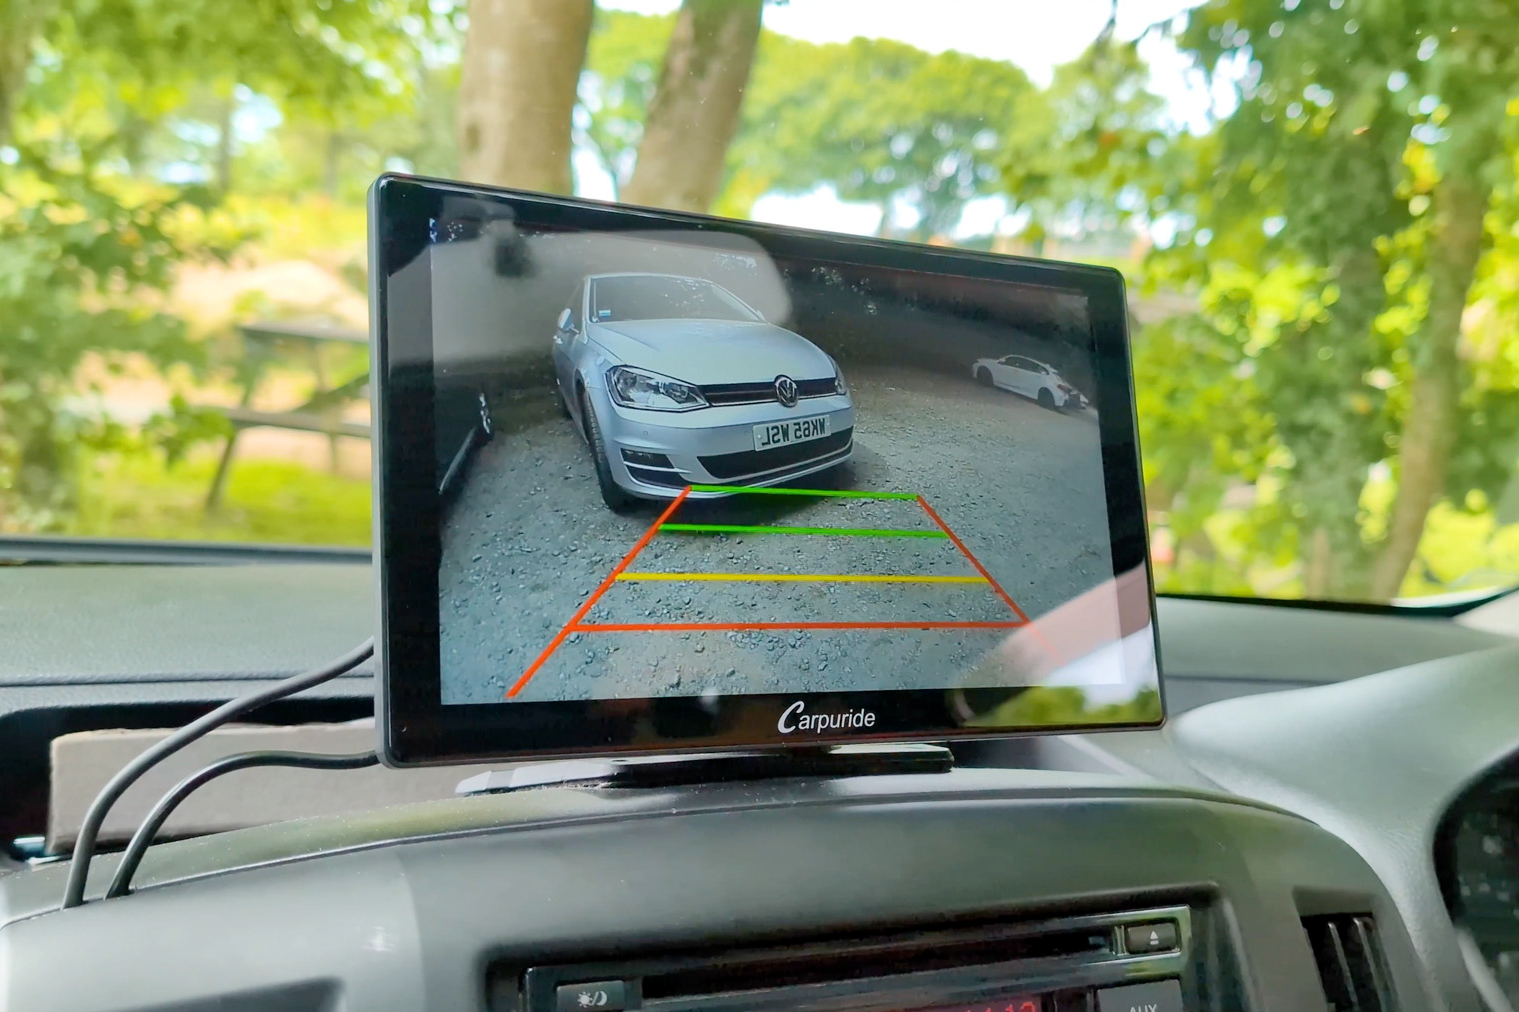
You can pick up the Carpuride reversing camera for under £25 from their website and I’ve got a link to it, plus portable headunit consoles for all budgets below.
And don’t forget to use discount code LENSOFJAMES to get a discount off qualifying orders from carpuride.com.
Thanks for stopping by!
Click to buy your own…
(Affiliate links which help support this blog)
