
This article is a written account of a video from the Lens Of James YouTube channel. Watch the video above and subscribe if you like what you see!
This article contains affiliate links to relevant products I have used in my videos. By buying through these links, I receive a small percentage of the sale at no cost to you which helps me support and grow my website and YouTube channel, so I can create more content like this in the future. Thank you for your support.
I’m really excited to share how I built this new table storage side unit with an integrated battery pack for charging my devices…and this all begins with removing the existing table. I recently made a video about how I made this old table, and it’s a really easy cheap setup, so do check that one out too!
I’ve split this blog/video into 2 parts. In this first blog/video I’ll be building the table unit, and in the next part I’ll be kitting it out with storage, so do keep an eye out for that..
Let’s get into the build!
The plan
I created a design of how I wanted it to look Sketchup and the idea is to stick with the fold-down table concept I’ve used previously – and this will be cut out of the front section – but making it all much neater, with added storage and a place for my battery pack, and for it match the wheel arch storage box that I made previously.
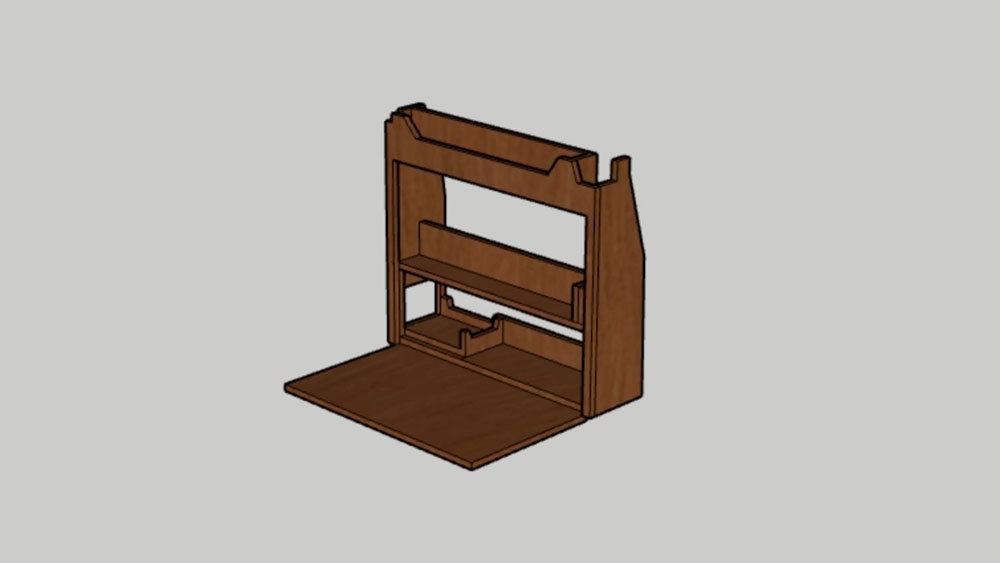
I’ve seen many vans make a side unit going all the way to the floor, but I want to retain the full width of my 3-section pullout bench-bed, which is king size and very comfortable, so having the table unit suspended allows a gap for the bed and the mattresses, plus a bit of sleeping room.
I would be using a couple of pine boards again, as these are made in useful sizes and are cheaply available, so I purchased two at 175x50cm.
To get the width I needed for the front section, I cut a 65cm length piece off of each board, so they could be joined.
The front
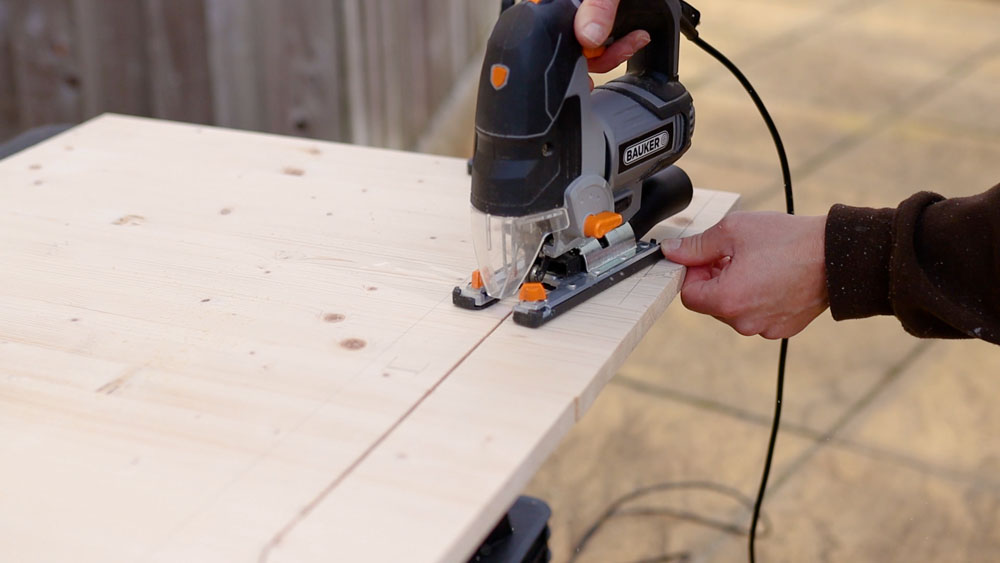
With my measurements made, I made a note of which side of the wood would be the face and could make my first cuts using a circular saw and a straight edge.
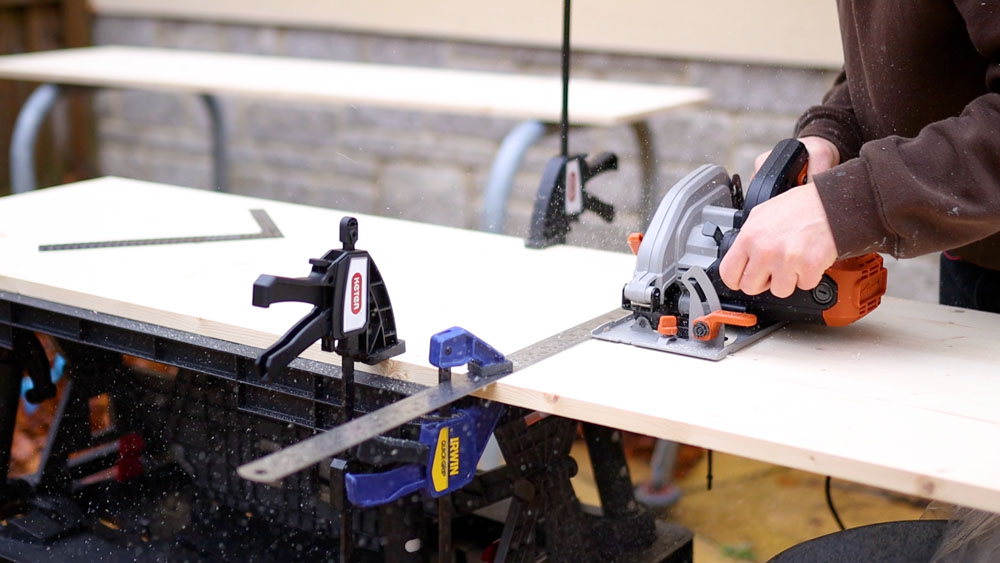
With both boards cut to 65cm I cleaned up the edges and then passed both edges to be joined over the planer to get a perfectly flat edge.
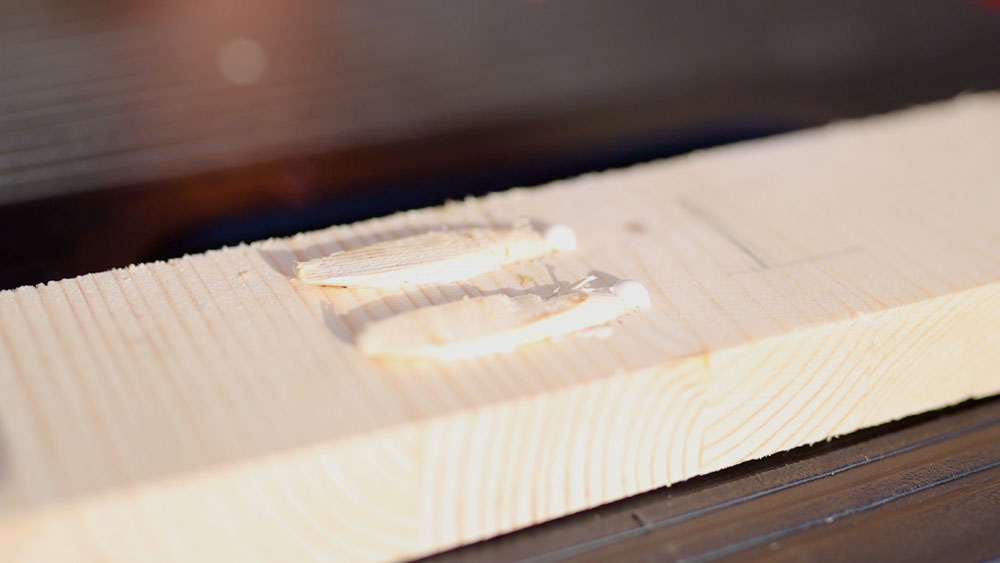
I could then mark where my dowels would go. I didn’t dowel along the hole length of the board, as I would be cutting the table out from this piece later on and I didn’t want to hit a dowel, though I do strengthen the rest of the join later on.
Using a collar on a 6mm bit, I drilled two holes and inserted dowel pins before wet weather forced me inside, which would be a theme throughout this build.


I lined up both boards and gave a tap with a hammer to create a mark on the opposing board with the pins and could drill dowel holes in the second board.
With dowels inserted, I could check the join, and it was a really nice fit.
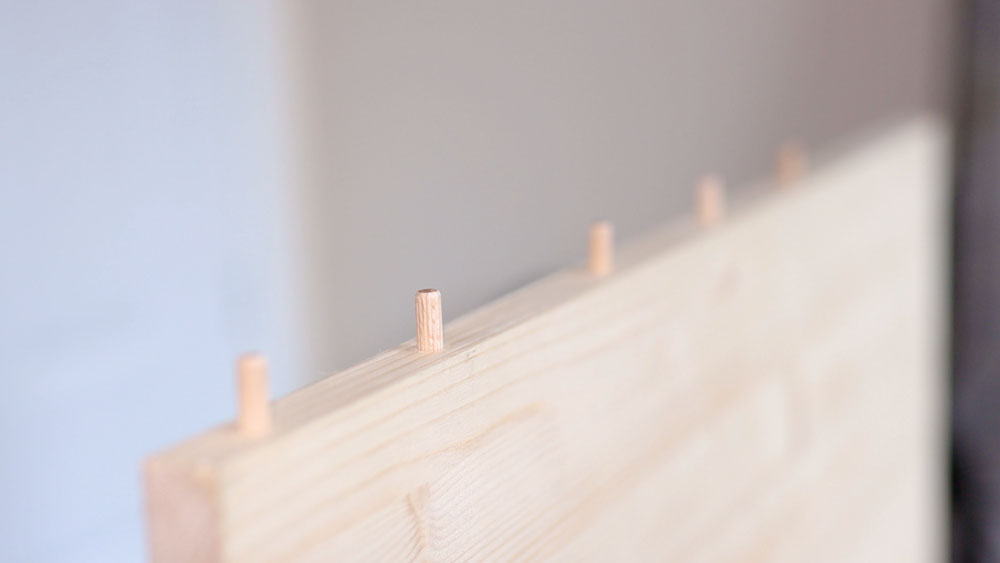
All that was left was to create 3 more dowel holes using the same process, and glue it up.

Along with the long clamps, I also added clamps and weights to the face of the boards to ensure that they would dry flat.

The side pieces
Whilst that dried, I moved onto the side pieces.
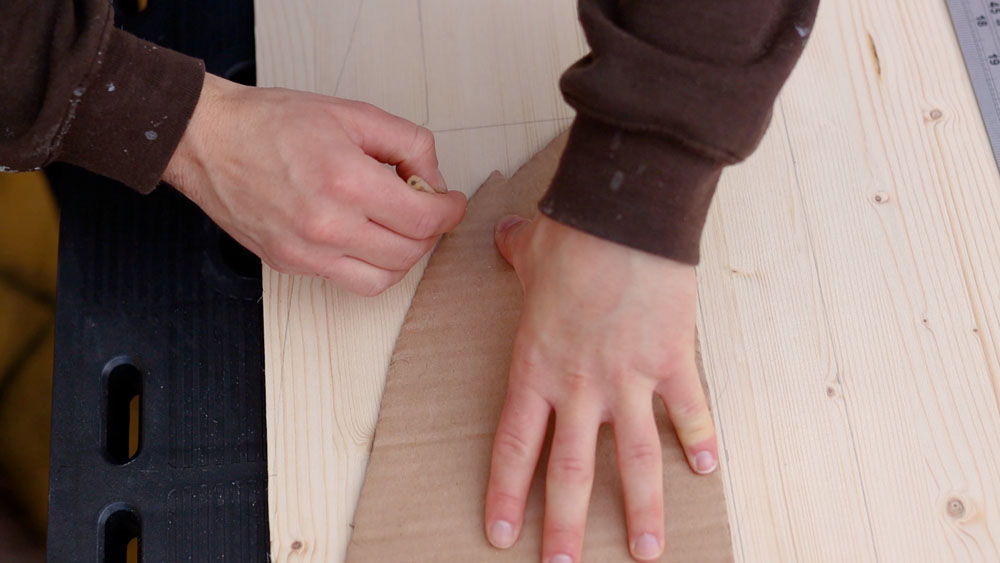
With the van wall being a very uneven surface, I created templates with 2 big bits of cardboard and trimmed them down to get a good fit.

Just to make things a little trickier, where I would be attaching the unit to on the left is actually 40mm further forward than on the right, so this had to be accounted for.
Next, I drew up the templates onto the wood.
Using a combination of the jigsaw and circular saw, I cut them out and repeatedly went back to the van to check the fit and could make small adjustments to the various curves and notches as necessary.
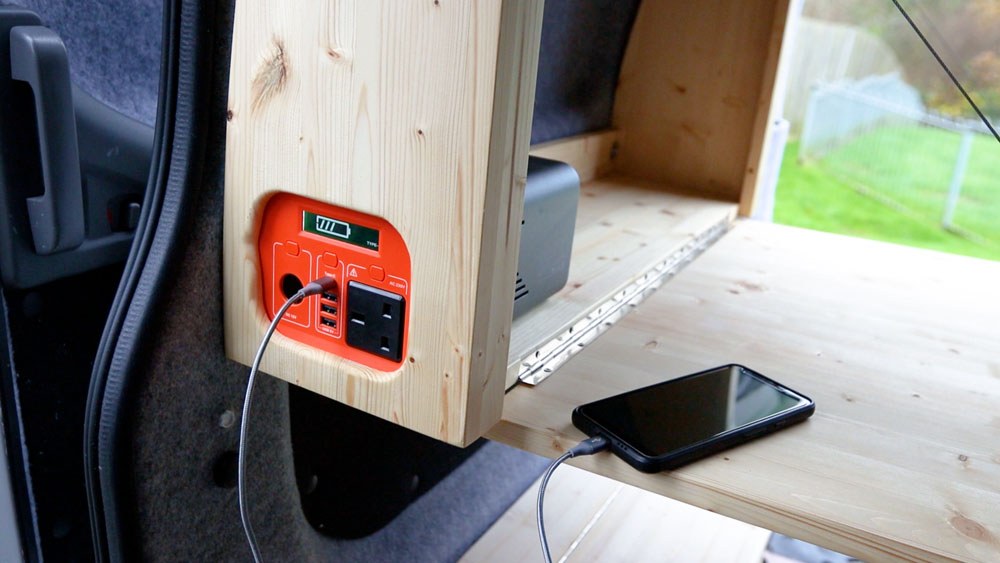
With the side pieces cut, I could begin something that I had mentioned in an earlier video – building in my portable battery pack for easy access charging.

Click to buy your own…


(Affiliate links which help support this website)
The first step here was to work out where the battery pack would sit. This would be facing out of the left side piece, and I created a template of it onto the wood based on the face of the battery pack.

I then made the shape smaller by 10mm on each side, and this is to give the battery a ledge to sit against without falling out of the opening.
I drew the round edge with a similar radius curve on a small can for easier sanding later and then cut the opening out with a jigsaw.

I used a router to reduce the thickness of the wood on the side, so that the sockets of the battery are more accessible.
I free-handed this, and although it’s fairly messy, it’s on the inside and will never be seen.
After refining the edge with some hand sanding, I could then neaten the front of the opening with a roundover on the router.
We’re also on Instagram!
Check out yogi.the.van to keep up-to-date with all our adventures in the van!


Back to front piece
I could now jump back to the front piece, and extracting the table from board I had glued up earlier.
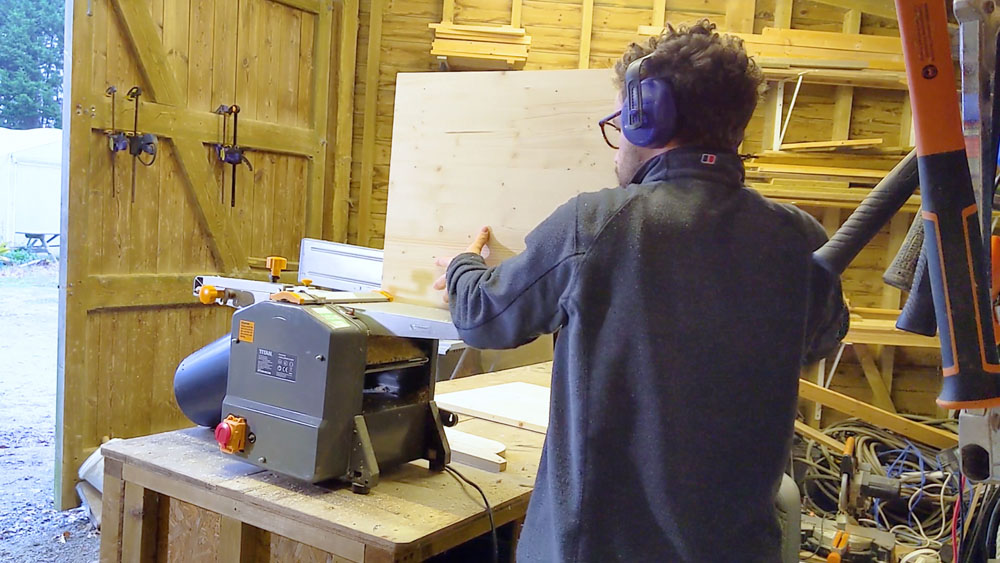
I started by prepping the board with a thorough sand to smooth it over.

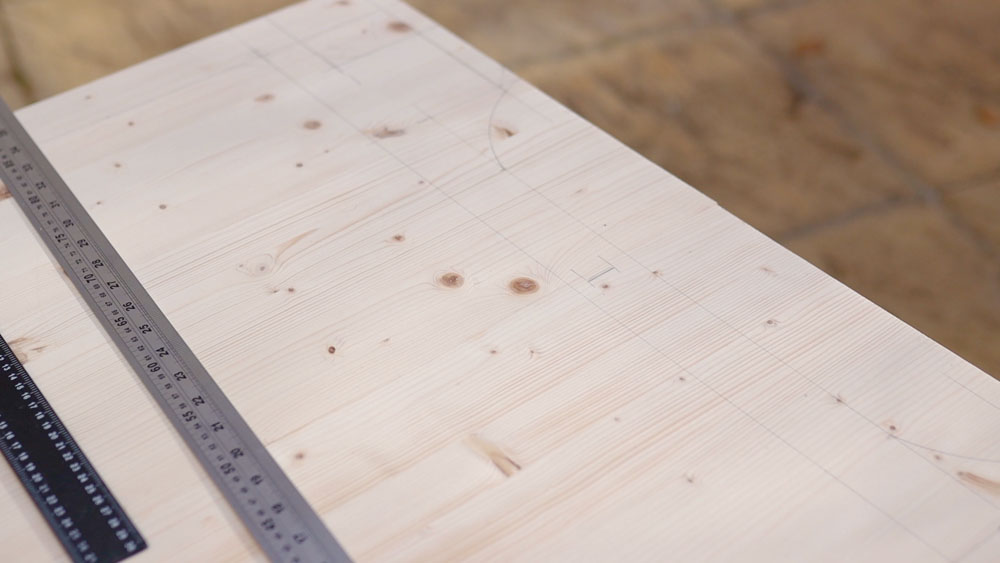
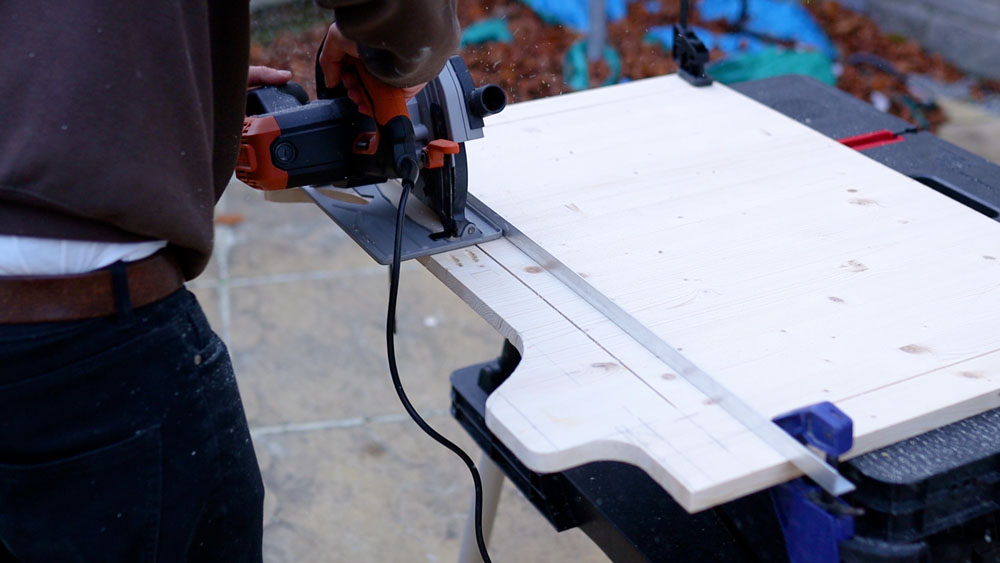
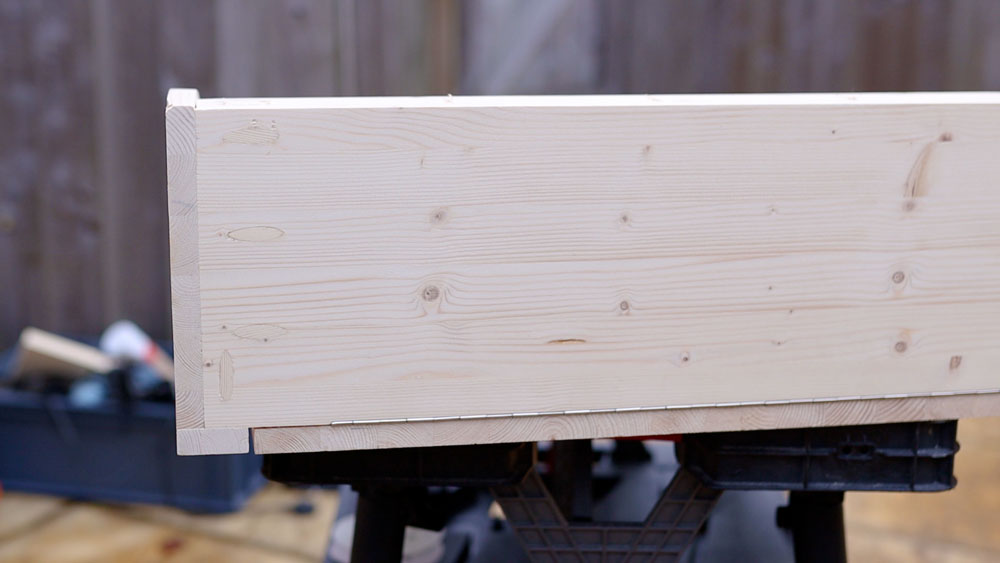
Next, I cut a straight edge along the bottom that I could work from, and then could trim a bit off both sides to get the width down from 100cm to 81cm, which is as big as the van would take.

Next I drew up all of the notches I would need to remove for it to fit to the ceiling of the van, and this included the opening for the top shelf.
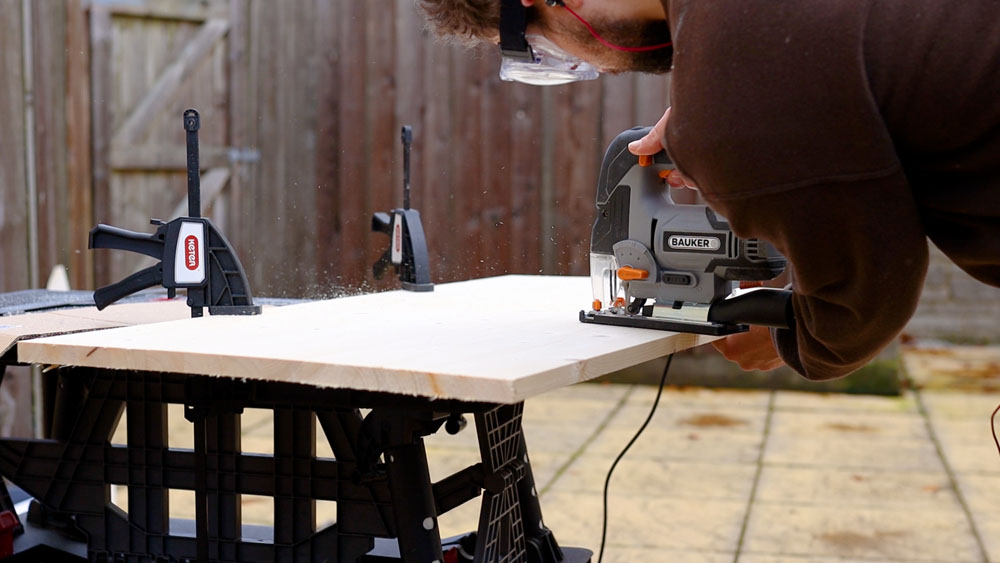
For the shelf, I started with a plunge cut on the circular saw against a straight edge and then I could jigsaw the rest of the material out.
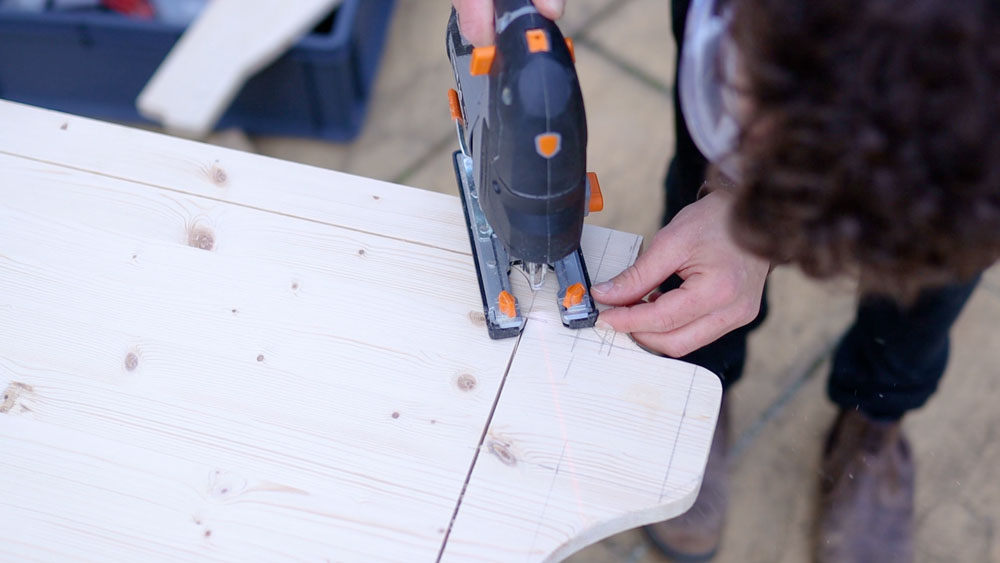
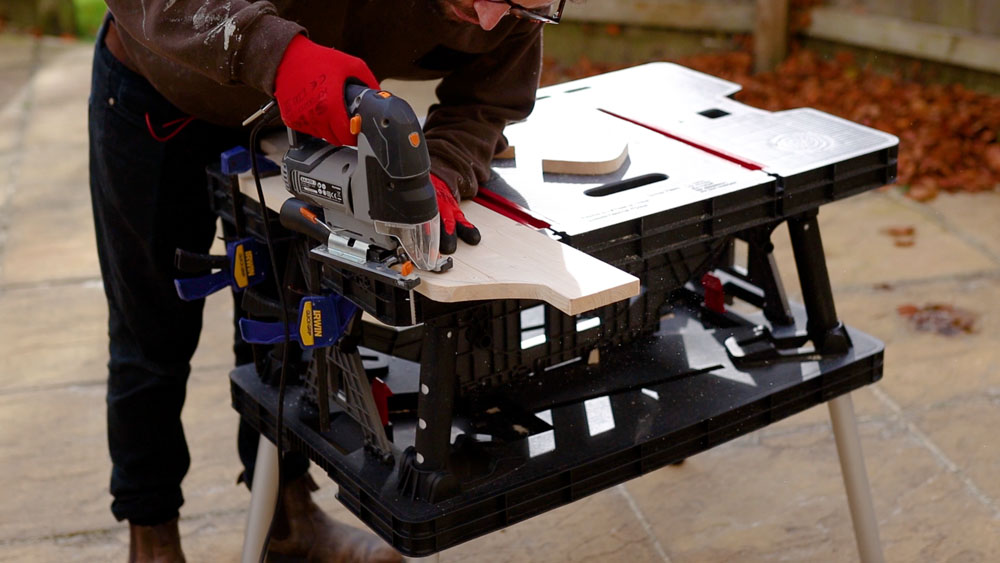
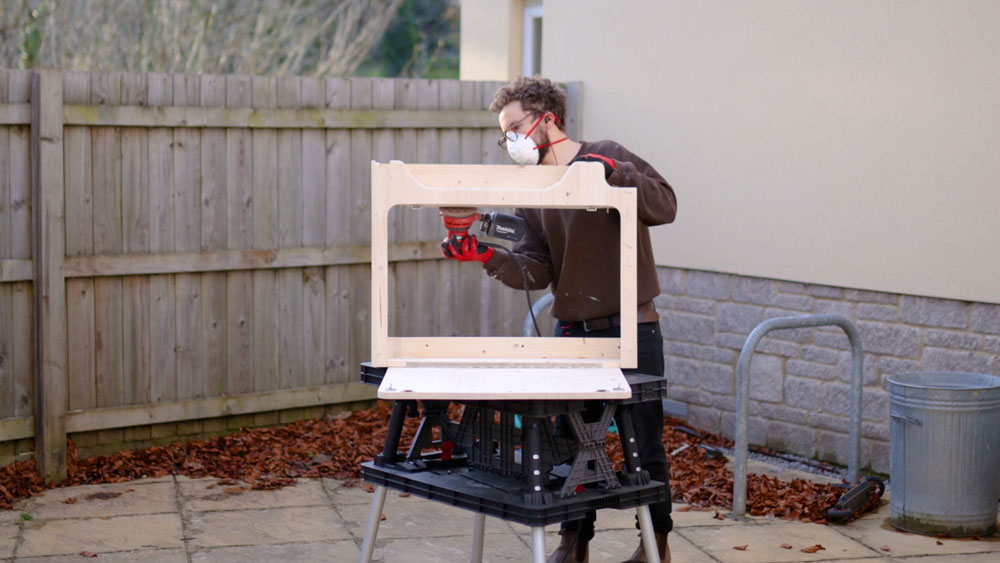
Other notches followed to match shape of the van walls and ceiling, and then I could begin the part of the build I was most worried about…cutting the table out of the board.
I did these cuts on the circular saw in 2 passes, to try to preserve the edges of the wood on both sides and prevent tearout.
The first side was a case of cutting up to a certain point, but the other side – due to the fact that the circular wouldn’t pass over my clamps – had to be another plunge cut.
Cutting the top involved another plunge cut with two passes.
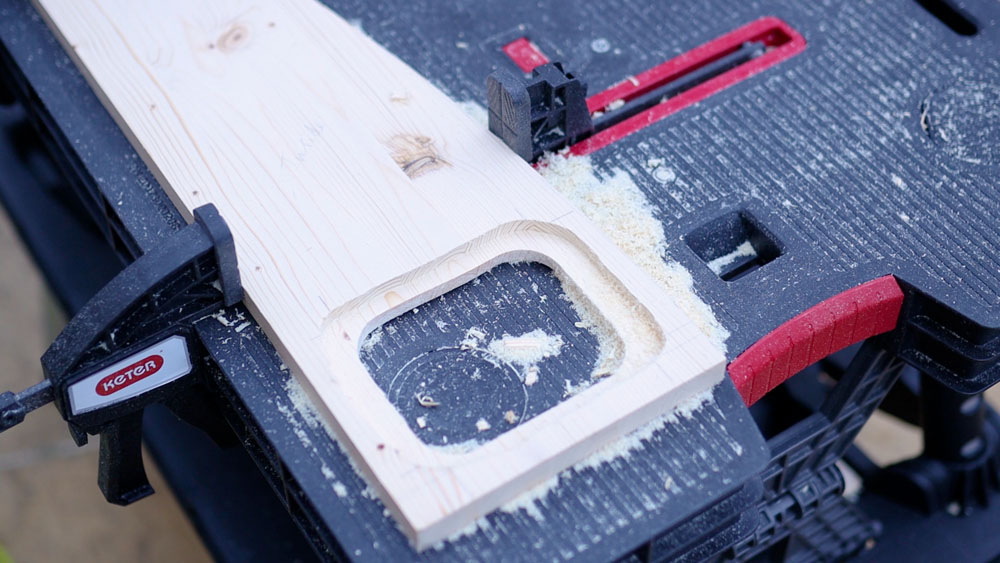
I used the jigsaw to carefully join up the corners. I used a jigsaw bit meant for tight corners and it did a great job. Being thinner than the circular saw blade, it gave me a bit of leeway to sand it down at a later date.
Despite being stressful, as this was my front piece and table which I really didn’t want to mess up, it turned out really well.
I could then refine the edges with sanding.
If you noticed the two pocket holes on the front piece whilst I was cutting, these are just to provide a bit more support to the join I made in the boards earlier and will be hidden on the inside when the table is assembled. I plugged them with pine dowels and sanded them flush off-camera.
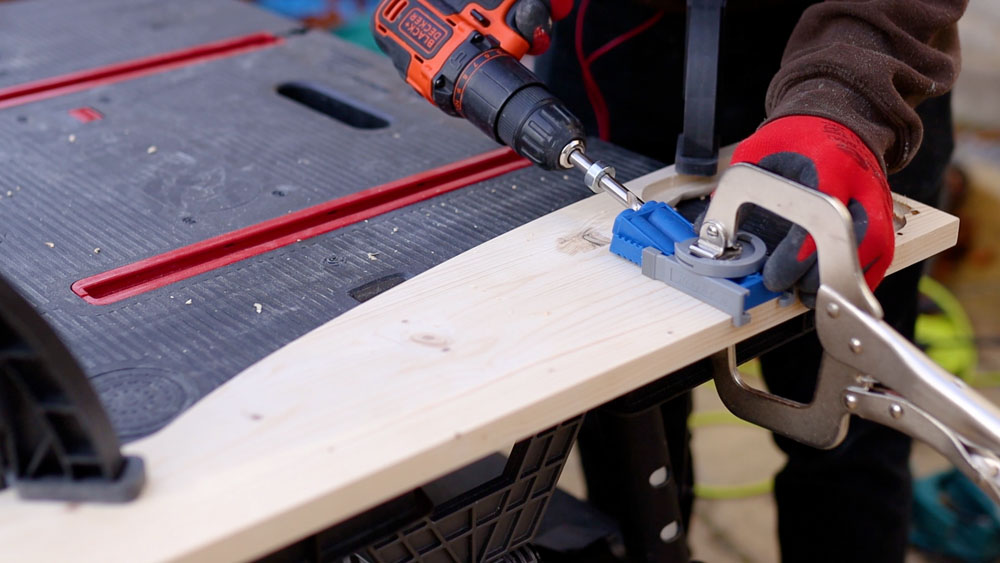
I could finally get some structure to the table unit, by adding pocket holes to the side pieces so they could be attached to the front frame.
I used pocket holes on my previous wheel arch storage box build and they provided such a quick and strong way to put furniture together that I decided to use them again.
Click to buy your own…

(Affiliate links which help support this website)
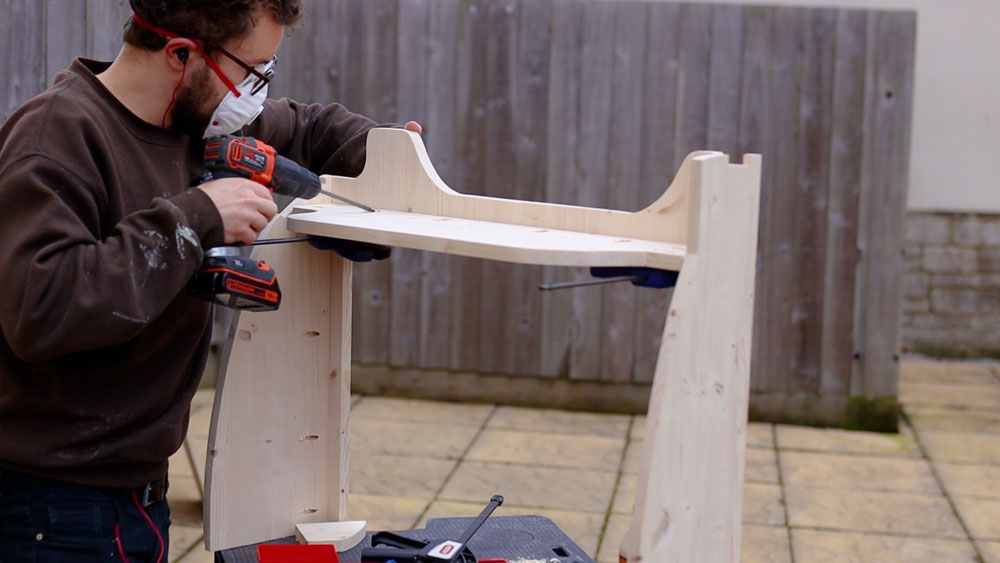
Assembling the main structure
Clamping the side pieces in place, I screwed them along the edges of the front piece to created this arched structure.
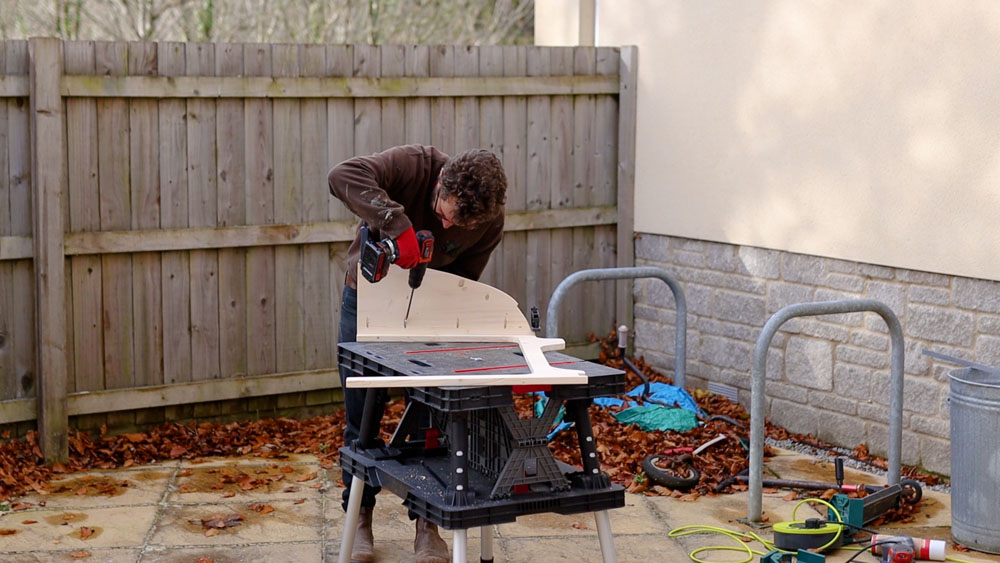
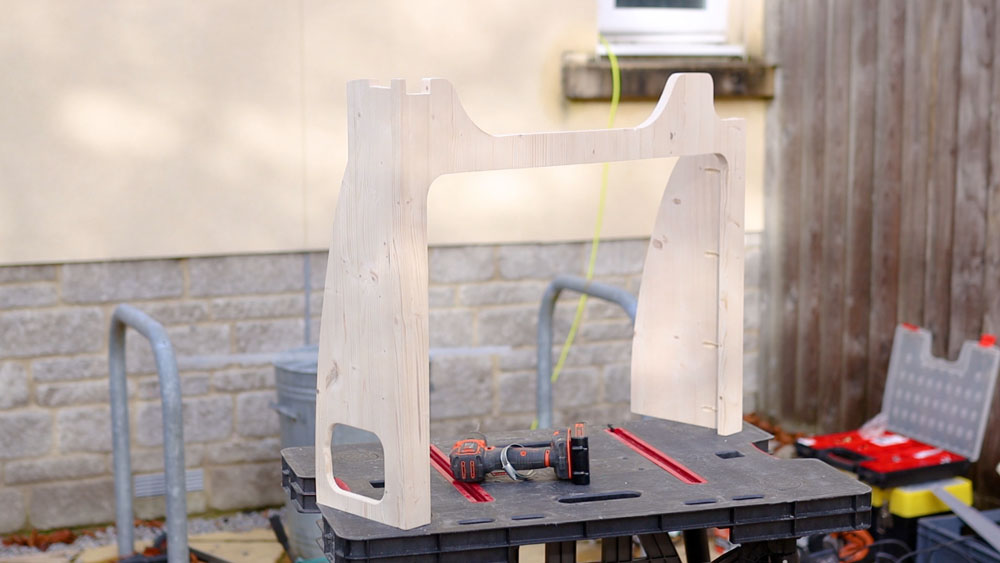
Top shelf
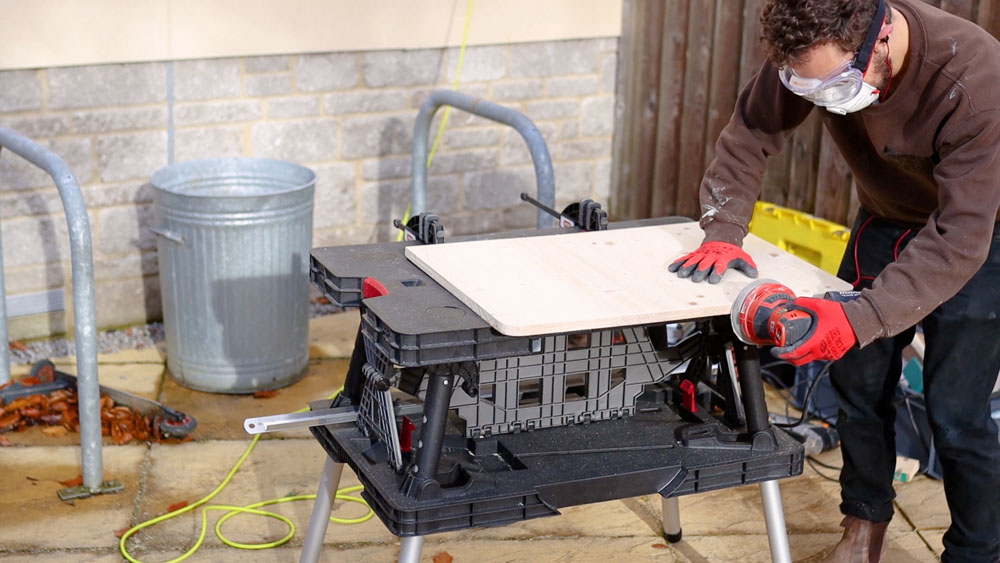
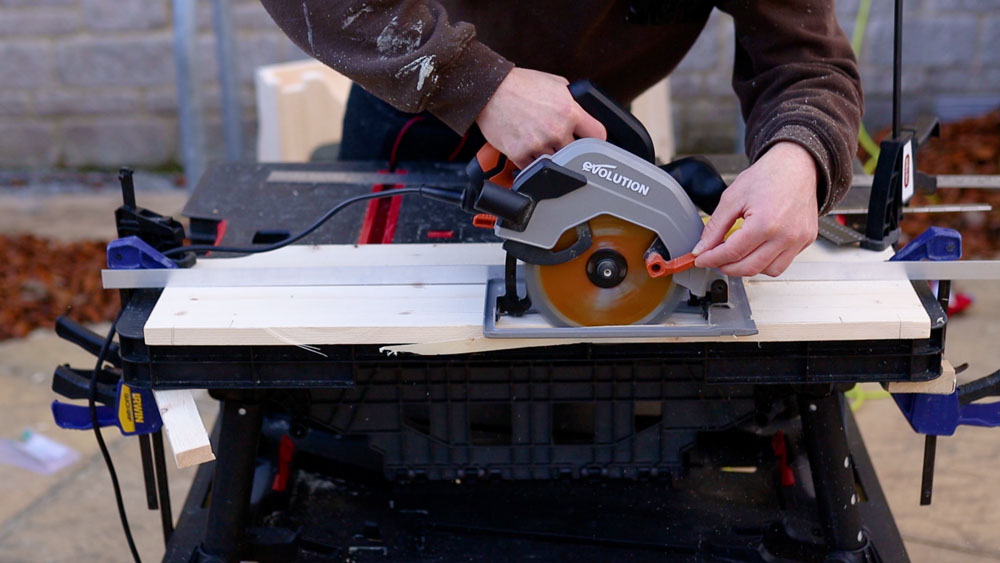
The next piece to cut was the top shelf, once again with a couple of notches removed, so that it would fit nicely in the van.
Once cut and sanded, I added pocket holes and screwed it into the unit, making the bottom of the shelf was flush with the top of the table opening.
Upper brace
This shelf would have the addition of a back piece, which I’m calling the ‘Upper Brace’ and this is would allow an area for the table to be attached to the van wall.
Due to the corners of the van, the back piece didn’t stretch all the way along, but as long as it met the screw threads in the van walls then this didn’t matter.

I set about screwing this in, and then could begin work on the base.
The base
I created the base in the same way as the top shelf and with a bit of refinement got it to a good fit.
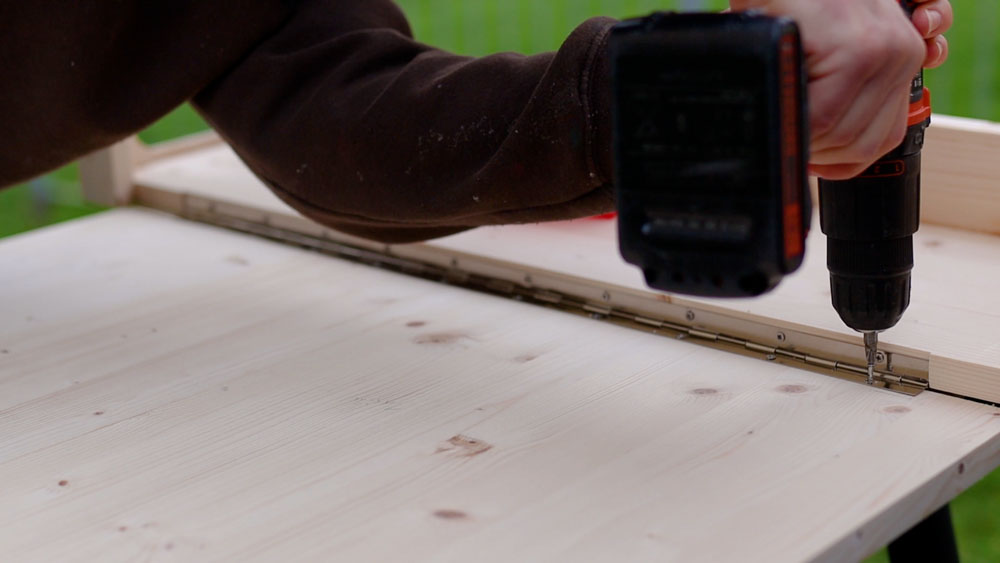
It was time to cut a recess for my piano hinge to sit in and this is so when the table is folded up it sits flush with the rest of the front.
I chose a piano hinge as I had already used one on my wheel arch storage box and so they would match.
After a plunge cut with the circular saw, I could work my way along to my mark and finish the recess off with the jigsaw.
I marked out where my screws would go, and loaded the board with pocket holes on the underside, as I figured this would be the side least likely to be seen.

With the structure of the table finally coming together, I could attach the hinge into the front recess.
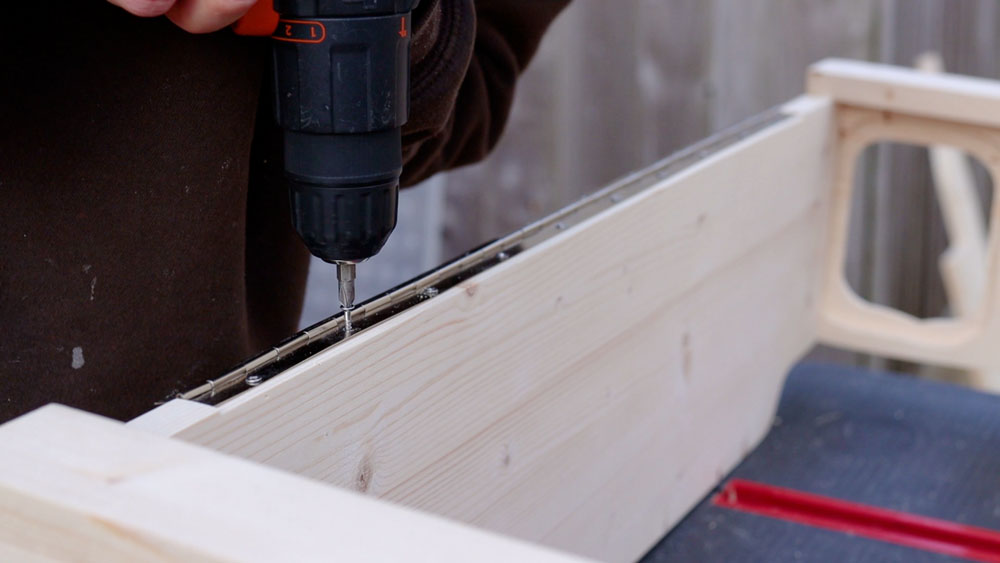
I marked out, pre-drilled and screwed in the two further screw holes to make sure I had it straight, and then continued to do the same with the rest of the screws.
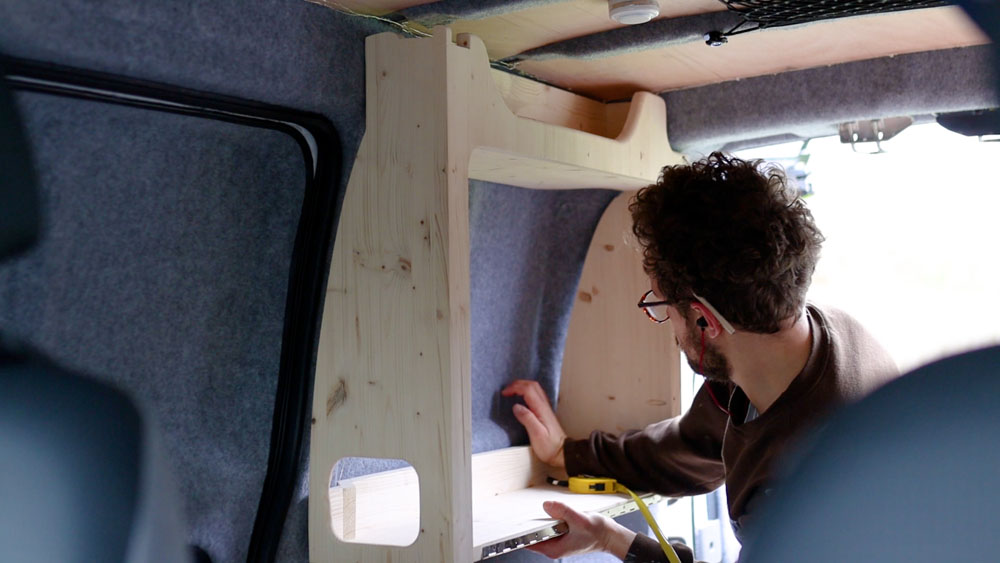
Lower brace
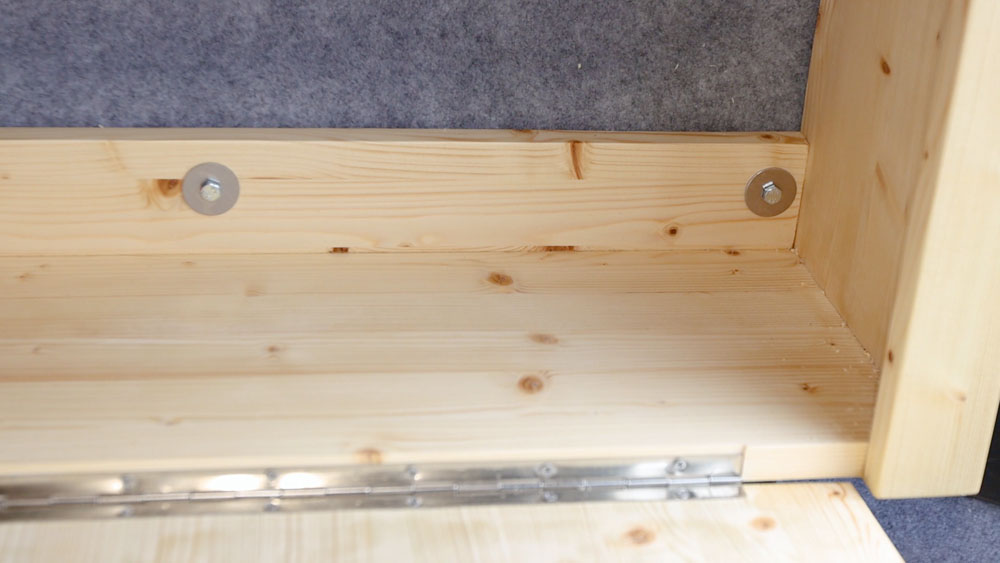
I needed to fix the lower area of the unit to the van wall, and so another brace was needed. This time, it required an angled edge to accommodate the corner of the van.
With the bar screwed into the base, I put two bolts into the threads in the van and put some pencil lead on their heads.
I then held the unit up, made sure it was level and gave a couple of sharp taps to the bolts to transfer a mark to where I should drill my holes, which I proceeded to do.
Final prep
I was now at a stage where I could take care of a few final bits before sanding and varnishing.
I did these before attaching the table as it would be much easier without the table in the way.
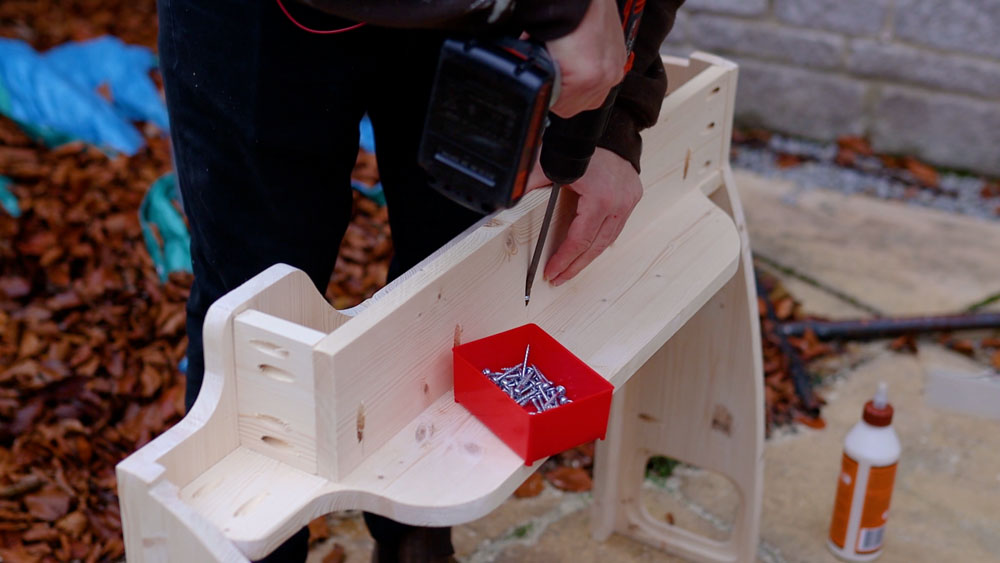
I undid the pocket holes, and got some wood glue in the joints and then, after screwing it all back together, got some 9mm diameter dowel plugs that I had pre-cut, to fill the pocket holes in places where they might be seen, like the top shelf, inside the side the unit and on the base.
For any plugs that didn’t want to go in, I gave a light tap with a hammer and, once the glue had dried, I sanded them down flush with the wood.

The Table
I was now ready to attach the table, so I carefully aligned it, then fixed it from one point on each end of the hinge to get it level before fully attaching it.
It was a good fit overall, though the corners were a little tight, which I had expected, so I fitted the rest of the screws before taking some time to work on the table edges and make sure they gave a good fit.
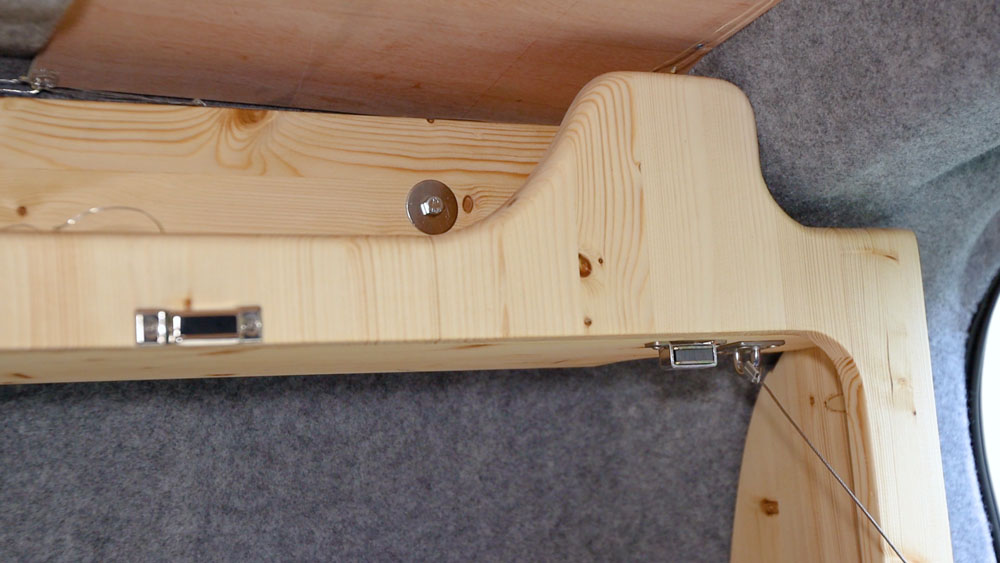
I could then attach a couple of magnets – and these are the same ones I used on my wheel arch storage box, which each have a 6kg pull.
Once aligned, I drilled pilot holes, then carefully screwed them in and they do a brilliant job of holding the table in place, and can be adjusted to get the table sitting at the right depth.
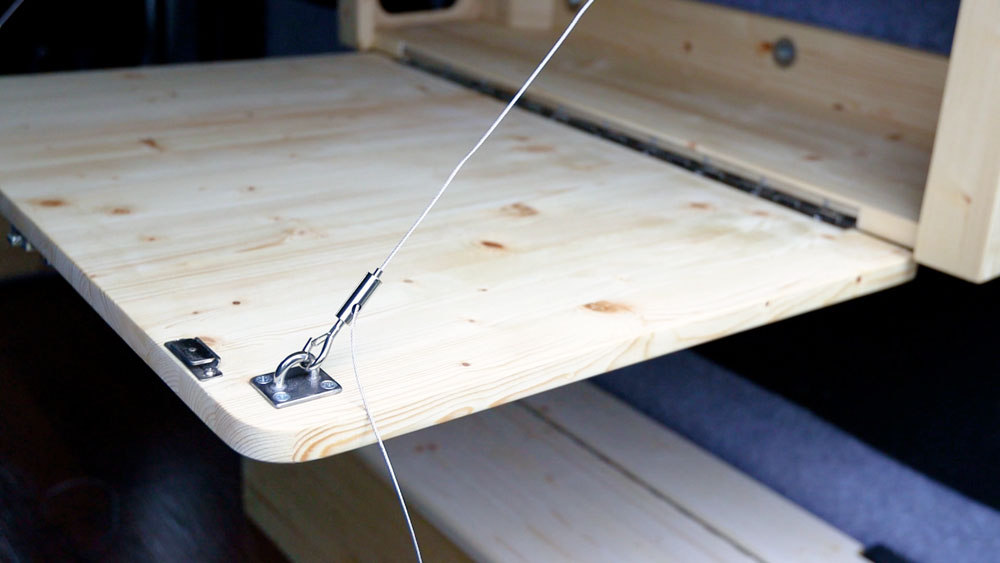
I then attached these eye plates using the same method.

I’ve been so impressed with the strength and support given to my previous van table, which used ropes from the ceiling, that I wanted to incorporate and updated version of this into the new table.
I looked at nearly every possible way of supporting a table, including folding shelf brackets, fold-out arms and piston stays.
Though it would have been nice not to have these attachments and wires, I’ve never found them to be ‘in the way’ and if I’m going to be cooking on this table, then I want the strongest possible support for it.
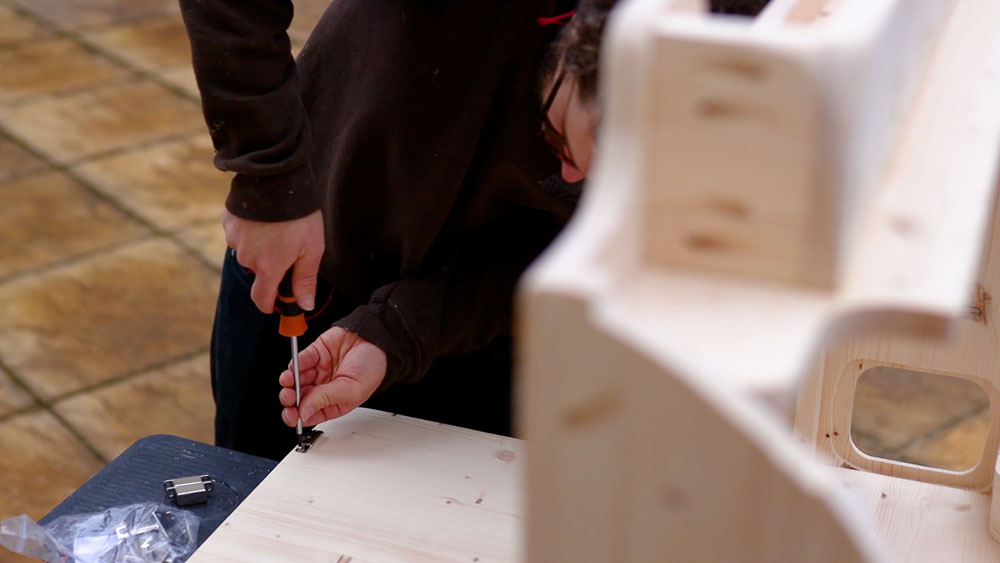
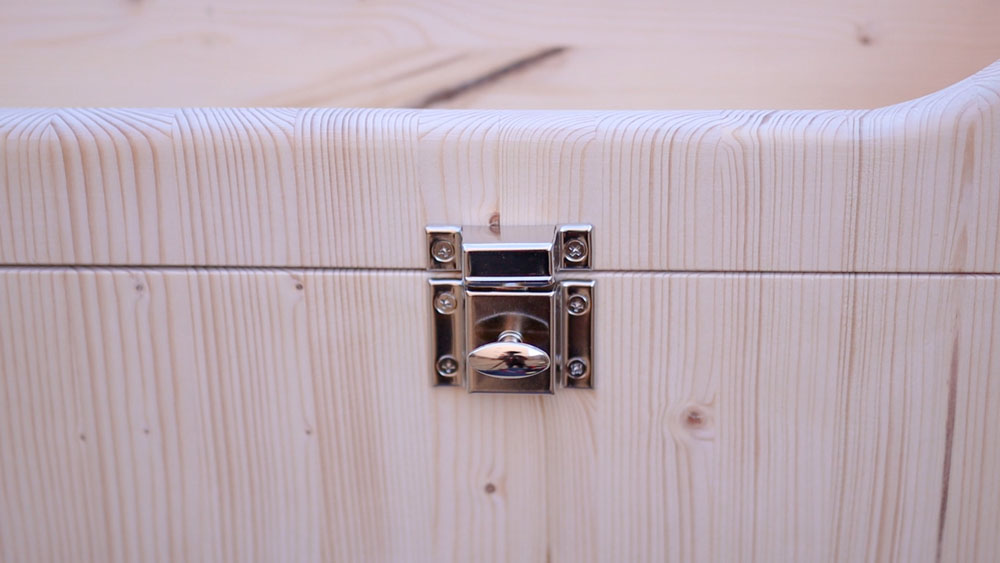
I gave the table a final sand and went over all the edges to take care of any splinters, and added a latch to the front. Though the magnets are very strong, I need the latch to ensure that the door doesn’t fall open under any circumstances, and it all provides a handle with which to pull the open down.
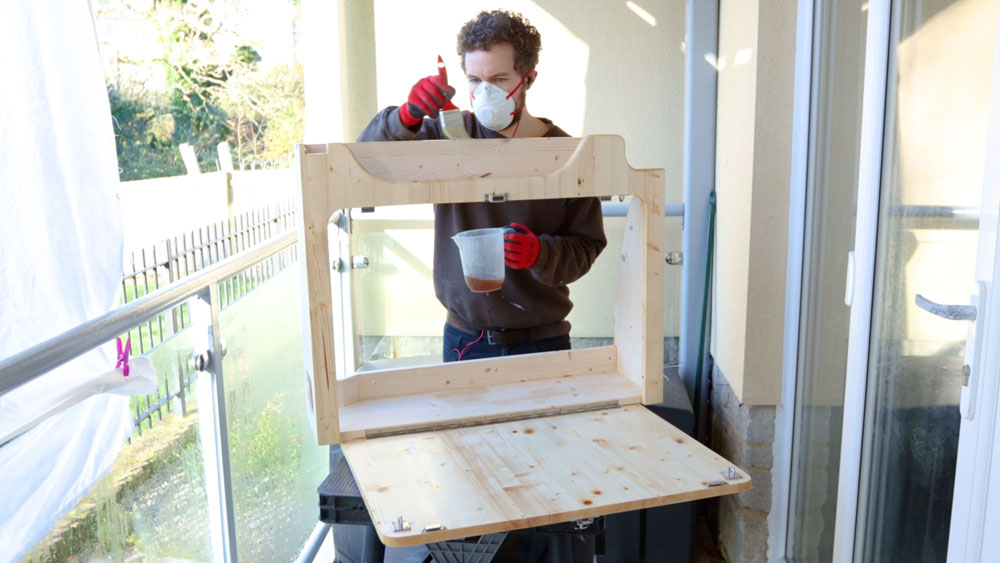
Finally, I gave the whole unit 3 coats of polyurethane varnish to protect the wood, and sanded in between coats.
Installing the table
At long last I was ready to install the table in the van. For this I used all 5 of the M6 screw threads built into the wall of the van, and purchased some high tensile bolts (eBay affiliate link) that would secure it in place, along with penny washers (eBay affiliate link) to help distribute the load and protect the wood.

And the table is SOLID!
To hold the table in place, I’ve used a pair of picture hanging wires on Amazon which are really smart and have an adjustable clips on one end, which could provide handy if I’m parked up on uneven ground. Once the table was level I cut the wires shorter leaving and a short length extra.

With the table secure, I could add the battery, and despite the wonky edge, it works really well. It’s great to finally have power built in, and easily accessible.
So that’s my new van table built and installed!
The bed fits between the storage chest below and the table with ease and plenty of room to spare, meaning that I haven’t had to compromise on my bed.
In part 2 of this video, I’ll be adding storage, a protective holder for the battery so it doesn’t slide around, as well a few other ideas I’ve had to make the space as practical as possible for the van.
If you want to see more of my camper van build in action, please CLICK HERE.
(Affiliate links which help support this website)

One response to “Building A New FOLDING VAN TABLE With STORAGE, Part 1”
[…] If you’d like to read or watch part one of my tiny camper conversion van table build, please CLICK HERE […]
LikeLike