
This article is a written account of a video from the Lens Of James YouTube channel. Watch the video above and subscribe if you like what you see!
This article contains affiliate links to relevant products I have used in my videos. By buying through these links, I receive a small percentage of the sale at no cost to you which helps me support and grow my website and YouTube channel, so I can create more content like this in the future. Thank you for your support.
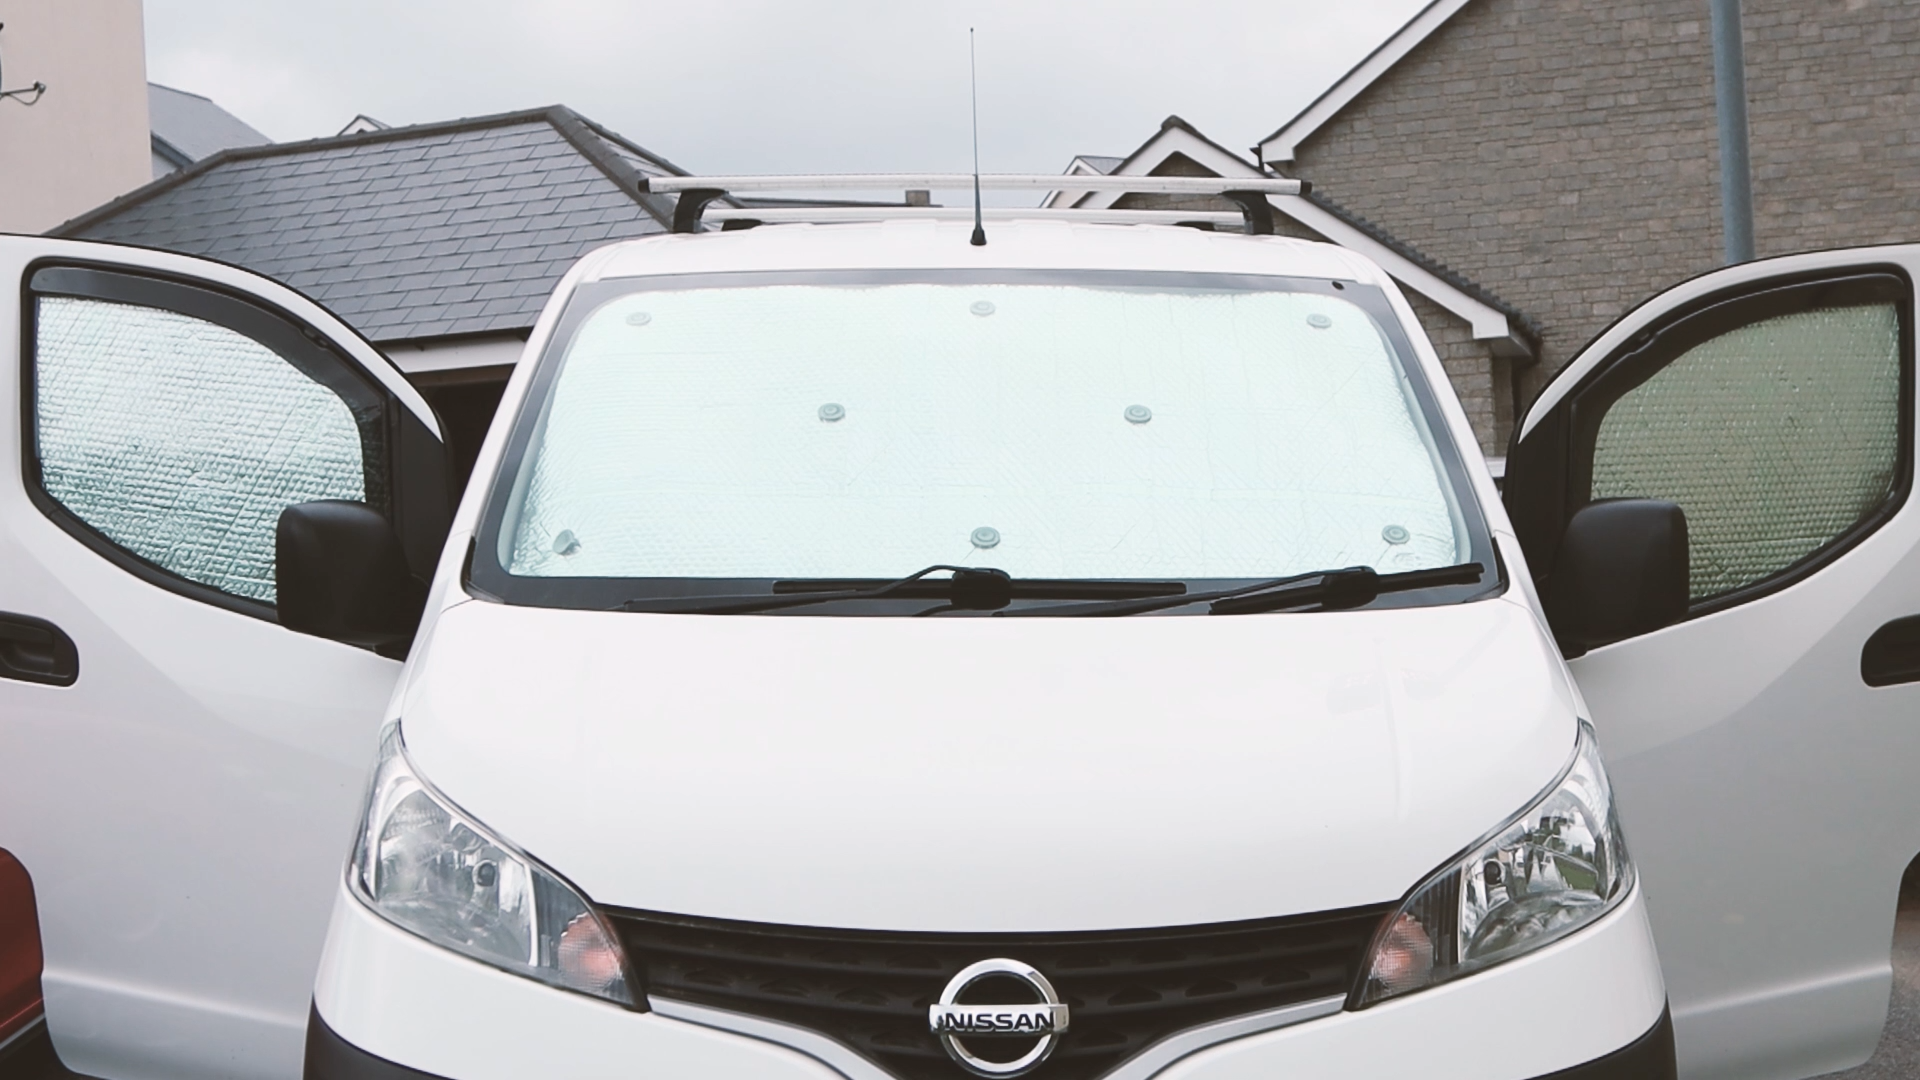
In this blog, I’ll be sharing how I made my own thermal blackout van window covers for my Nissan NV200 using leftover carpet and foil insulation, as I convert the van into a camper.
The benefits of window covers
Although I already have a curtain in the van, the purpose of these covers will be to keep condensation to a minimum when sleeping in the van, keep heat out on sunny days and darken the van whilst I’m sleeping.
Why DIY window covers?
The simple reason I chose to make window covers myself is that they’re VERY expense for what they are! The cheapest set I could find which covers the windscreen and the two large side windows (not even the small quarter glass sections!) was £80. I knew that with a bit of effort and resourcefulness I could make my own for a fraction of the cost.
Are the professional ones better than mine? Sure! £60-70 better than mine? I certainly don’t think so!
Measuring up
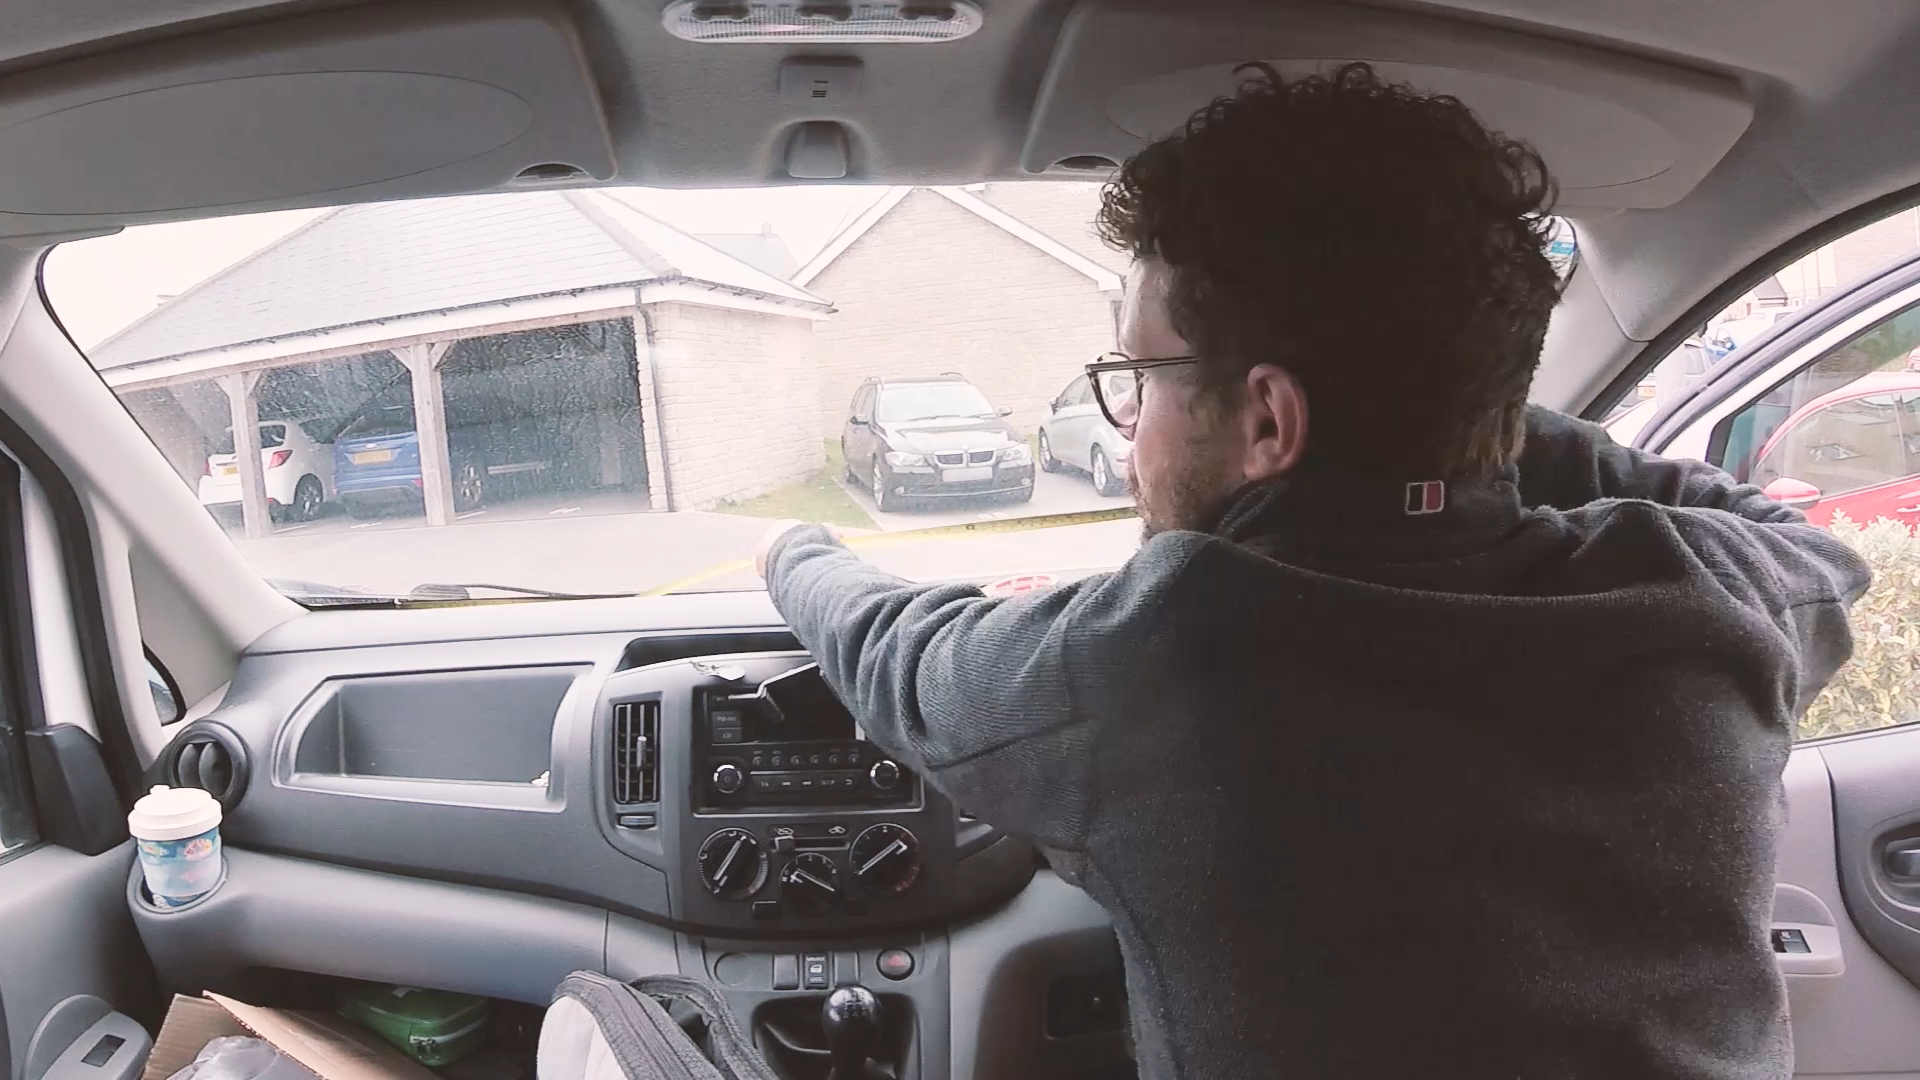
I started this project by measuring the van windscreen, the two large side windows and the two small side quarter glass windows, to make sure that I had enough materials. These are the only windows in my van, so I would be making two sets of identical side window covers and one large cover for the windscreen.
Making templates
With the windows measured, I made templates to work from. Sliding pieces of paper into the edge of the window, I worked my way round the window and, once I had covered all of it, drew the edge of the window onto the paper.


I then trimmed the edges of the paper to leave an accurate outline of the side windows and the windscreen, which I could use as my template.
Before committing to window covers, I decided to make a small prototype, consisting of 2 layers of the foil insulation glued together, with a layer of carpet glued to one side. From this I could see how it would look and how thick it would be. Happy with this test, I continued with the window covers.
Cutting the insulation pieces
I temporarily stuck the small side window template to the foil insulation with some masking tape, so I could cut round the edge. I left a small margin, as I didn’t want to undercut the template.

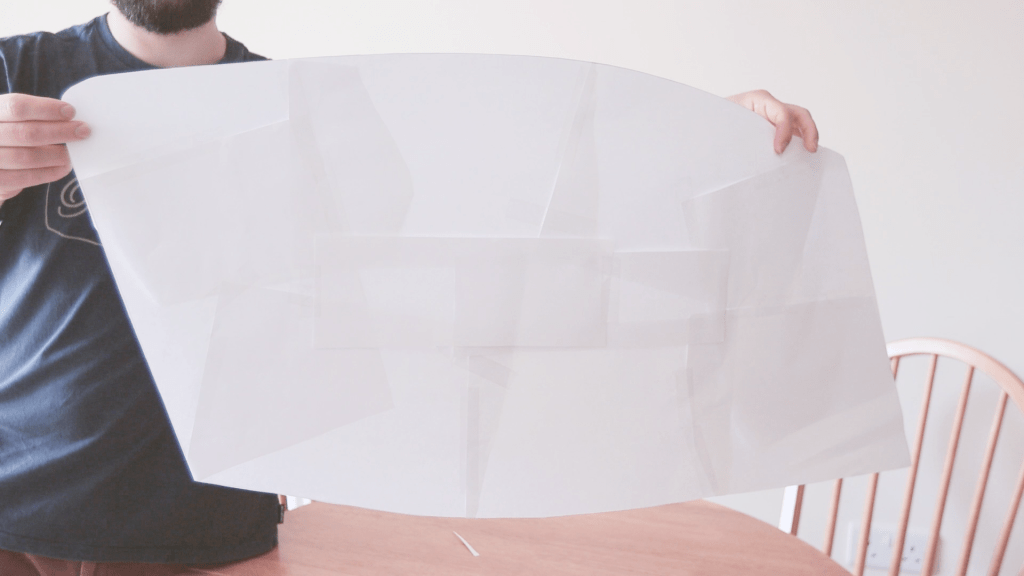
I then did the same for the windscreen. Because the Thermawrap insulation is only 60cm wide, and the NV200 windscreen is 79cm from top to bottom, I had to compromise and make up the difference with another piece of insulation. I cut it to size and taped along the side which would face the window with some aluminium foil tape to hide where the pieces join together.

Checking the fit
I could then take these two foil insulation pieces to the van to see how they fit. I marked any areas I wanted to cut by creating creases in the foil and then proceeded to trim these off.
After lining the covers against the van windows again I was finally happy with the fit. I could now cut out the second side window cover, copying it from the first one, in the knowledge that they would both fit perfectly.
We’re also on Instagram!
Check out yogi.the.van to keep up-to-date with all our adventures in the van!


Doubling up the insulation
My next step was to double up the insulation by gluing a second layer to each piece. This will help improve their insulation properties as well as strengthening the covers.
I stuck the pieces together using Trim fix high temperature contact adhesive. I left the second layer oversized and then trimmed them down to match the first layer after I had applied the glue, and this left a really nice edge.

I ran out of insulation when doubling up the second side window, so had to create a small patch to fill the gap, however I would be carpeting over this side so it would never be seen.
Click to buy your own…


(Affiliate links which help support this website)
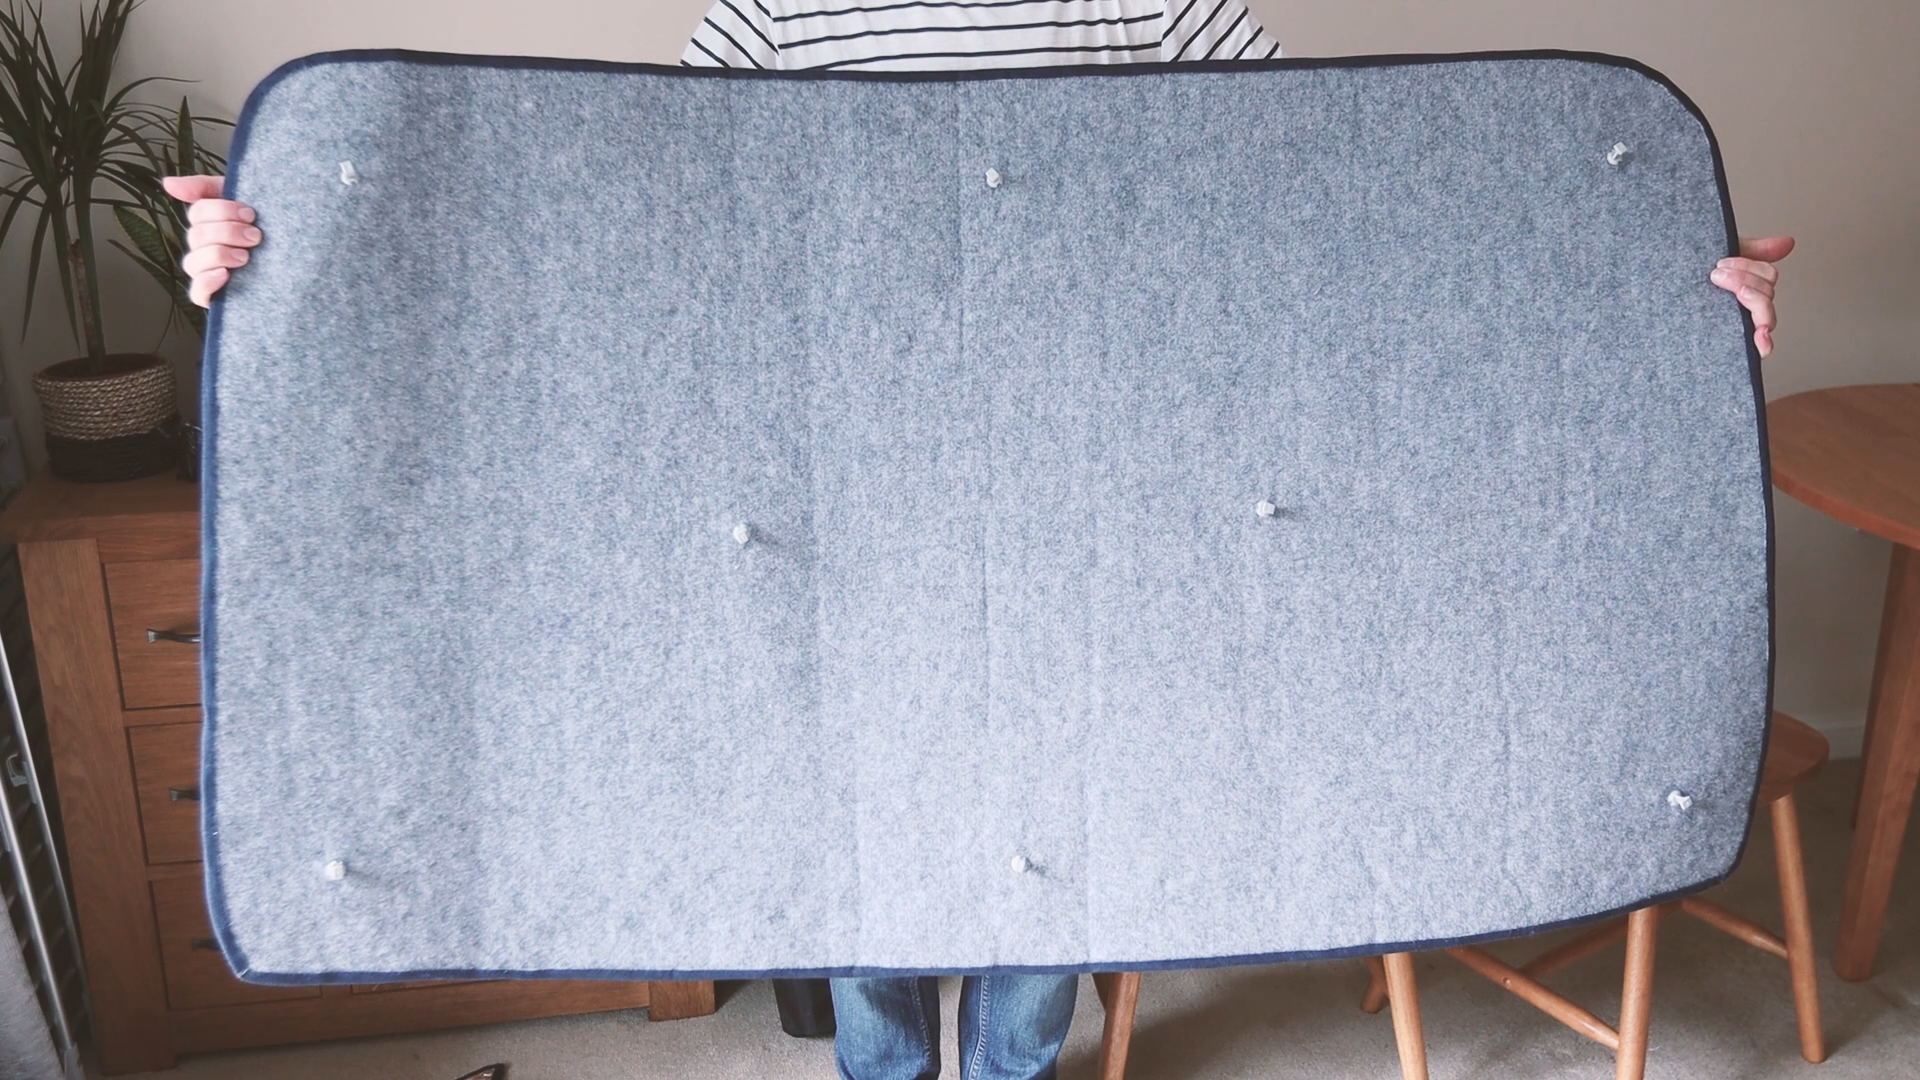
Carpeting the van window covers
With the insulation finished, I decided which edge would face the glass and began carpeting the opposite side that would face inside the van.
Whilst carpeting the inward facing side of the window covers isn’t at all necessary, I thought it would be a nice touch. I had over-ordered when I carpeted the inside of the van so this was a great way to use some of the excess.
Again, I used oversized pieces of carpet, stuck them down with Trimfix contact adhesive and trimmed the edges to match the shape of the foil insulation.
If I got any contact adhesive on the carpet, I used a bit of white spirit to wipe it off.

Having done the large side windows and the windscreen, I completed the small side windows, also known as the quarter glass, in the same way.

With these completed I took them back to the van to check the fit and trimmed them where necessary.
Creating a neat edge
I would be using 25 mm wide herringbone fabric to create a neat edge along the covers and whilst I considered sewing this edge on, as I don’t have a sewing machine it would have been a lot of work so I opted to use contact adhesive again.

In order to prevent too much over-spray, I used masking tape to create an edge on both sides of each cover and, where necessary, thickened this with scrap paper.
I sprayed contact adhesive onto both the cover edge and the fabric edge and, once the solvent had evaporated, worked my way round, carefully pressing them together for a neat finish.
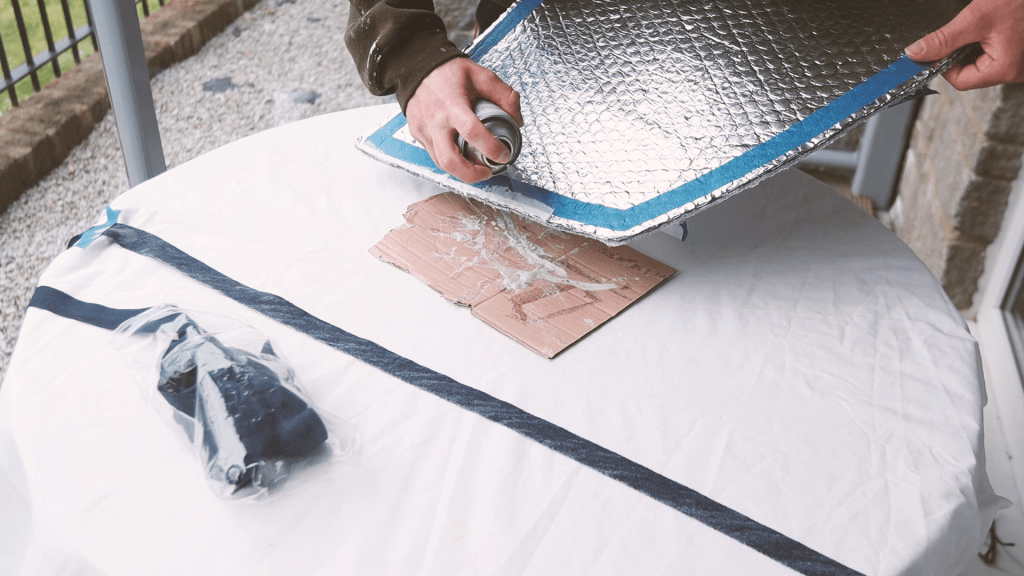
At the corners, I made cuts to get rid of the excess fabric and it worked out quite neatly. I could then turn the cover over and repeat the process to complete the edge. After removing the masking tape, I cleaned any excess glue off with white spirit.

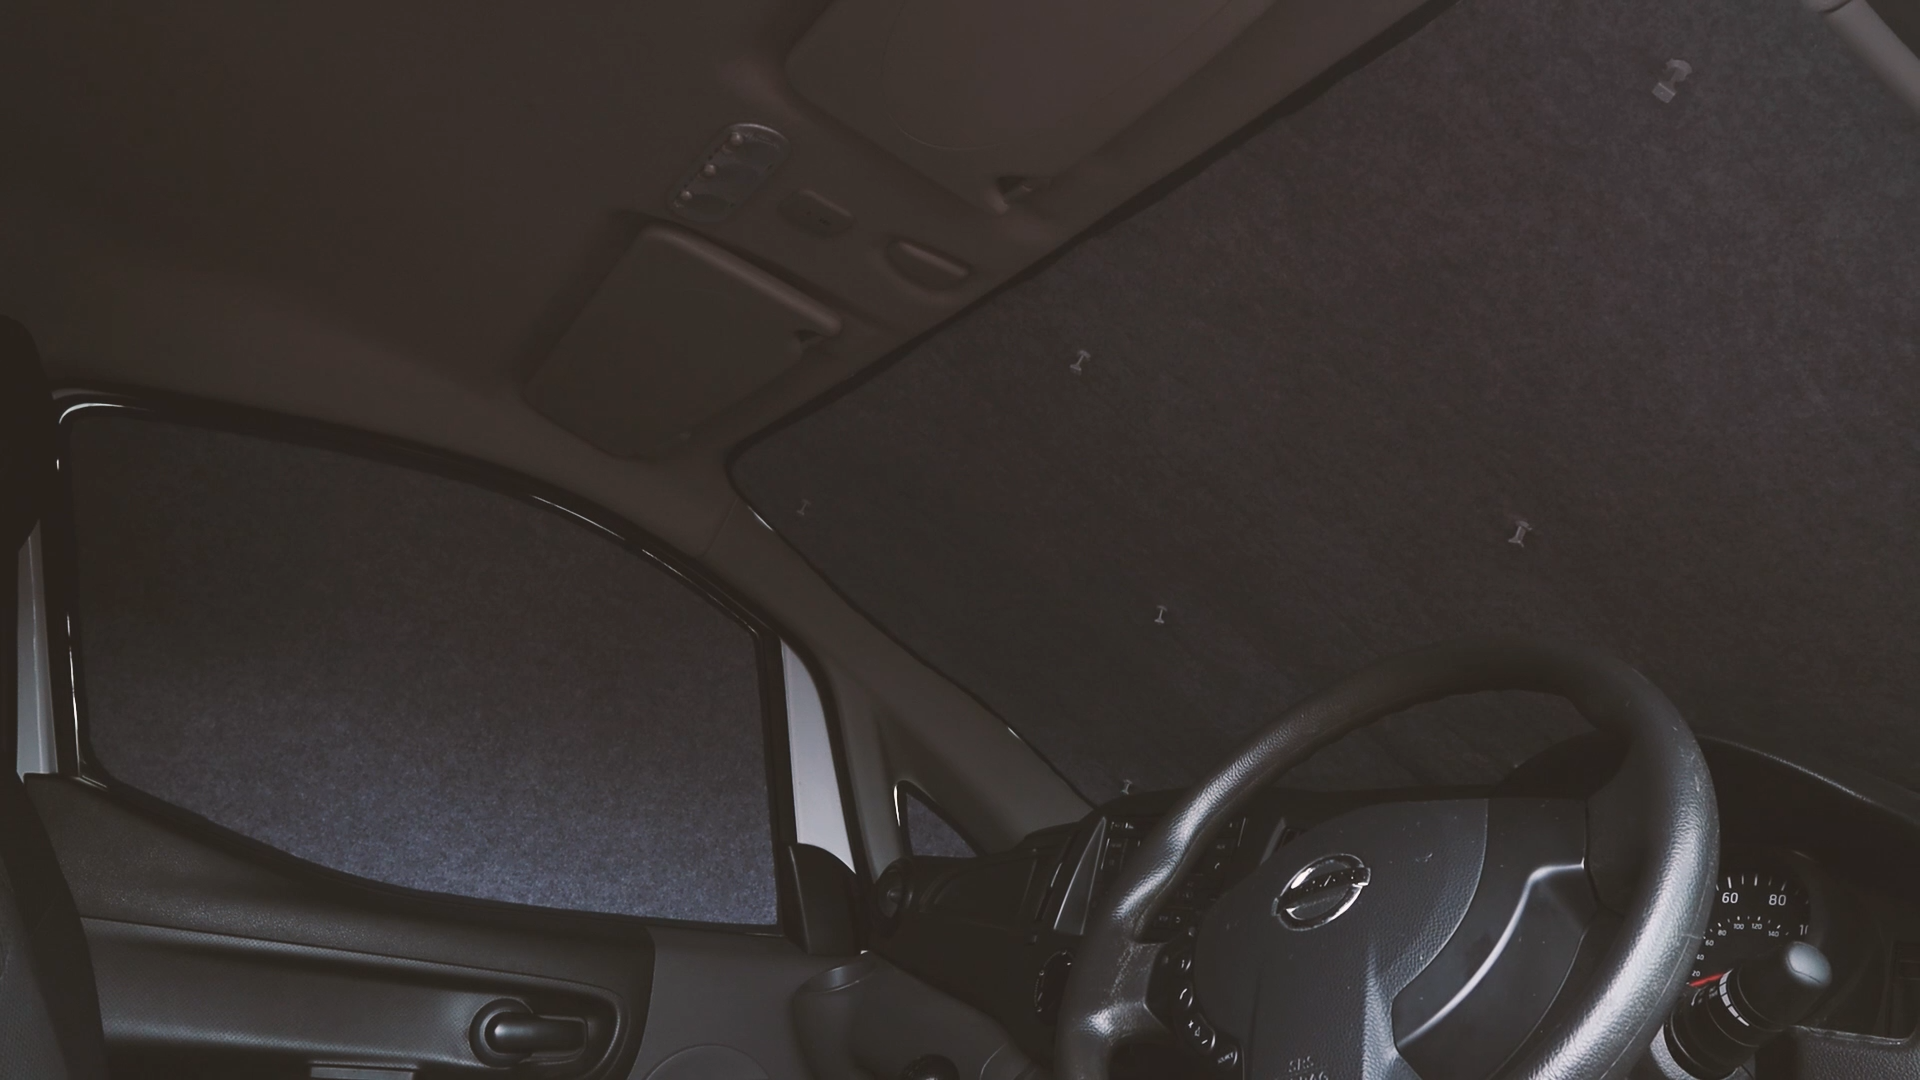
Attaching the covers to the van
With the edges complete, I could now think about attaching them to the van windows. I purchased a set of really good suction cups on eBay, and these push through the covers leaving the cup on the foil side and a small yet practical handle on the carpet side. They have a collar on the middle of the handle which covers the hole, leaving a neat look to the covers.

I started with the windscreen cover and used 8 suction cups (eBay affiliate link) in total – 3 at the top, 3 at the bottom and 2 in the centre.
Click to buy your own…


(eBay affiliate links which help support this website)
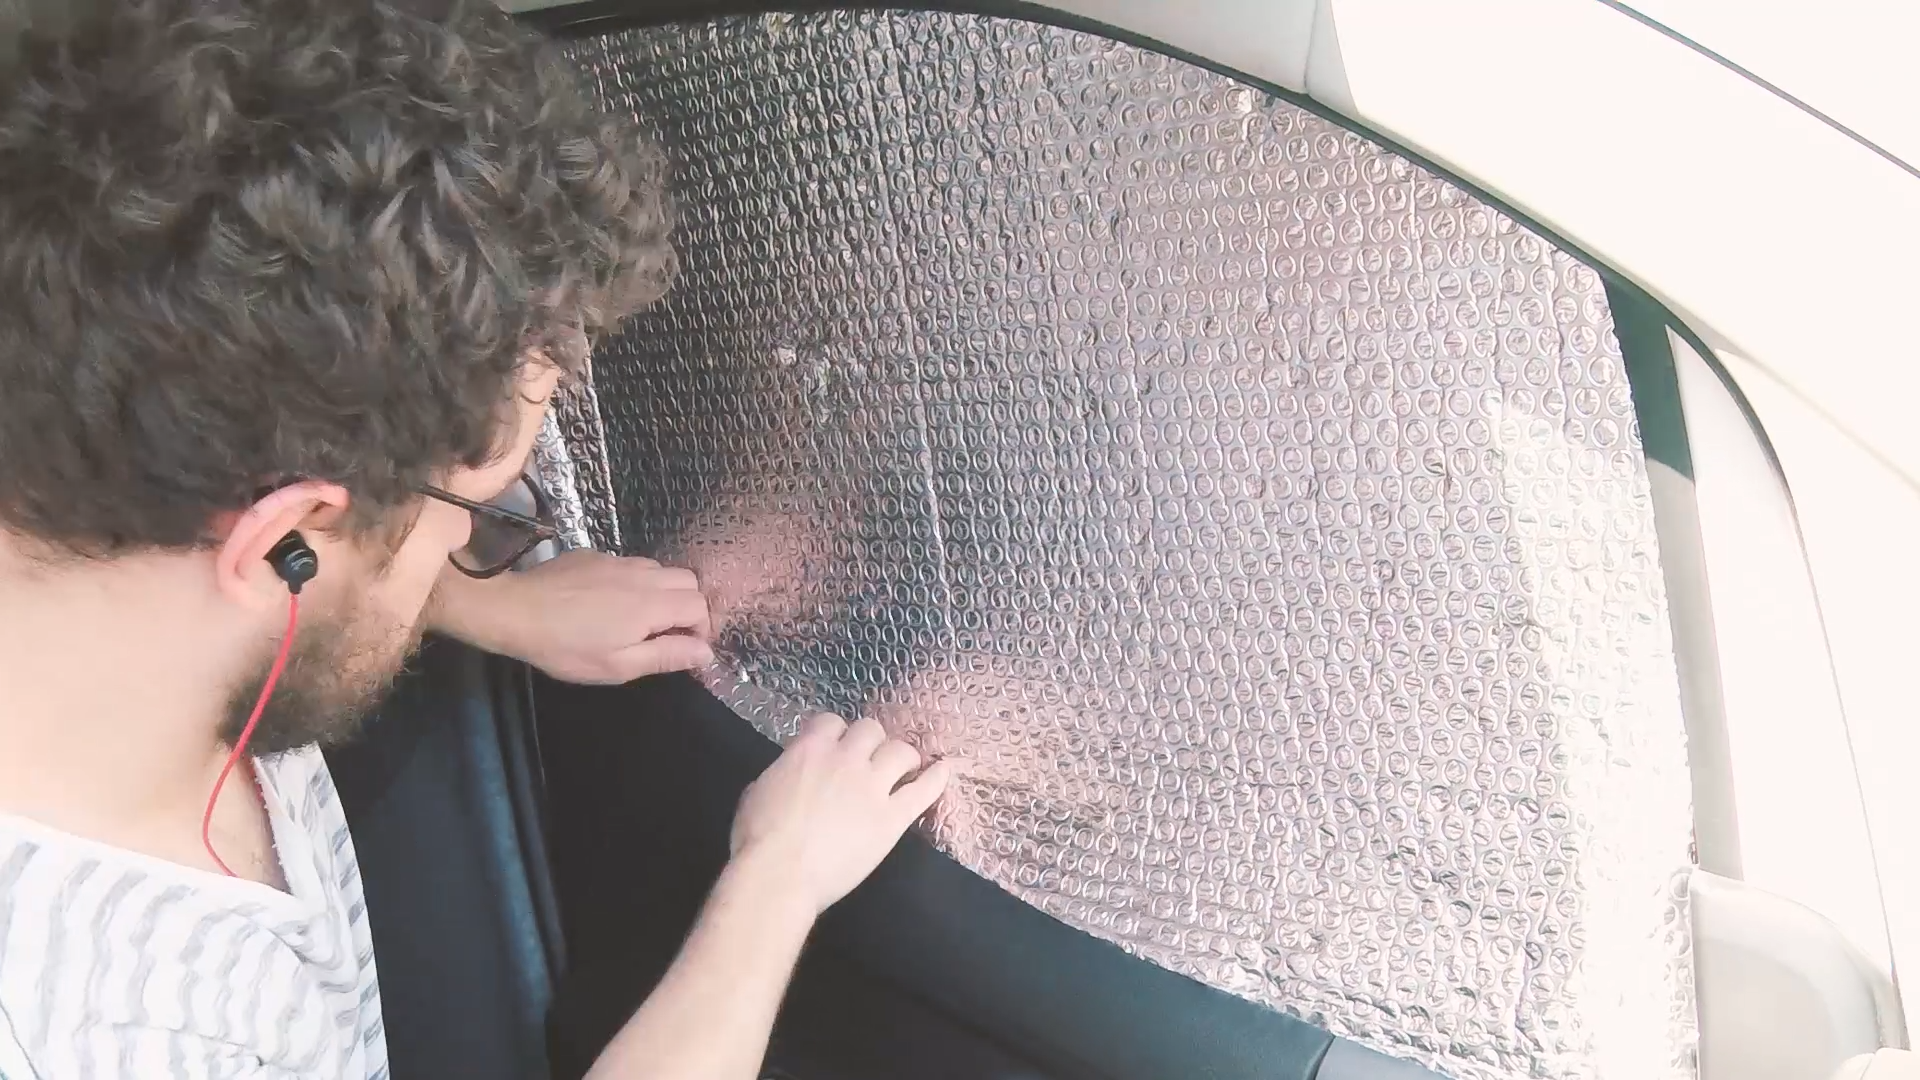
I took the cover to the van and it fitted and stuck really well. Whilst there, I realised that the side windows were rigid and a tight enough fit to stay in place by themselves, so I haven’t added any suction cups (eBay affiliate link) to them at this point. The small quarter glass covers stay in place on their own too.

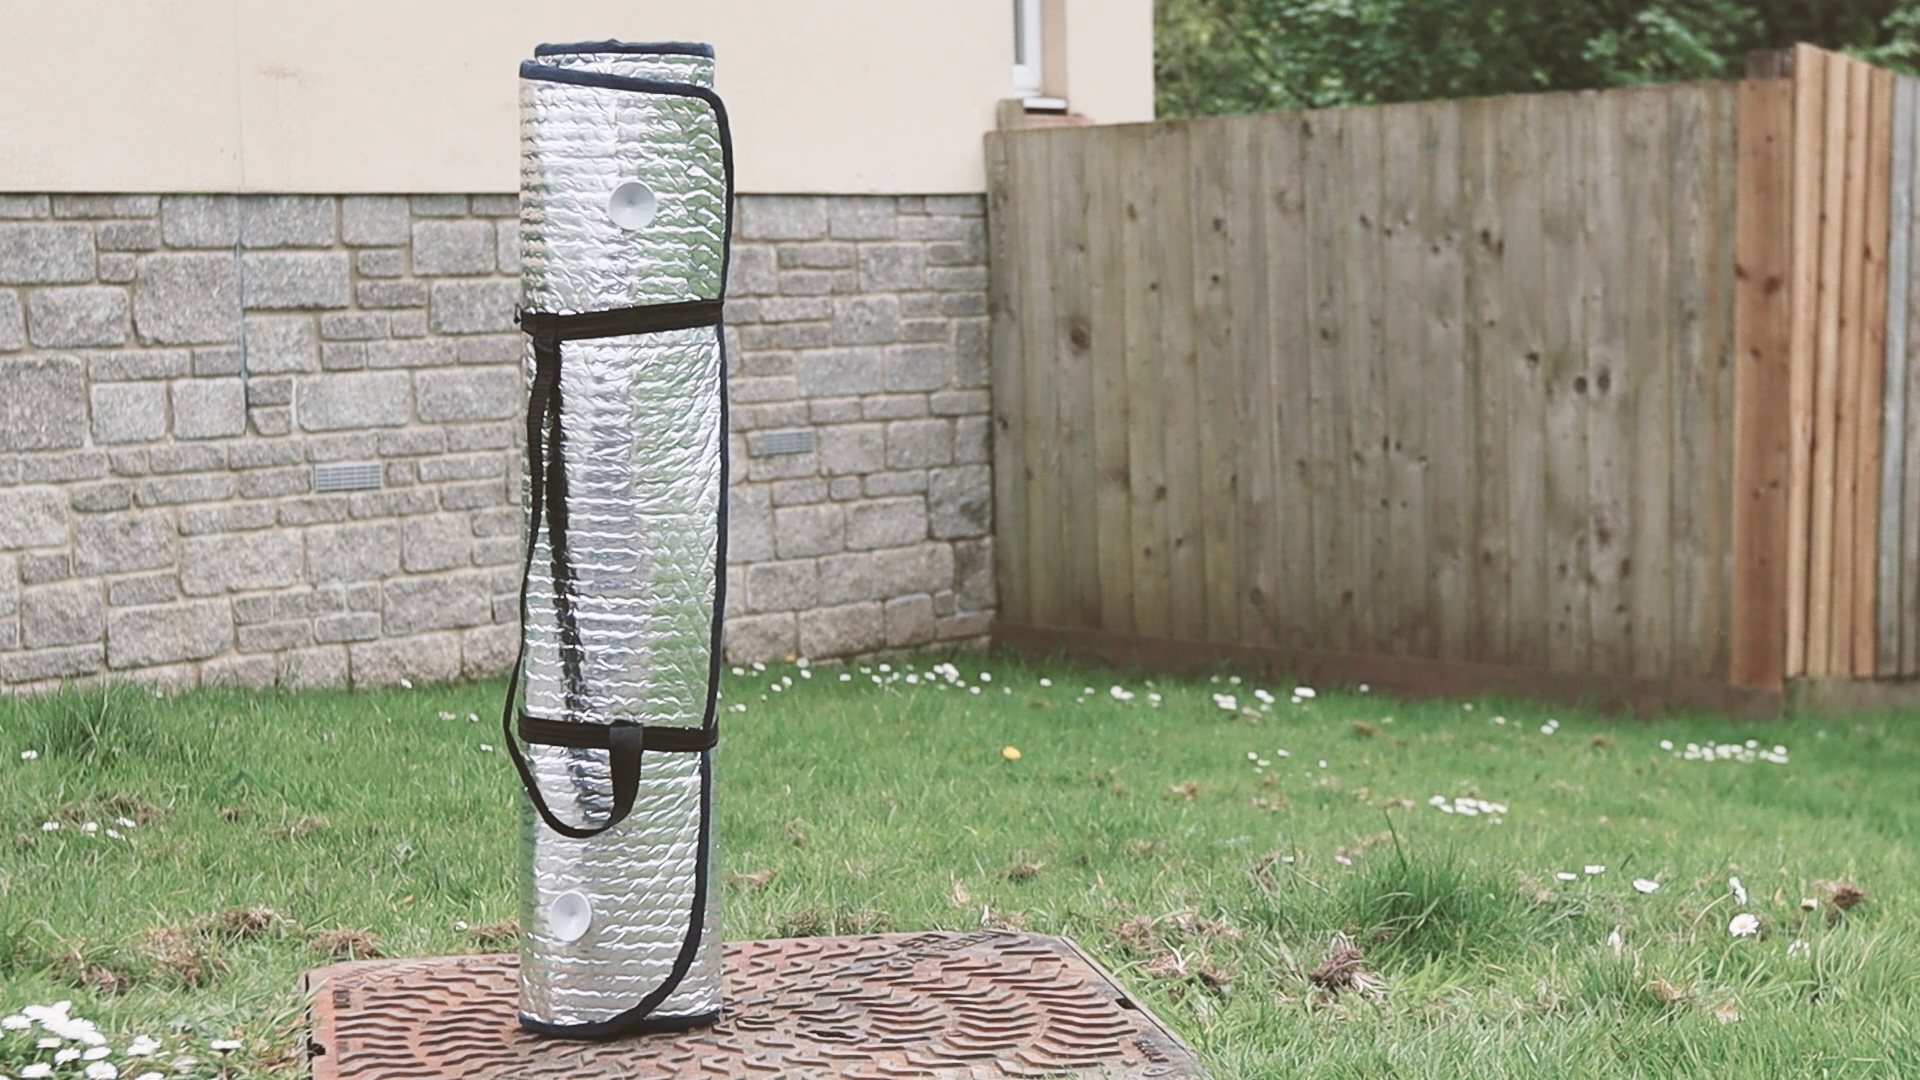
As the windscreen cover is quite large, I decided to roll it up and use a spare yoga mat strap to hold it together, which works really well and allows it to be stashed away easily when not needed.
Fitting the covers in the van
For a homemade, DIY attempt at making thermal blackout camper van window covers, I’m thrilled with the results and I’ve no doubt that the covers will do a great job at keeping the condensation to a minimum at night and keeping the sun out during the day.


If you want to see more of my camper van build in action, please CLICK HERE.
Click to buy your own…
(Affiliate links which help support this website)

2 responses to “DIY Thermal Blackout Van Window Covers”
hi! any chance you can share a link to those suction cups? i’m having a hard time finding any that’ll attach in that way! thank you!!
LikeLike
Hi, I got mine on eBay: https://www.ebay.co.uk/itm/10-X-SUCTION-CUPS-suckers-thermal-screen-silver-blinds-thermoscreen-campervan-/184485001057?_trksid=p2349624.m46890.l49292 Thanks, James
LikeLike