
This article is a written account of a video from the Lens Of James YouTube channel. Watch the video above and subscribe if you like what you see!
This article contains affiliate links to relevant products I have used in my videos. By buying through these links, I receive a small percentage of the sale at no cost to you which helps me support and grow my website and YouTube channel, so I can create more content like this in the future. Thank you for your support.
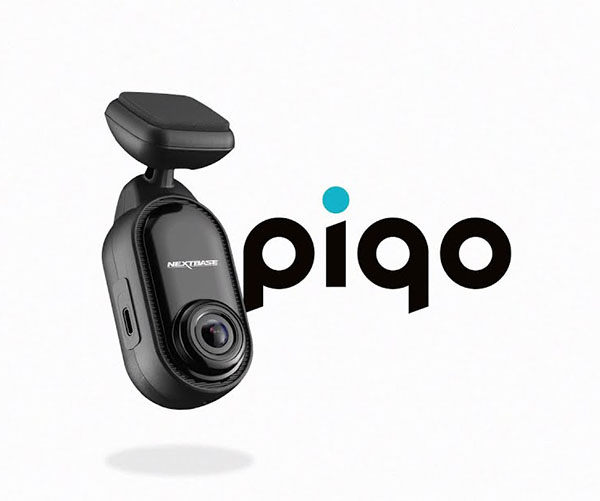
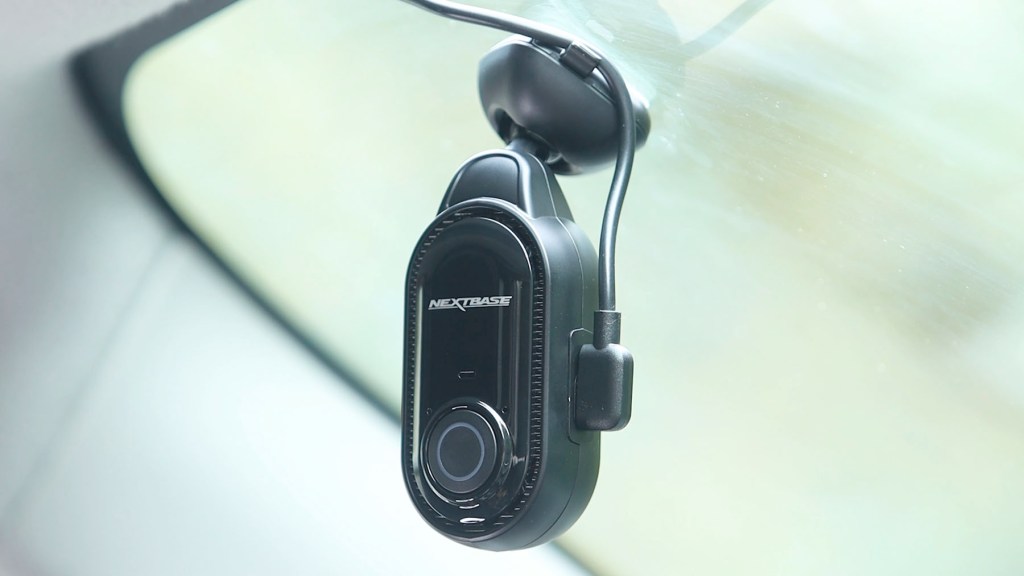
Introducing The Nextbase Piqo
Today, I’m diving into the Nextbase Piqo dash cam – a compact, powerful option for keeping an eye on the road for you, which was released by Nextbase in late 2024.


The Piqo is built on the iQ model released in 2023 which was a landmark AI dash cam which, after a number of firmware updates, is one of the best dash cams on the market.
For all its amazing features, the iQ came with a price tag so it’s understandable that Nextbase would want to make their next dash cam one which is smaller and cheaper but still packed with the exciting features.

And just so you know, Nextbase kindly provided the Piqo to make this article, though all the thoughts and opinions are my own. If you’d like to get one for yourself, I’ve put an affiliate links throughout the article.
Let’s take a closer look at what makes the Nextbase Piqo range stand out!
Click to buy your own…

(Affiliate links which help support this blog)
What Is The Piqo Dash Cam?
So what is this latest dash cam from Nextbase?
In a nutshell, the Nextbase Piqo is a single lens dash cam designed to be compact, discreet and easy to use, focusing on user-friendly technology and, most importantly, safety.
There are two models to choose: the Piqo 1K and the Piqo 2K.
The Piqo 1K has a max resolution of 2560×1080 and a 140-degree field of view, while the Piqo 2K can capture at 2560x1440p with a 145-degree field of view for those who want a bit more clarity to their footage.

Click to buy your own…
(Affiliate links which help support this blog)
Unboxing The Nextbase Piqo
Opening up the box you’ve got some accessories, the dash cam, some info and a cleaning kit.
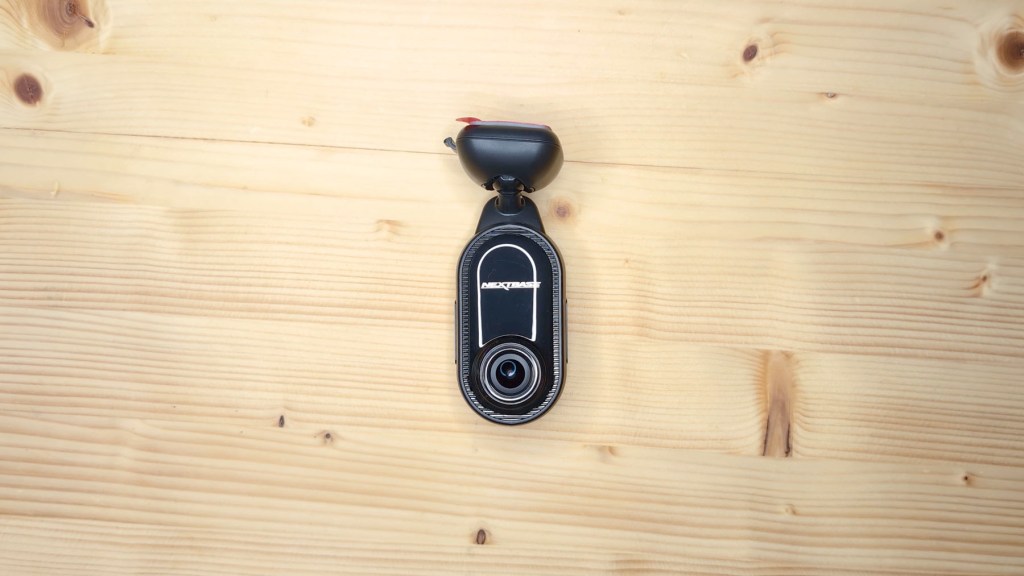
Taking the Piqo out of its box, one of the first things you’ll notice is just how compact it is, fitting in the palm of my hand.
It measures just 109mm by 40mm by 32mm, so it’s not going to be obvious or take up too much space on your windshield.
Having removed the protective plastic, it’s got a nice glossy and matt black finish to it and I think it’s quite a sleek and minimalistic dash cam.

On the first side there’s a bit button and this is for protecting your footage.
Flip it over and on the other side is the single lens that captures activities on the road.
At the top of the Piqo is its base, and it’s a fairly standard 3m sticky pad which is adjustable for getting the perfect angle.
It has a removable top to it, so the dash cam could be transferred between more than one vehicle for example.
On one edge of the dash cam is the memory card port, though you don’t get one included with the dash cam. The 1k version supports micro SD cards up to 128gb, which is around 12 hours of footage and the 2k version up to 256gb, which is around 18 hours.
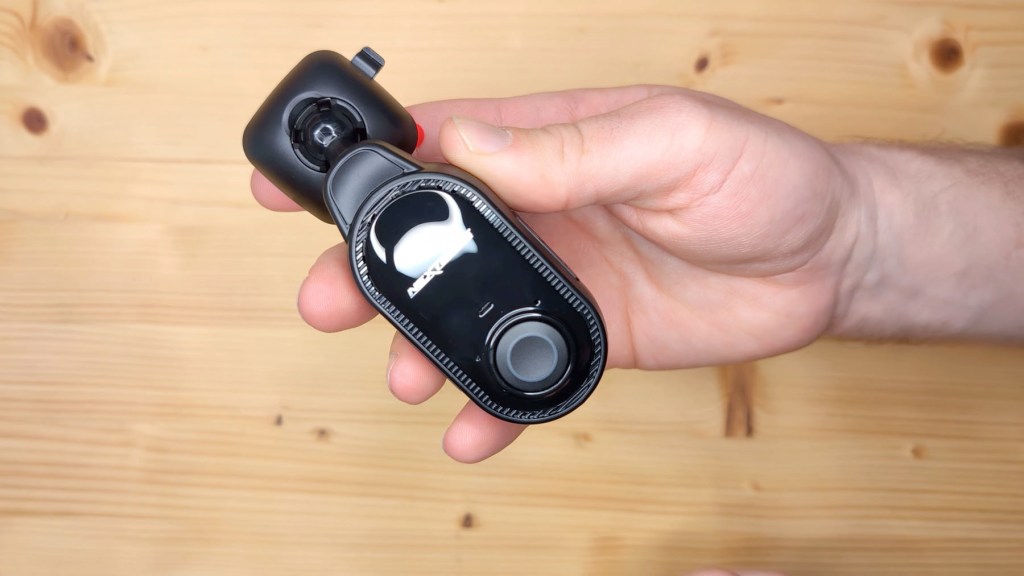

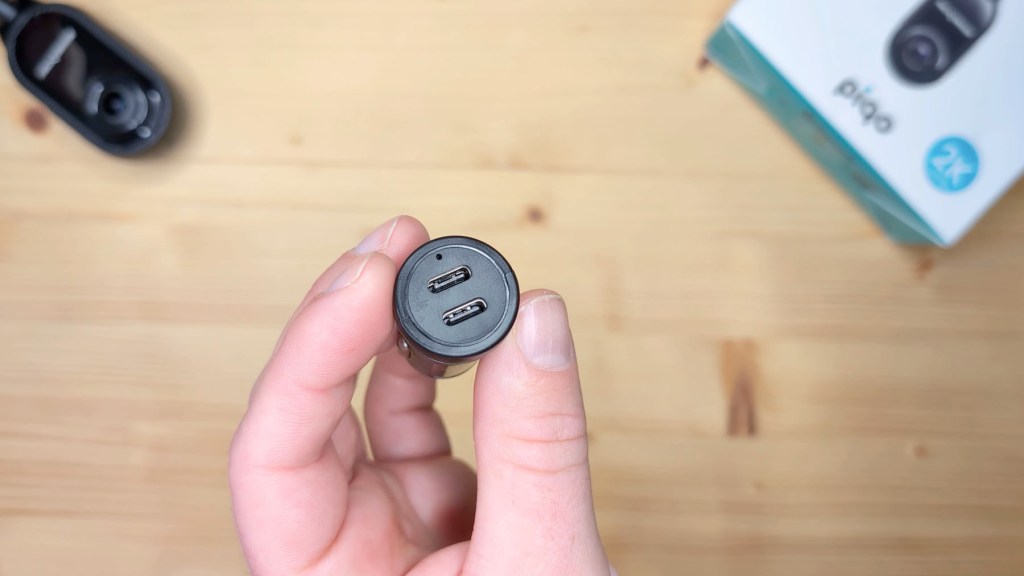
On the other side is a standard USB-C port for powering the dash cam with the included cable.
This USB-C to USB-C cable is 4m, and will be long enough for the majority of car setups.
To be able to power the Piqo from a vehicle, a 12v adapter is included, which handily has two usb-c ports so you use it to power another device too.

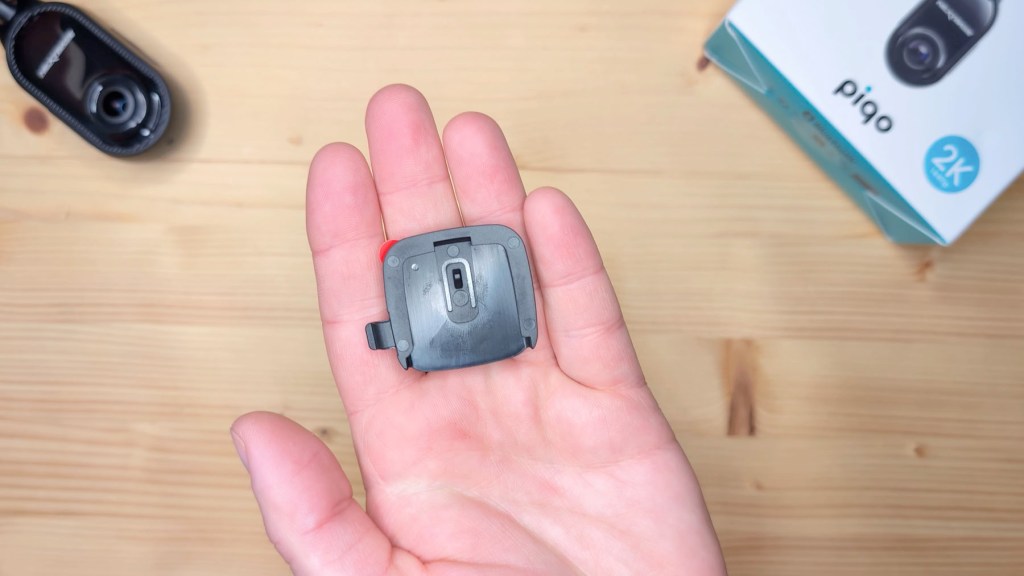
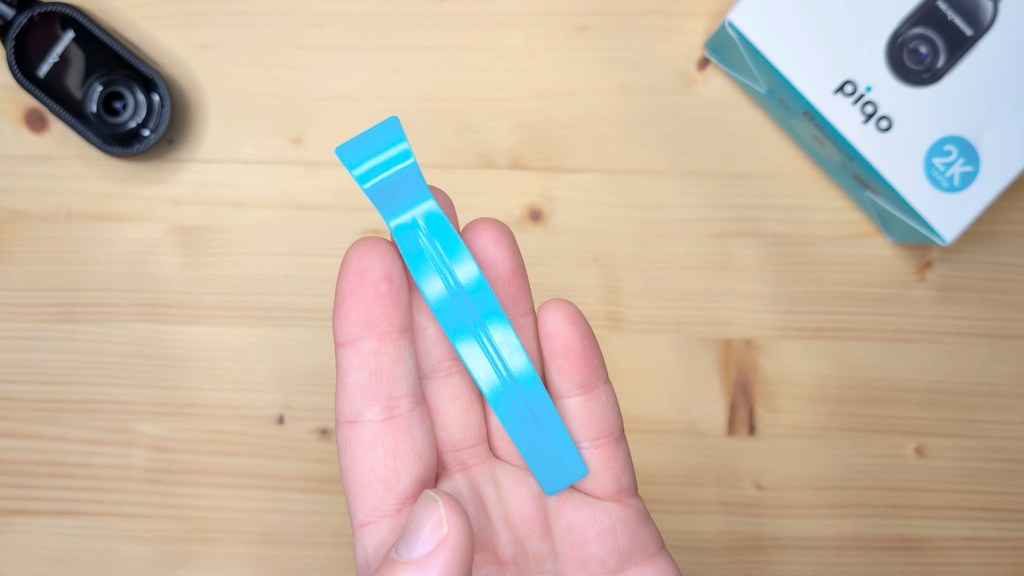

Also included in the box is a spare sticky pad mount, a glass cleaning kit which will come in handy later when I install the dash cam, a spudger for hiding cables and a couple of window stickers.
So that’s what’s in the box, let’s get installing it.
We’re also on Instagram!
Check out yogi.the.van to keep up-to-date with all our adventures in the van!


How To Install The Piqo & Cable Management
Installing the Nextbase Piqo is easy and you can definitely do it yourself.
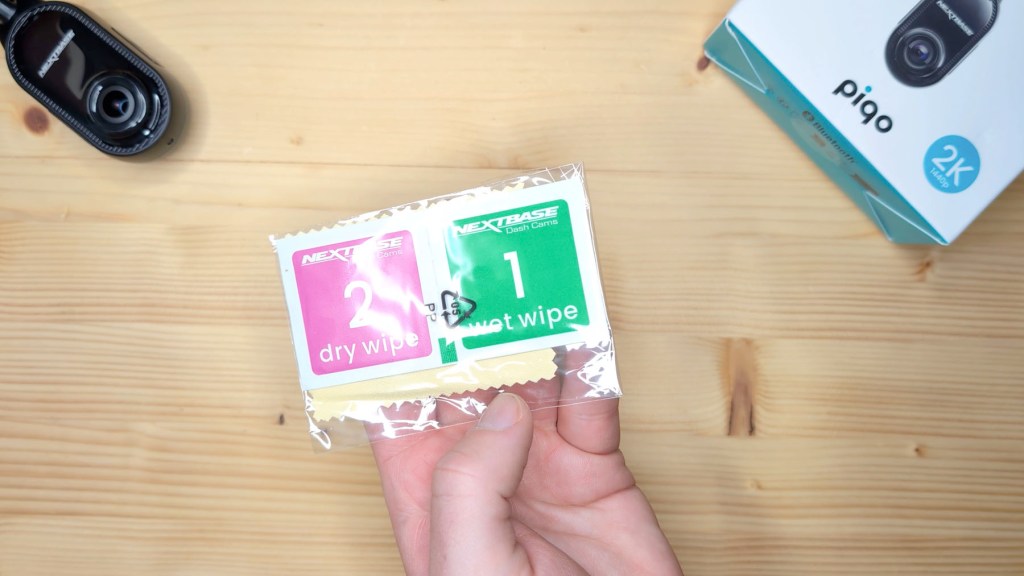
To begin, grab the glass cleaning wipes included with the dash cam. When you’ve found where you want to stick the Piqo, use the wet wipe to clean the area on the glass, then use the dry wipe to absorb any moisture. If there’s any dust remaining on the glass, a quick wipe with the cleaning cloth should have it ready to go.
Grab the dash and, with the sticky pad mount either on or detached from the Piqo, peel back the film, line it up on the glass and push firmly in place.
Because the mount swivels and turns easily, you don’t have to worry too much about getting the mount stuck perfectly straight on the window.
That’s the Piqo attached, now it’s time to power it.
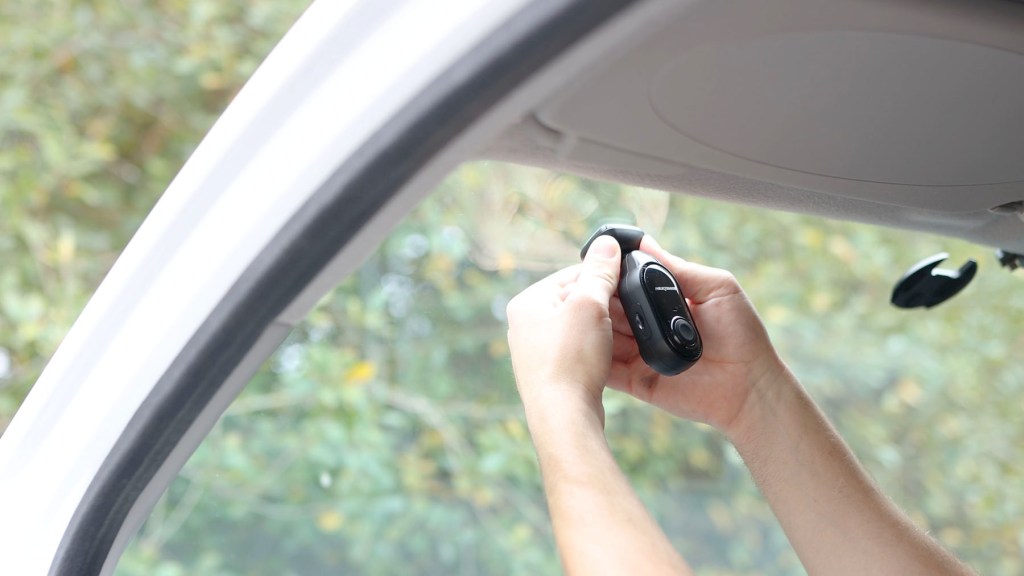

Grab the 4m usb-c power cable, and plug the L-shaped end into the dash cam, with the wire pointing upwards.
As you don’t want a cable in the way, potentially blocking visibility or getting caught on things, the best method of wiring the dash cam is hiding the cable in the vehicle’s trim.
Using the spudger tool in the box, work your way around tucking the cable away.
In my case, I can push it easily into the headliner above me, but it doesn’t go so easily into the plastic pillar covers. In most vehicles, you can remove door seals, pop off bits of the trim, feed the cables through and snap them back in place.

After feeding the cable down the pillar towards the floor, you can run the cable along the footwell towards the 12v port, which in my van is near the floor between the two seats.
Once there, grab the 12v USB-C adapter, insert it in your vehicle, plug in the power cable to the dash cam and you’re good to go – when you start the vehicle, the dash cam will begin recording.
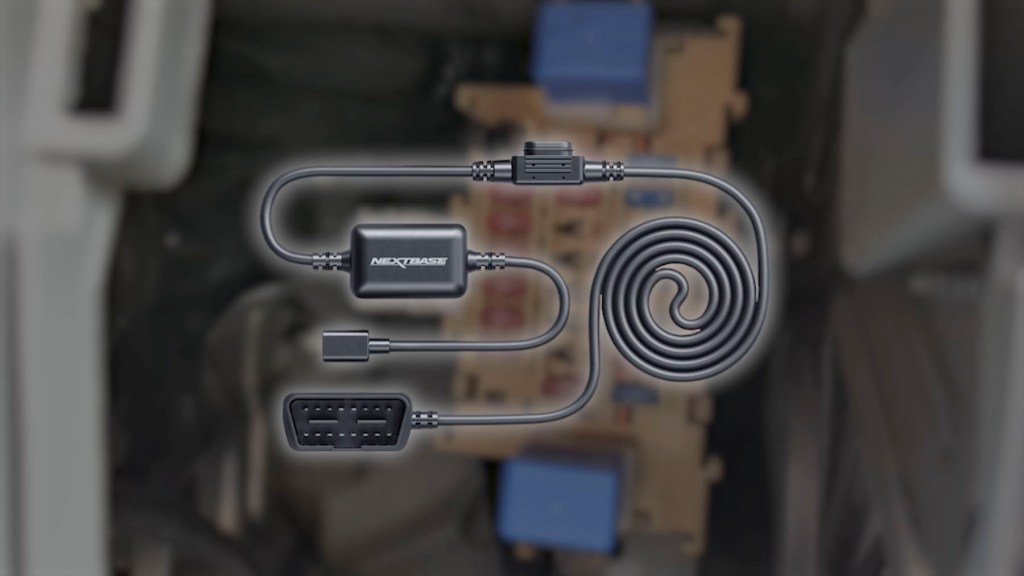
If you were going to power the Piqo via the OBD port or by hardwiring it into the van, then you’d need to locate the inside fuse box, which is usually near the steering wheel or glove box. You’ll need to purchase these cables separately but they’ll provide constant power for the dash cam which you’ll need for the smart parking mode, which I’ll go through in more detail a little later.

To align the camera, connect the dash cam to the Nextbase app, and I’ve got details on how to do that next.
Tap the live view button to see what the camera’s seeing and from there you can tilt and adjust until the Piqo’s got a good view of the road ahead, or of the cabin, depending on how you intend to use the dash cam.
One note of safety though; do ensure the dash cam doesn’t obstruct your line of sight or block any airbags. The mount should be positioned outside your direct line of sight.
Click to buy your own…
(Affiliate links which help support this blog)
Nextbase App, Features & Settings
The Nextbase Piqo uses the Nextbase app, which can be downloaded from the App or Play Stores, depending on your device and is separate to the MyNextbase and Nextbase iQ apps.
First, create an account and go through the necessary permissions.
You’ll need to be near the dash cam as it will create a local connection during the set up.
The dash cam uses 2.4GHz Wi-Fi and Bluetooth 4.1 to connect with the Nextbase app on both Android and iOS, with minimum requirements of iOS 15 and Android 8.
When your Piqo appears on the ‘choose your dash cam’ screen, tap it and follow the set up steps of inserting an SD card, ensure the power cable is connected and the Piqo is powered on, allow permissions and then hold the button on the Piqo down for 5 seconds to enter pairing mode. The led ring light will change from red to blue.
When the app finds your dash cam, tap it and it will begin connecting. When successful it may start to download the latest firmware update. It was a little slow for me, but may have just been my internet connection at the time, and once the update’s installed you’ll get steps to installing your dash cam, alignment options and cable management tips.
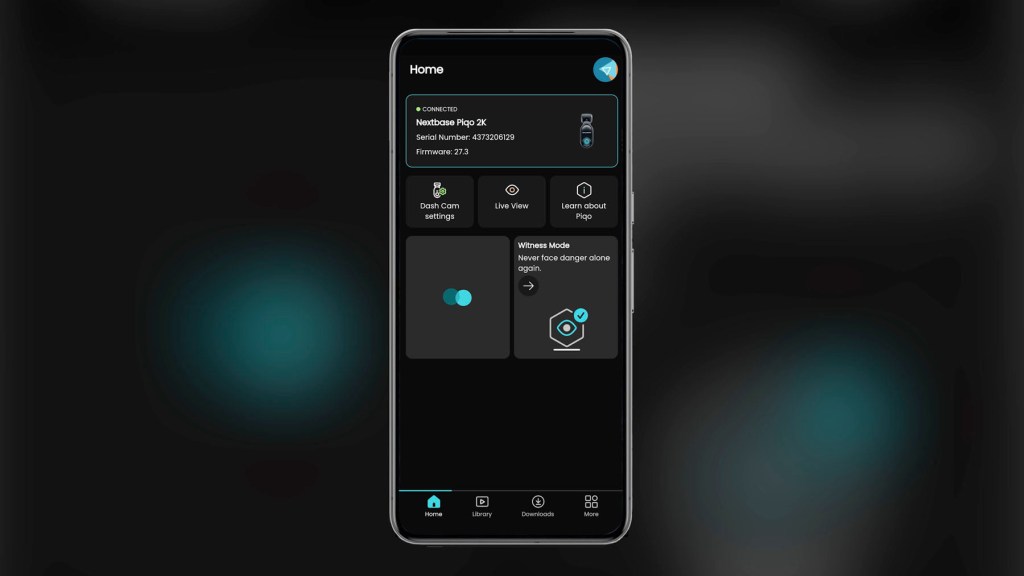
After all that, you’re set up and have access to the app.
At the top of the app you’ll see whether your dashcam is connected or not.
Below that, the dash cam settings which include
- Set up settings, where you can:
- Turn Smart Parking on or off, and you’ll need a constant power source such as a hardwire kit for this,
- Turn device sounds on and off,
- Switch speed units between miles per hour and kilometres per hour
- Adjust the impact sensitivity
- Adjust the clarity and sharpness of the video
- And change you language
- Next there’s Video Settings, where you can
- Change the video quality between 1440p, or 2k, at 30- frames per second, 1080 full hd at 60 fps or 1080 at 30 fps
- Adjust the cameras exposure plus or minus 6 stops
- Turn audio recording on or off
- Add your license plate to the footage
- And add gps, time, dash cam model and speed stamps to the footage
- Finally in settings, you can view all your dash cam information

Back on the homepage, the next button along is Live View, and tapping it will crete a wi-fi connection between your phone and the dash cam.


Once established, you can view what your dash cam sees, though as mentioned it’s only a local connection so you’ll have to be within a few metres of your dash cam to use this.
The final button on this row of the homepage is ‘Learn About Piqo’ which provides info about your dash cam.
It’s here that I have suspicions a rear view camera to match the Pico might be coming soon, as next to the Piqo tab is a tab labelled 385 which doesn’t provide any different information but the symbol certainly looks like a smaller camera. We’ll have to wait and see on that one, though there’s no reason you couldn’t buy another Piqo to watch the rear of your vehicle, though you may need a longer power cable.
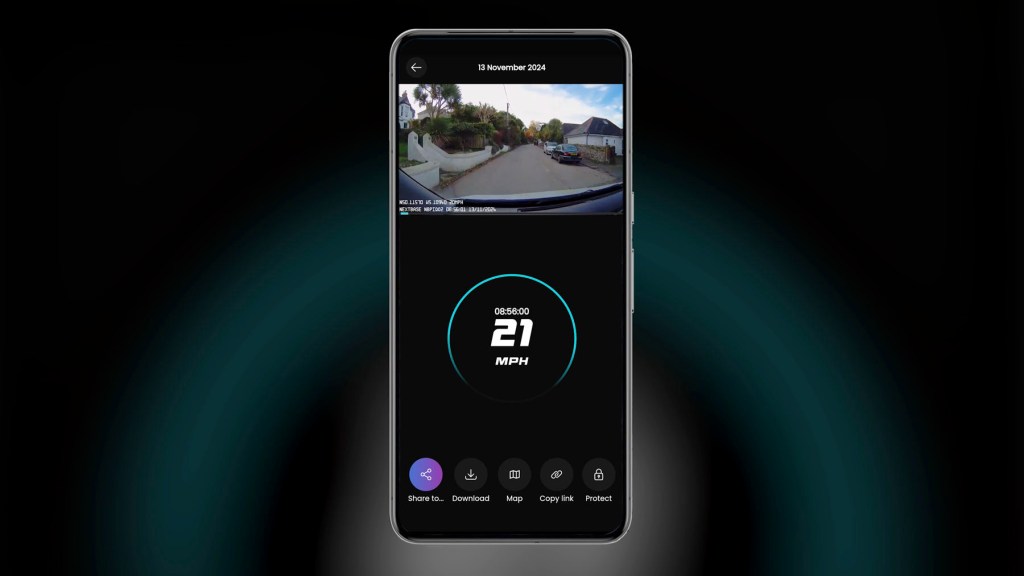
Moving to the Library button along the bottom row, you’ve got access you all the footage on your dash cam. It can take a couple of seconds to connect but your protected videos are along the top, with all other clips chronologically ordered below.
Tap a clip and while watching it you can view the speed travelled whilst it was being filmed, as well as location, time, date and file information, gps data and speed details using the menu along the bottom, as well as the ability to download the file, copy the file as a link, and protect a file so it can’t be deleted.
Click to buy your own…
(Affiliate links which help support this blog)
The third item in the bottom homepage meu is downloads, where you can see the footage downloaded to your phone.
Moving along to the bottom right corner of the homepage, you’ve got the More button which offers even more settings for the other features of the camera.
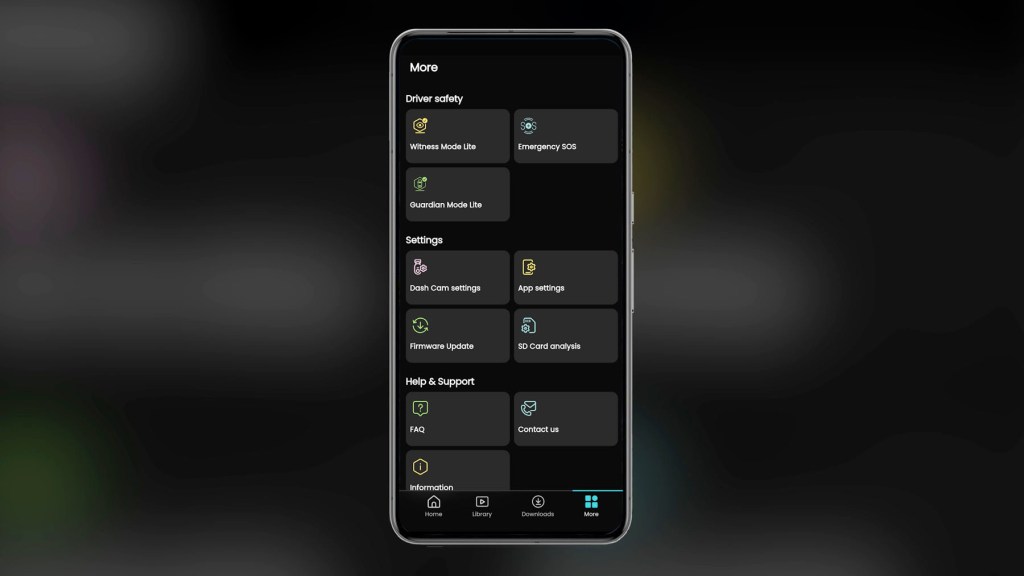
The first is Witness Mode Lite, which is where you can set up up to four people who will be sent a message with your location should you enter witness mode by saying “Hey Nexy, Witness Mode”
Next is emergency SOS which is available through the paid subscription plan and will contact the emergency services if the dash cam detects an incident.
Then there’s Guardian Lite mode which allows you to set speed and location limit and alerts and add relevant contacts who will be notified if the limits are breached.
Next is dash cam settings which we’ve already looked at and then there’s app settings where you can toggle analytics and notifications on or off.
Then there’s the option for checking and installing firmware updates, before the SD Card analysis button which shows remaining storage, information and allows you to format the card.
Finally there’s FAQ, Contact Us and Information buttons.
Nextbase Piqo Video Quality
Moving onto video quality, Nextbase are renowned for their high quality dash cams, so what can you expect from the Piqo?
The Piqo 1K has a max resolution of 2560×1080 and a 140-degree field of view, while the Piqo 2K can capture at 2560x1440p with a 145-degree field of view.

As mentioned, I have the 2k dash cam here and it shoots good footage, but is perhaps compressed a little bit more than other models I’ve used. That said, number plates and important detail remain visible which is what really matters and dash cam manufacturers will probably always be in a battle to capture the most detail in the smallest file size possible.
Both models use omnivision sensors, which are known for their reliability and performance under various lighting conditions. While there isn’t any dedicated night-vision support, the sensors still cope with dark or poor visibility conditions well.
As is standard for dash cams, the Piqo uses loop recording, which overwrites the oldest footage when the memory card fills up, unless the footage is protected, such as if you’ve tapped the big button or an impact has been automatically protected by the dash cam.


How Much Does The Piqo Cost?
Nextbase offers two price points with the Piqo series. At the time of recording, the Piqo 1K model retails at around £100 or $130, while the Piqo 2K is priced at about £120 or $150.
Once you’ve bought the Piqo, there are also two subscription plan options to choose from.
The first is completely free and gets you all of the features I mentioned earlier, except Emergency SOS.
The paid subscription is £2.99 a month or £29.99 a year, and adds Emergency SOS as well as 180 Days Cloud Storage, up from the 30 days included with the free plan, and an additional 2 years warranty.
Ultimately, you can get along very well with just the free option and there’s really only the one feature that you’d be missing out on.
Firmware updates are regularly available for each plan, so you aren’t stuck with the version of the Piqo you buy and improvements can be made during your ownership of the dash cam.
Should You Buy The Nextbase Piqo?
The Nextbase Piqo is a fantastic little dash cam that definitely stands on the shoulders of its groundbreaking cousin, the iQ, taking the best features and condensing them into a smaller, more affordable package.
It’s discreet on your windscreen and the 1k or 2k options give flexibility of price with video quality to match. Whilst a great option for most people, I think it could also be ideal for company cars or keeping an eye on young drivers, as you can’t change the settings of the dash cam without using the app, so have an excellent way to monitor how the vehicle is being driven thanks to Guardian Mode.
It lacks a display which some people like, however more and more dash cams are ditching displays in favour of connecting to apps for viewing footage and adjusting settings.
I’m pleased to say the Nextbase Piqo worked perfectly straight out of the box and only struggled a little with the initial firmware update, which may have been signal related.
It’s simple to set up and If you hardwire it into the vehicle, you’ve also got the smart pakrign for extra peace of mind while the vehicle’s unattended.
It’ll be really interesting to see how Nextbase develops it in the future and do let me know in the comments what you think about the new Nextbase Piqo —would you get one?
Finally, don’t forget to check out the affiliate links throughout the article if you would like to get a Piqo for yourself.
Click to buy your own…
(Affiliate links which help support this blog)
