
This article is a written account of a video from the Lens Of James YouTube channel. Watch the video above and subscribe if you like what you see!
This article contains affiliate links to relevant products I have used in my videos. By buying through these links, I receive a small percentage of the sale at no cost to you which helps me support and grow my website and YouTube channel, so I can create more content like this in the future. Thank you for your support.
In this article…
- Introducing the Foxpark S1 wireless rear car camera
- Unboxing the Foxpark S1 backup camera
- How to install the Foxpark S1 screen
- How to install the wireless reverse camera
- How to install Foxpark S1 solar panel
- How to use the camera to reverse
- Foxpark S1 Reversing Camera settings
- About The Foxpark S1 HD reversing camera
- Should you buy the Foxpark S1 backup camera
Introducing the Foxpark S1 wireless rear car camera
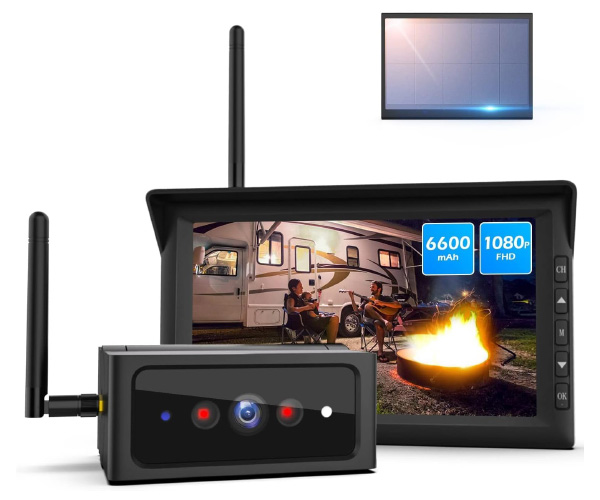
This is the S1, the latest solar-powered wireless reversing camera from Foxpark.

I recently created video on how to install a reversing camera, including how to connect that pesky red wire to your reversing light wire.
But, there is a way to avoid the wiring and that’s using a wireless reversing camera such as this.

It’s a 1080 full HD battery-powered car backup system, that transmits your video from the camera to the screen on your dashboard, and it’s got solar to so you won’t need to keep charging it for long periods.
Currently the S1 is only available in the US and the camera is geared towards US license plates, but there are other models available in the UK and other countries which I’ve put, along with the S1 camera system in the affiliate links throughout this article.
And just so you know Foxpark provided the S1 reversing camera for me to make a review video, though all the thoughts and opinions are my own.
Click to buy your own…
(Affiliate links which help support this blog)
Unboxing the Foxpark S1 backup camera
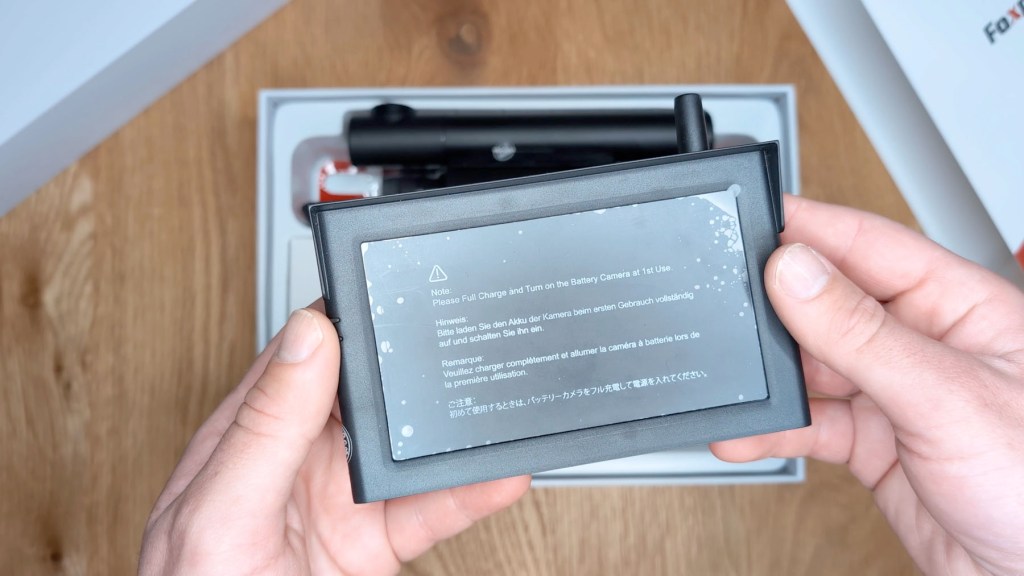
Getting the box opened you’ve got the camera, accessories and the manual on top. It’s in-depth and covers all the types of setups you might need.

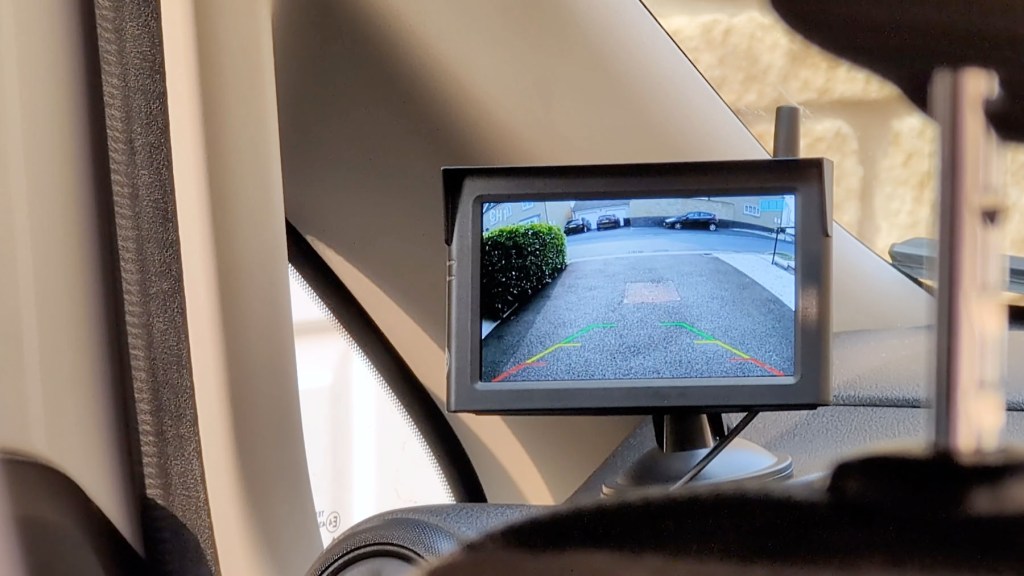
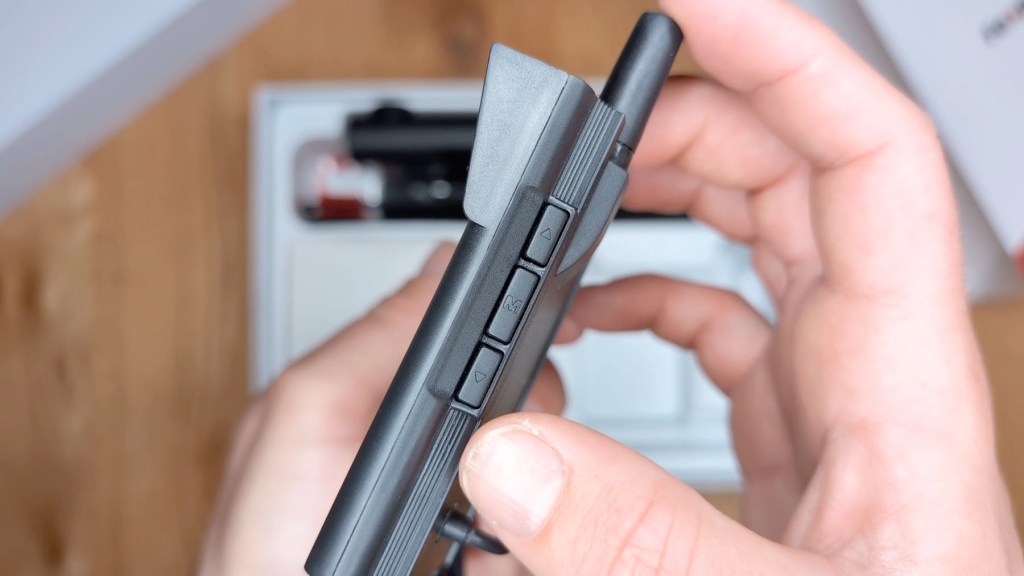
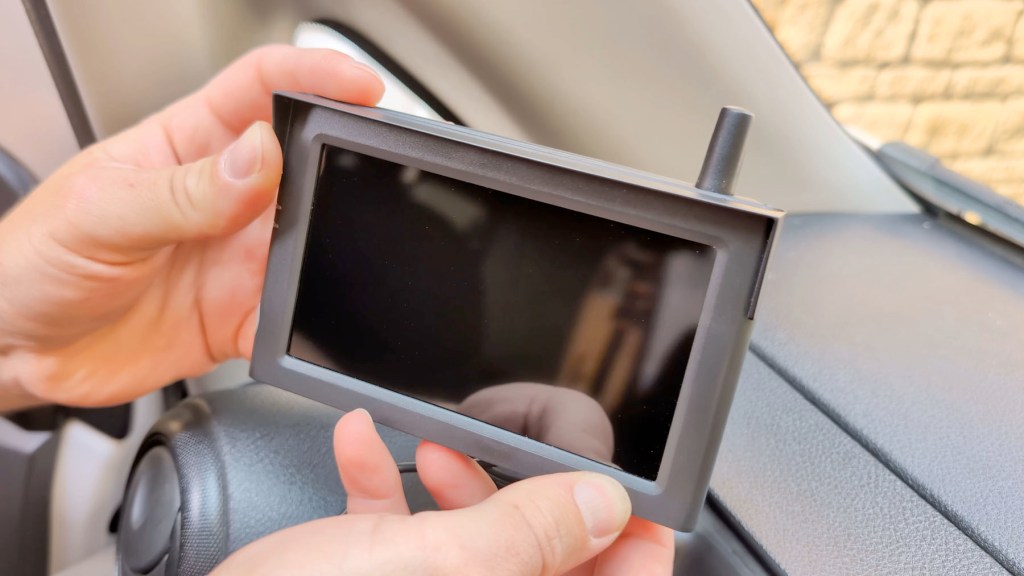
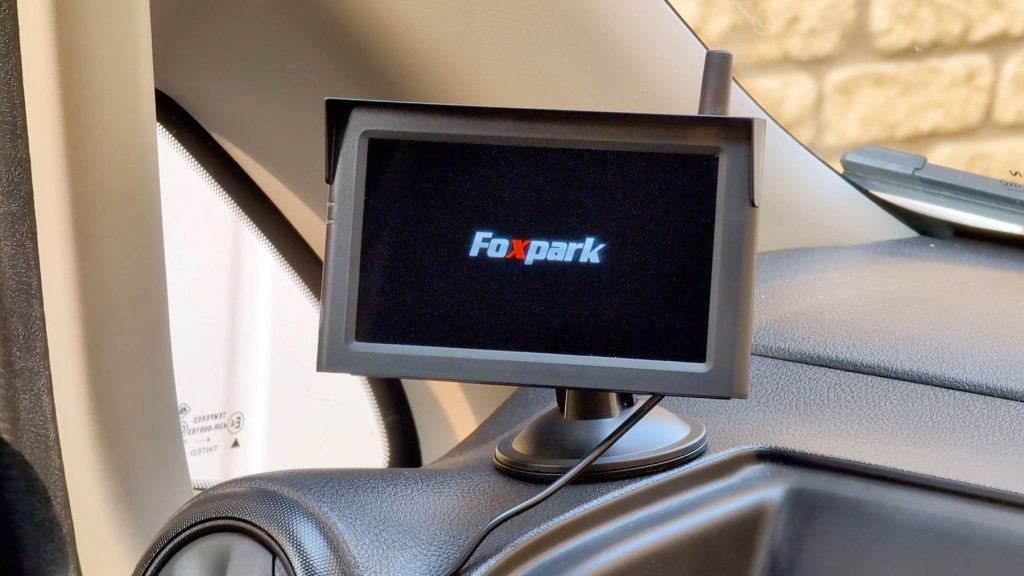
Let’s start with the fun bit, the screen. It’s 5 and 1/4 by 3 and 1/4 in with a 5-in screen diagonally and a slight lip at the top to keep the sun off. On the back there’s a four pin connector and cable, and the mounting slots, whilst on the one side there are two LEDs and on the other side an up, down and menu button.


On the top of the screen is an air vent and a small antenna, and on the bottom another air vent. Taking the protective film off there’s a semi-reflective screen below.
Putting that to one side, the other half of this product is the wireless camera.
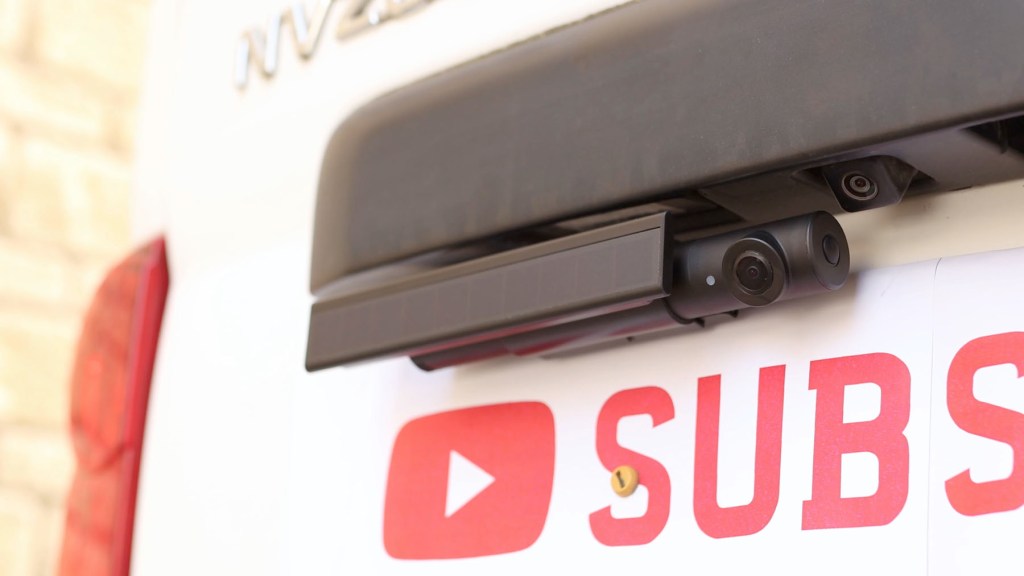
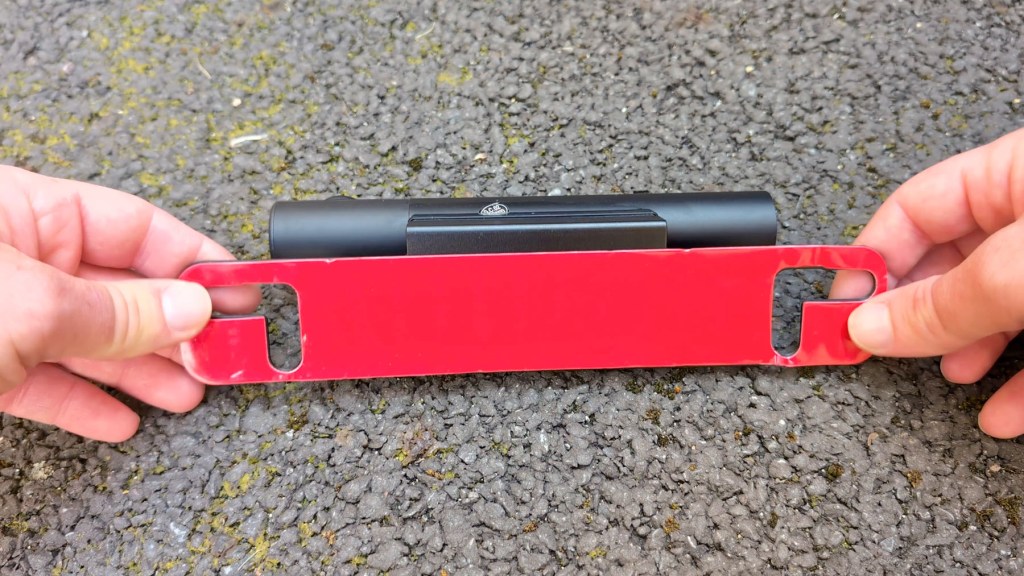
The module is mounted to a piece of metal designed to fit behind a US license plate with holes to account for the screw positioning.
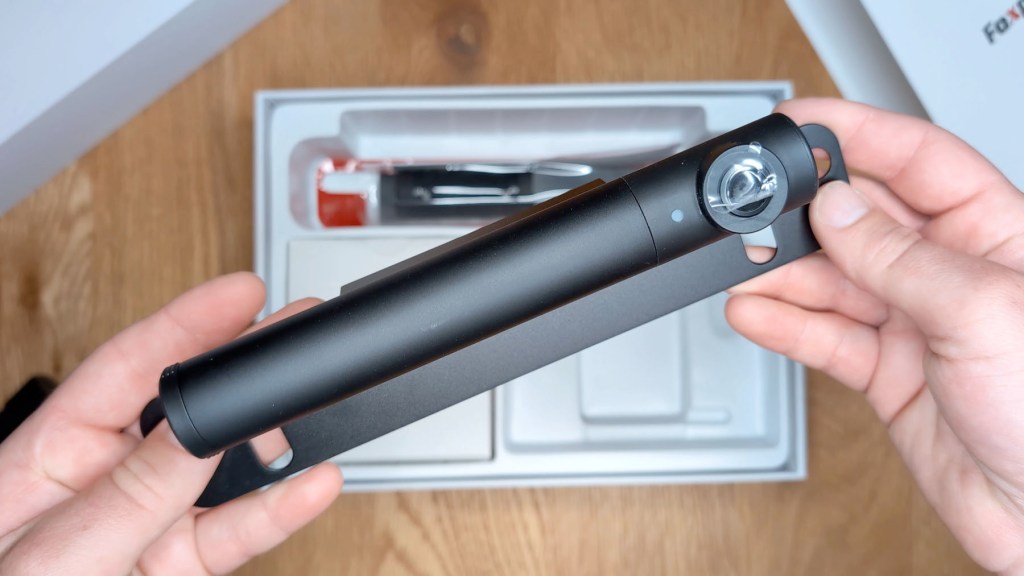

This Is where it isn’t so compatible with the UK number plates, as the mounting won’t line up, but there’s an option to get around that which I’ll show shortly.
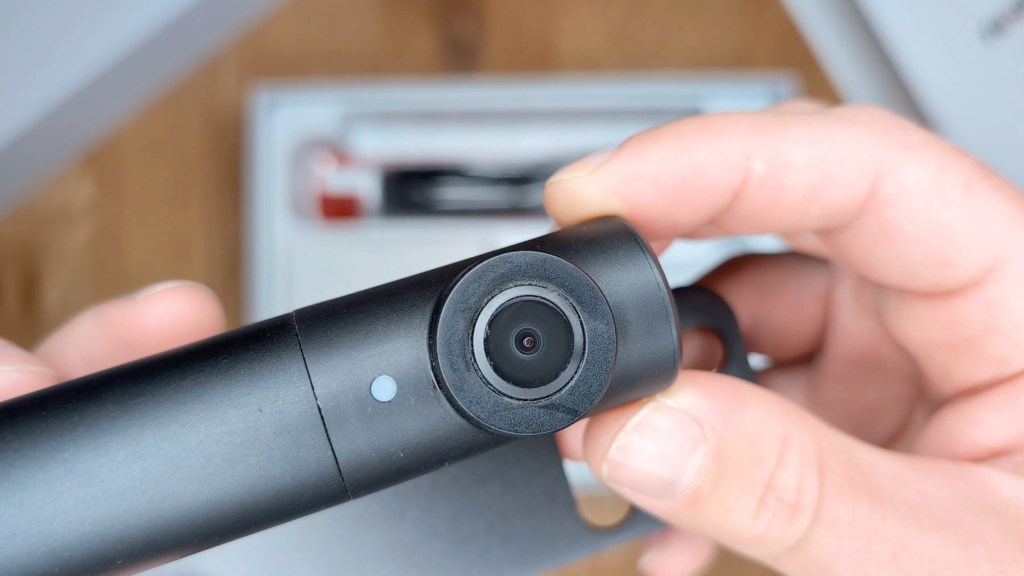
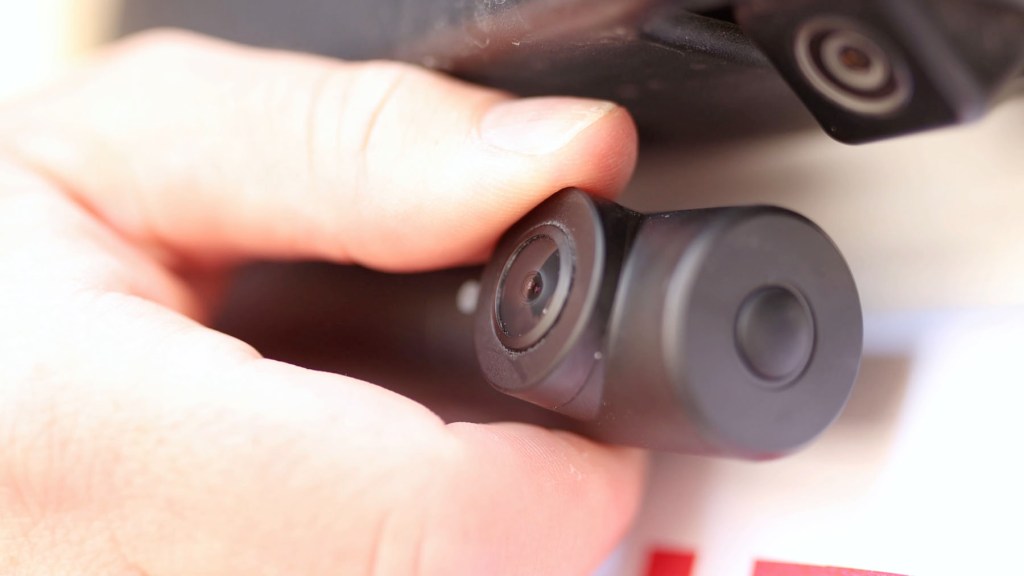
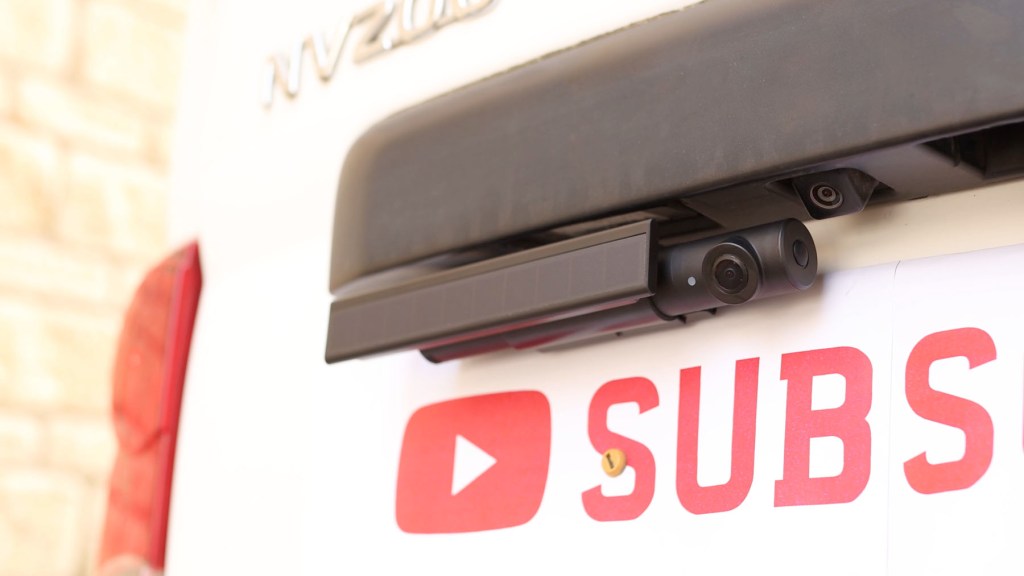
The bulk of this contains the battery, with a small LED and camera lens on the right side, which has a tilt of about 30° to get your desired angle.
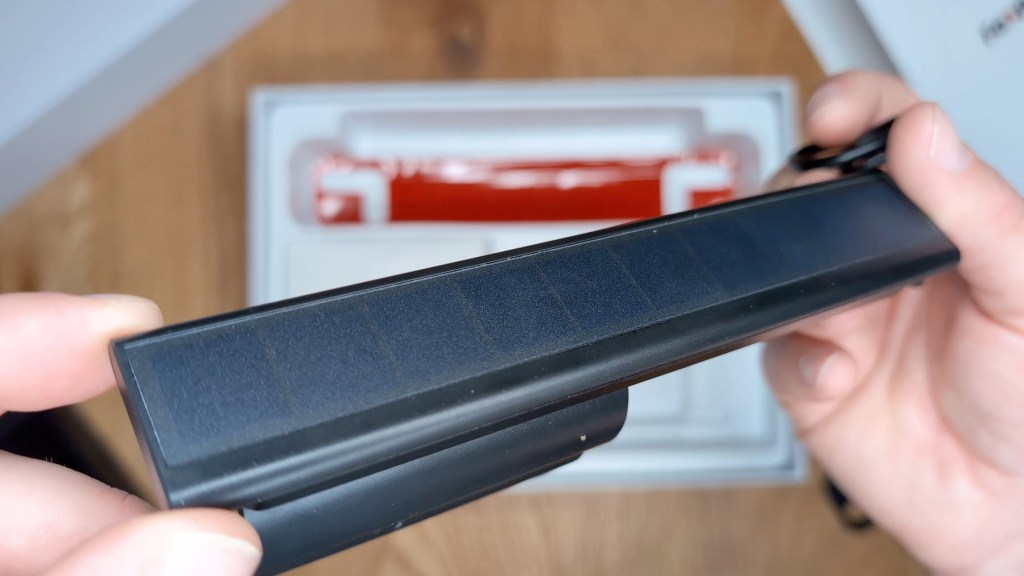
There’s also a small solar panel included which clips onto the camera module, and on the end there’s a wired USB end plate which will connect the solar power to the camera so it can charge. There’s also a sticky pad for the solar panel, as well as one for the camera module which is the alternative way it will be held in place behind the UK number plate instead of screws.


There are also a bunch of accessories included. Up first is the four pin to 12v port power adapter which has an on/off button, an AUX port and a USB-A port. The cable is 11 1/2 ft long. Next there’s a suction cup mount with a ball head so you can adjust the angle of the screen, and then a 5ft USB-A to micro-B cable for charging the cable if you aren’t using the solar panel. Finally there’s a tiny screw and hex key for fastening the solar panel to the camera.


Click to buy your own…
(Affiliate links which help support this blog)
How to install the Foxpark S1 screen
So let’s get installing the S1 in a vehicle, and we’ll start with the screen which couldn’t be simpler. The first step is to wipe down the surface so you get good adhesion to your dashboard.
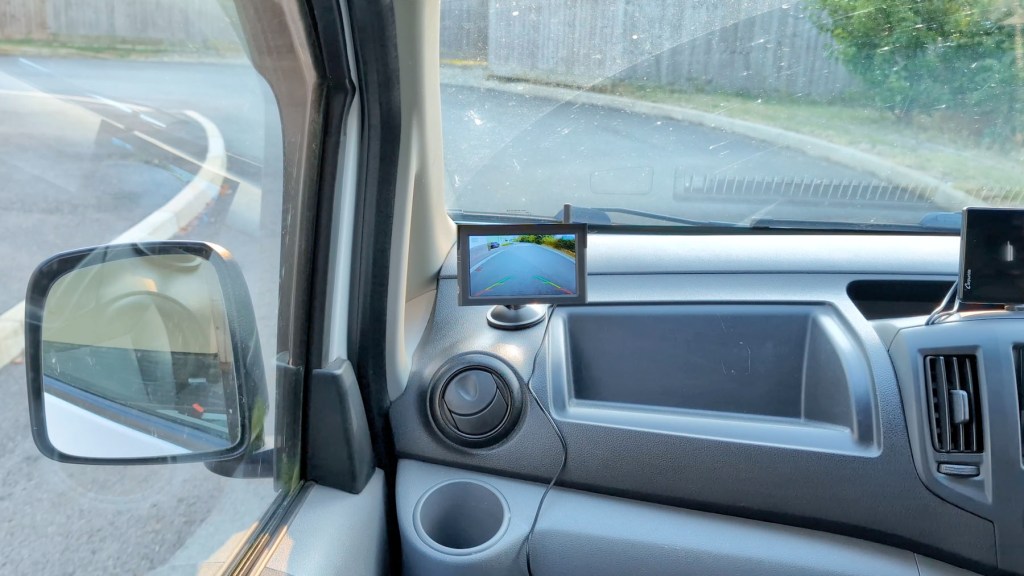
Due to the need to film this in an uncluttered environment, I’m fitting it to the far side of my dashboard but usually you’d install it near your steering wheel.
With the dash prepped, take the suction cup, peel off the protective film, stick it to your chosen spot, and push the lever to clamp it firmly in place – this isn’t going anywhere.
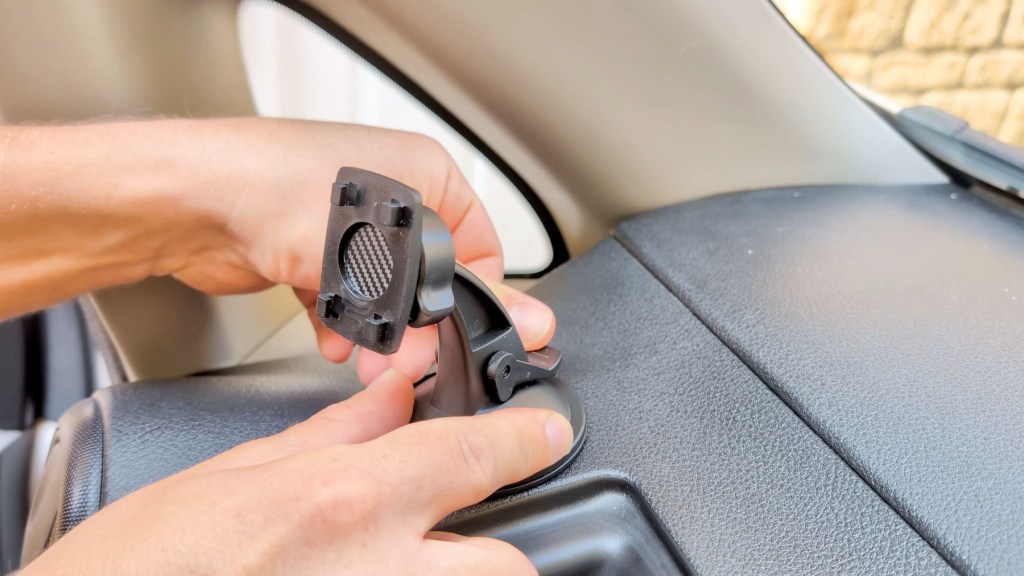
You can then grab the screen and easily attach it using the four mounting points on the back, and it can be adjusted in a number of directions to get the perfect angle.
The next step is connecting the screen to the 12v power adapter, which is easily done, and then you can insert the plug in the 12v port. Having the additional USB-A a port built in, you can still keep your phone charged whilst using the screen.


And that’s the screen installed. The only other thing you could do is hide the wires in the cab trim. That varies for differ ent vehicles and setups, but if it was me I’d root the wire down the door frame, along the footwell trim, and down towards the 12v port. The 11 1/2 ft long cable is long enough to give you a ton of options and hiding it will give you a nice clean dashboard.
Check out these trim and panel removal tools which won’t damage your vehicle if you’re keen to do this for yourself.
We’re also on Instagram!
Check out yogi.the.van to keep up-to-date with all our adventures in the van!


How to install the wireless reverse camera
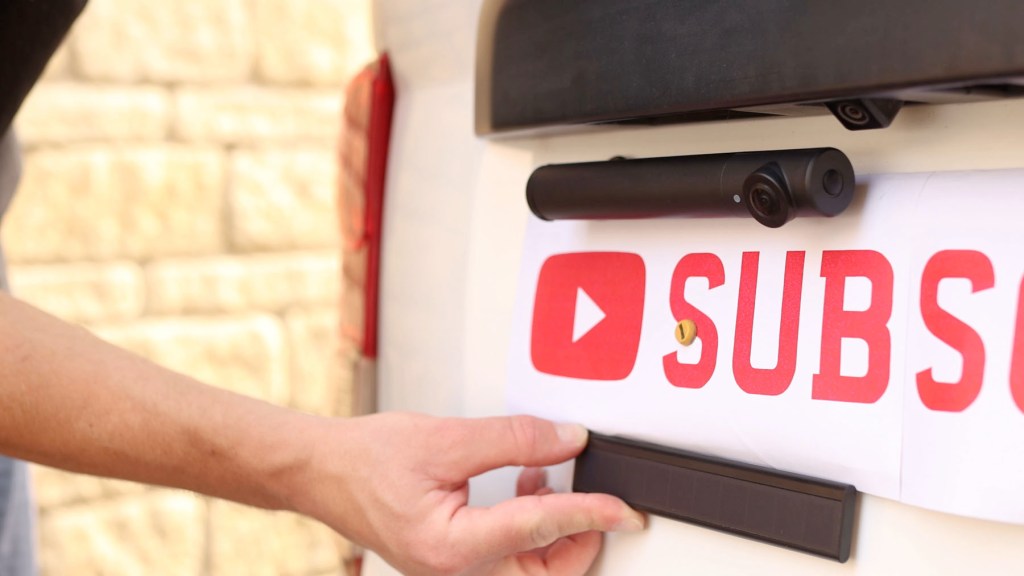
Now the screen’s installed, let’s get started with the camera which which isn’t any harder. Whether you’re screwing the camera in place or just wedging it behind the license plate, the included sticky pad is a must and will give you that extra bit of security and stop any rattles.
To start remove your license plate and you’ll see I’ve got my wired in reversing camera from the previous video here, so ignore that because this article is all about how to avoid doing that wiring.
Sit the camera over the top or under the bottom of the license plate depending on your preference, and find your ideal location.
If you’ve got a US plate then you’ll probably be lining it up with the screw holes so the camera will be central on the plate, however because I’m just sticking it in place behind my plate I have the option of where to put it.
Remove the plastic from the sticky pad and screw your number plate back on and that’s the camera in place.
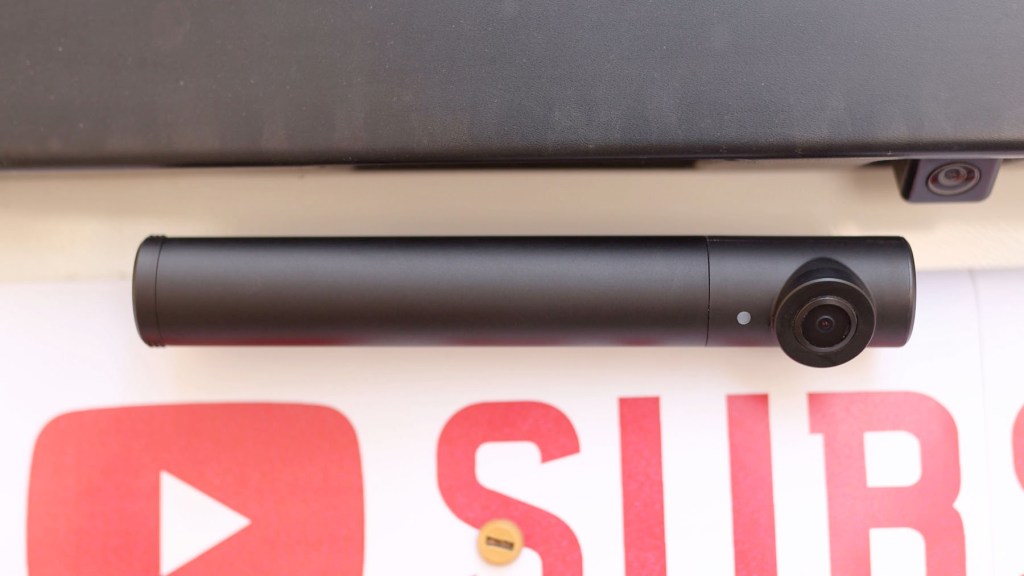
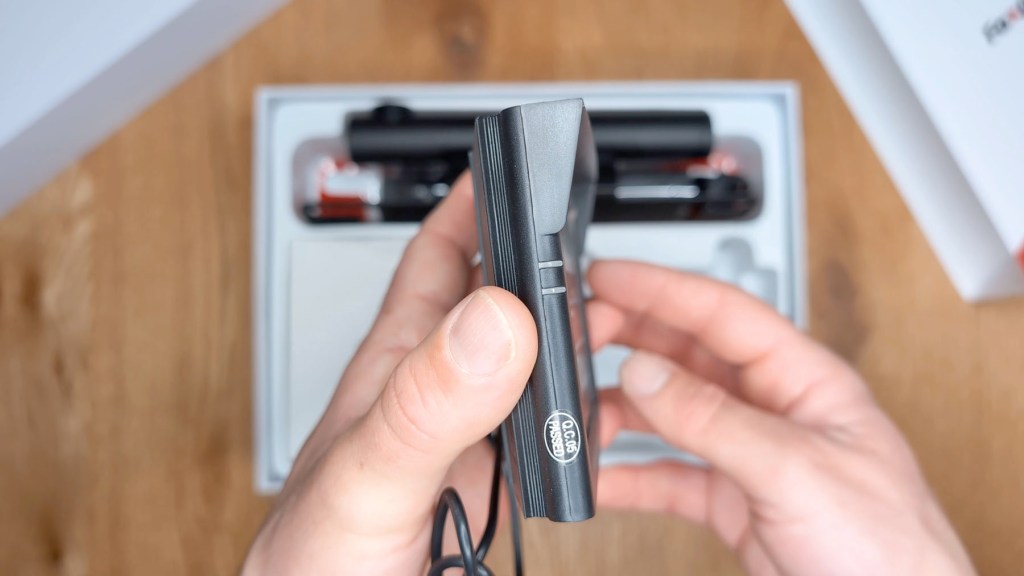
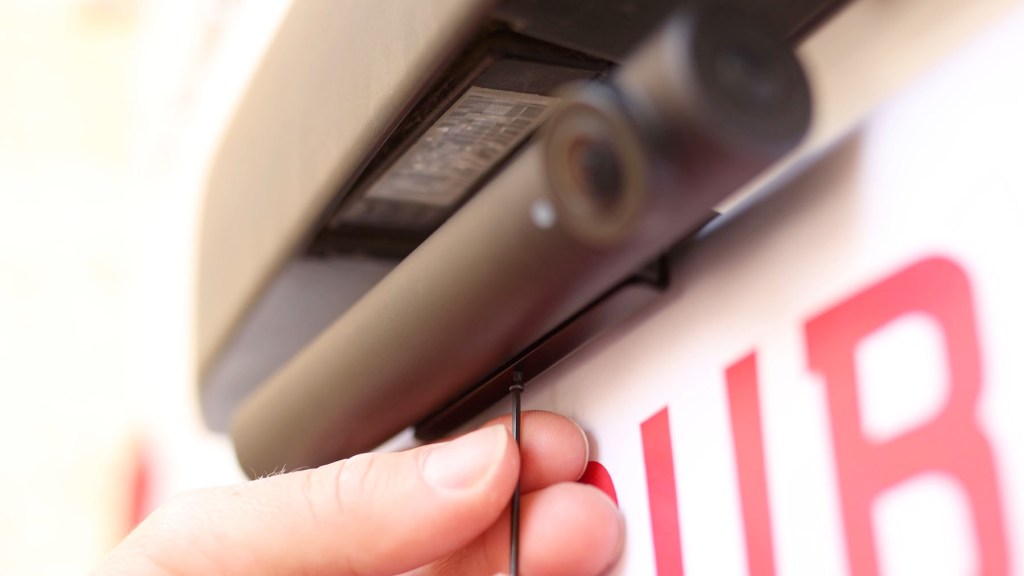
Don’t forget to add this little end piece to the camera, which not only protects the charging port but actually houses the antenna which transmits the image to the screen. When you need to charge it and you’re not using the solar panel, which we’ll come onto in a minute, you simply remove it again and plug in the included USB cable. A red light next to the USB port will show that the camera unit is charging.


You can now test the system works, if the camera battery is charged and you haven’t done so already, and I couldn’t believe how quickly it connected. Simply press the button on the end of the camera and the faint red light will show. Then make sure the screen is receiving power and it will show the image as transmitted from the camera.
How to install Foxpark S1 solar panel
So the camera is now installed and good to go, but if you want to skip the regular manual recharging then you can attach the solar panel so that it recharges itself, providing it gets adequate sunlight.
There are two ways to attach the solar panel the first is to remove the two screws on the back of the panel and use the second sticky pad provided, and stick it below your license plate.


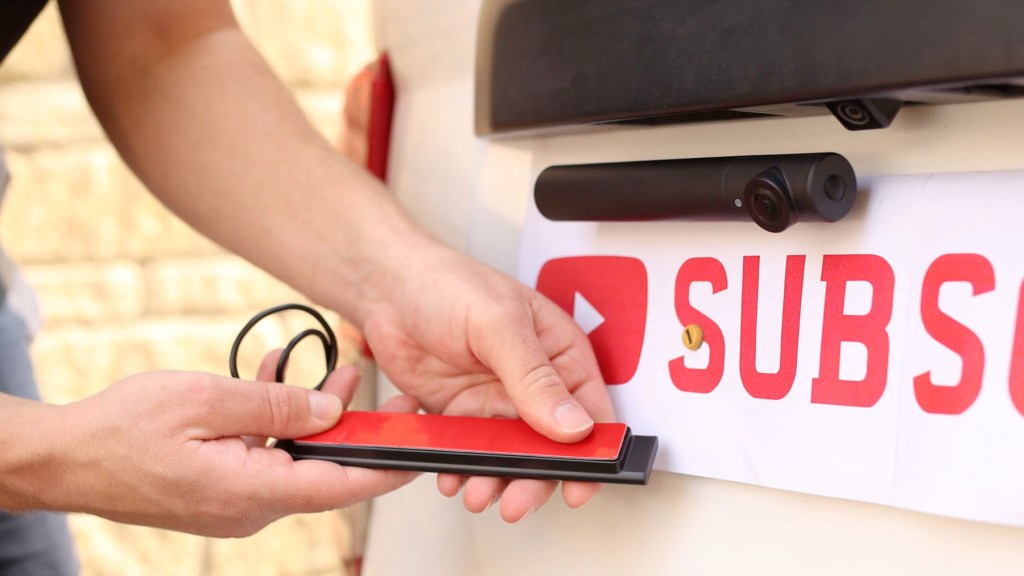
Plugging the wired antenna attached to the panel into the camera and hiding the wires behind the license plate.
In theory you could stick the solar panel anywhere that makes sense for your vehicle, depending on your setup.
The second and probably best option is to connect the solar panel securely onto the camera module.
There’s a small security screw underneath the camera which you first need to remove using the hex key provided, and remember there’s a spare screw in case you lose it, and the camera will then be loose on its mount.
With the semi circular mount still on the solar panel slide it along the camera module until the hole on the solar panel lines up with the hole on the camera mount.

You can then tighten the security screw, securing both the solar panel and the camera module together. Then plug the wide antenna firmly into the camera unit and hide the wires behind it all and you’ll be left with a neat self-charging wireless reversing camera.


Click to buy your own…

(Affiliate links which help support this blog)
How to use the camera to reverse
Using the reversing camera is incredibly simple.
Once turned on, the camera remains on just in sleep mode, so whenever you act activate the screen it wakes up and provides an image.
To activate the screen simply press the button on the 12v adapter and it will wake up.
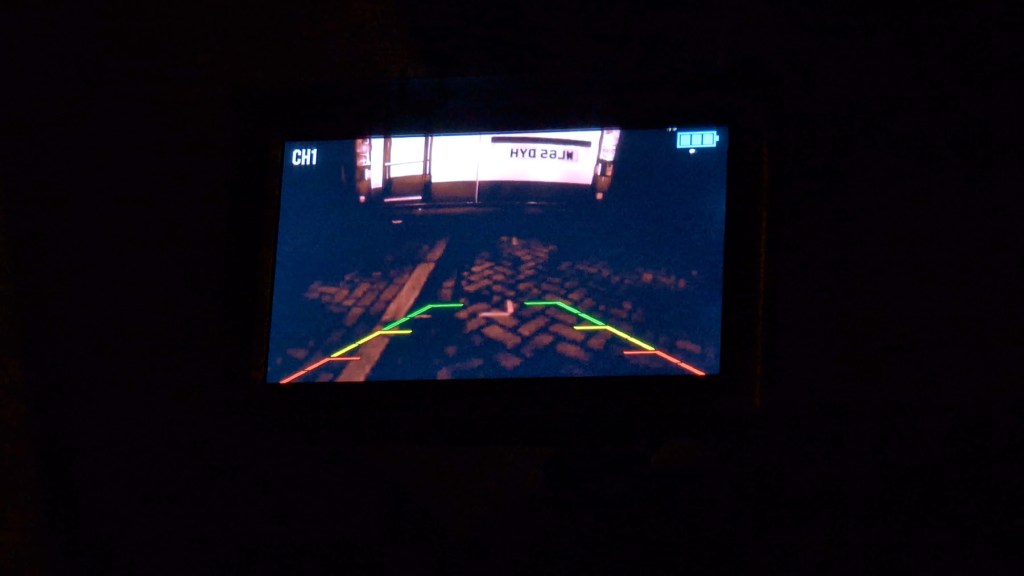
It briefly shows the Foxpark logo, though not always, and you quickly get a nice clear image of the rear of your vehicle. You can adjust the camera to your desired angle and you’re all set.

Foxpark S1 Reversing Camera settings
The screen has a few settings built in that you can play around with.
To access these, power the screen and press the ‘M’ menu button on the side and use the arrows to navigate around.
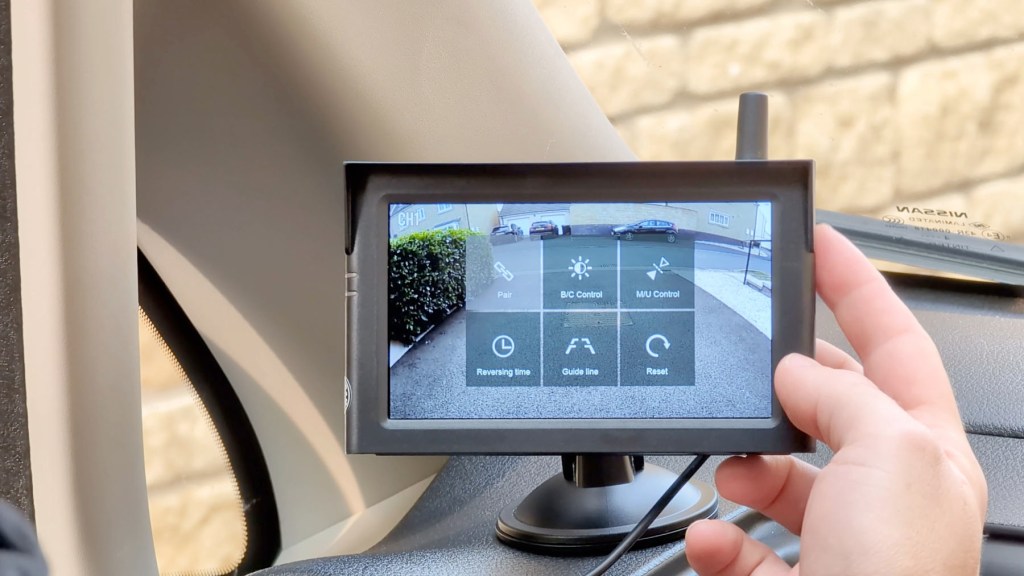
Up first is pair, and this is how you pair your camera, though it does come pre-paired, as well as room for a second camera if you have one say for the front of your car, though I don’t and haven’t tested this feature.
The next is BC control where you can adjust the brightness and contrast of the screen.
The next is MU control and this allows you to mirror the image or flip the image upside down, which is useful if you’ve installed the camera to the underside of your number plate.
The fourth setting is reversing time and here you can tell the screen to stay on for 45, 60 or 90 seconds while you reverse.
Of course the longer you have the screen on the more battery it will consume from the camera.
Next you can turn the static reversing line off and finally you can return all your settings to the factory defaults.
About The Foxpark S1 HD reversing camera
There are a few more important things to know about the Foxpark S1.
Firstly the image quality is really nice.
Although it’s a small screen you get a very clear image and the camera changes the exposure to suit the scenario, so if you’re going from bright sunlight to shade you’re covered.
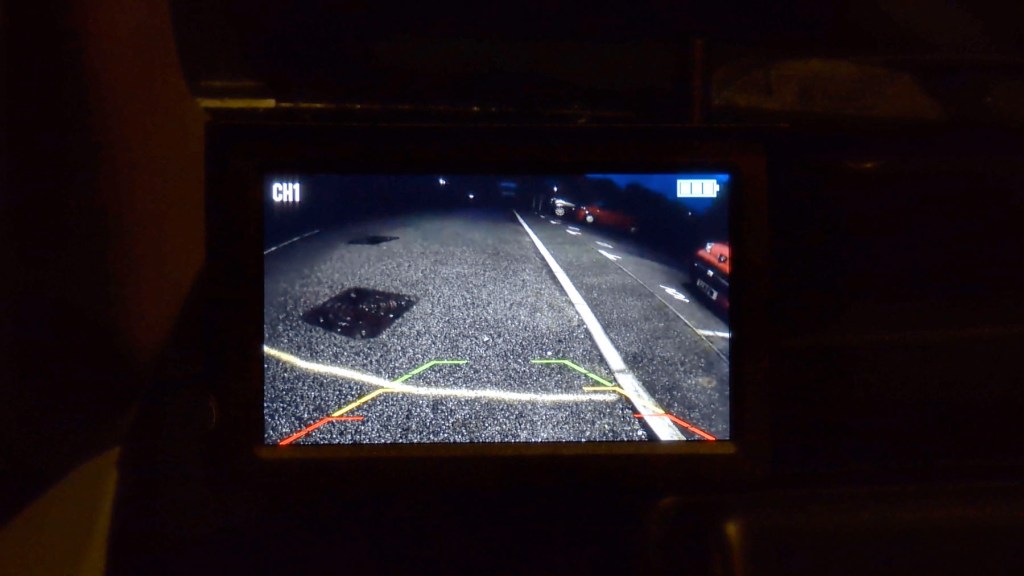
The nighttime quality is also very clear and you won’t have any problems lining up your reverse parking.
Without using the solar panel the battery should last about 75 days when full, 45 days when on 70%, 20 days when on 40%, and 10 days when on 20%.
This is all temperature dependent though, and the S1 has an operating range of 140°f or 60°c down to -4f or- 20c.
Battery life at these temperatures will be around 44% and below that it just won’t really work at all.
If using the solar panel, it’s a great idea to ensure that it’s always kept clean so it can charge the camera module as efficiently as possible.
Foxpark says that if the panel is in 2 hours of direct sunlight a day and the device is used for 60 seconds three times a day, you shouldn’t need to charge the battery for 3 to 6 months, so the solar panel really provides a bit of extra charge rather than you never needing to plug it into power ever again, though the more sunlight you can give it the better.
Should you buy the Foxpark S1 backup camera
The Foxpark S1 is a fantastic way to to add a reversing camera to your car without any wiring.
It feels well made and is a solid camera unit, with a screen that gives clear enhanced visibility to vehicles that aren’t blessed with tech.
With the solar panel attached to the camera module it is quite a big unit, and my preference would be to have it screwed to the license plate rather than just stuck.

It would be amazing to see mounting options for UK plates at some point in the future.
I had no problems with the wireless connection between the camera and screen at all during testing, and found it to be very stable at all times.
If you’re interested in getting the S1 or one of their other models, check out the links through this article.
Thanks for stopping by!
Click to buy your own…
(Affiliate links which help support this blog)
