
This article is a written account of a video from the Lens Of James YouTube channel. Watch the video above and subscribe if you like what you see!
This article contains affiliate links to relevant products I have used in my videos. By buying through these links, I receive a small percentage of the sale at no cost to you which helps me support and grow my website and YouTube channel, so I can create more content like this in the future. Thank you for your support.
In this article…
- An Introduction To The Dash Cam Market
- 622GW & iQ Build Quality & Design
- Features Of The 622GW & iQ Dash Cams
- Technology of the 622GW & iQ Dash Cams
- Image Quality Of The 622GW and iQ Dash Cams
- Choosing A Dash Cam That Lasts
- Safety & Known issues With The 622GW & iQ
- How Much Do the 622GW & iQ Cost?
- Which Dash Cam Should You Buy?
Introducing the Atoto P909PR Carplay Stereo
This is the Atoto P909PR, also known as the P9; a 9 inch portable car stereo which will upgrade your dashboard to include CarPlay and Android Auto with just a quick install.

On first glance it’s at the top end of dashboard consoles, with features such as a 1280×720 pixel QLED touchscreen, the option of 4G for internet access, and a newly released AI voice assistant too.

It runs on the Android 10 operating system, meaning it’s essentially an Android tablet for your car. You can even download apps to its 32gb memory, so yes you can have Netflix, YouTube and other apps in your car.

The difference between the P9 and other third party screens is that you have to hardwire this one into your car for power, but the benefit of this is it facilitates a 3 second fast start feature and keeps wires to a minimum, but it isn’t as difficult as you’d think.
Everything you need comes in the box and I’ve got a whole step-by-step section on how to do this later in the video.

And just so you know, Atoto provided the device for me to make this video though all the thoughts and opinions are my own.
If yo’re not confident doing this work yourself, then get someone skilled to complete it for you. This content is for entertainment purposes only.
If you’re looking to get the P909PR for yourself I’ve got an affiliate link in the description below which helps support this channel and make videos like this possible.
Click to buy your own…


(Affiliate links which help support this blog)
Unboxing the Atoto P909PR Dashboard Console
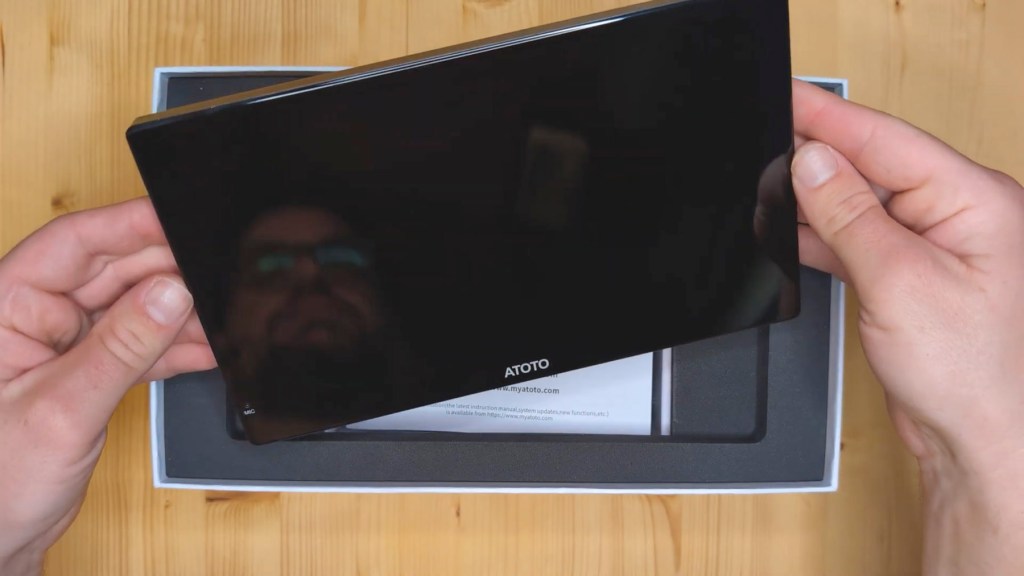
So let’s get the P9 out of its very nicely designed box, and the screen is securely wrapped so let’s get that off and you can see it’s a very smart reflective screen with a matte gray plastic back.

Putting the screen to one side there are a bunch of extras tucked away in the box. Up first is the instruction manual which is very thorough, and then there’s a quick start guide, and warranty information.


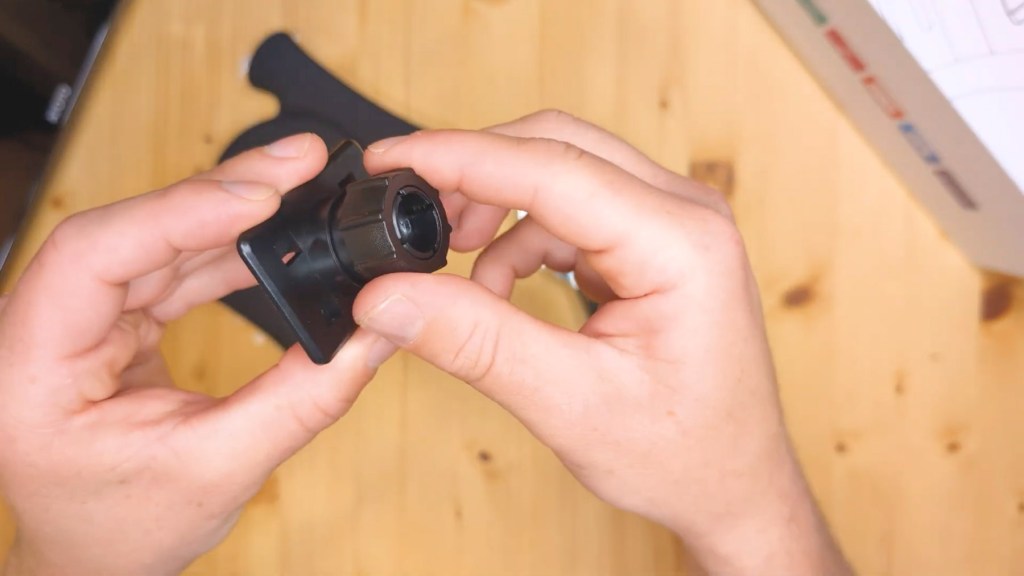
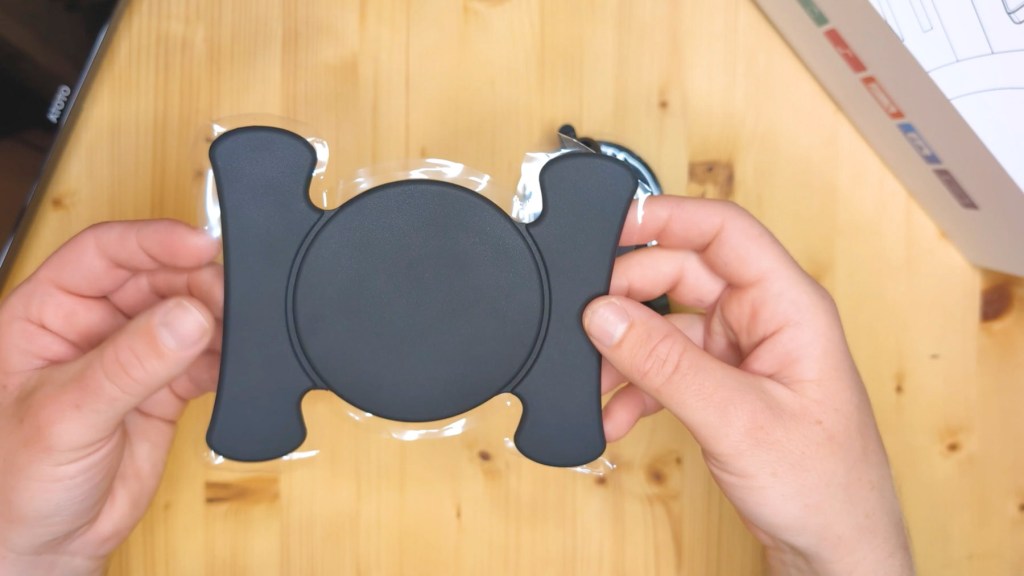
You get a number of accessories included with the P9. This is the suction cut mount which attaches to the dashboard, and also comes with a flexible mounting pad for curved or textured surfaces, as well as this adapter which fits on the ball end of the mount to connect it to the P9.

Up next is a wired lapel microphone, which I’ve never seen included as standard with a screen before. Although there is a built-in microphone, attach this inside the vehicle, or to your clothing, and you’ll get extra clear calls.

Then there’s the wireless steering wheel remote control. Although your built-in steering wheel controls will work with the P9, it gives extra functionality and is good for those without built-in controls. It can be attached to your steering wheel like a watch, or stuck directly to your dashboard thanks to the included sticky pad. It also comes with a spare battery too.

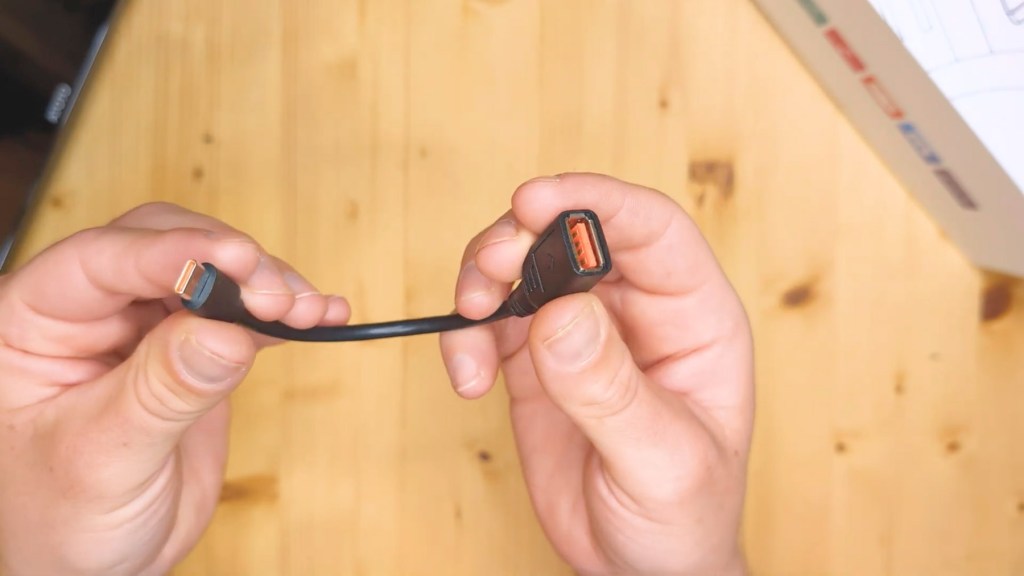
Next there’s a male USB-C to female USB-A cable for loading external content and a 3.5 mm AUX cable for wired listening to music.

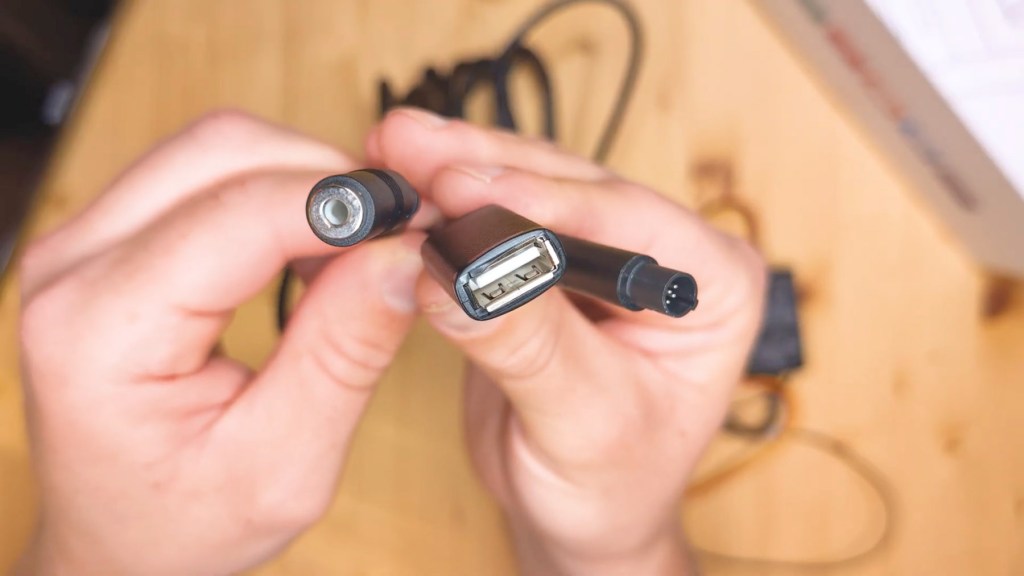
Instead of powering it from your 12v port, the P9 is powered by tapping your vehicle’s fuses, thanks to the included fast boot connector and selection of wire taps which should cover the majority of vehicles.
In addition to the red accessory ignition wire the yellow constant battery wire and the black ground wire there are three other connectors; the first is the connector on the right which plugs into the back of the screen, then there’s a USB-A port for wired Android Auto or CarPlay, and then there’s a 3.5 mm AUX out port for wired audio.

Let’s head back to the screen and on the front you can see the built-in microphone on the bottom left side, and turning it over there are a selection of ports.

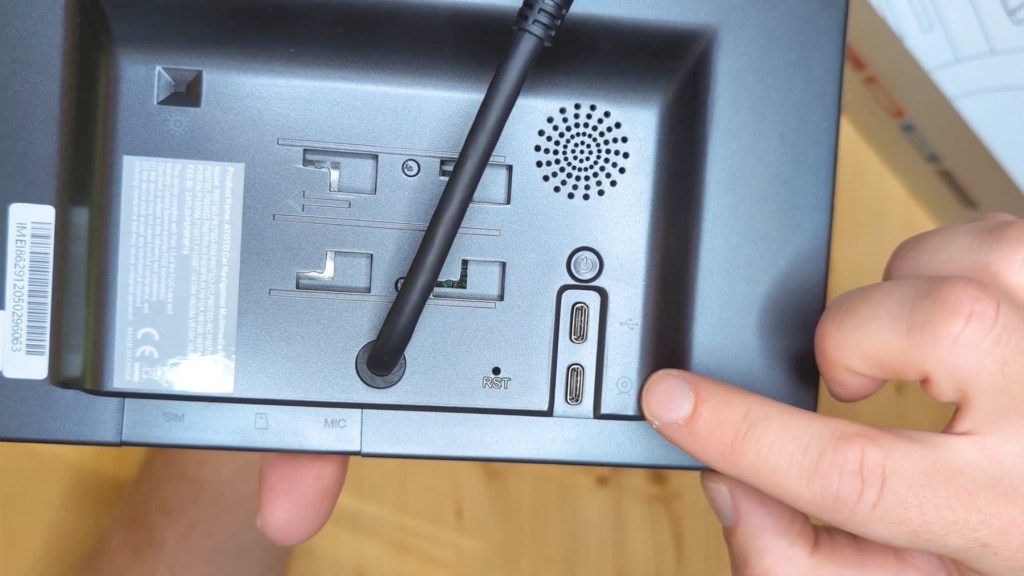
Up first is the power button and then two USB-C ports, one for a USB drive and the other for an optional rear view camera which I don’t have here.
To the left of that there’s a reset button and to the left again there’s a black lead which plugs into the power connector shown earlier.
Up to the top left, there’s the light sensor for auto dimming the screen and at the bottom there’s a SIM card slot for 4G cellular data which you’ll have to buy separately, a micro SD card slot for loading content, though a card isn’t included as standard and the 3.5mm microphone in port.

The built-in speakers are housed on the back too along with the mounting slots which take the suction cut mounts shown earlier.
Click to buy your own…


(Affiliate links which help support this blog)
How To Tap A Car Fuse And Hardwire A Dashboard Console
So let’s get installing the Atoto P9 and, as mentioned earlier this device needs to be hardwired into your vehicle to work.
The process to doing this starts with;
- Finding the right fuses to use
- Checking which direction the power flows in and out of the fuses
- Inserting the fuses
- Attaching them to the device
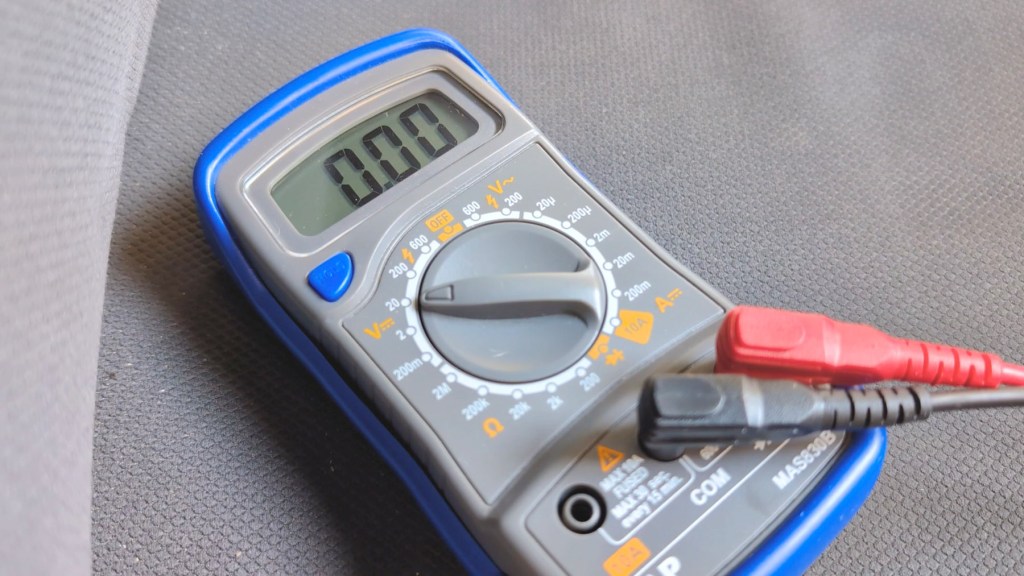
The only additional tool you’ll need is a multimeter.
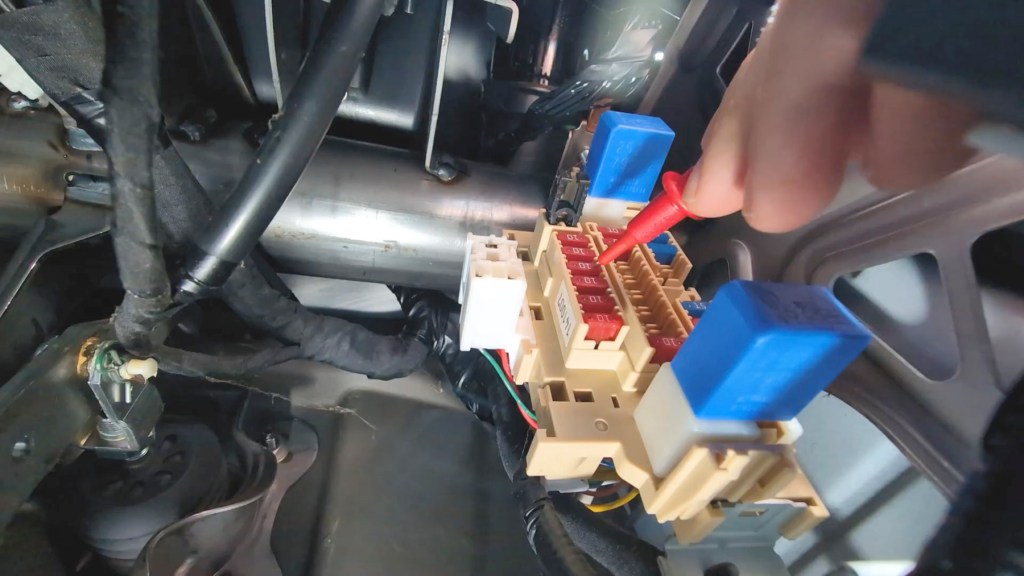
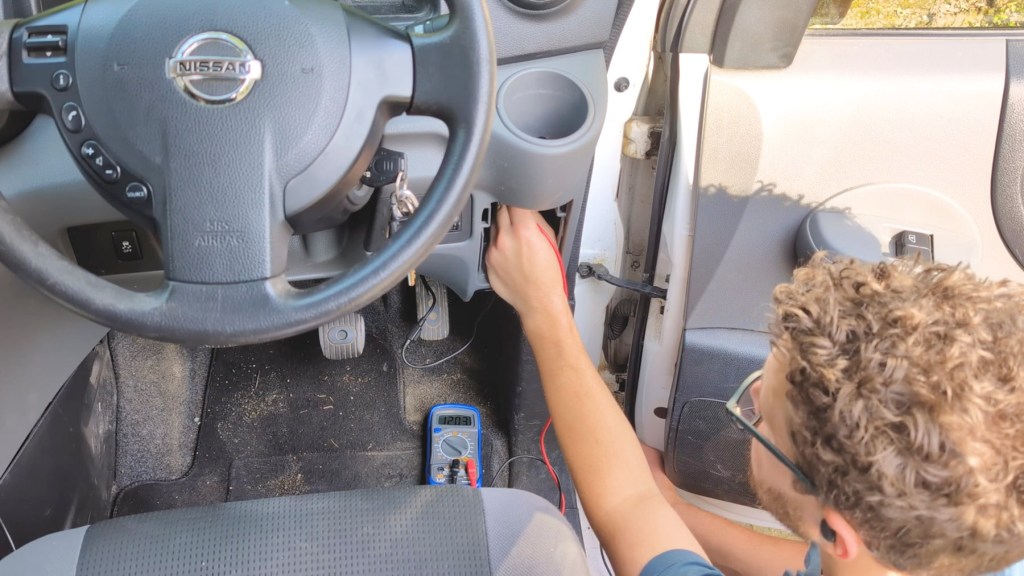
To begin locate your vehicle’s interior fuses which are usually found around the steering wheel or glove box. Mine are to the bottom right of the steering wheel in my NV200.


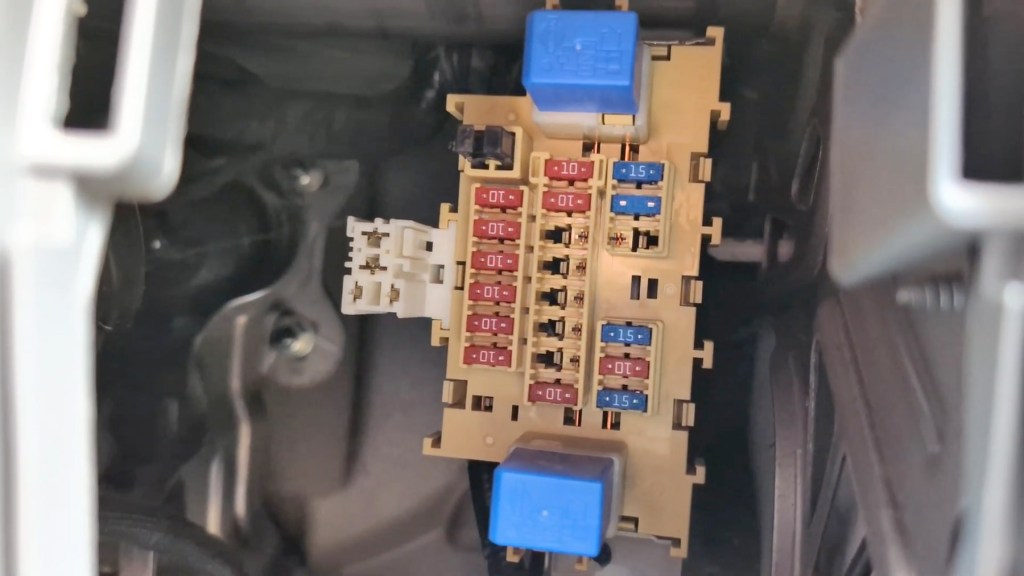
As you can see there are a bunch of them in there, some upside down, and a load of empty gaps too. I don’t have the highest spec of this fan so a lot of those empty ones are for features I don’t have but other models might.
On the fast boot connector you have two wires which need to be connected to the fuse box; a red wire which is labeled ACC, meaning that it needs to be attached to an accessory fuse or one which is only powered when the vehicle ignition or engine is on.
The second wire is yellow and is labeled B+ which stands for battery and requires a fuse which delivers constant battery power, regardless of whether the vehicle is on or off.

To find which fuses you should tap into you’ll need a multimeter set to 20v in the DC range
With the engine off and the key out to the ignition, ground the black probe on an uncoated clean bit of metal attached directly to the vehicle, such as a bolt like I’ve got on my door here. Then work your way around the fuses in the fuse box with the red probe, touching it to the exposed metal dots on the backs of the fuses.
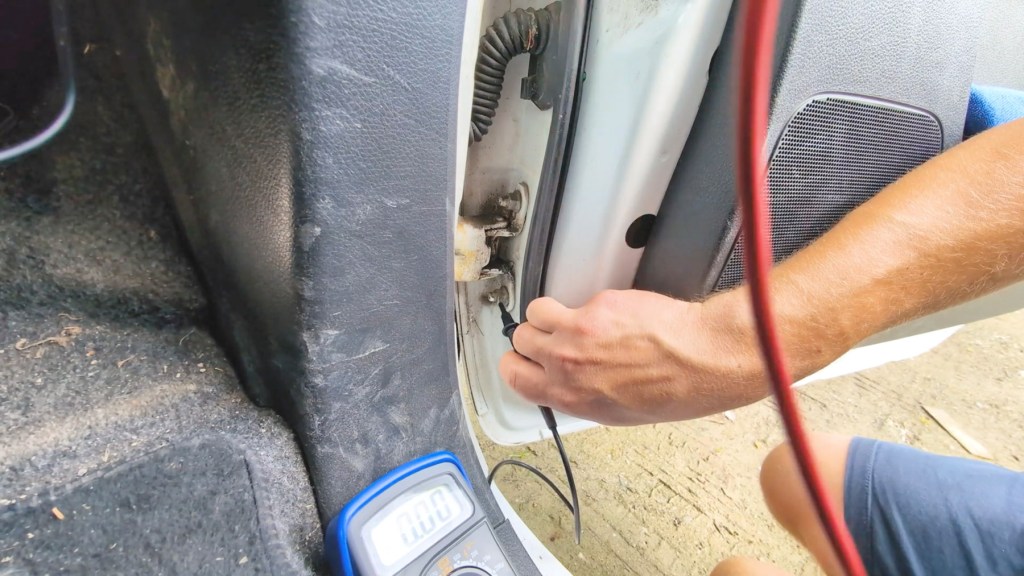
If your multimeter is showing a voltage which with a healthy car battery should be above 12v then you’ve got a fuse that uses constant power or a B+. You can probe either dots on the fuse to find this out, as both will display a voltage if there’s one present as the power flows through the fuse.

Next it’s time to find the accessory power fuse. Chances are if you found fuses that don’t do anything when the ignition is off then they’re accessory fuses. For tapping a fuse you want to find an accessory fuse which isn’t integral to your vehicle’s driving functions, such as the audio system.
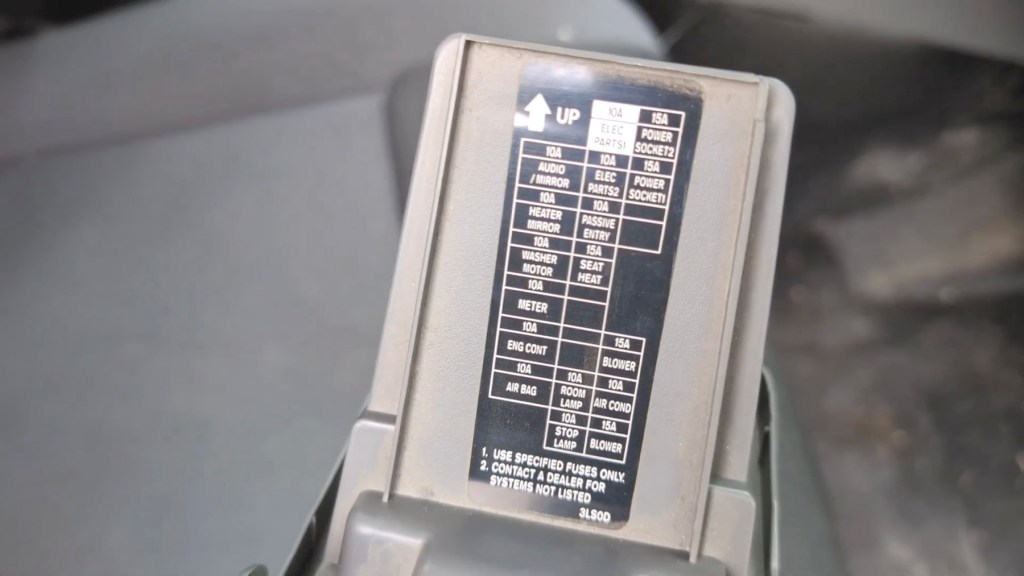
You can find out what circuits your fuses protect by checking out the back of the fuse box cover, which usually has a full list. If not take a look in your car manual.
Once you found a fuse you like the look of test it with the ignition off, then put the key in and the ignition on and test again. Hopefully a voltage of 12+ will be on the multimeter.
If you have a start stop vehicle then there are further instructions in the included P9 device handbook to help with the hard wirring process, but it doesn’t look too much more complex.
You can then remove the relevant fuses from the fuse box, and I took a photo of the fuse box on my phone beforehand so that I know exactly what originally went where.

At this point you can see which size of fuse tap fits your vehicle and, as shown earlier, there are four sizes to choose from which should fit most vehicles.

The next step is to find out which side of the fuse slot the current comes in, as this is important to getting the hardwiring kit working properly. To do this insert the red probe, into one side of the slot you you just removed the fuse from with the black probe grounded on bare metal again, and then check the other side too and see which one shows the voltage on the multimeter.
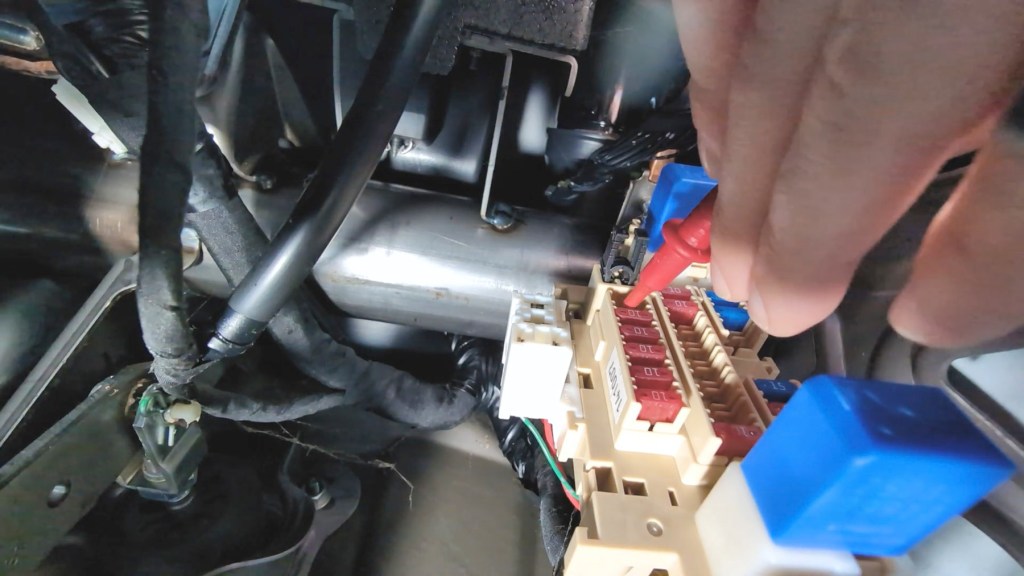
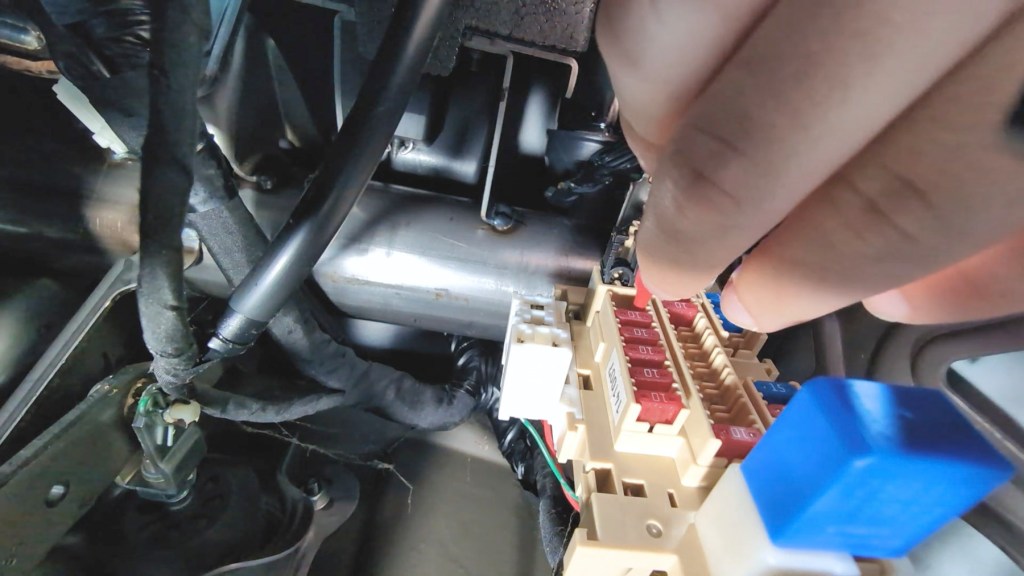
For the accessory fuse you’ll need the ignition on, whereas the constant battery fuse slot will show power whether the ignition’s on or off. Make a note of which side has power and which doesn’t as the fuse taps only work in a specific way.
The outer prong is the entry for the voltage, whereas the inner prong is where the voltage exits. This means that the outer prong needs to connect with the side of the fuse slot which shows a power reading, so when inserted the fuse tap completes the circuit.
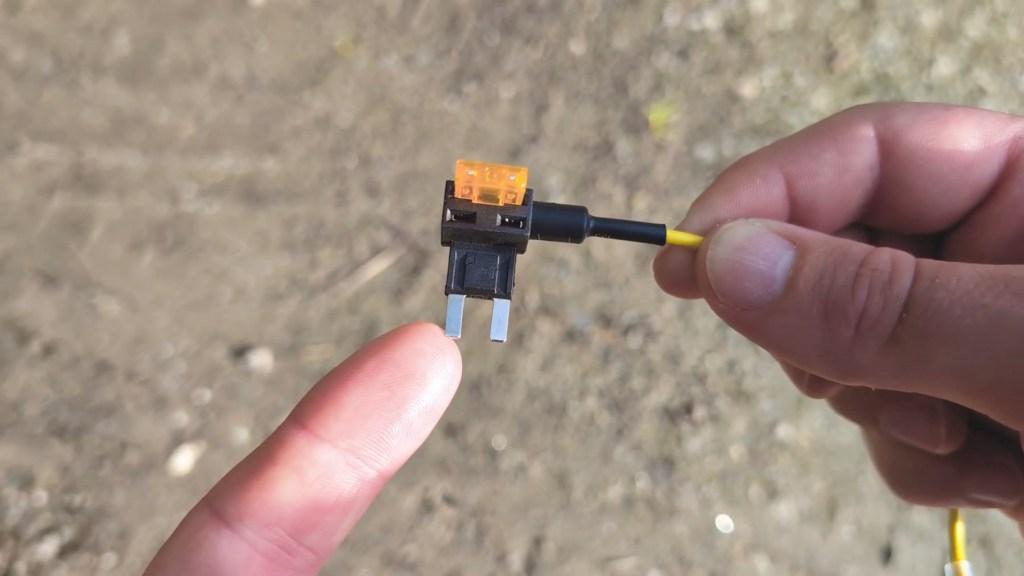

You can now place the accessory fuse you removed from the vehicle into the red ACC fuse tap and the constant battery fuse into the yellow B+ tap. Make sure they’re seated firmly for a good connection.

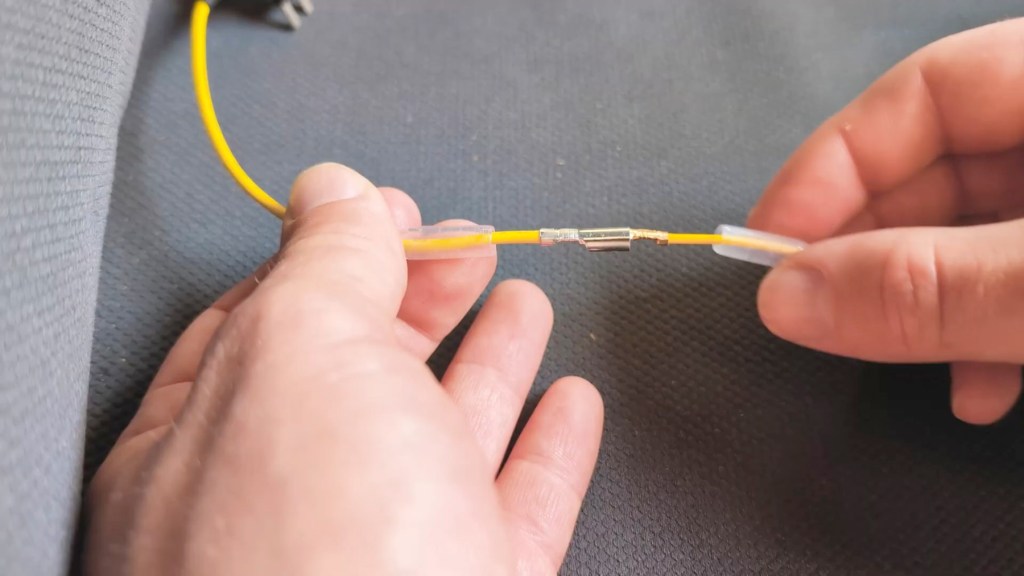
It’s now time to insert the taps into the vehicle, and with the fast boot connected to hand and the keys out of the ignition, connect the red tap with the red wire and do the same with the yellow. They have a nice connector which creates a firm connection and, although the user manual doesn’t say anything about crimping them together, you could try it if you’re worried about the strength of the contact.
There are plastic sheaves to protect the connectors and I found the best way to do this was to layer one over. The Atoto user guide doesn’t say about using a heat gun to shrink them together, which is often the case for other hardwire kits so I haven’t done this here, but I feel happy with the level of protection provided by the plastic tubing.

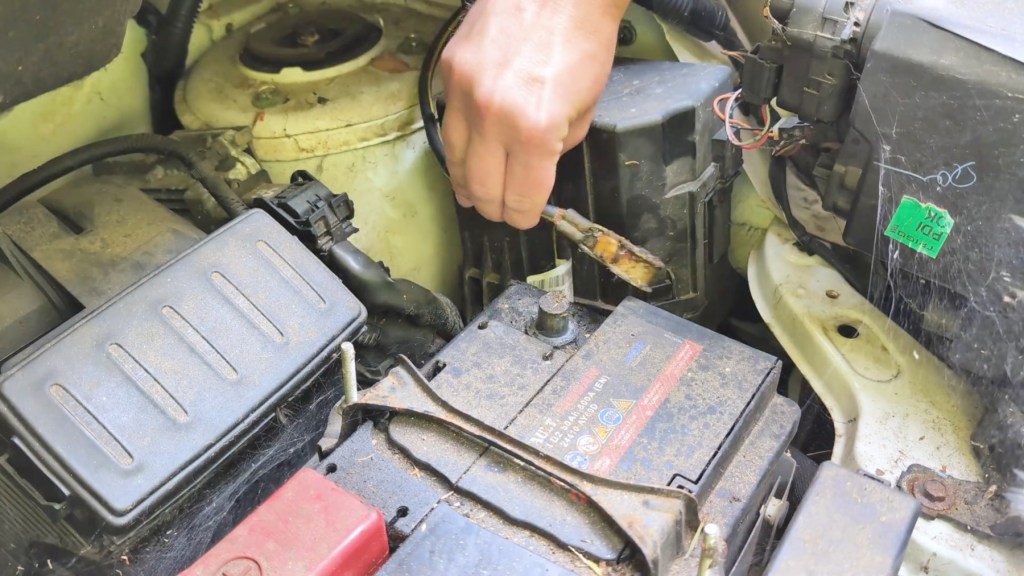
Before inserting the fuse taps into the vehicle, Atoto recommends disconnecting the negative terminal of the battery which I did here, however if you do this too you’ll be resetting your stereo so will require a radio code, which is often found in your car manual, but always worth checking before you disconnect the battery.
Ensure that your fuse tap is is up the right way you determined earlier, and insert the first tap into the slot. You may notice on my second tap, the yellow B+ wire, that I don’t have a vehicle fuse inserted and then I’m inserting it into an empty slot.


This is because despite initially trying to tap a fuse, my only constant battery fuse was in too difficult a position to tap because of the right angle of the fuse. As a result I resorted to an empty slot which worked absolutely fine.
Again make sure this is in the right orientation and, as you’ll see from my vehicle, the red and yellow fuse taps are actually facing in different directions, so there isn’t always a set direction they should be inserted.
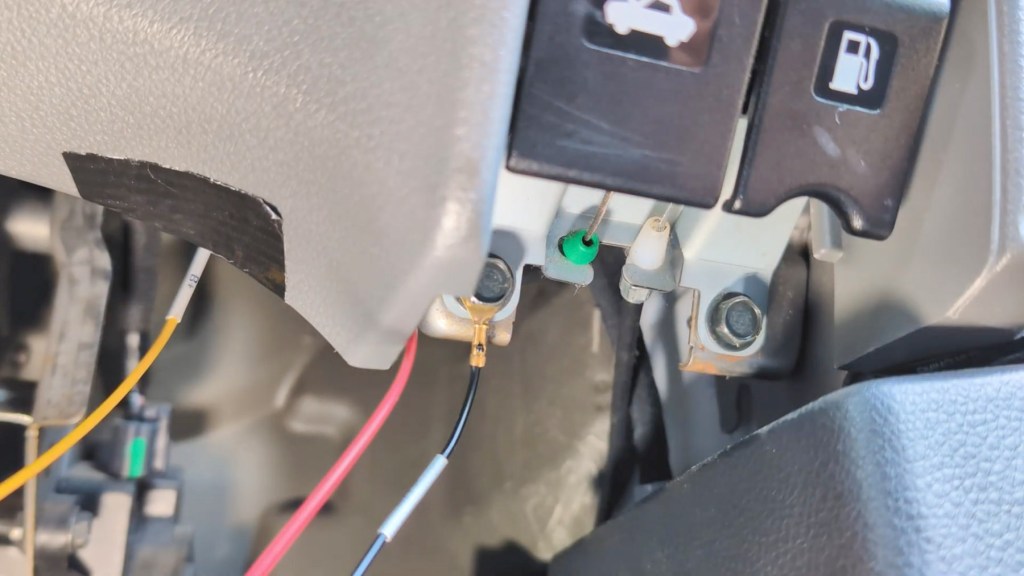
Up to this point we’ve neglected the third wire coming off the fast boot connector, and that’s the black ground wire. This needs to be slid under a grounded bolt and so I found one just below the fuse box here, so I can tighten that in place.

Finally plug the cable of the fast boot connector into the Atoto P9 screen and reconnect the negative terminal of the vehicle battery. With power flowing to your fuse box again, the P9 will take a few seconds to power on and you’ll see it run through its startup screens.

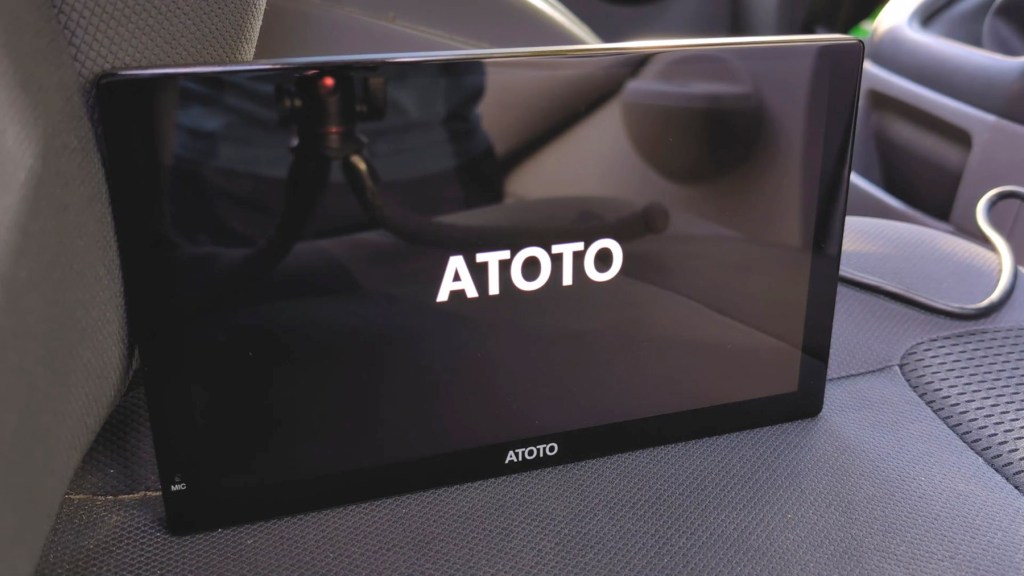
As it’s hardwired it will only go to sleep when the vehicle’s off, instead of powering off fully, and won’t need to go through these screens every time, hence the 3 second startup mentioned at the beginning of this video.
But this won’t run your battery down. Atoto says that when it’s in ultra low power sleep mode it would take between 160 and 250 days to run a standard vehicle battery down, so it’s unlikely you’d ever have a flat battery because of the P9.
For some reason when first turning on my P9 went straight to the music player screen, but ever since it’s gone straight to the homepage when it powers up.
We’re also on Instagram!
Check out yogi.the.van to keep up-to-date with all our adventures in the van!


How To Install The Atoto P9 In Your car
With the hardwire out the way it’s a breeze to install the P9 on your dashboard.
Grab the suction cup mount, and you can use the flexible pad mount as well if necessary, and stick it to your desired position on the dash.
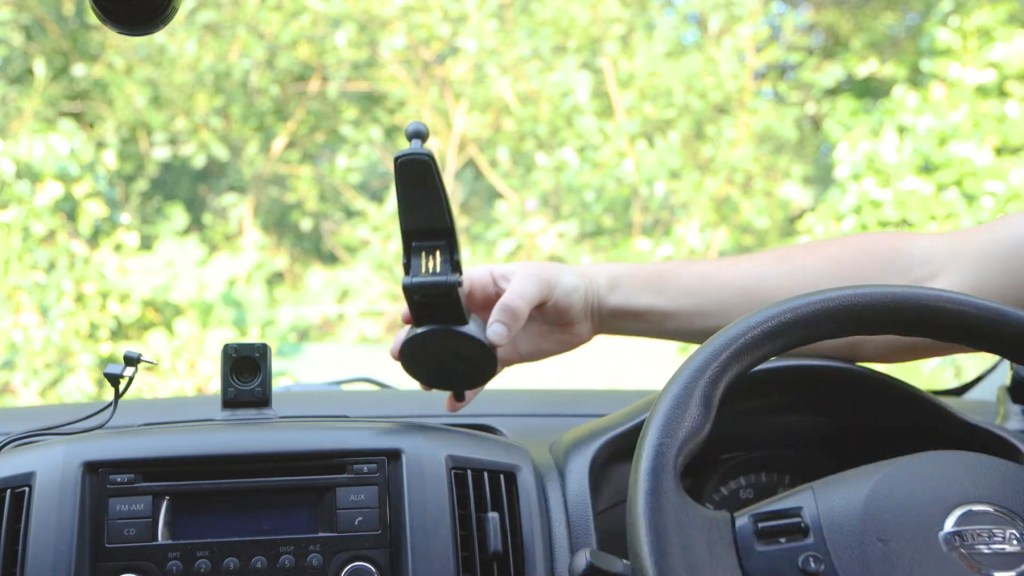
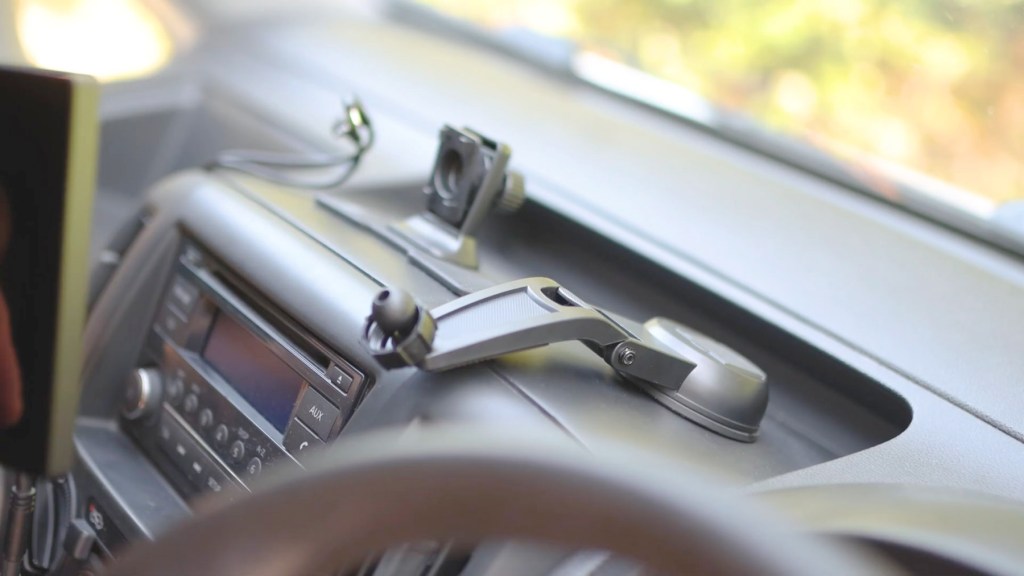
Find the angle you want for the arm and lock it in place, then lock the attachment plate to the back of the P9 which seats very securely, and with the screw collar on first attach the screen to the ball joint and tighten it in place.
The suction cup mount opens in a way which is designed to overhang your dashboard, almost mimicking a full replacement of your built-in head unit, so it looks like it’s part of the vehicle.
And that’s it, the P9 is installed!
You may well want to hide the power wires and this can be done by popping off bits of the dashboard using trim removal tools, and I’ve got a link to a set which won’t damage your vehicle in the description below.


How you get the trim off differs for every vehicle and depends on where you want to route your wires to, but it’s doable for most and is a great way to get a clutter-free dashboard.
Click to buy your own…

(Affiliate links which help support this blog)
Exploring the apps & settings of the Atoto P909PR
So let’s get the P9 turned on and have a dive into the interface and apps.

I should start by saying that if you’re seeing artifacts or lines on the screen, it’s just my camera and not the P9 which has a very high quality screen that my camera doesn’t do justice at all.
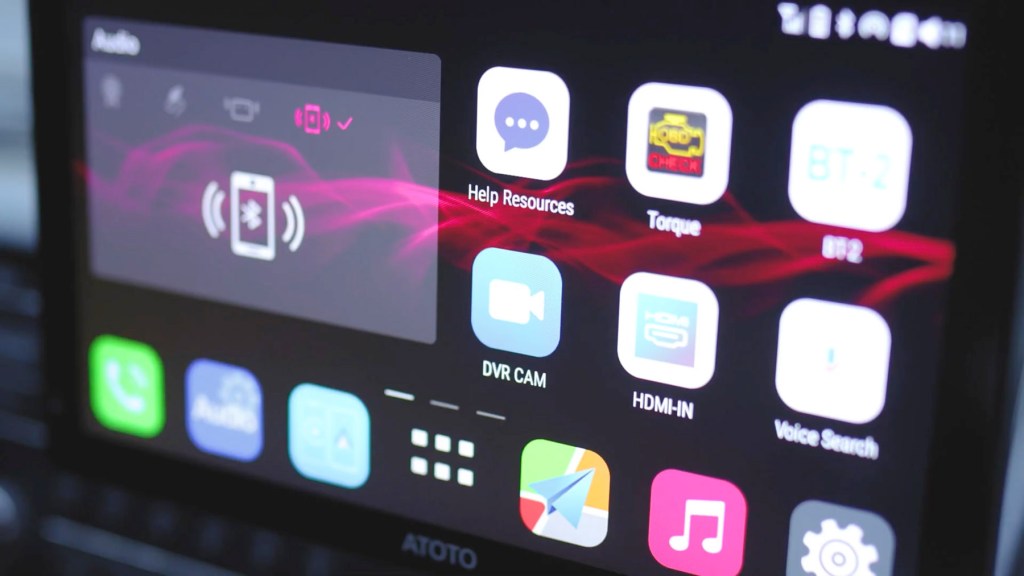
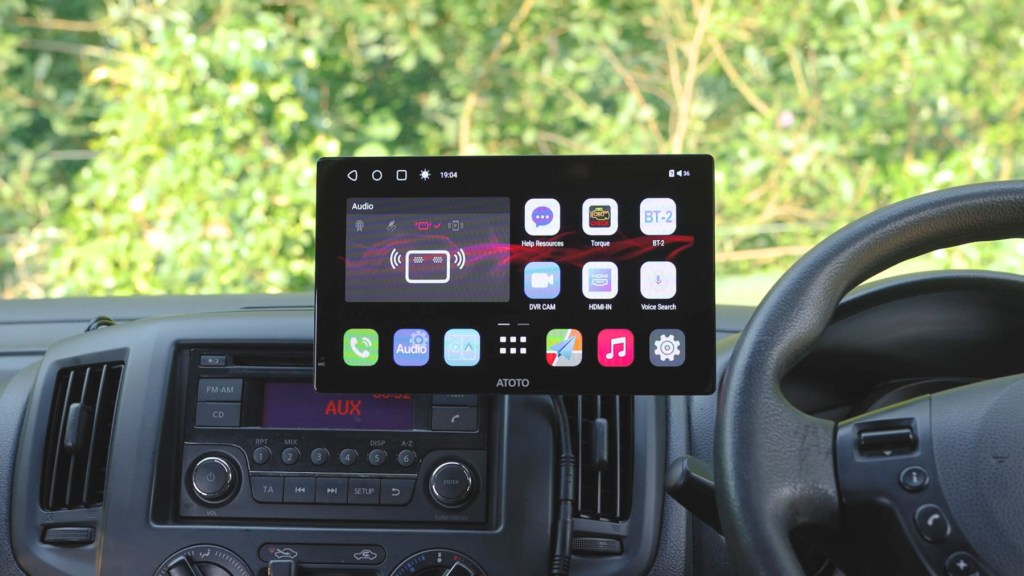
Starting in the top right corner you have direction buttons, as well as access to a display showing currently open apps.
The P9 has 4gb of built-in memory so you can navigate between multiple apps with ease. The sun button toggles your brightness and there’s also auto-brightness dimming too.
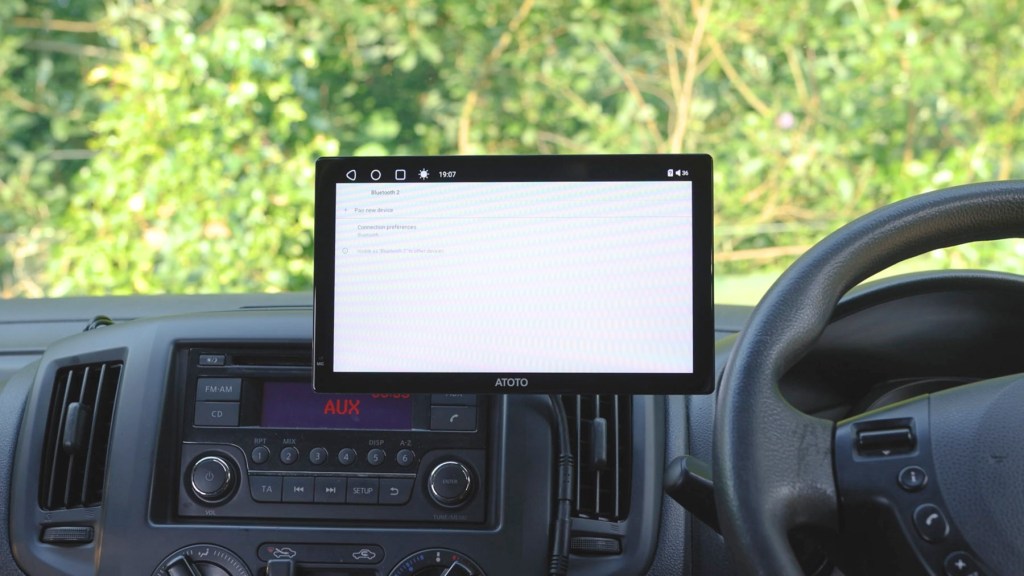
Below that you have your audio playback setting, with the choice of playing via radio, where you tune your vehicle and the P9 to the same frequency, wired playback via the included 3.5mm AUX cable, playback via the built-in P9 speaker, and finally wireless bluetooth playback .
Pressing this final option will take you to the playback app where you get instructions for bluetooth setup and a slider to change radio frequencies, which are also programmable.
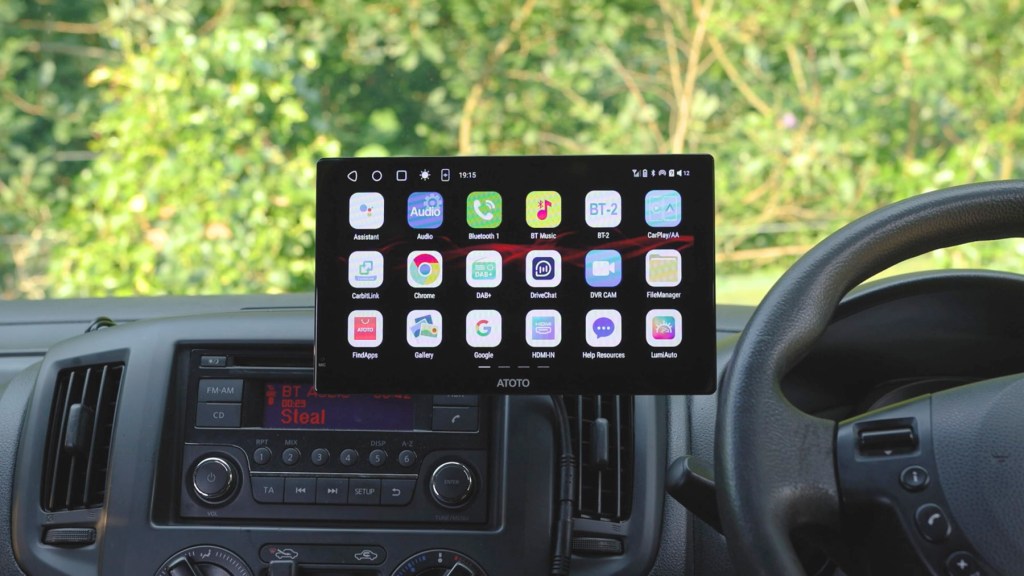
Moving on to the apps there are lots to choose from and this is just the first page. Atoto have also developed a number of apps themselves so you can get the most out of the device.
Up first is Help Resources with a range of options for learning more about the device.

Then there’s Torque, which is a really interesting app that reads a number of data points including fault codes and acceleration information via the optional AC-4450 OBD Port bluetooth plug, which reads your car’s diagnostics and sends them to the device.

BT2 is a second bluetooth option which, unlike the BT1 bluetooth which connects to your phone for media playback, this is for data transmission and Bluetooth Low Energy, or BLE connection. This means you can connect and use devices such as bluetooth keyboards and diagnostic tools.
DVR cam allows you to record footage from any optional additional cameras you have installed, essentially making the device a dash cam. You can lock clips, capture photos and configure what information is imprinted on the video clips too.

HDMI-In allows the connection of HDMI devices such as games consoles and TV plugins, using an additional HDMI to USB-C adapter which you’ll have to buy separately.

Voice Search is a shortcut to Google Assistant and a way for you to ask questions and find things out in a hands-free way.

Along the bottom row the phone symbol takes you to your contact book, if you’ve connected your phone via bluetooth. Here you can dial out, control your music and adjust your bluetooth settings.

The next app along is Audio and this is the playback page we saw earlier for choosing how you listen to music on the device.
Then there’s the app which most people want to get set up and using; CarPlay and Android Auto. It’s really easy to do and once you’re on the app the P9 will send out a bluetooth signal that you need to find on your phone, connect to it, go through the permissions and the interface will load on the screen pulling data from your phone.

I’ve got an Android phone so I’m using Android Auto on the P9 but you’ve got access to music and navigation, in my case Google Maps which is currently in dark mode, and Spotify, both split between either a third or 2/3 of the screen.

You can also go full screen with the maps and have the ability to view messages, make calls, use Google Assistant for voice commands and change Android Auto settings, including switch in from Night Mode to Day Mode, though it’s great to have this addition to reduce eye strain at night.
I mentioned earlier that you can use your steering wheel controls to control music. The trick to this is connecting your phone to the P9 via CarPlay or Android Auto, like we’ve just done, and then connecting your phone to your car’s bluetooth.

By doing this your phone is telling the vehicle to play sound whilst telling the P9 what to display. Very clever stuff and a fantastic integration of third party tech into a vehicle. It should be mentioned that there aren’t many dashboard consoles with this built-in, so it’s great Atoto has embraced this for the P9.
Heading out of Android Auto and back to the home screen, the middle button along the bottom row takes you to an index of installed apps.
And because this is essentially an Android tablet you have apps such as Chrome, Spotify and YouTube already installed.
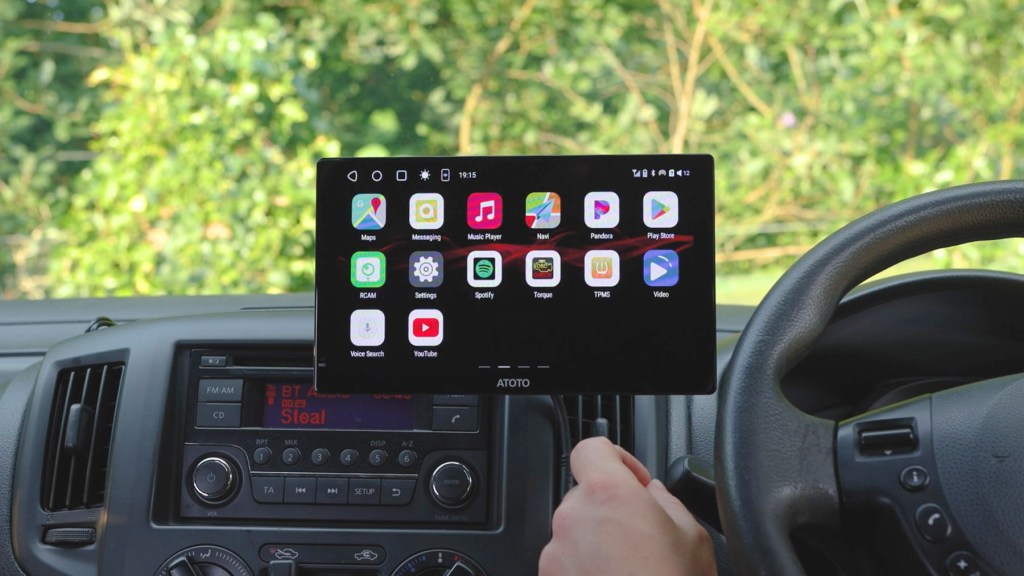
There’s also a Google Play Store app so you can download pretty much whatever you want like Netflix, Disney+ or Amazon Prime – just don’t be watching them while you’re driving, as that’s probably illegal in whatever country you’re viewing this video from.
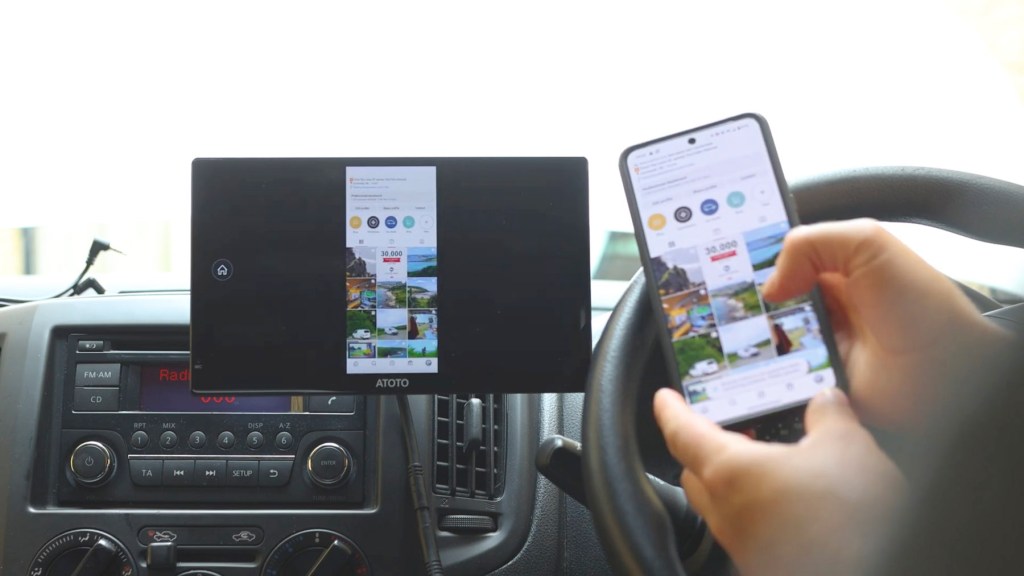
There are other apps worth mentioning here including CarBitLink, which is a way to mirror your phone screen to the P9, and you’ll need to download the app on your phone as well to do this.

Then there’s Atoto’s own DriveChat app, a custom voice assistant based on ChatGPT which they’ve released recently. It offers company on the road through voice conversations, advice through intelligent Chatbots and voice commands too. You need to download an app onto your phone too, but it’s a really exciting development which pushes the capabilities of what you can do whilst hands free.


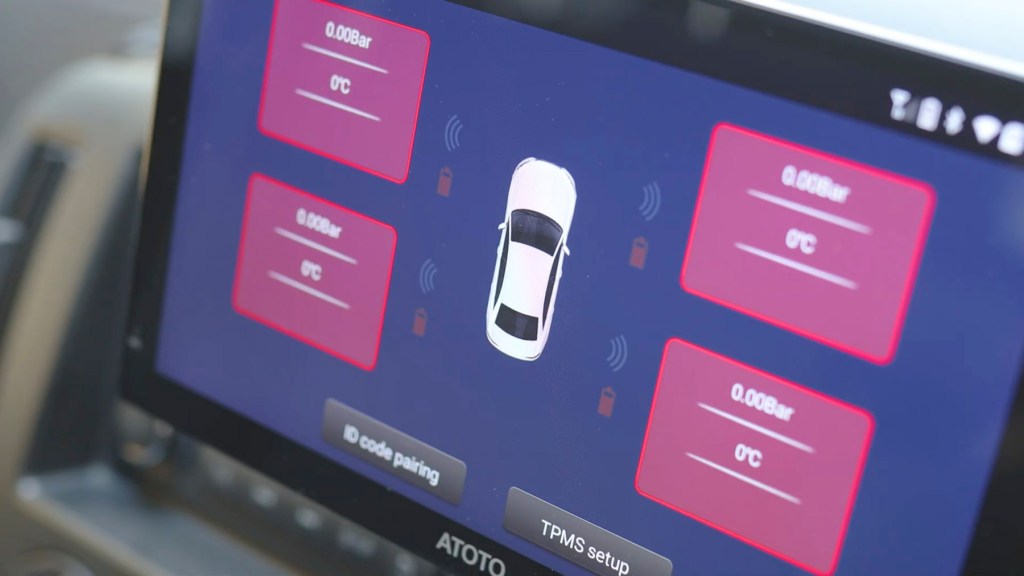
On the next page of apps there’s RC Cam which will adjust settings such as parking lines of any rear view reversing cameras you have connected, there’s also the TPMS app which if you’ve got the additional AC-UTP1 USB tire pressure monitoring system installed you can keep an eye on your tire pressure here.
There are many more apps there and countless others you could download yourself, but hopefully get the idea that the P9 is well and truly loaded with useful innovative additions to your vehicle.
Back on the homepage the remaining apps are maps, which is another way to access Google Maps or whatever navigation program you prefer, a music player for if you’re playing music without being connected to CarPlay and Android Auto, and finally settings.
Heading in there’s lots to play with and I won’t go through absolutely everything, but you can view Wi-Fi connections data usage and sim info if you have one installed, on the device tab you’ve got display, sound, GPS location, bluetooth, USB storage and app settings.


Under General you’ve got some camera, touch and audio settings amongst others, whilst under Users And Accounts you have location, security, language, and Google settings, as well as the ability to do a system reset.
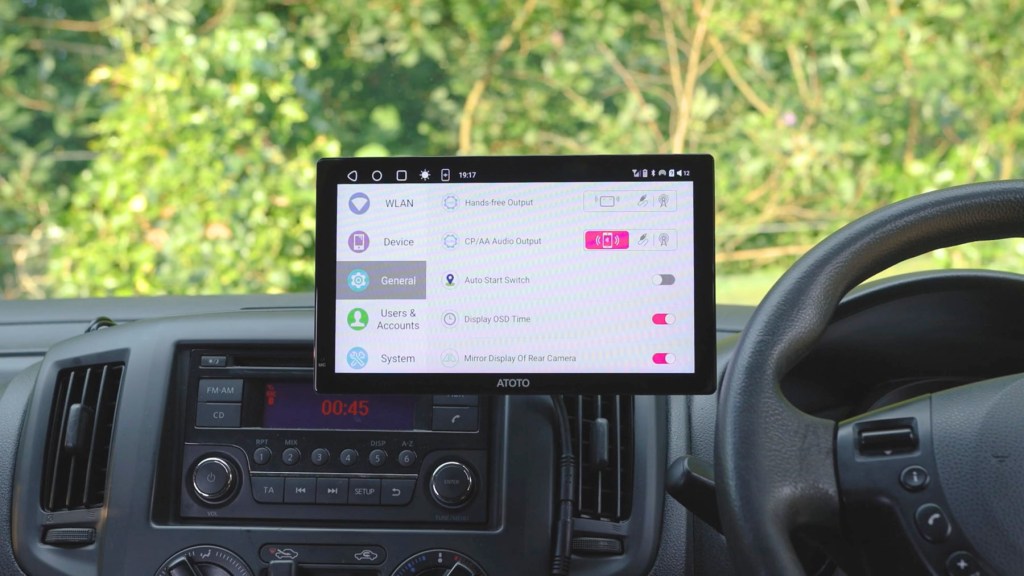

Finally under system you have date and time, accessibility, screen lock and device settings, and there’s also the option to add your own startup logo with instructions on how to do so.

So that’s a fairly brief rundown of the apps
It’s only the tip of the iceberg as there really are so many to explore, with apps that cover almost anything you could imagine clearly making the P9 a very versatile device.
Other hardware options for the Atoto P9
There are two hardware editions that are also included in the box.
The first is a wired lapel microphone for clearer calls, and I think the best place to install this would be to the plastic trim nearest your head. You can then tuck the wires away and feed the end to the port on the P9.

The second is this handy remote control which straps onto your steering wheel. Whilst your steering wheel controls will work when connected to CarPlay or Android Auto, this gives additional handfree controls directly from the wheel and the dial to control the volume is very satisfying.
How Much Does The Atoto P909PR Cost?
So how much will the Atoto P9 set you back?
There are a few different P9 models out there with differing screen sizes, memory options and accessories.
For this 9 inch model with 4gb memory and 32gb storage you can expect to pay around £300 or dollars.
I’ve got affiliate links which help support this channel for this version and for other models in the description below, and these include 9 inch screens with more accessories such as front and rear cameras, and smaller ones with 7 inch screens, with prices ranging from 280 to £360, so have a look below and see which one suit you needs best.
Bear in mind this is a premium dashboard consoles, but there are cheaper ranges available from Atoto too.
Is The Atoto P9 Any Good?
I’ve reviewed a number of dashboard screens over the years and I have to say that the Atoto P909PR is up there with the best of them. Having it wired in might be a bit of extra work, but the speed at which it powers on is second to none making it a fantastic integration into a vehicle.
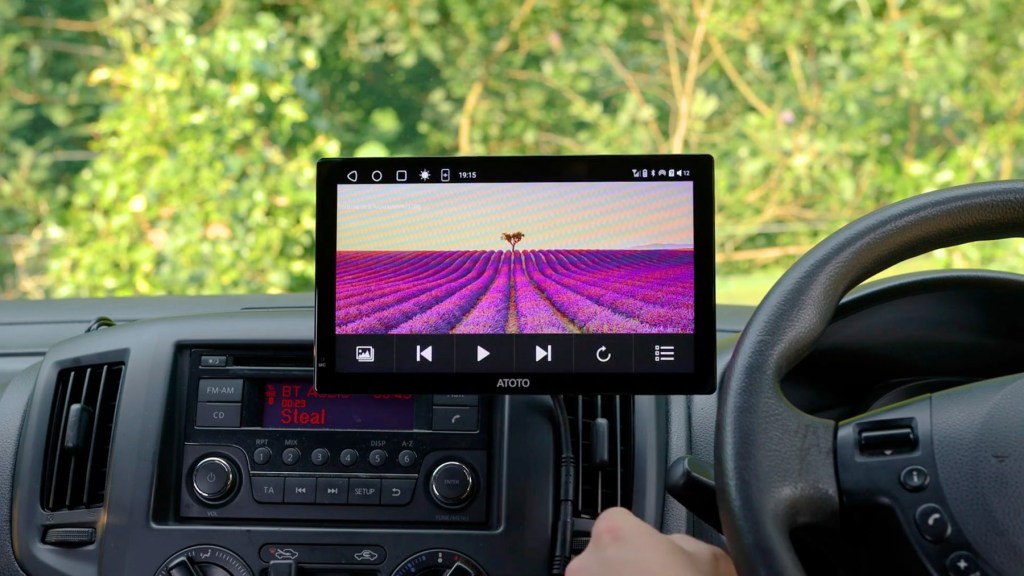
As for the screen quality, although difficult to do it justice on camera, it’s pin sharp with excellent colours and clarity whilst being very bright in daytime conditions and dimmable for night.
But one of the most exciting features which I just haven’t seen anywhere else is the ability to add extras such as tire pressure monitoring and bluetooth OBD plugins. It means you’re not just getting a screen but a complete system you can add to and update for years to come.

With dozens of useful pre-loaded apps, as well as the ability to download thousands more, is definitely one of the most comprehensive screens.
I’ve come across if you want to get a P9 for yourself or browse more of a too’s product then I’ve got affiliate links in the video description below.
Thanks for stopping by!
Click to buy your own…
(Affiliate links which help support this blog)
