
This article is a written account of a video from the Lens Of James YouTube channel. Watch the video above and subscribe if you like what you see!
This article contains affiliate links to relevant products I have used in my videos. By buying through these links, I receive a small percentage of the sale at no cost to you which helps me support and grow my website and YouTube channel, so I can create more content like this in the future. Thank you for your support.
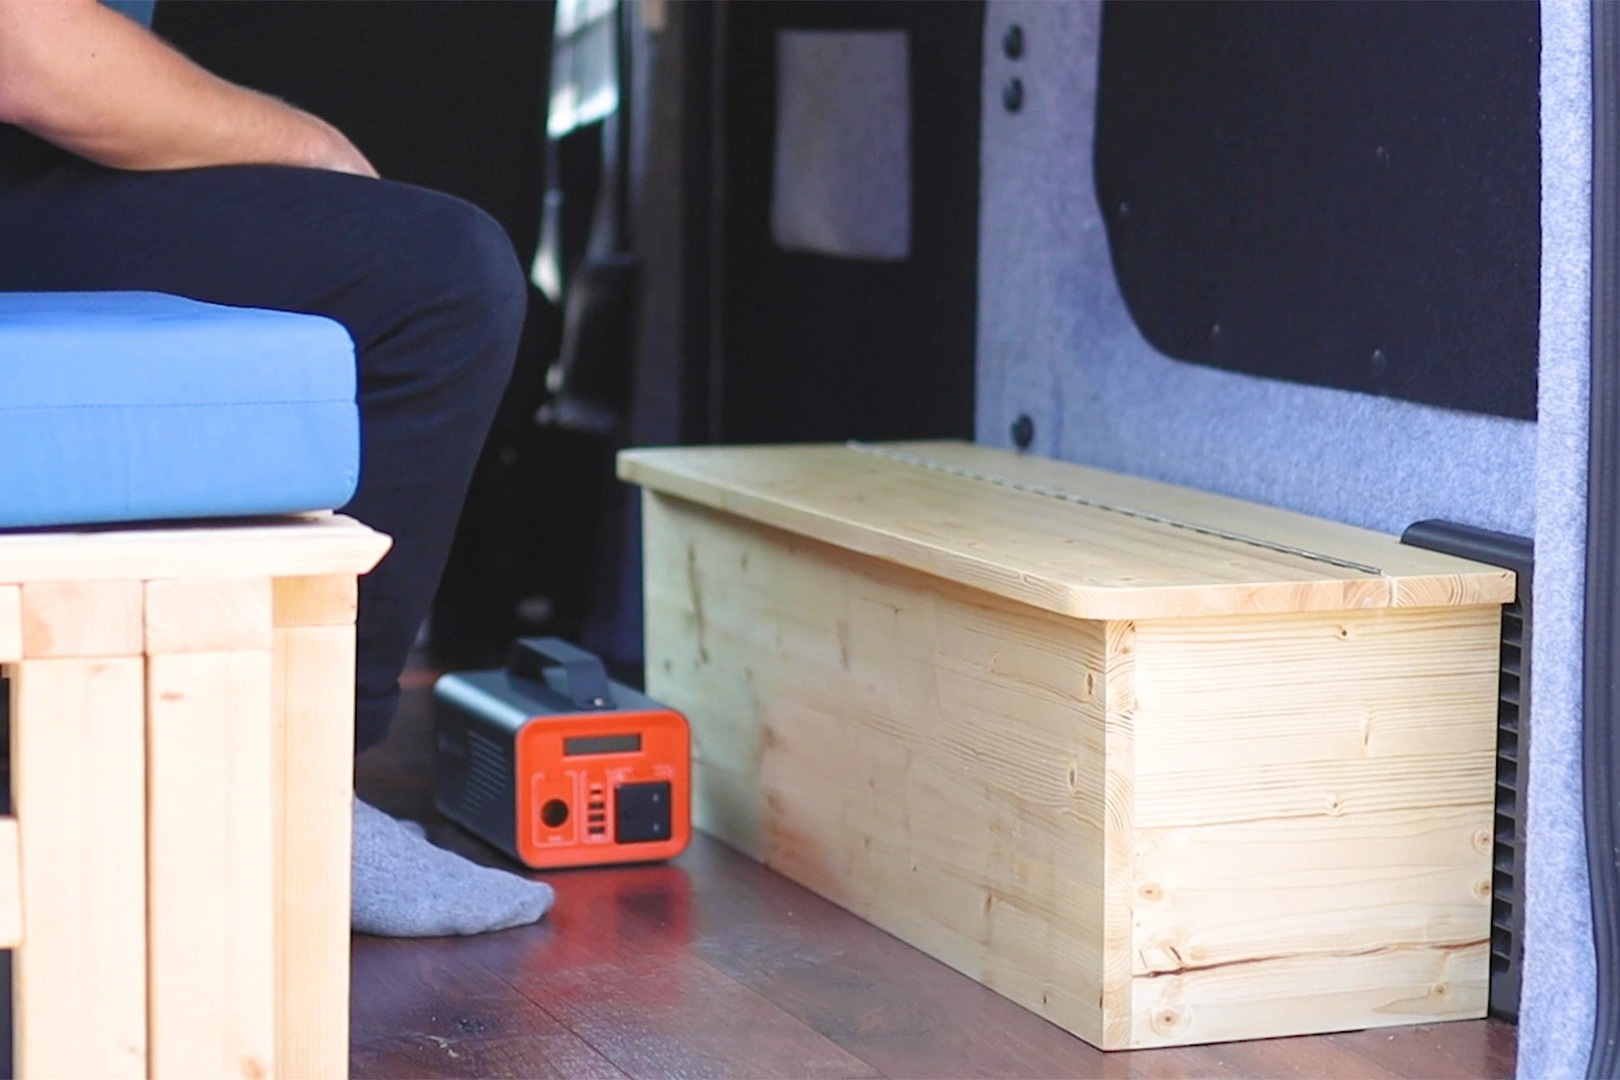
This blog is the first of a 2 part sub-series on building a side console with storage and a fold-down table for the van. Whilst I could build one big which spans from the ceiling to the floor, as many van conversions have, I would lose some of the width of my bed, and having worked so hard building it to the entire width of the van, that’s the last thing I want to do.
So in this blog, I’m building a wheel arch storage box which the bed can pull over and rest on, and later I’ll be building an upper section which sits above the chest, leaving a gap for my bed in the middle.
Hopefully it will all become clear as I go, so without further ado this is how I did it.
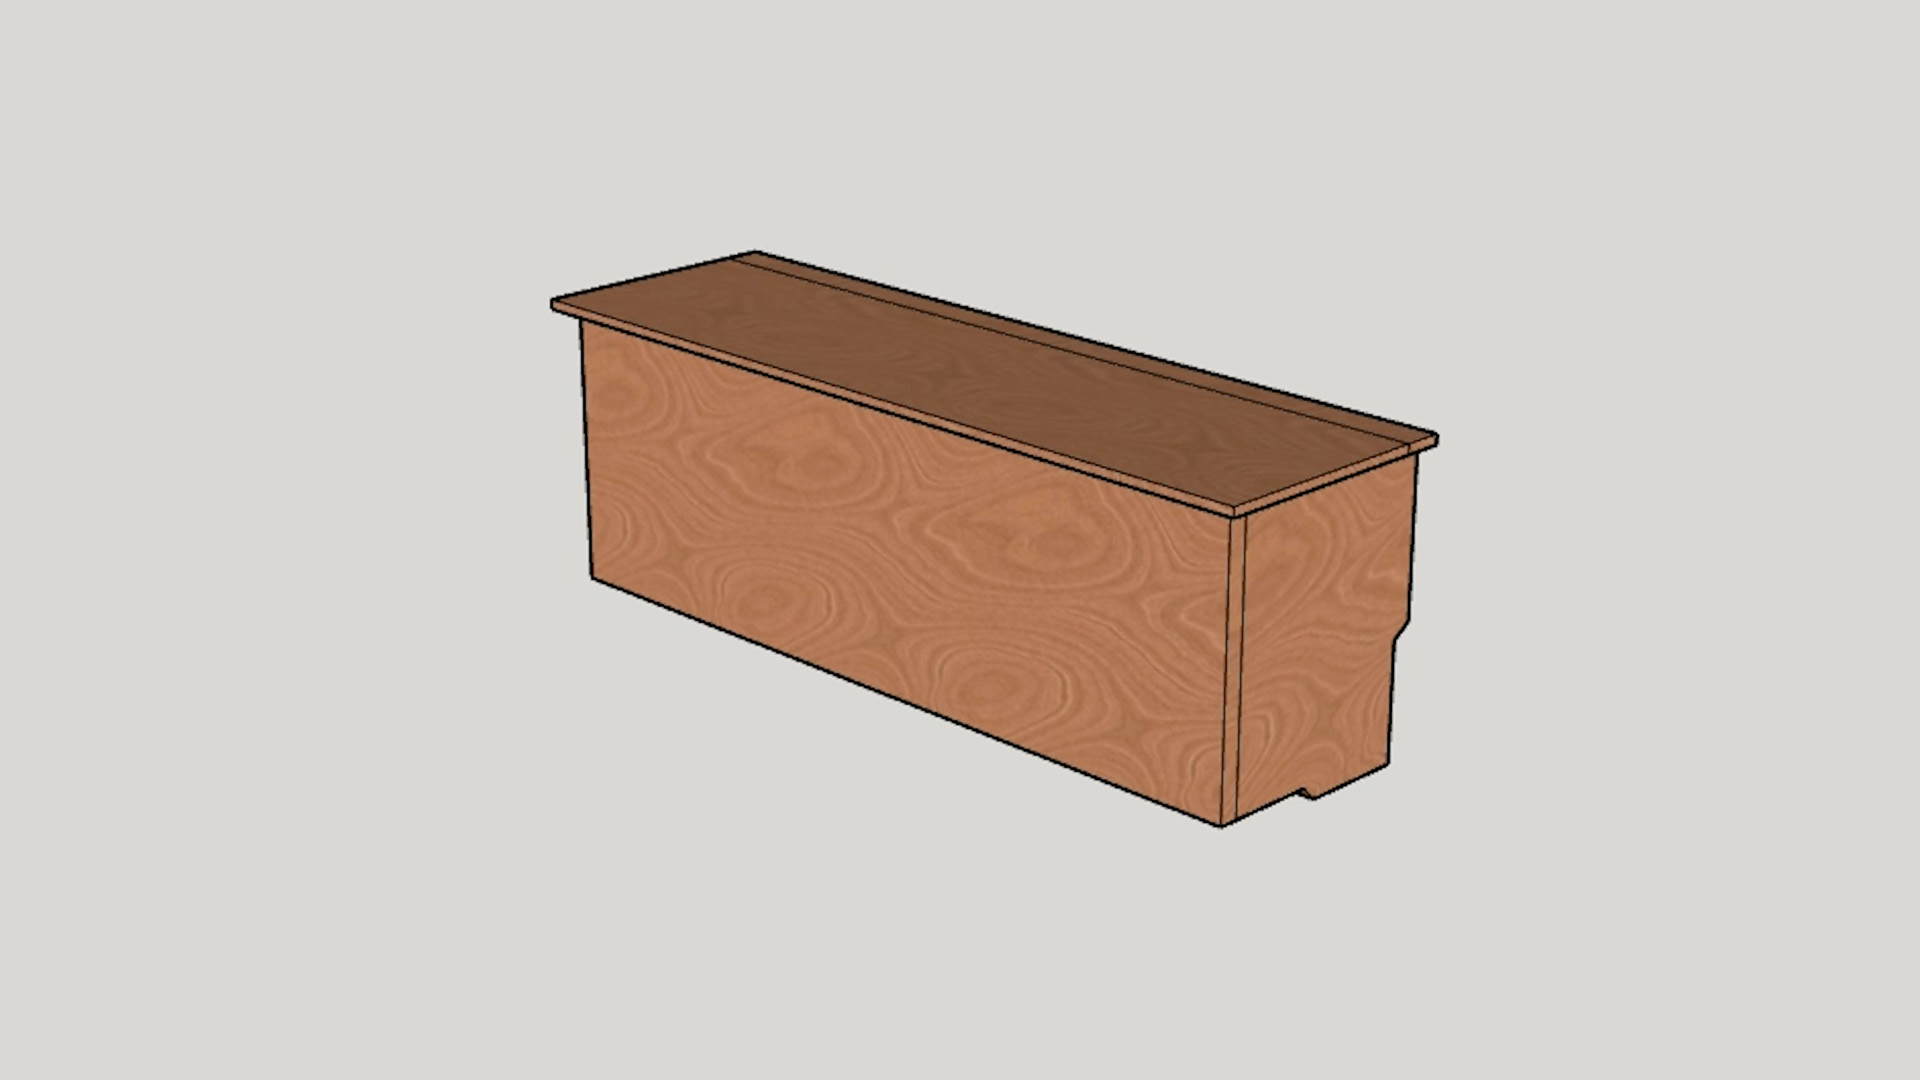
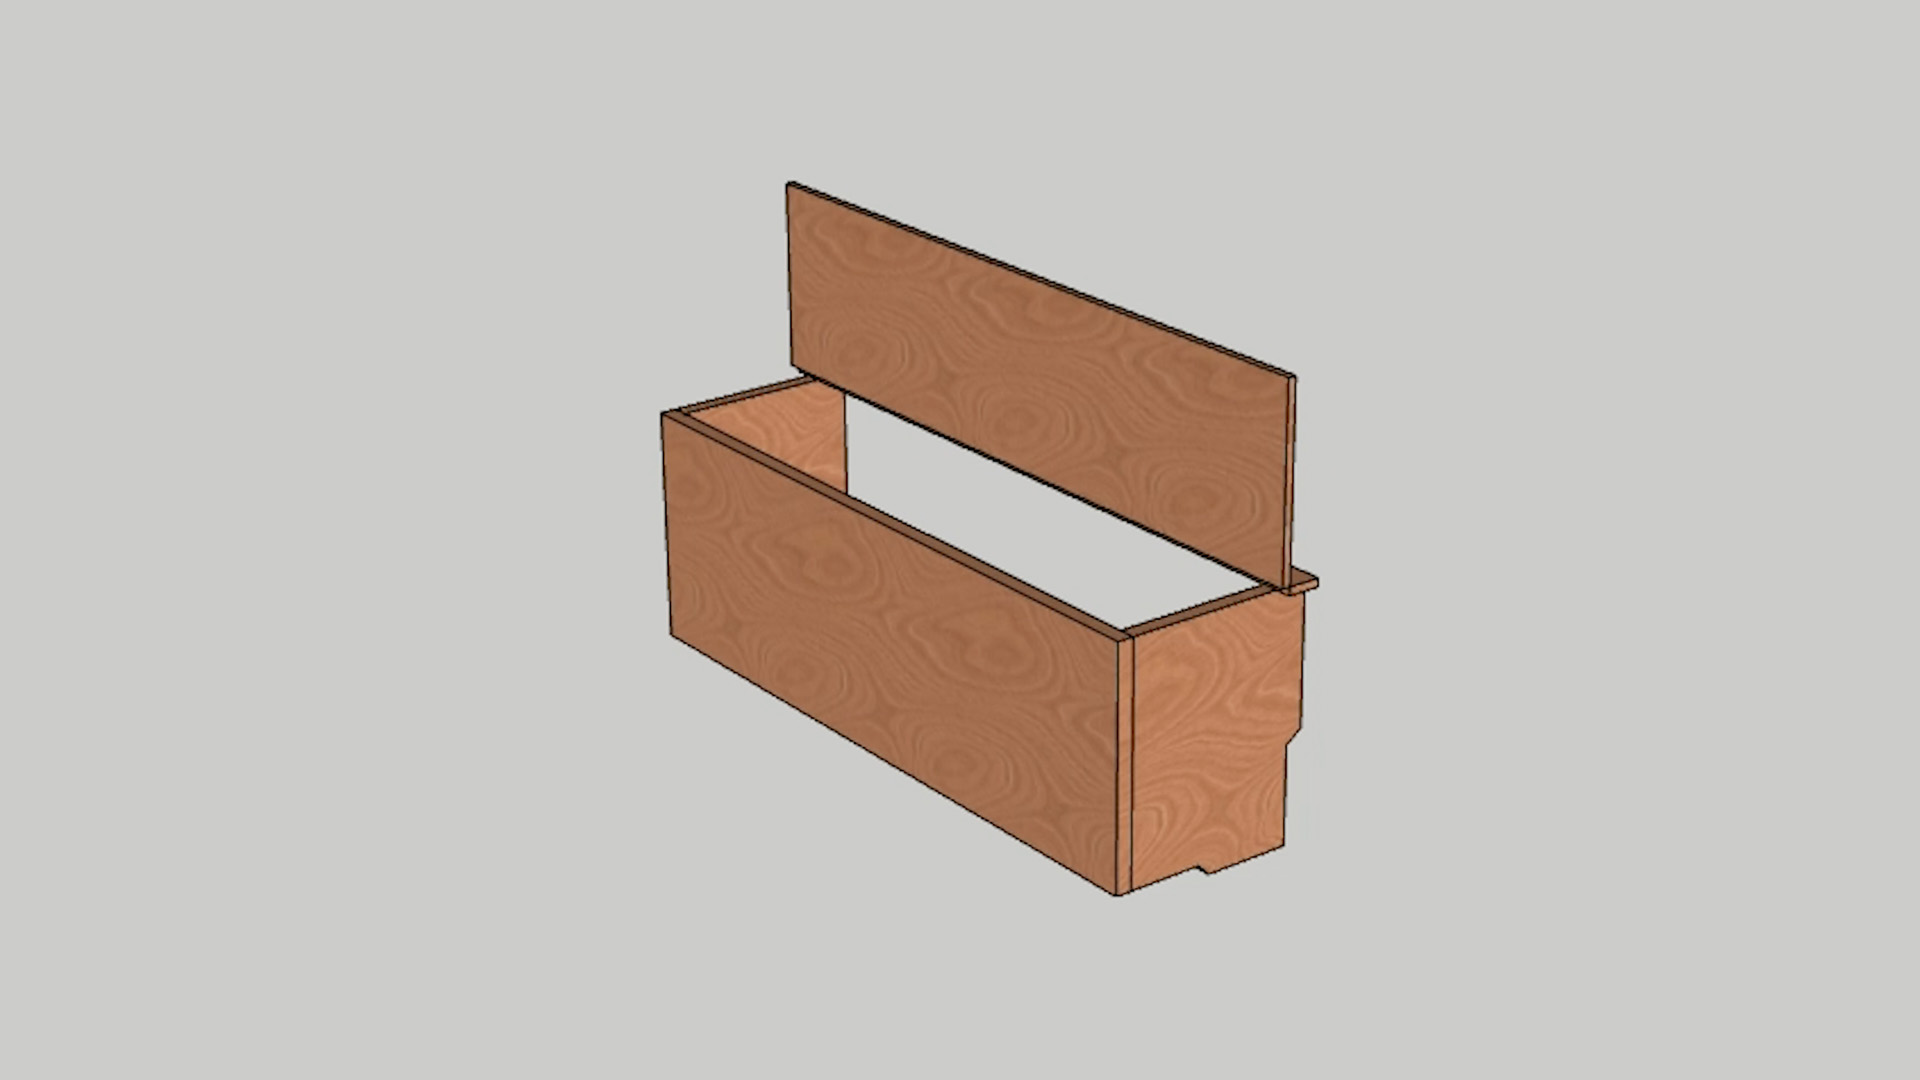
Designing the storage box
I started by making a rough design of how I wanted the chest to look on SketchUp. It was my first time using the software, but I found it quite easy to use.
My reasons for creating a wheel arch box are that;
- It creates more vital storage in a largely unused area of the van
- It creates another point of support for the bed when it is fully extended
- It covers up some of my questionable carpeting over the wheel arch
- And it doubles up as a foot rest when we’re sat in the van
Creating an upward-lifting lid on it would mean it is accessible even if the floor van is full and putting a wooden base in the bottom of the box increases its rigidity, as there won’t be a back to the box.
Marking out the van
My first stage was to work out the depth of the side pieces. I wanted to fit my water bottle and, temporarily, my portable power pack, whilst continuing to allow room for my surfboard to fit down the centre of the van.

I spent a lot of time measuring out the box’s area, and then masking taped its shape onto the floor of the van so that I had a visual reference.
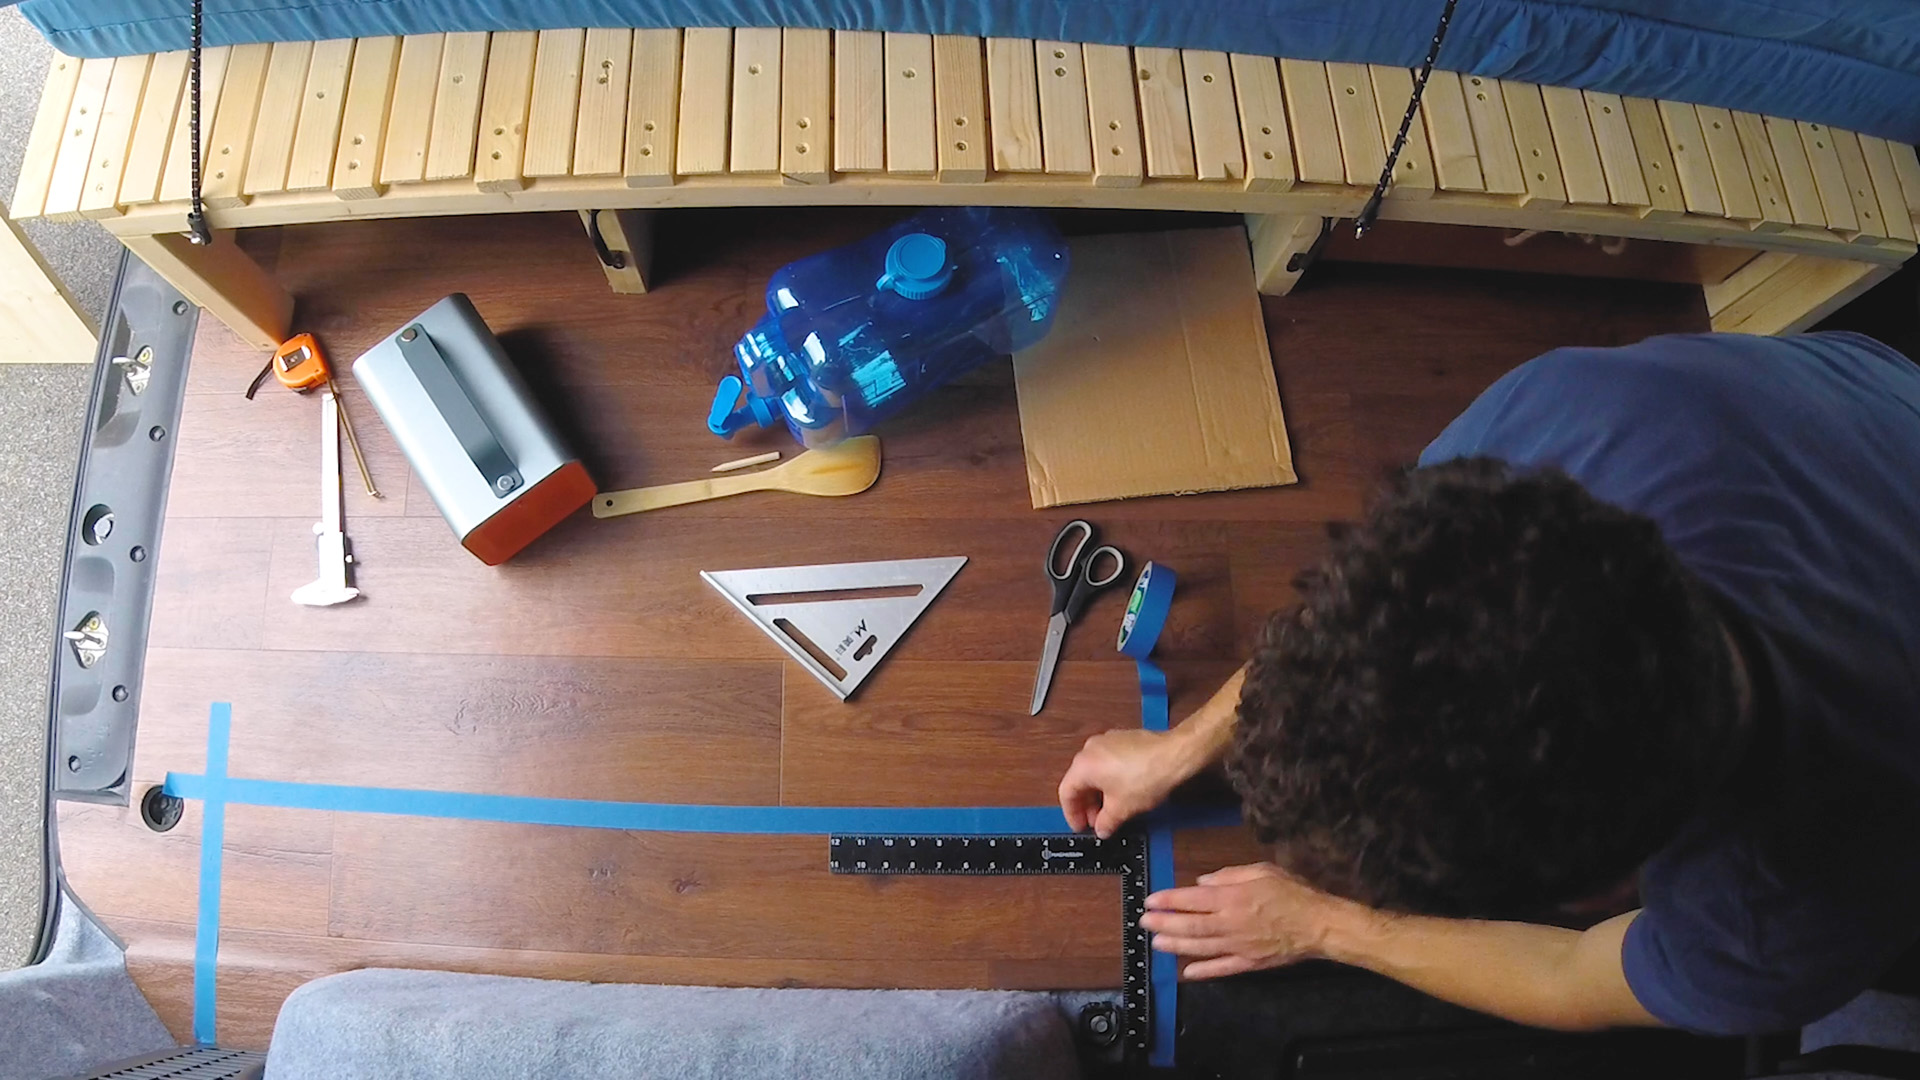
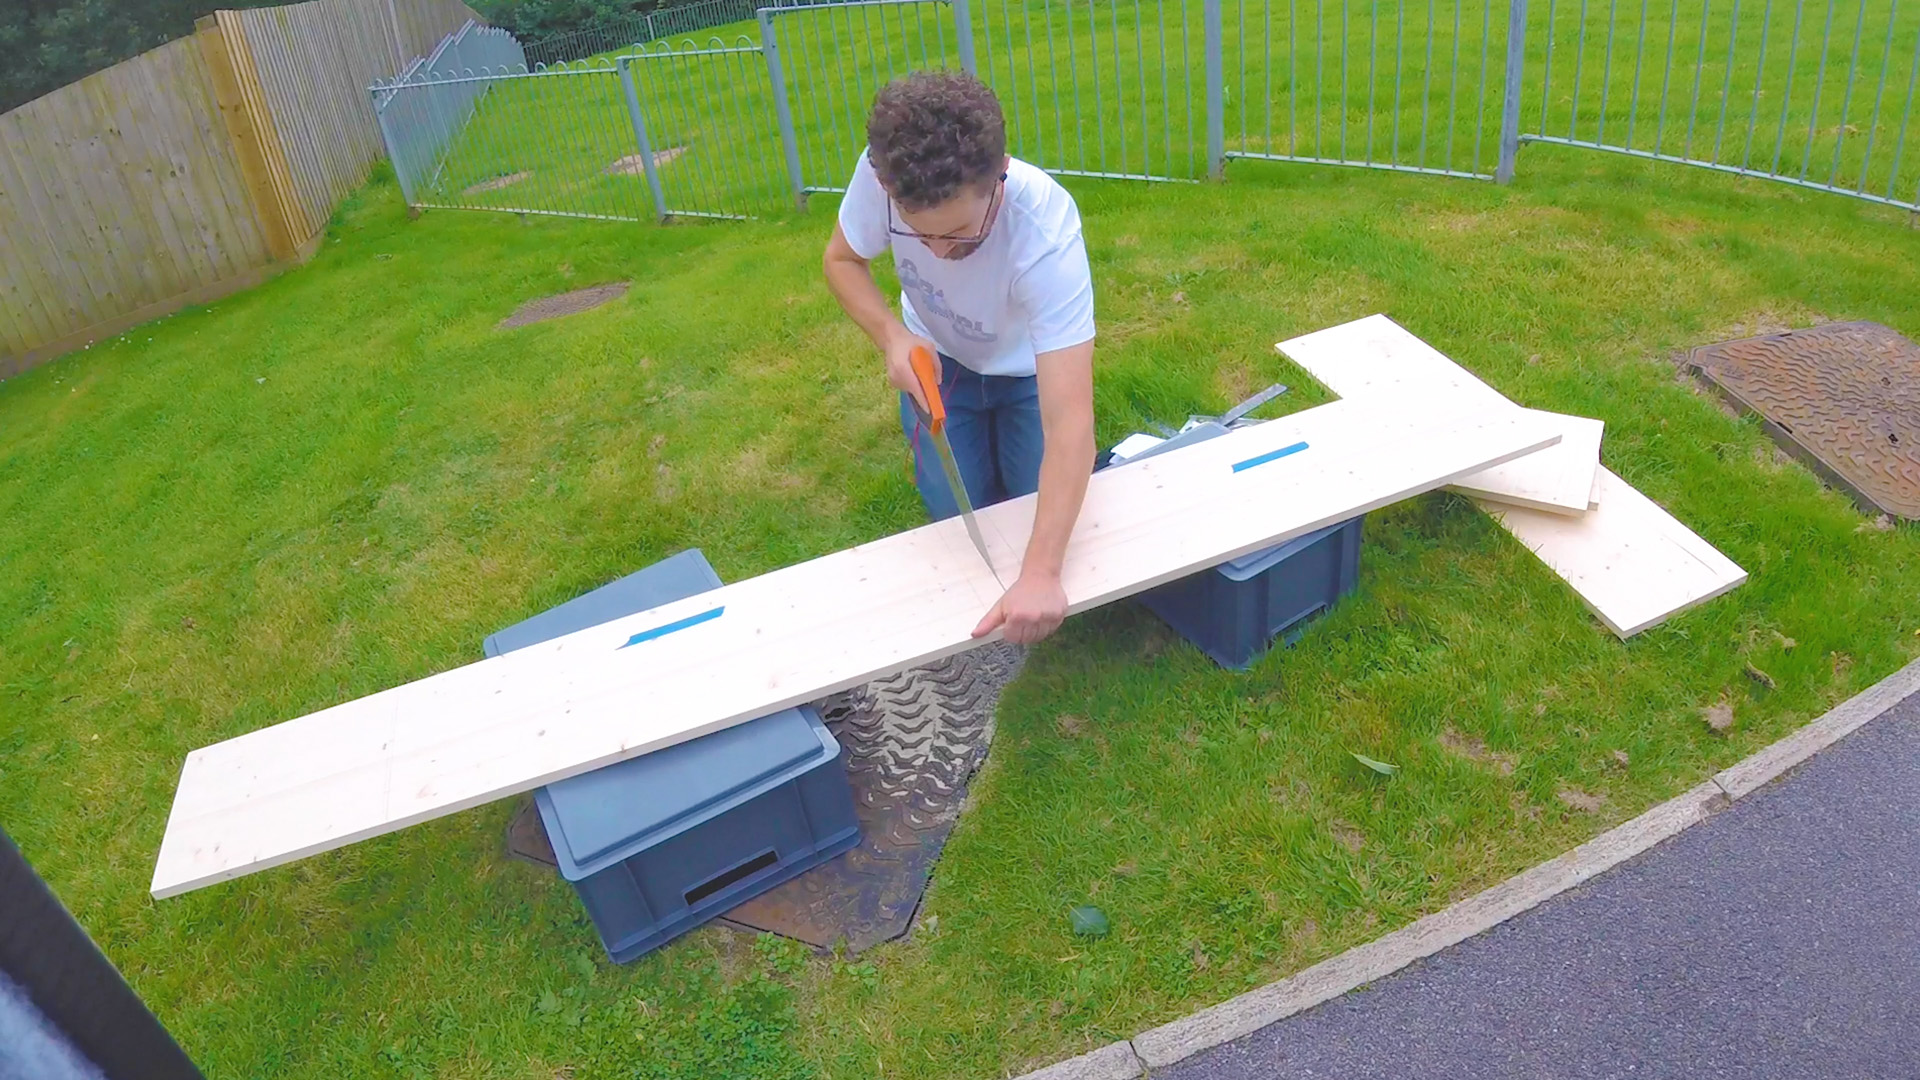
I would be building the box out of lengths of pineboard, which I could source cheaply and came in a number of useful sizes, meaning less cutting for me. I measured out the side pieces and realised I would need to scribe out the back edge near the side door.
Click to buy your own…


(Affiliate links which help support this website)
Making templates for the box
I created a cardboard template for this and cut it out with a jigsaw at a later date.

I could then measure out the lid, the front and the base from the other pieces of wood and roughly cut the sections so that they were easier to transport.
Building the box frame
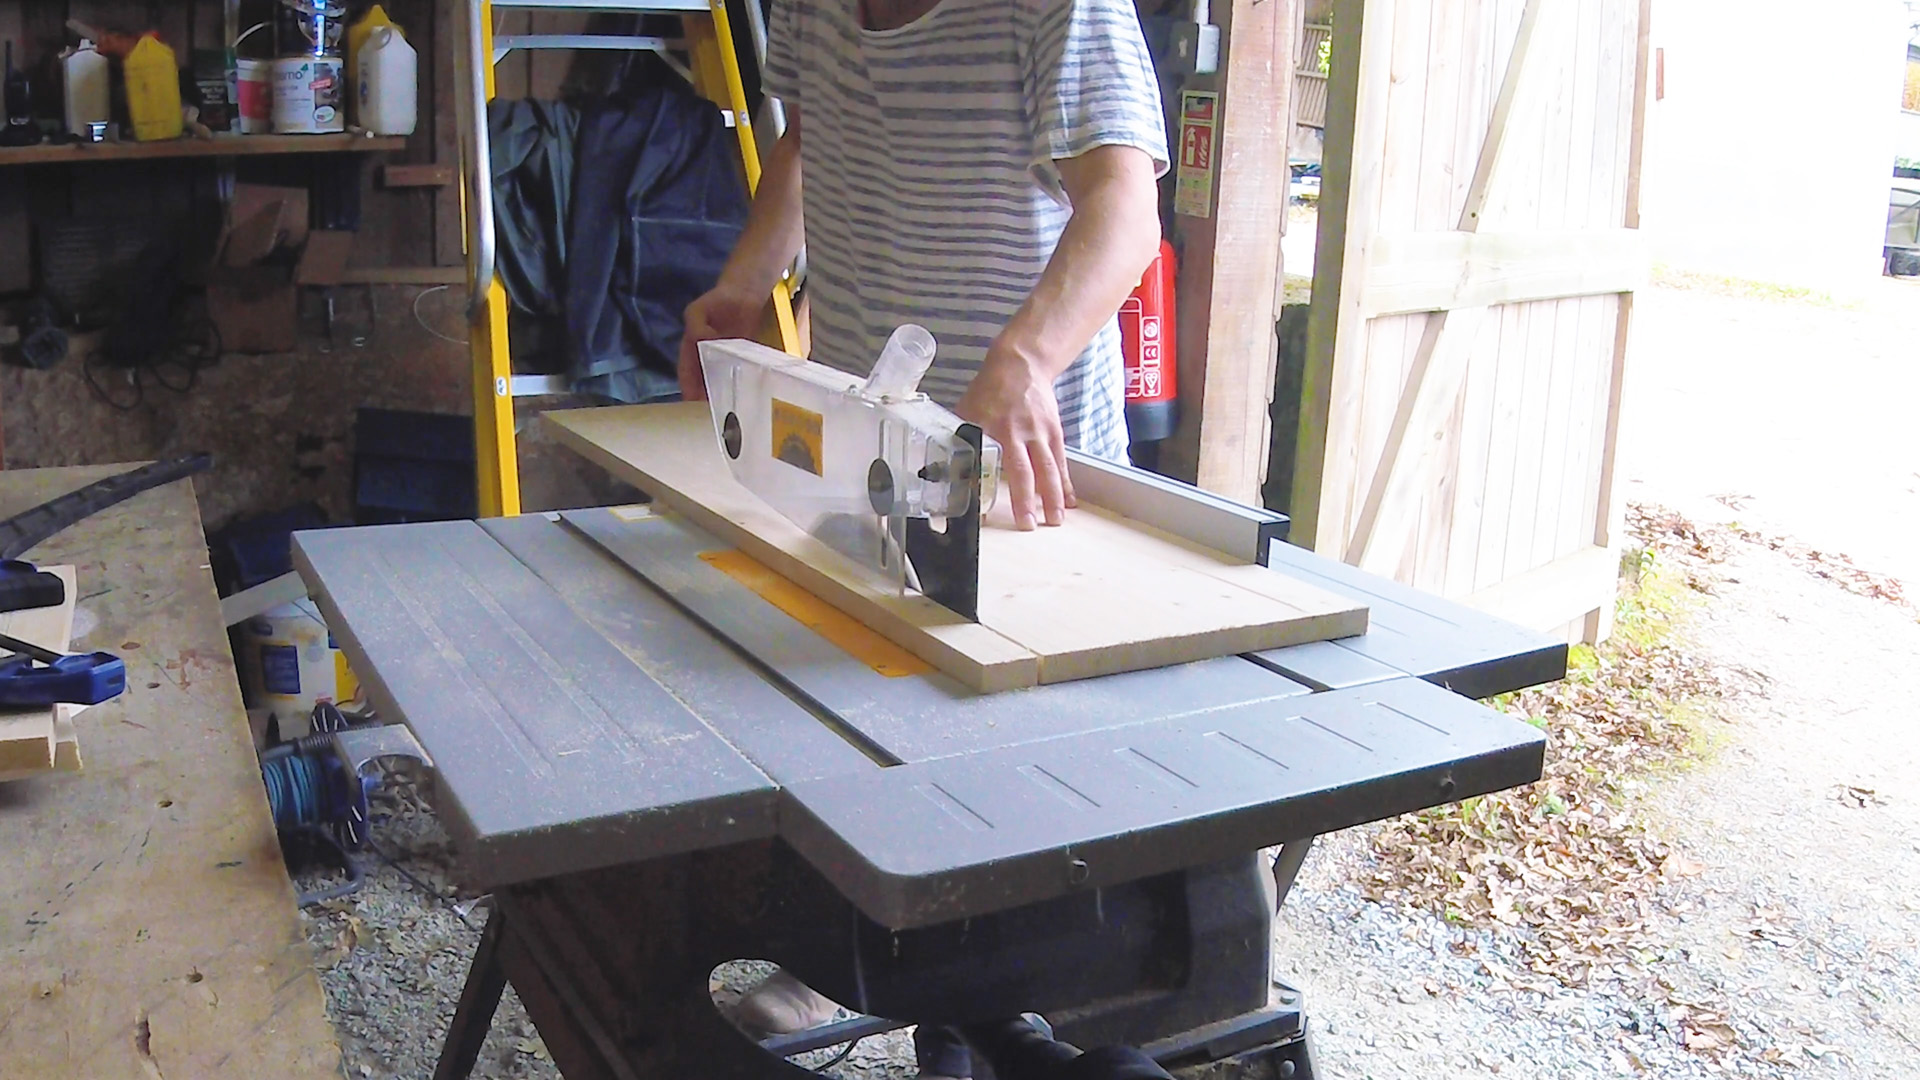
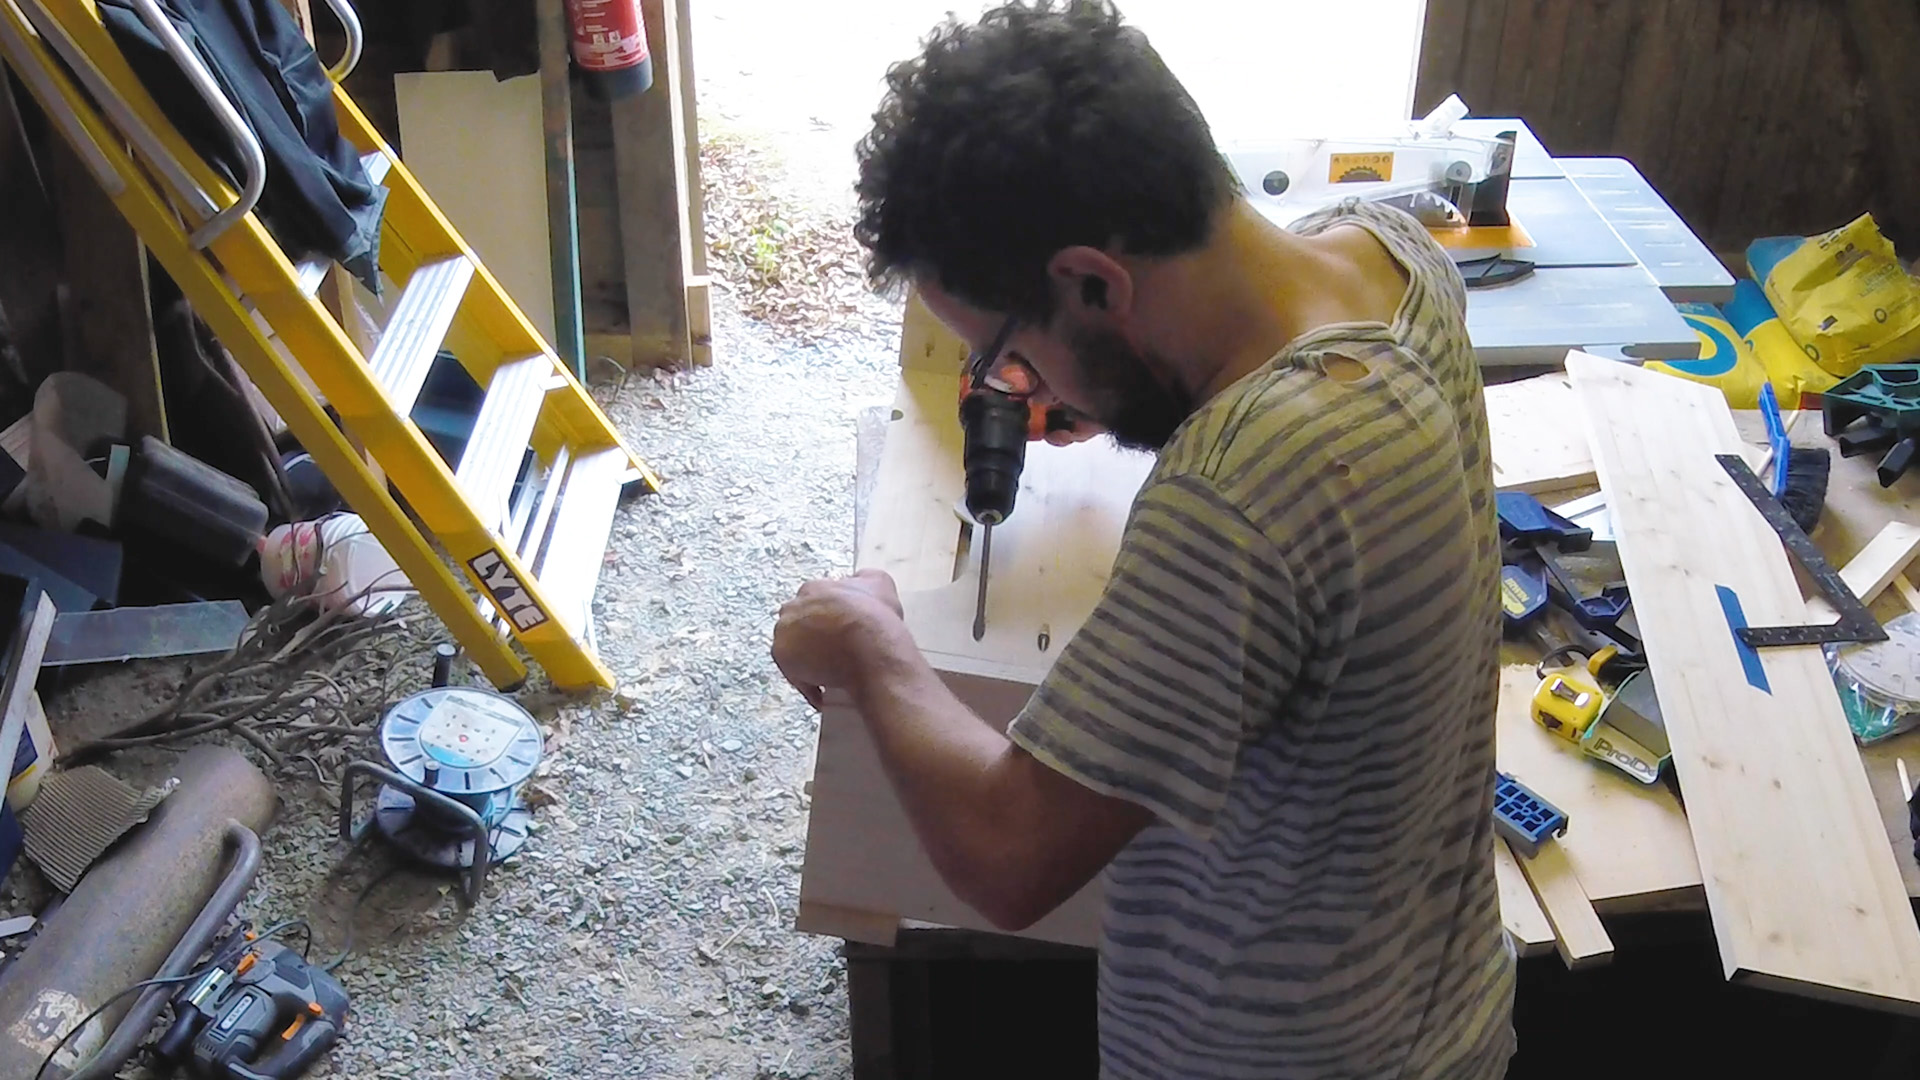
In the workshop, I began work on the box by cutting the side and front pieces to size, using a mixture of the table and circular saw. I needed to get all 3 pieces to the same height so the lid would sit flat, which was trickier than it sounds as the floor was at different levels in places.
With the pieces cut, I used pocket holes to attach the cut pieces together. It was the first time I had used a pocket hole jig but, as everyone else says, it really is a quick and easy way to build furniture.

I then used some corner clamps to get my alignment right when screwing the boards together and managed to get the box nice and square.

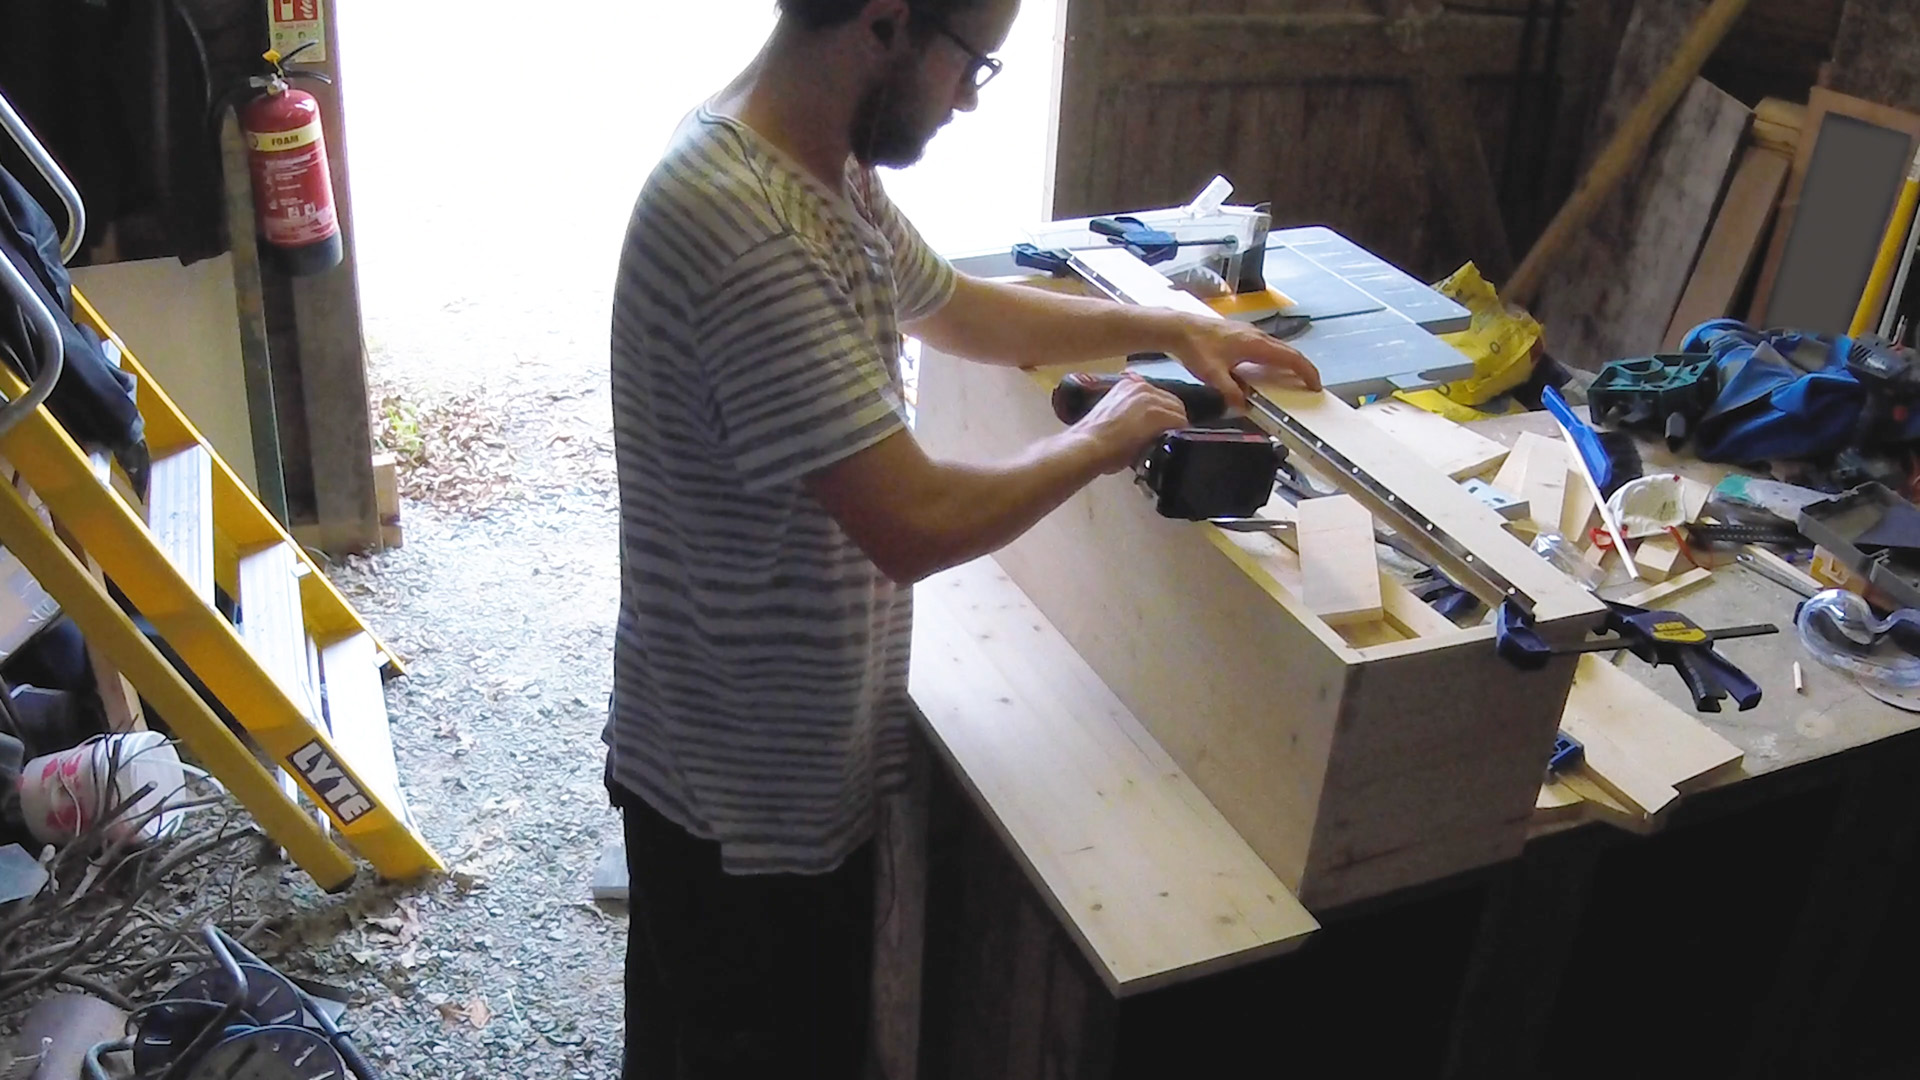
After this was assembled, I began work on the lid. I cut it to size on the table saw and then cut the lid in 2, as per my original SketchUp design. This design allowed me to fit a hinge, as I didn’t have a back to the box.
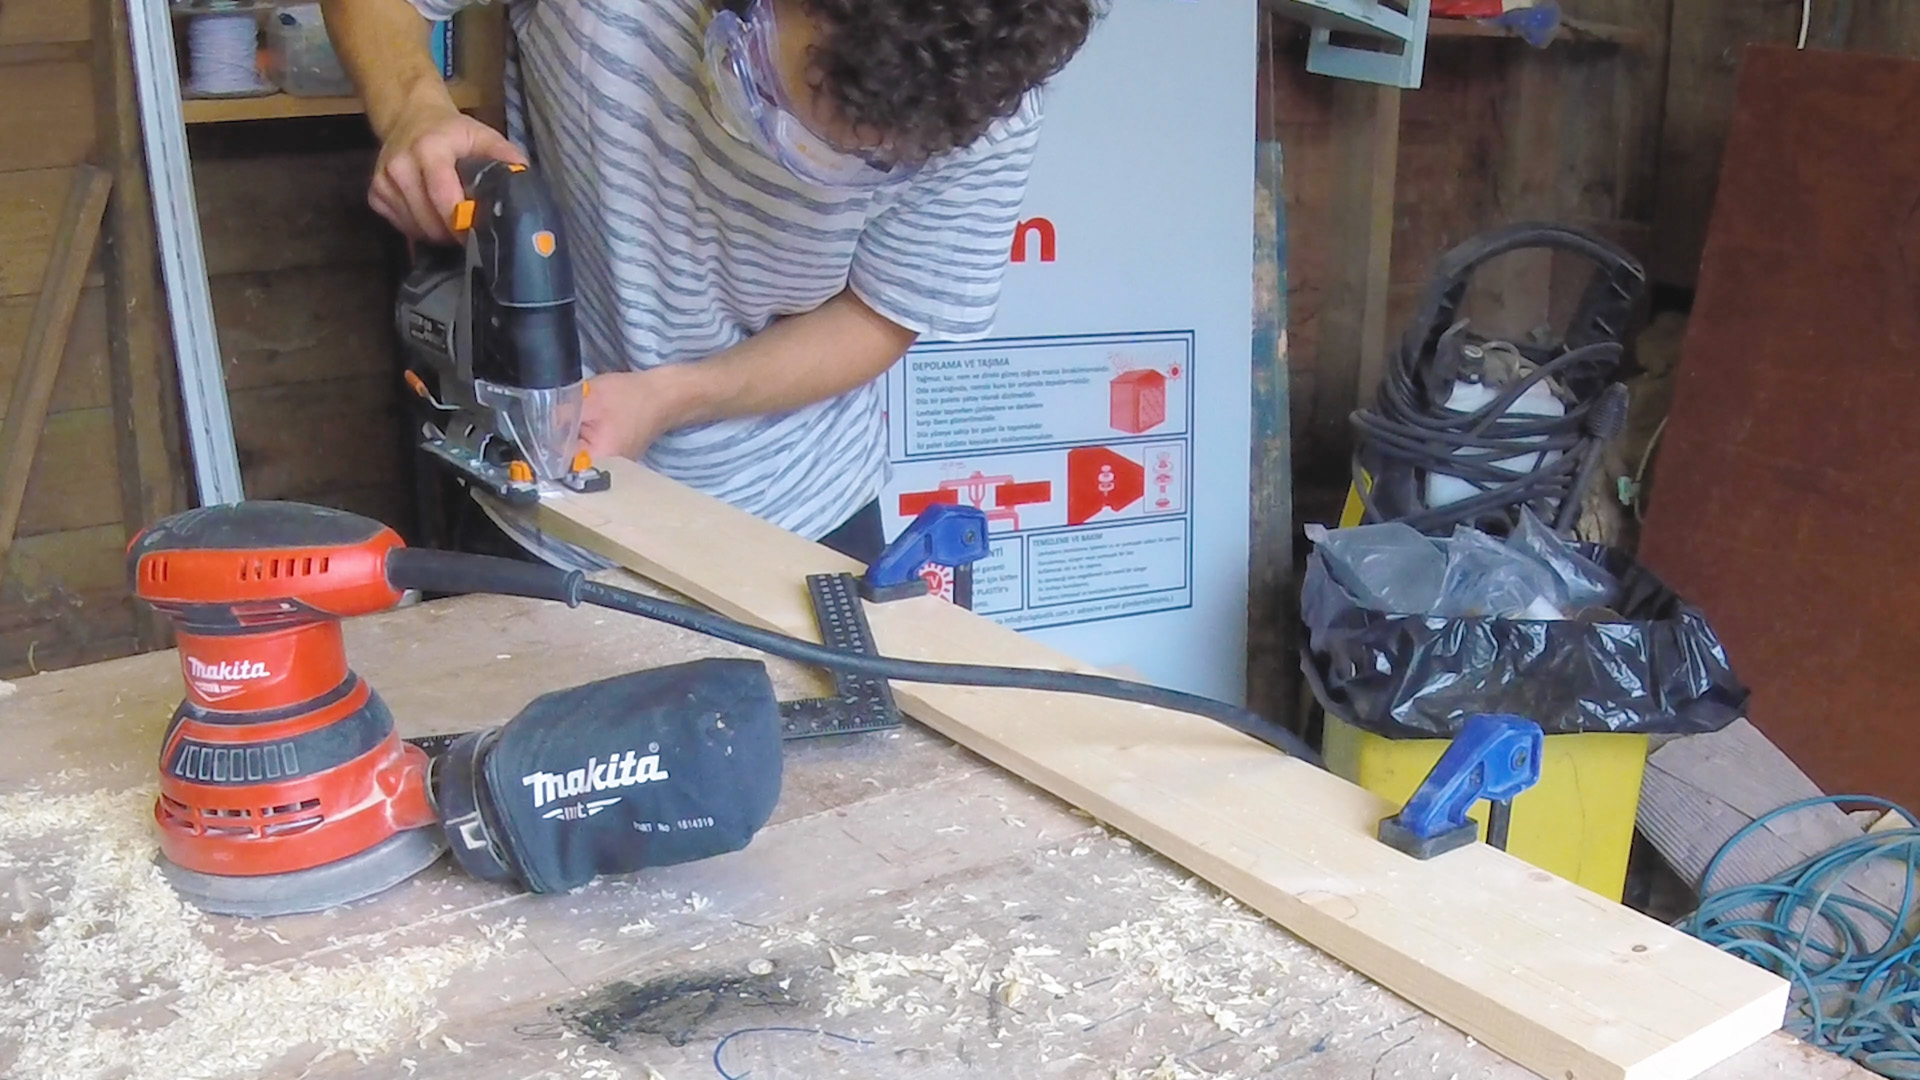
Once both lid pieces were cut to width, I cut out some material from the underside of the narrower piece using a planer and sander so that it would sit nicely over the wheel arch.

I could then cut out a couple of areas which needed to be removed so that the lid would sit flush with the wall of the van. Unfortunately I cut out a small area which wasn’t necessary in the end, but it isn’t too noticeable.
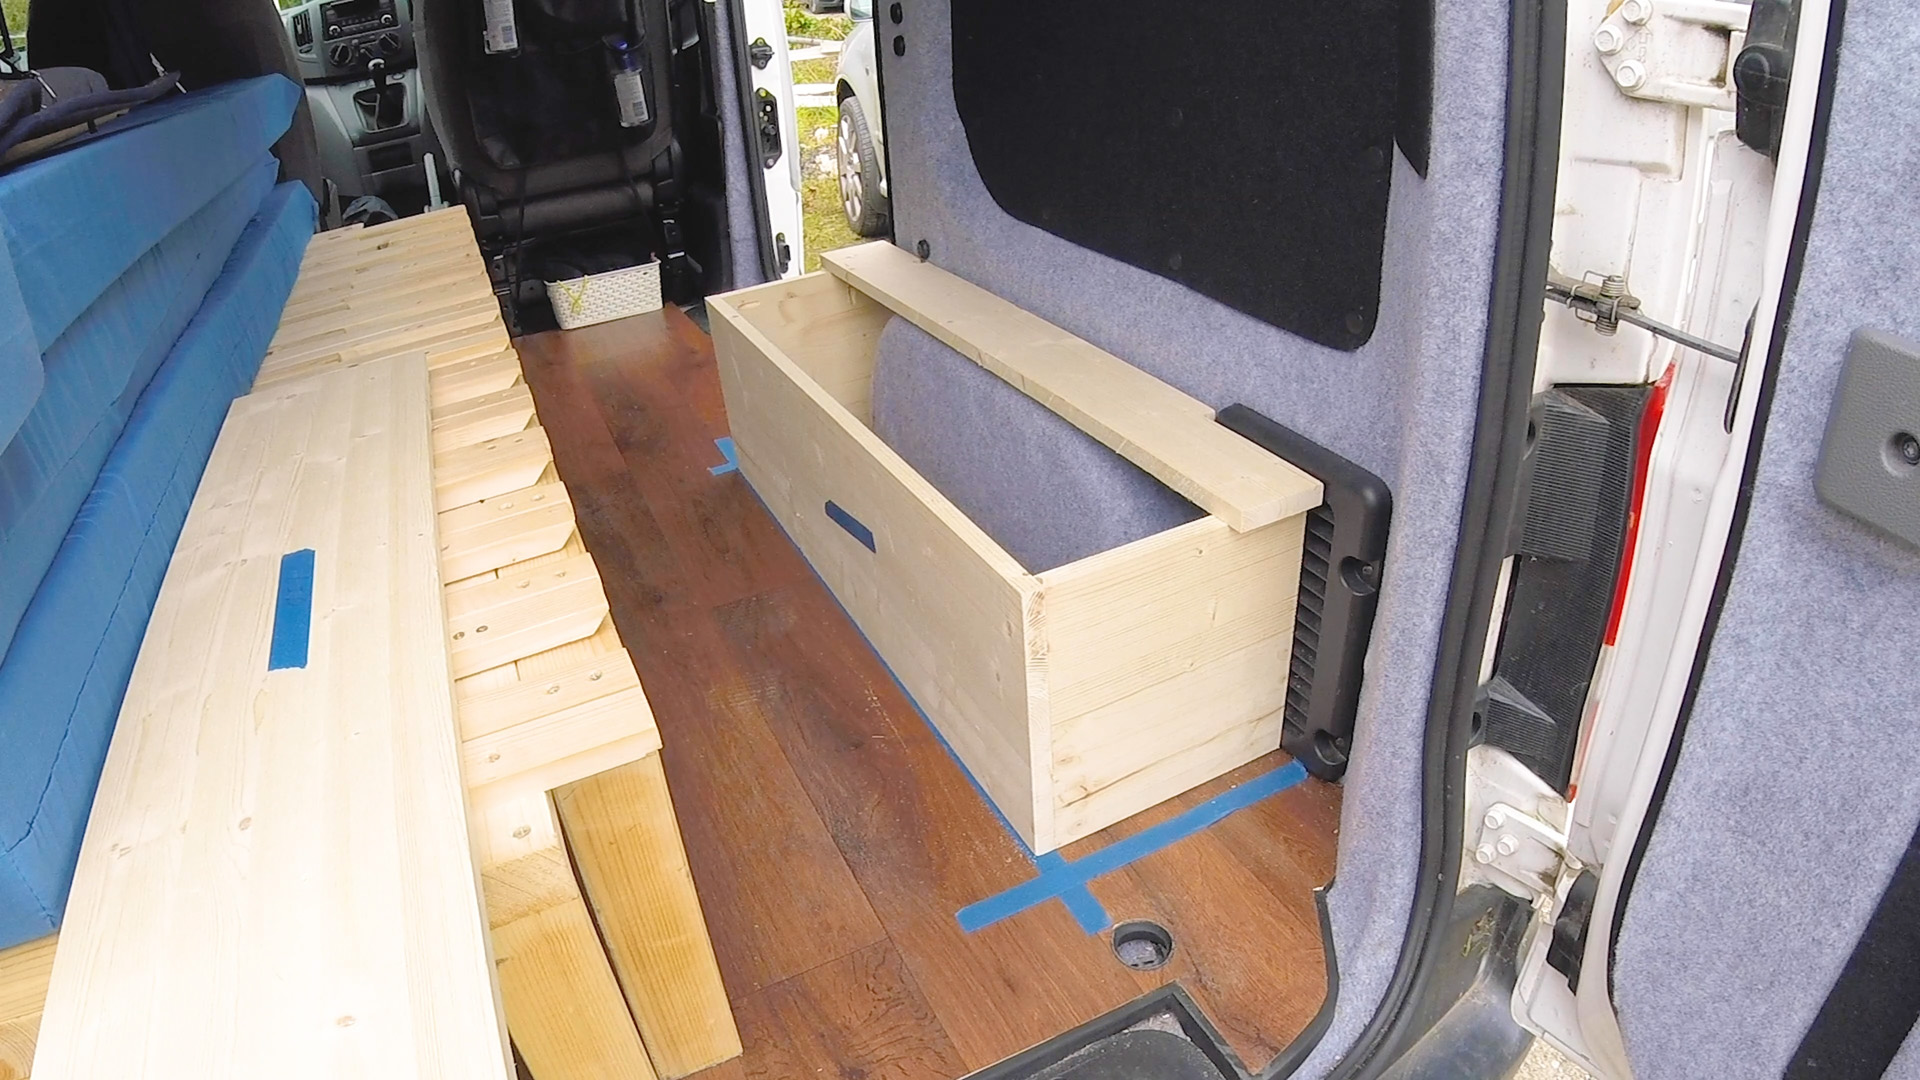
I attached the narrow lid piece with pocket holes and could check the fit, which was nice and tight in the van. You’ll notice that the box is a little smaller than the masking tape outline on the floor, as I hadn’t taken into account the leg of the bed so had to do a last minute fix.
We’re also on Instagram!
Check out yogi.the.van to keep up-to-date with all our adventures in the van!


Making and attaching the base
The final piece to cut was the base and, as mentioned before, this was more about adding strength and rigidity to the box. I measured and scribed where the wheel arch needed to fit and cut the wood to size on the table saw and jigsaw, then attached it from the underside using pocket holes.
Click to buy your own…


(Affiliate links which help support this website)
Making and attaching the box lid
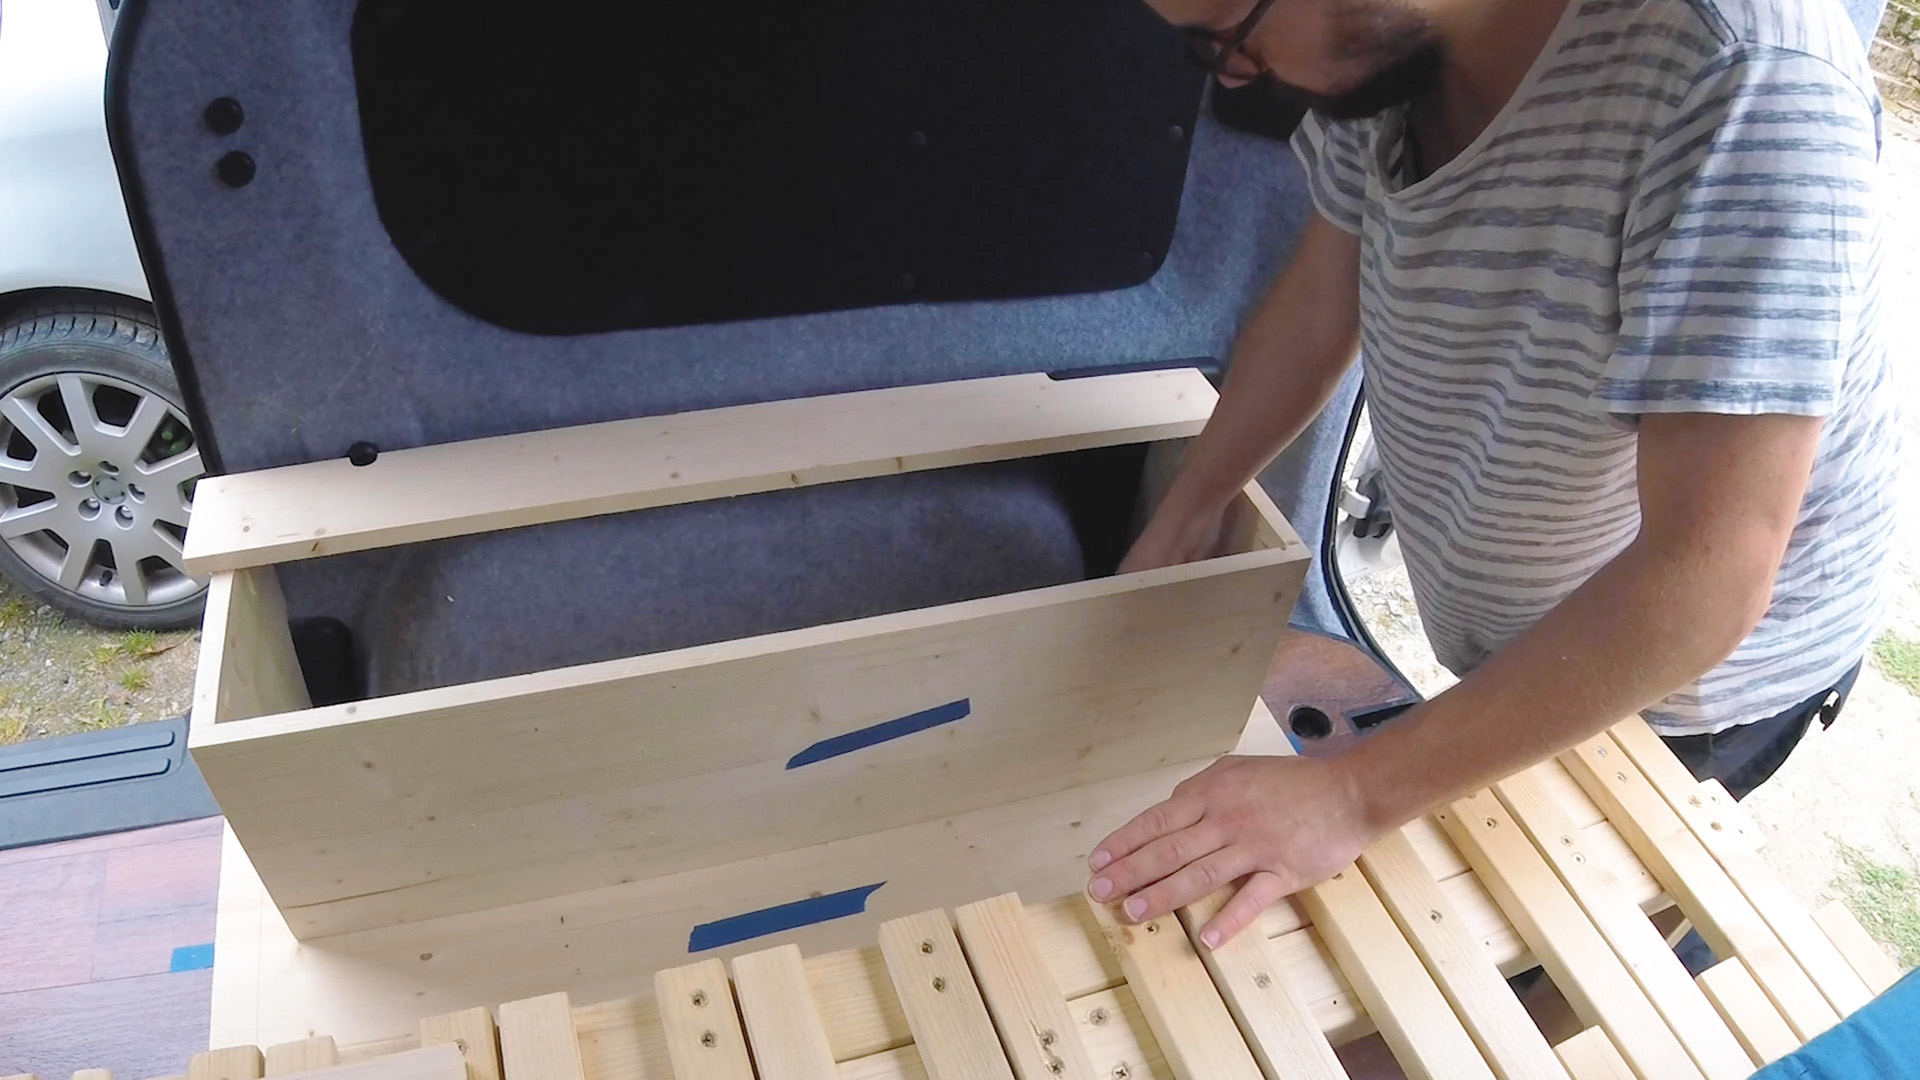
I then placed it in the van and was really pleased with the fit. I did some preliminary sanding to the box before I attached the hinge and the front section of the lid, as there would be some areas that would become difficult to sand once these were attached.
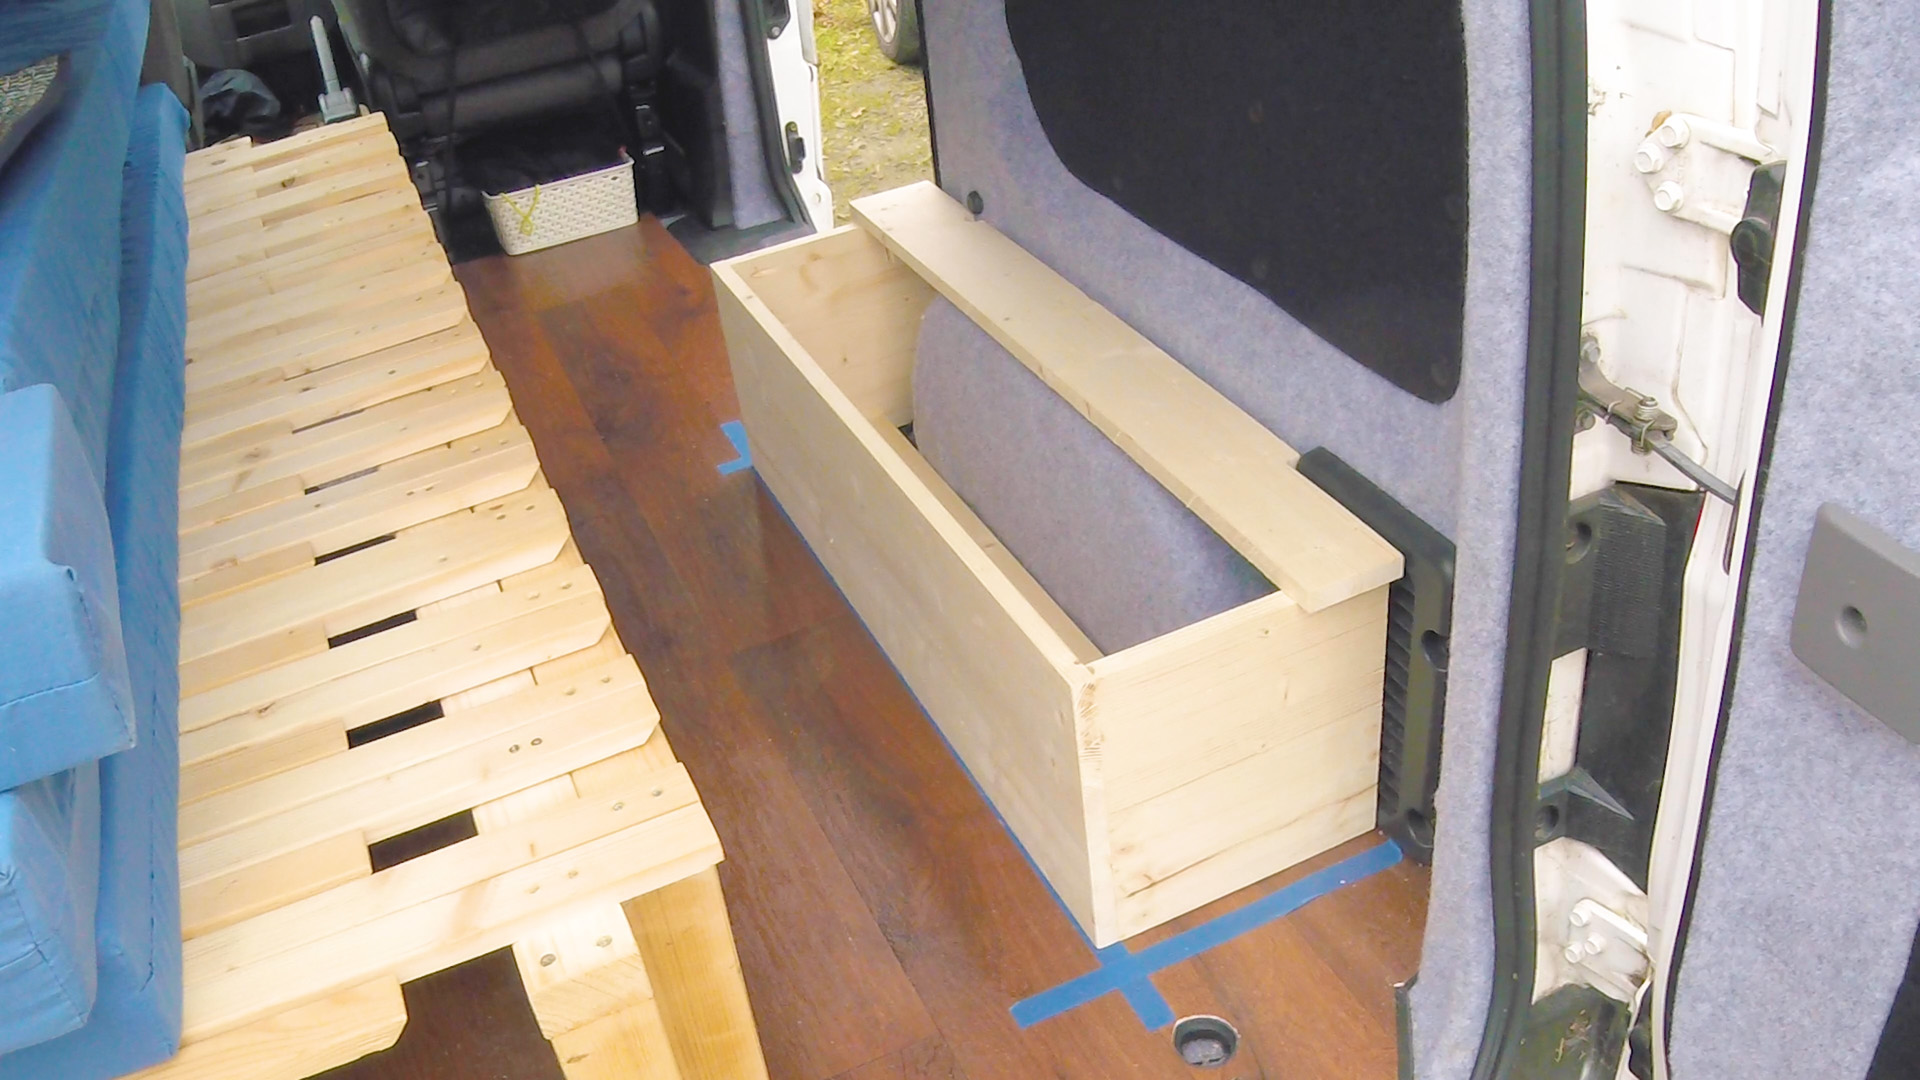
I used a 900mm piano hinge which looks really smart on the box.
Final assembly, sanding and varnishing
I then took some time to disassemble parts of the box and glue the joints which should hopefully aid the strength of the pocket holes.

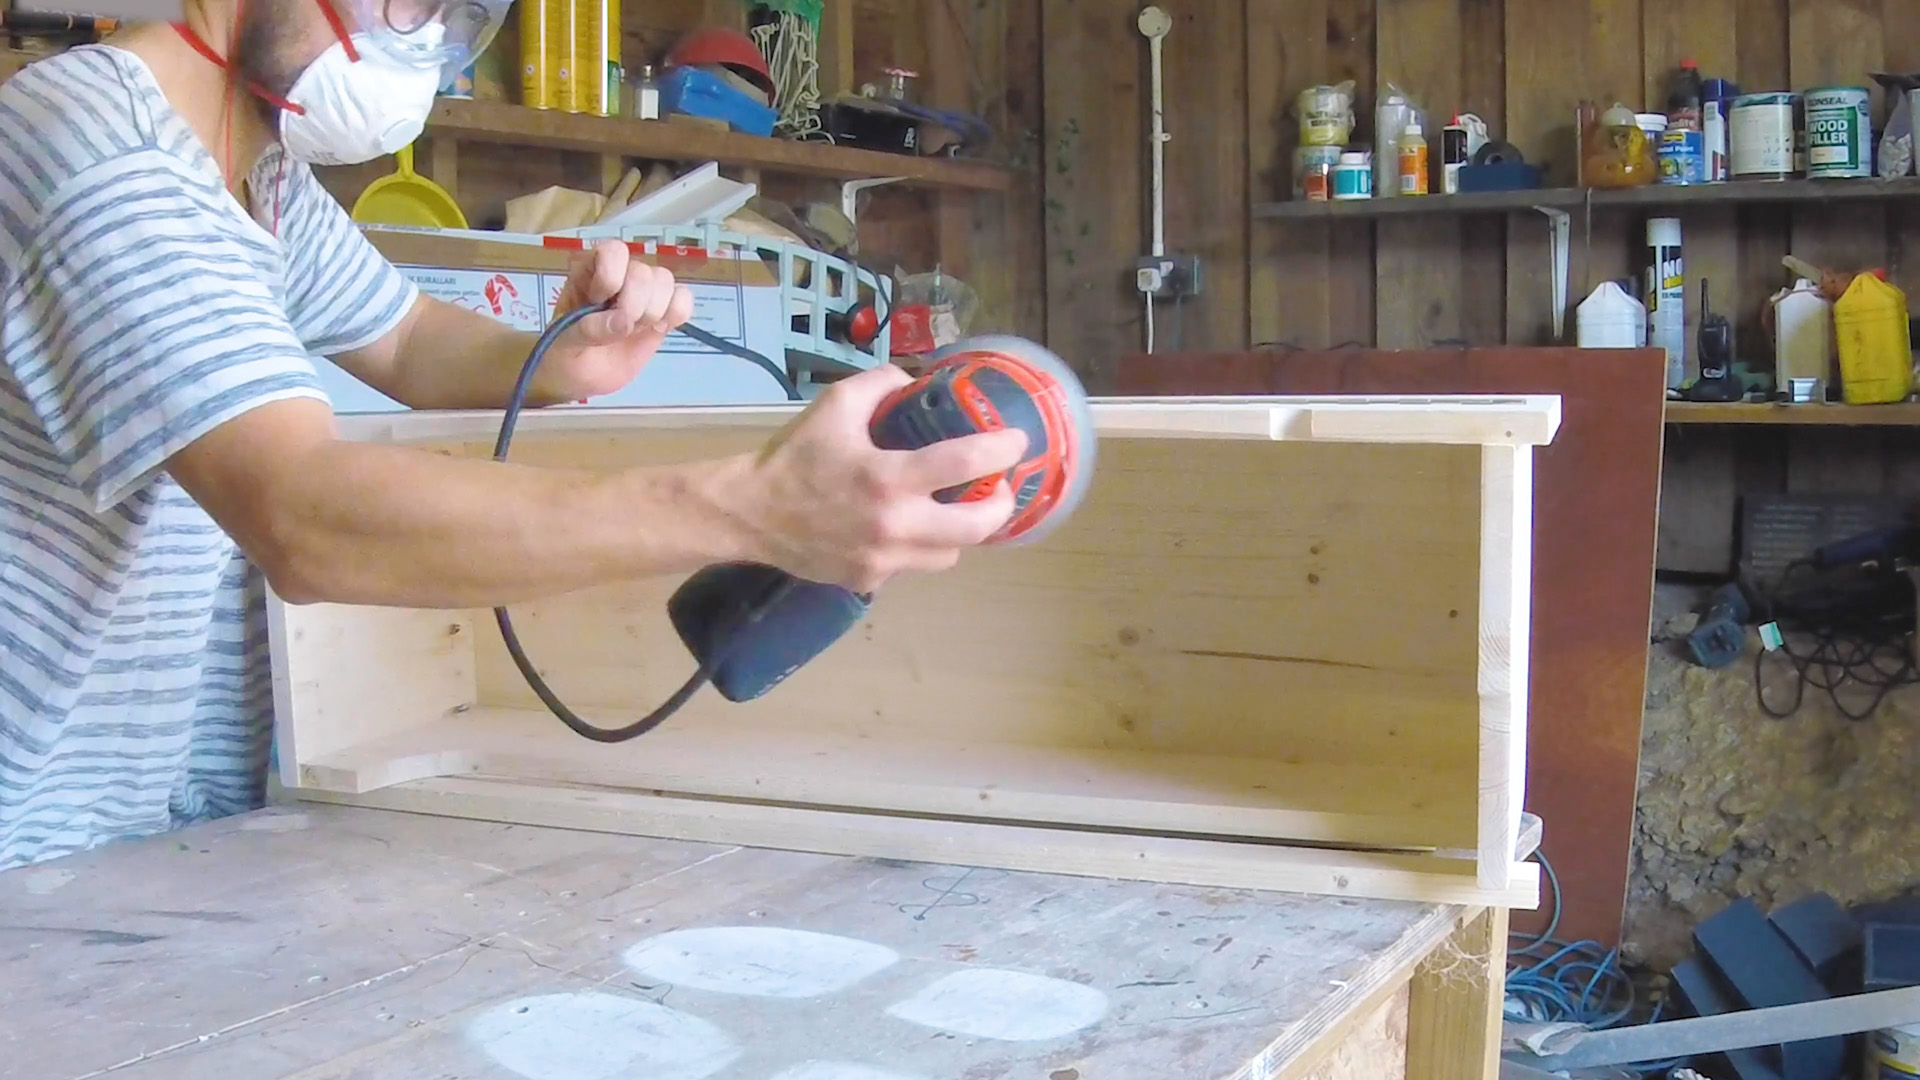
I did a final sand on the box and could then think about varnishing it. I used a matt-finish polyurethane varnish, and thinned the first coat with white spirit, as per the instructions on the tin. I work my way round the box and then let it dry overnight.

I lightly sanded the box before applying the second coat, because the wood grain had become raised in some areas. The second coat took really well and having sanded it again I applied a third and final coat and it gave a lovely finish.

Attaching the storage box in the van
I could now install the box in the van and, as I had done with the bed, I used turnbuckles for a non-destructive, easily-removable installation.
I drilled in metal eye screws to both sides of the box and was able to utilise load rings built into the van to tension the box in place. The left side was simple, as I had access to the load ring from within the box, however for the right side the load ring sat outside of the box, so I pulled up part of the floor – which is also easily-removeable – and threaded some cord with looped ends through, under the floor, into the box.

This method has worked perfectly, and the box is very securely attached and hasn’t required any drilling into the van walls or the wheel arch.
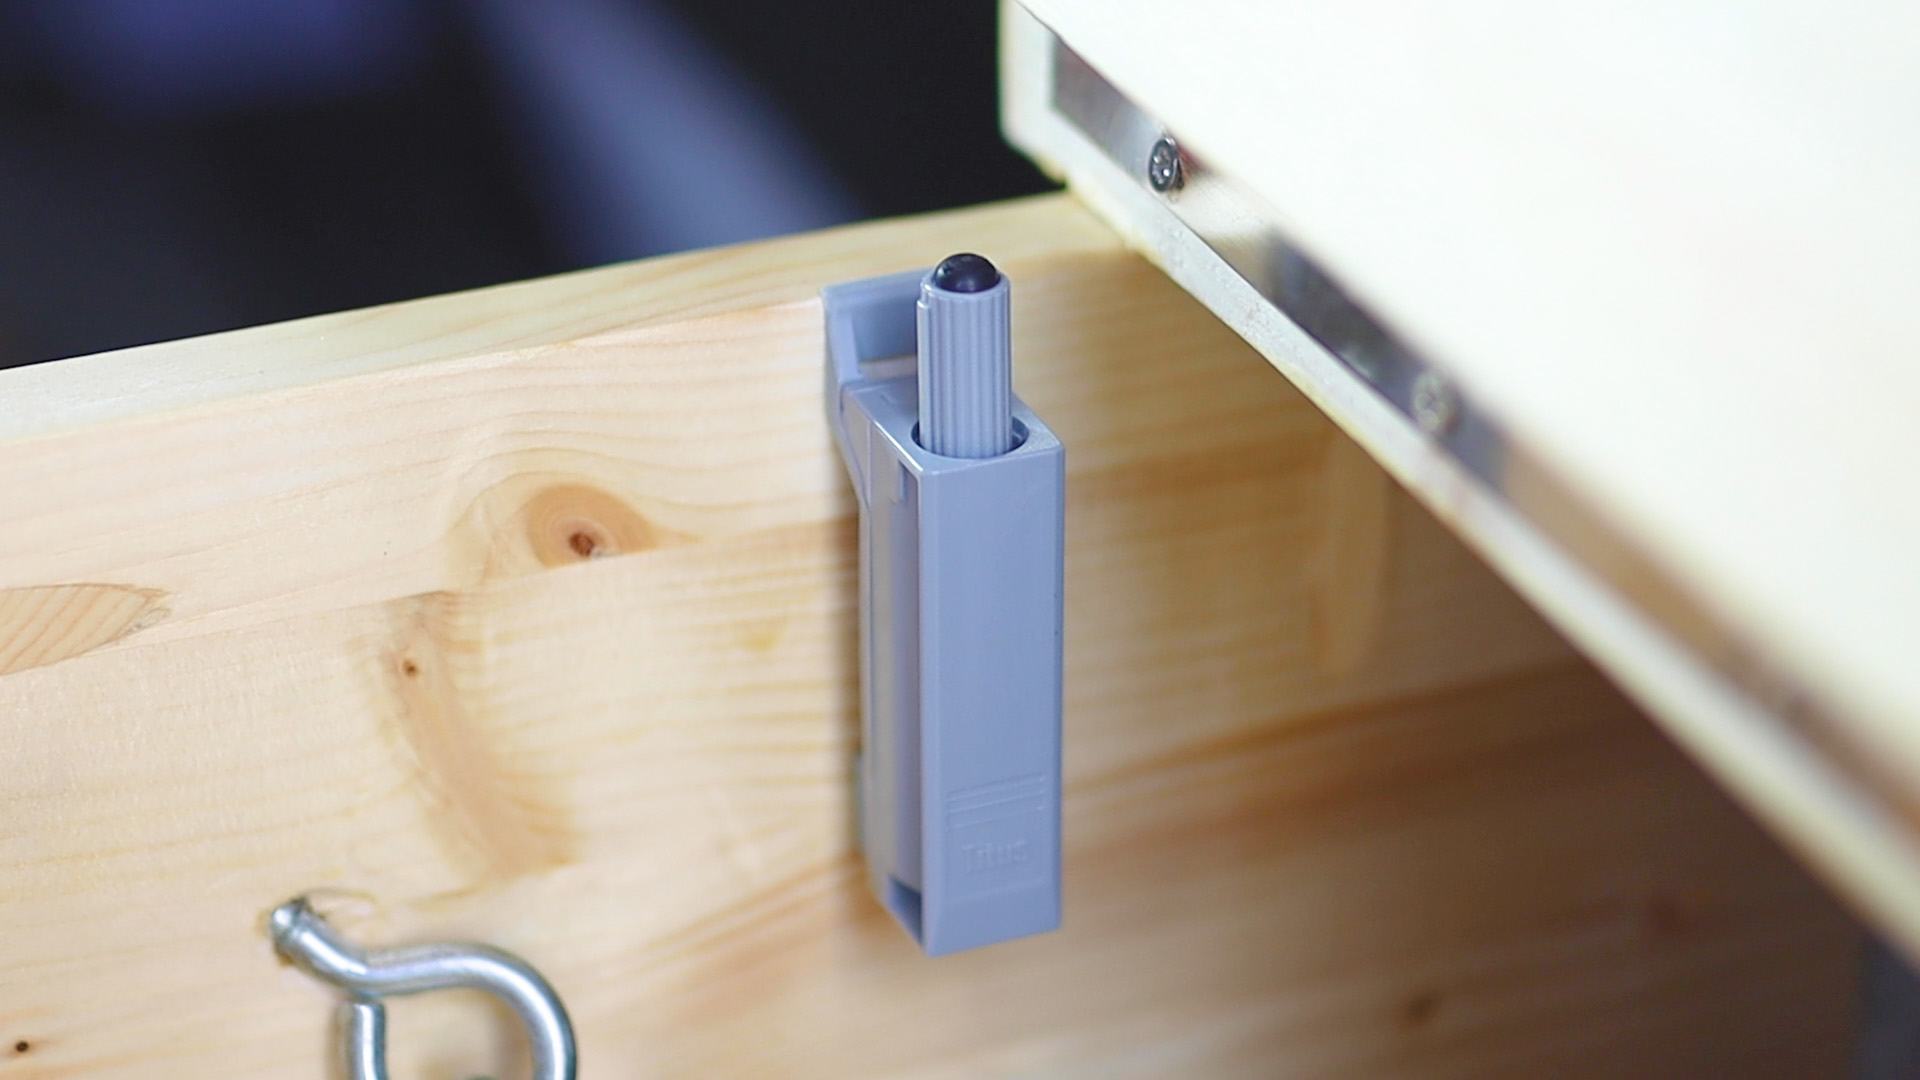
To finish the box off, I installed 2 very strong magnet catches to each end of the lid and these stop the lid from rattling whilst driving. Finally, I installed a soft-close attachment to the lid so that the lid won’t slam and bang.

Building this box was a really fun project, and I’m very happy with the result. It’s going to be so handy having this extra storage for trips away, as well as the additional support for the bed.
Thanks so much for watching, and please do subscribe to my YouTube channel to keep up to date with the rest of my van build series!
If you want to see more of my camper van build in action, please CLICK HERE.
Click to buy your own…


(Affiliate links which help support this website)
