
This article is a written account of a video from the Lens Of James YouTube channel. Watch the video above and subscribe if you like what you see!
This article contains affiliate links to relevant products I have used in my videos. By buying through these links, I receive a small percentage of the sale at no cost to you which helps me support and grow my website and YouTube channel, so I can create more content like this in the future. Thank you for your support.
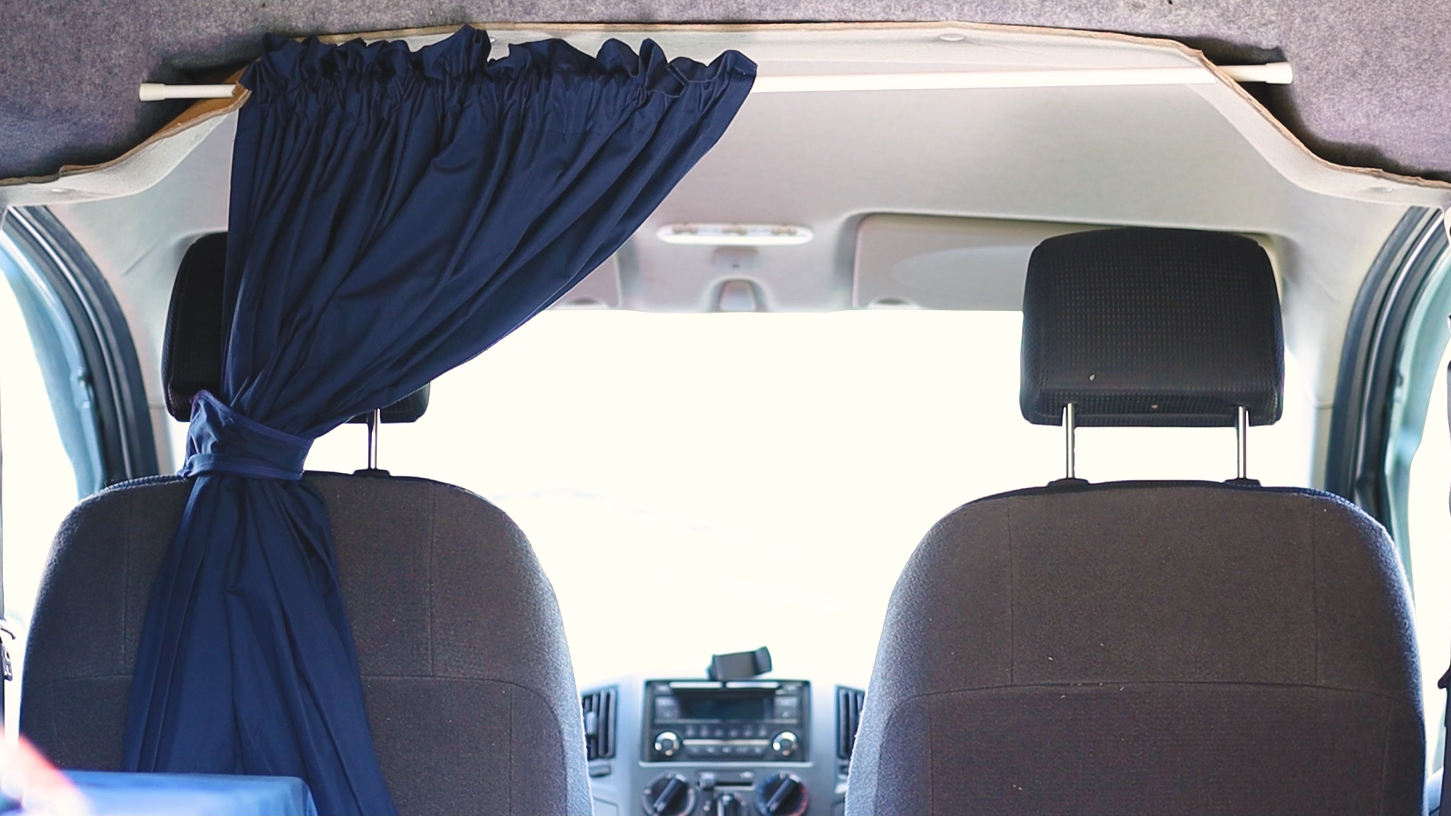
In this blog, I’ll be adding a sturdy blackout curtain to my Nissan NV200 small panel van, to fit between the front cab and back load space. It was pretty cheap and easy to put together too.
The advantages of a curtain?
In a few of my earlier blog post photos you may have noticed that I already have a curtain in place, separating the front cab from the back load space.
I have also made thermal window covers previously which might give the impression that I don’t need a curtain but there are some good reasons why both are essential to my van build. The window covers are great for keeping the sun out during the day, the heat in during the night and the condensation to a minimum and although curtains can’t really compete in this respect but they do provide easy and instant privacy. If I need to conceal the inside of the back of the van, for example if I’m getting changed or if I’m in a place that I don’t want to advertise what’s in the back of my van, then a solid curtain will be easier to use and less obvious than thermal window covers.
The first curtain
Using a tension rod, a small blackout curtain and a couple of sew-in magnets, I was able to create a really effective curtain. I held it in place with both tension from the rod and by creating 2 small holes in the van’s headliner to support it. However as time has gone on, I’ve noticed that both the weight of the curtain and its regular use have weakened the headliner and before it tears or gets any worse, I want to address it with a permanent solution.
How my current curtain is made
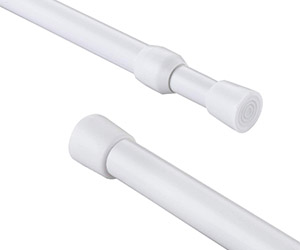
The tension rod is a basic one I found for a few pounds in a Wilko, while the curtain is one from a pair of blackout curtains that I found on Amazon which measures 168cm wide and 137cm long, and turns out to be pretty much the perfect size for an NV200!


Click to buy your own…


(Affiliate links which help support this website)
The plan for the new curtain
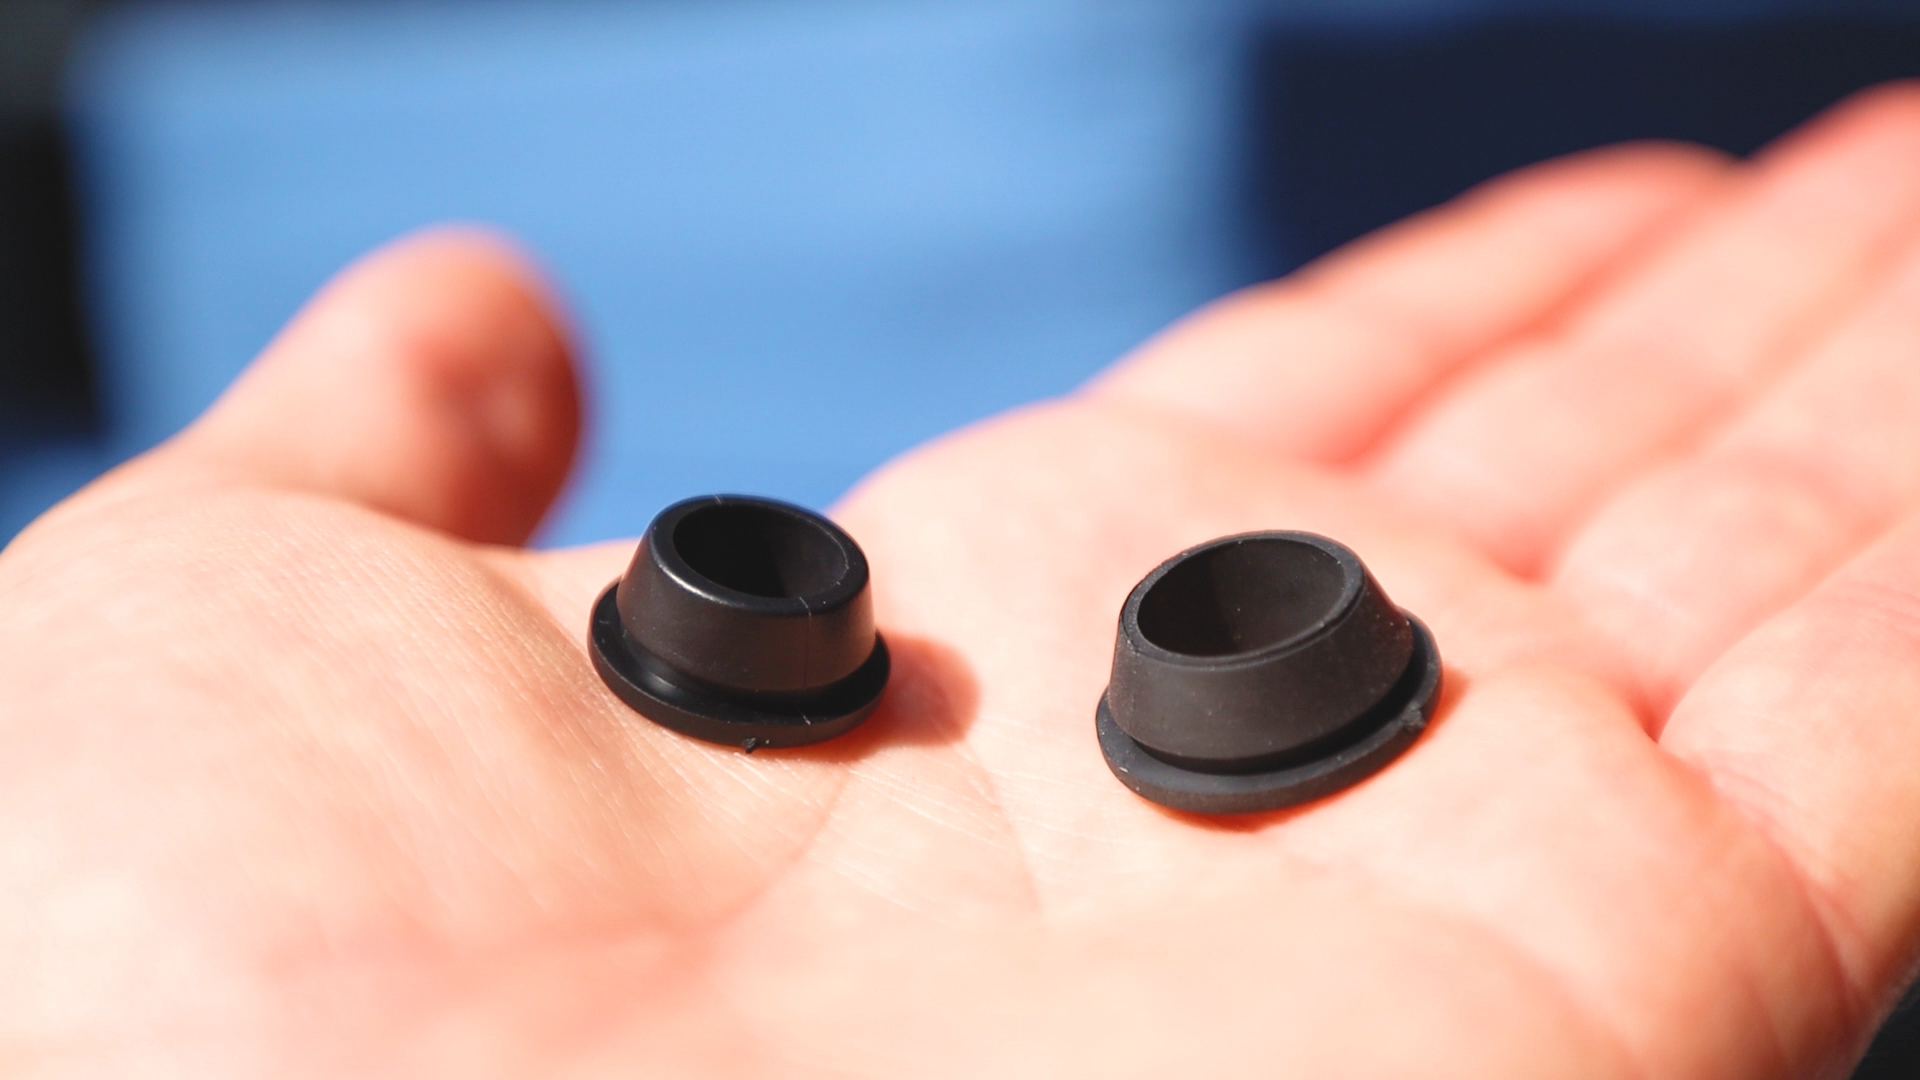
My plan for the curtain is to drill holes into the edges where the tension rod would normally sit to allow the rod to rest on the metal of the van instead of the flimsy headliner. In order to prevent any scratching or noise from this metal-on-metal fixture, I will be using 2 rubber grommets. This has the added bonus of looking really smart, as well as holding the tension rod very securely.
Measuring up
I started by measuring the diameters of both ends of the tension rod – the first being 11mm and the second 13.6mm.
I sourced 2 quick fit rubber grommets with inside diameters of less than that of tension rod, so ensure a tight fit. The smaller has a diameter of 10mm and the larger of 12mm.
I removed the white end caps of the tension rod and checked these grommets fitted and moved onto marking where I would be drilling into the van, which is hard to see on the carpet.
Drilling into the van
To make the holes I used a step drill bit, which cuts holes of 4 to 20 millimetres in metal up to 5 millimetre in thickness, and it was perfect for this job. I placed a piece of masking tape at the 14mm, which is the size the hole needed to be to accept the grommet, and began drilling.

I placed some strong magnets directly below the hole and these helped catch a lot of the metal filings and burrs that came from the hole. I would periodically stop to clear the magnets and clean the hole before continuing as ensuring that metal filings didn’t get everywhere was a priority.
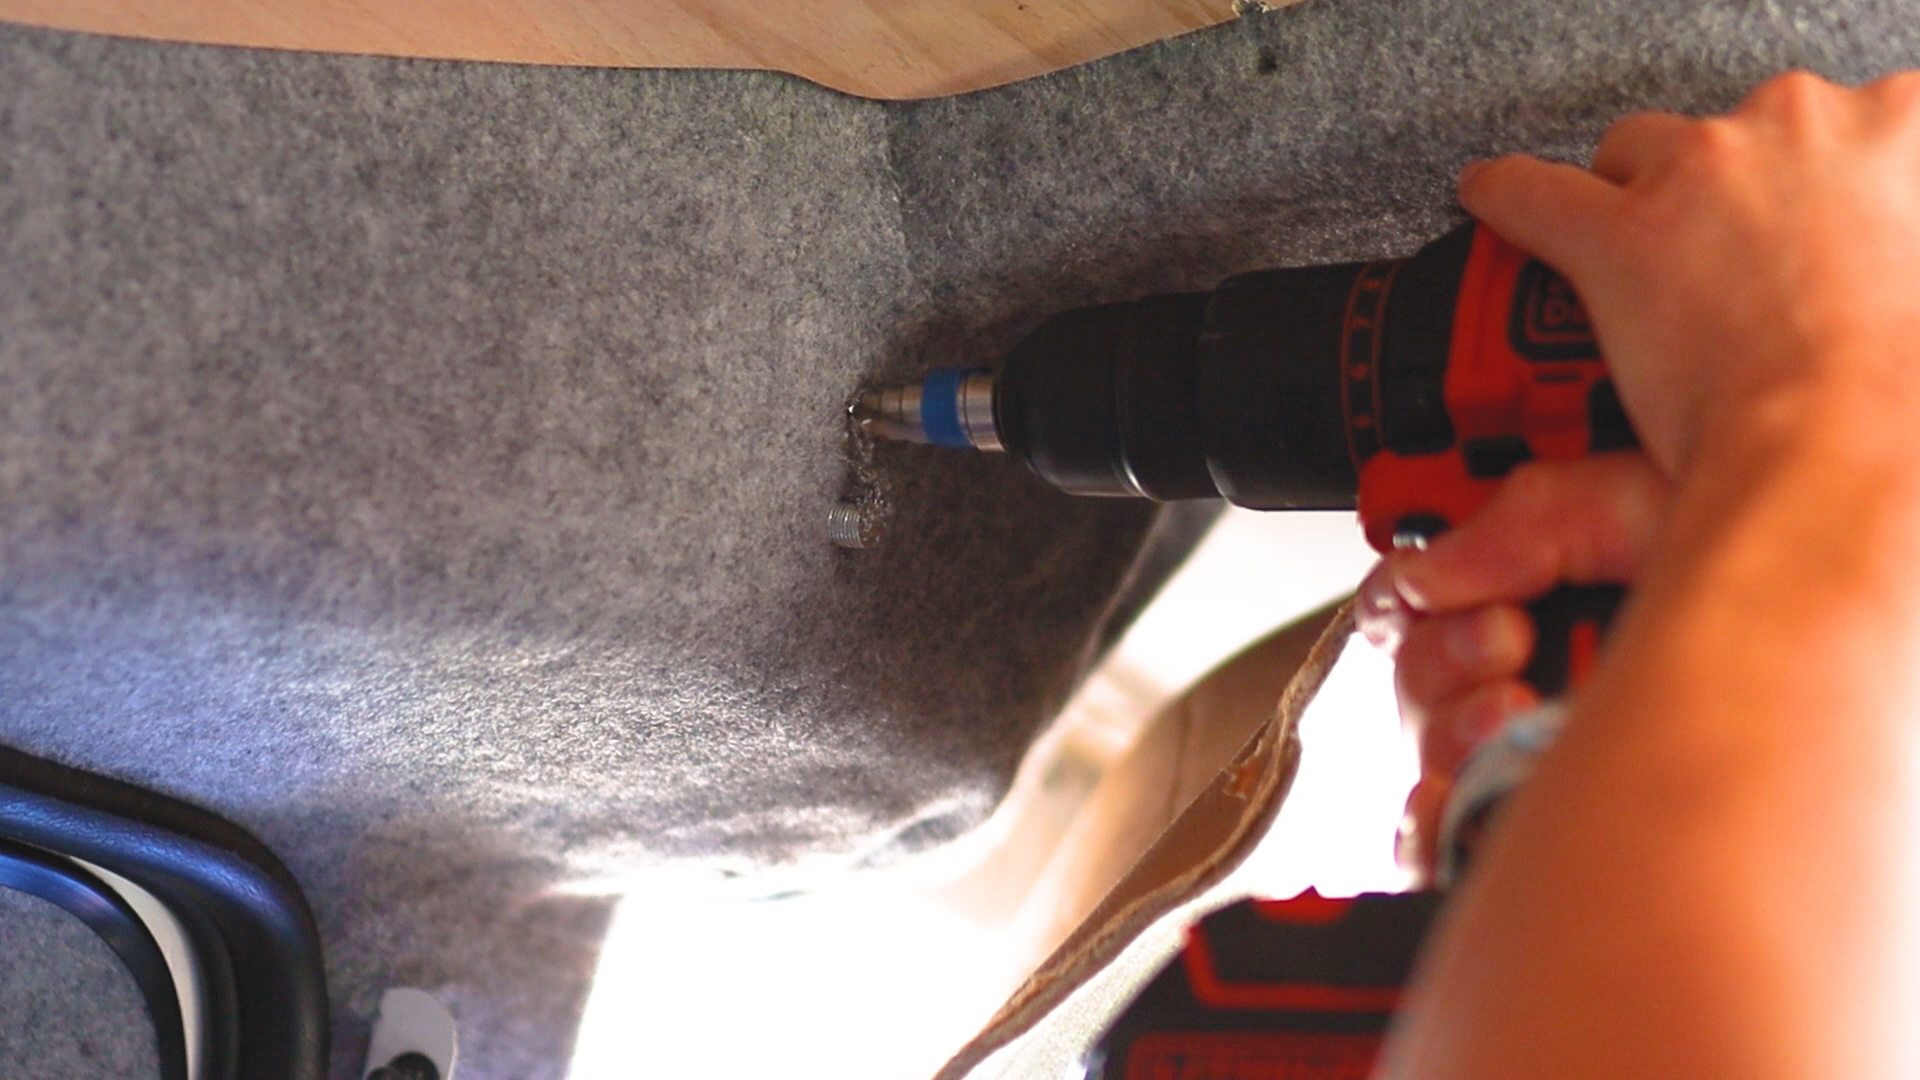
As silly as it sounds, it was a pretty stressful moment drilling into the van. So far in my van build I had purposefully avoided doing this, but I knew it was worthwhile doing it this time.
Once the hole was drilled, I used the magnet and hoover to clear up any pieces of metal and overall it was very successful. I then cut away any excess carpet with some scissors to clean the hole up.
With the first hole done, I moved onto the second one and didn’t exactly the same thing, with the exception of putting masking tape at the 16mm mark as this was the bigger grommet.
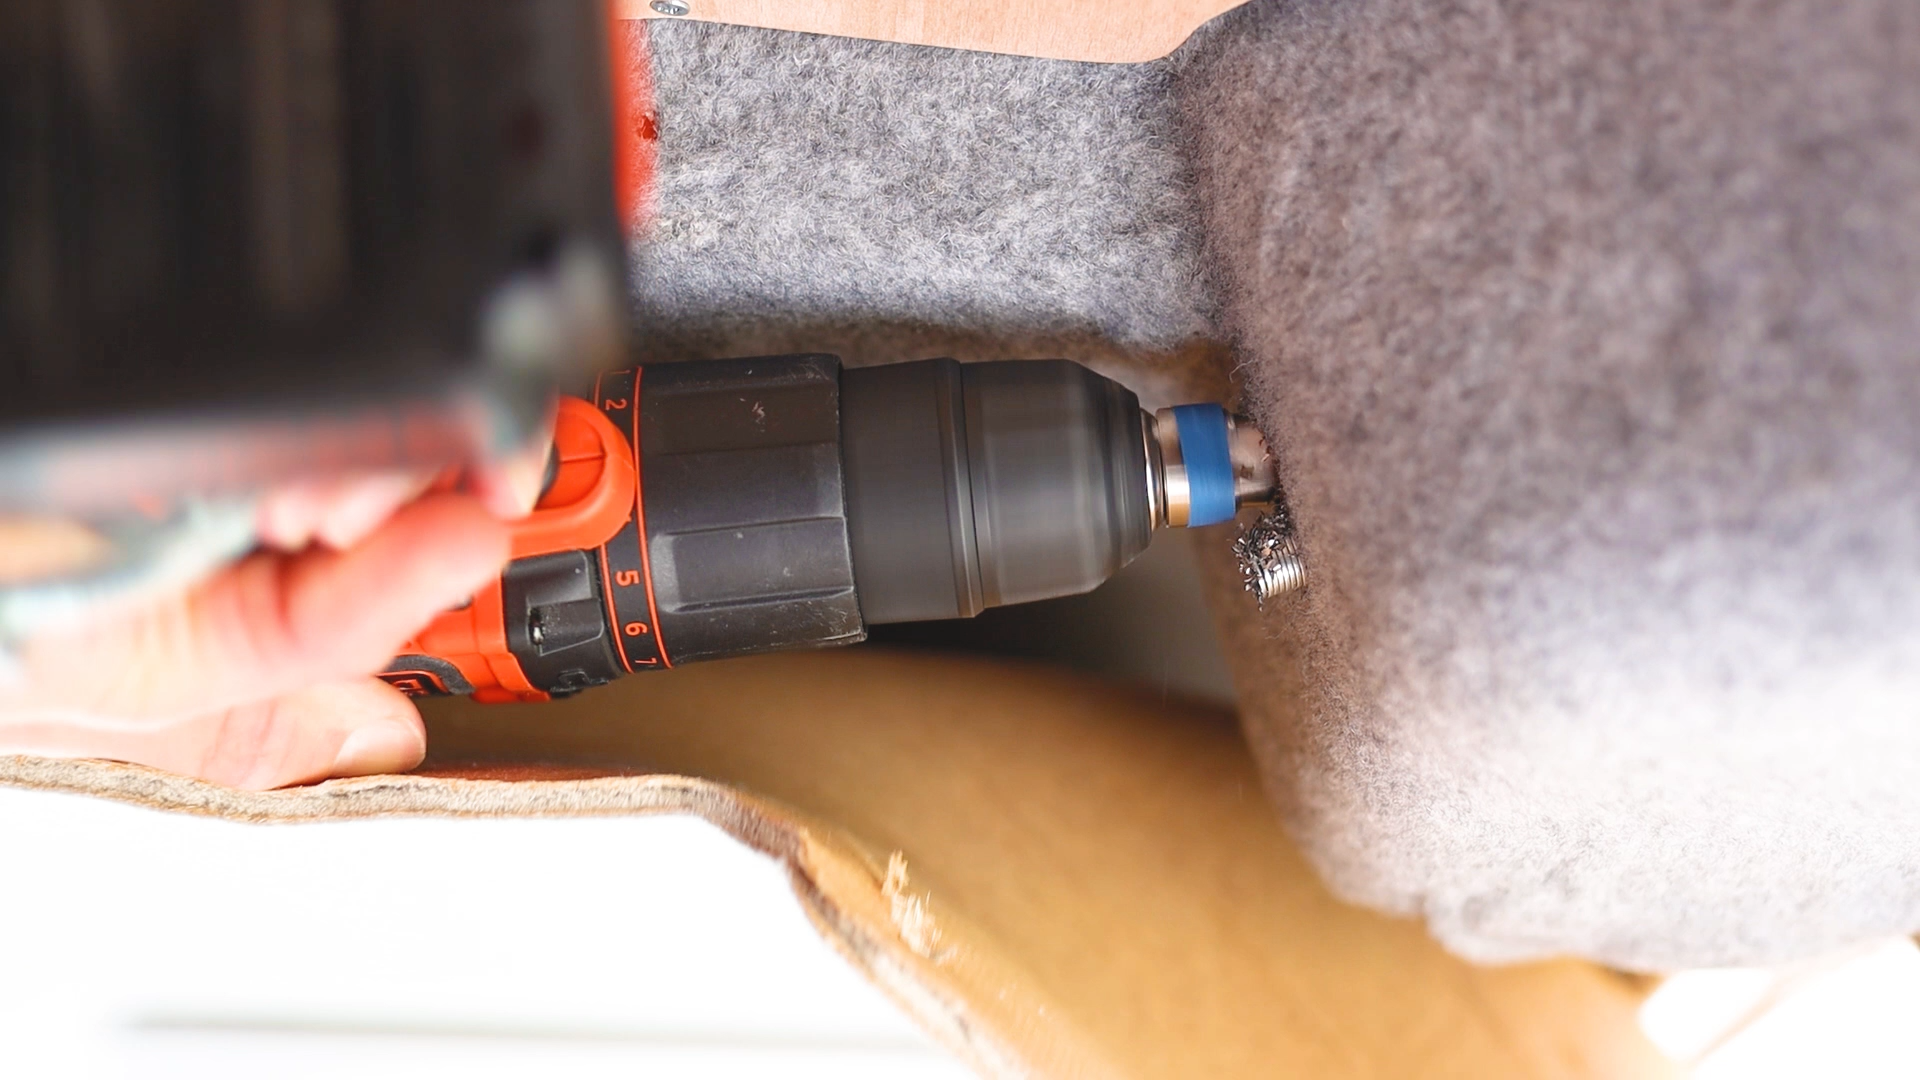
Both holes came out really nicely, and once cleaned up I could look to protect the exposed metal.
Treating the exposed metal
Using a white metal primer, I carefully but thoroughly painted both holes to prevent any rust in the future, left it to dry and did another coat later.

We’re also on Instagram!
Check out yogi.the.van to keep up-to-date with all our adventures in the van!


Adjusting the cab headliner
With the holes drilled, primed, dry I could look at the headliner. I made a template so I could trim a small portion off each side.
The headliner material had become quite worn where I made holes in it to support the curtain pole previously. I want to make sure that it doesn’t have to support the weight of the curtain, or even come into contact with the curtain again as it is actually quite a weak material.

By removing these holes, not only do I make the headliner look smarter, but I can actually draw the curtain further on each side as the headliner doesn’t stop the curtain, which is definitely an added bonus.

With the headliner cut to shape, I decided to use some rubber u-channel that was left over from carpeting the van doors, to cover the headliner edge as it didn’t look very nice.

It was a bit fiddly to attach but it looks much better. I may consider changing it to a grey trim in the future to match the headliner more, but for now it smartens up and protects the headliner adequately.

Installing the new curtain
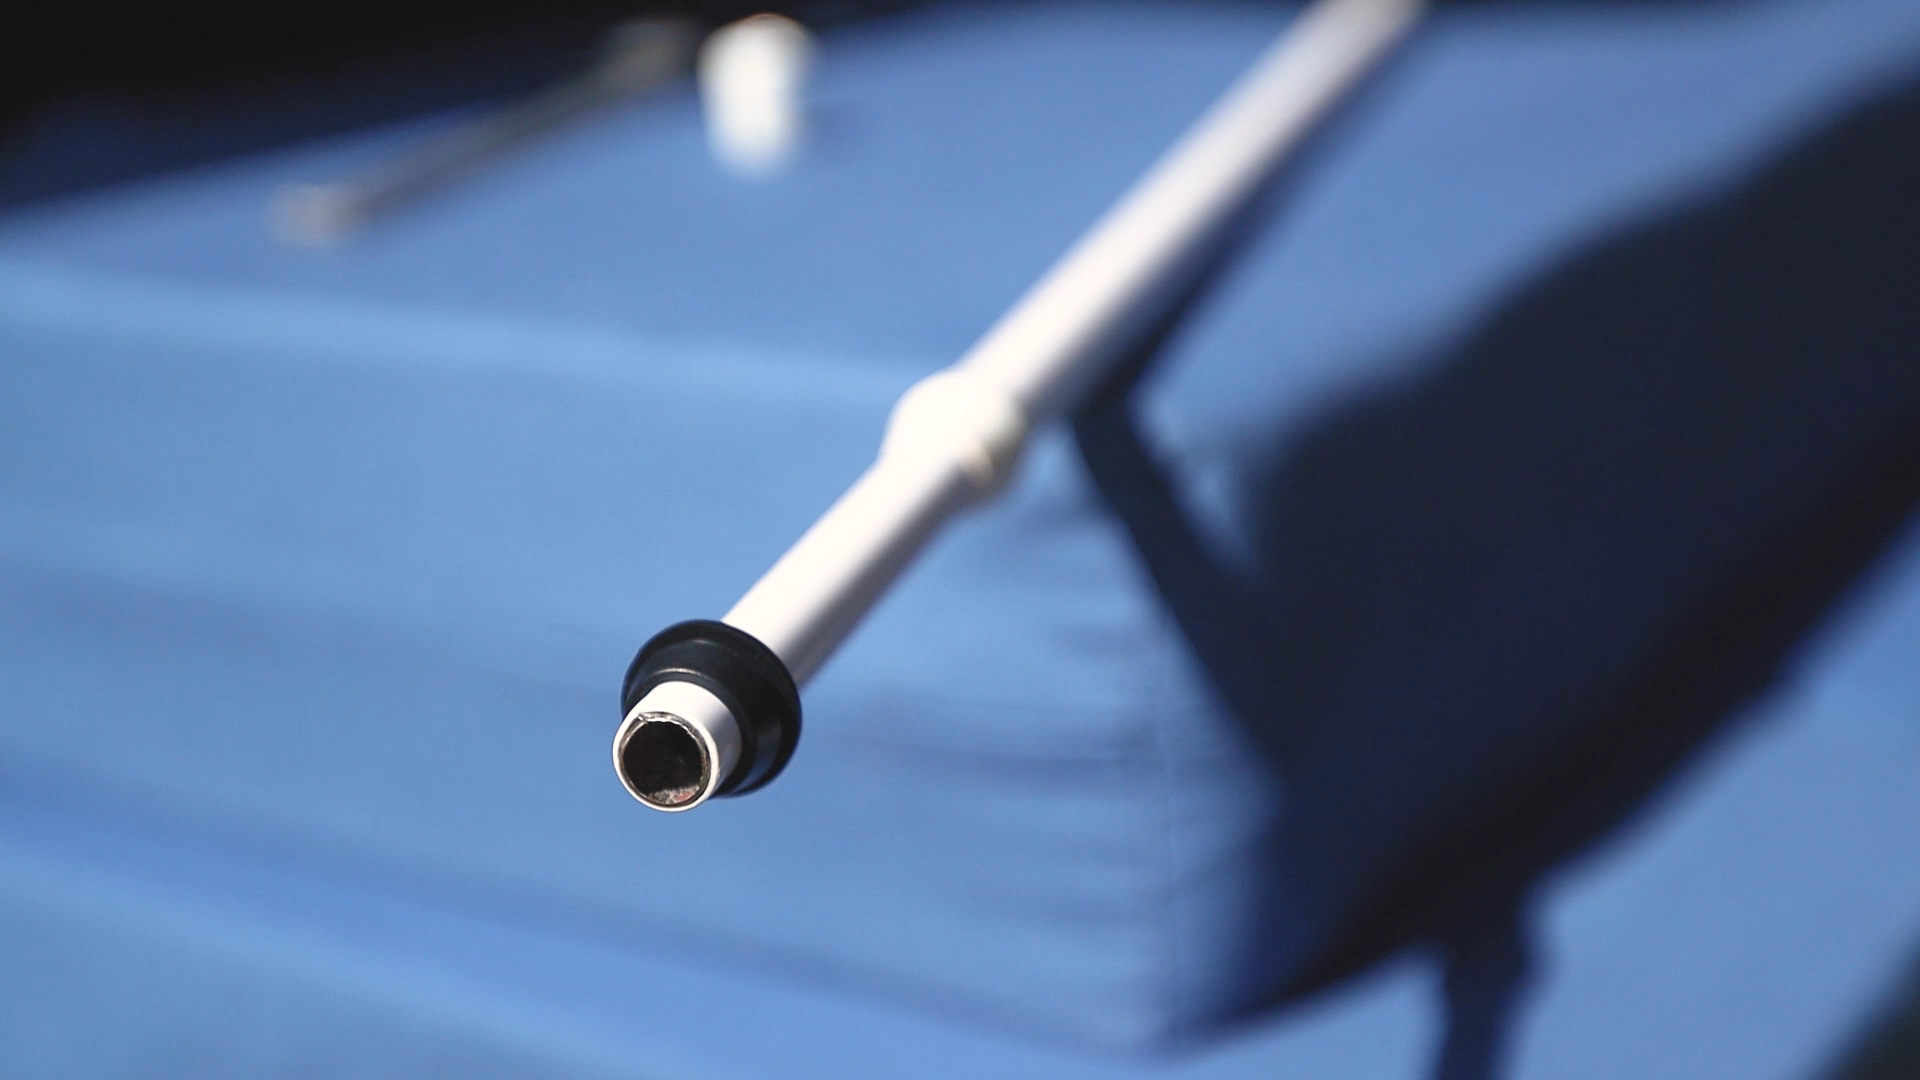
I could now finally install the grommets in their respective holes and begin reinstalling the curtain.

With a bit of manoeuvring, the went through the rubber grommets with tight fit, which is exactly what I wanted.
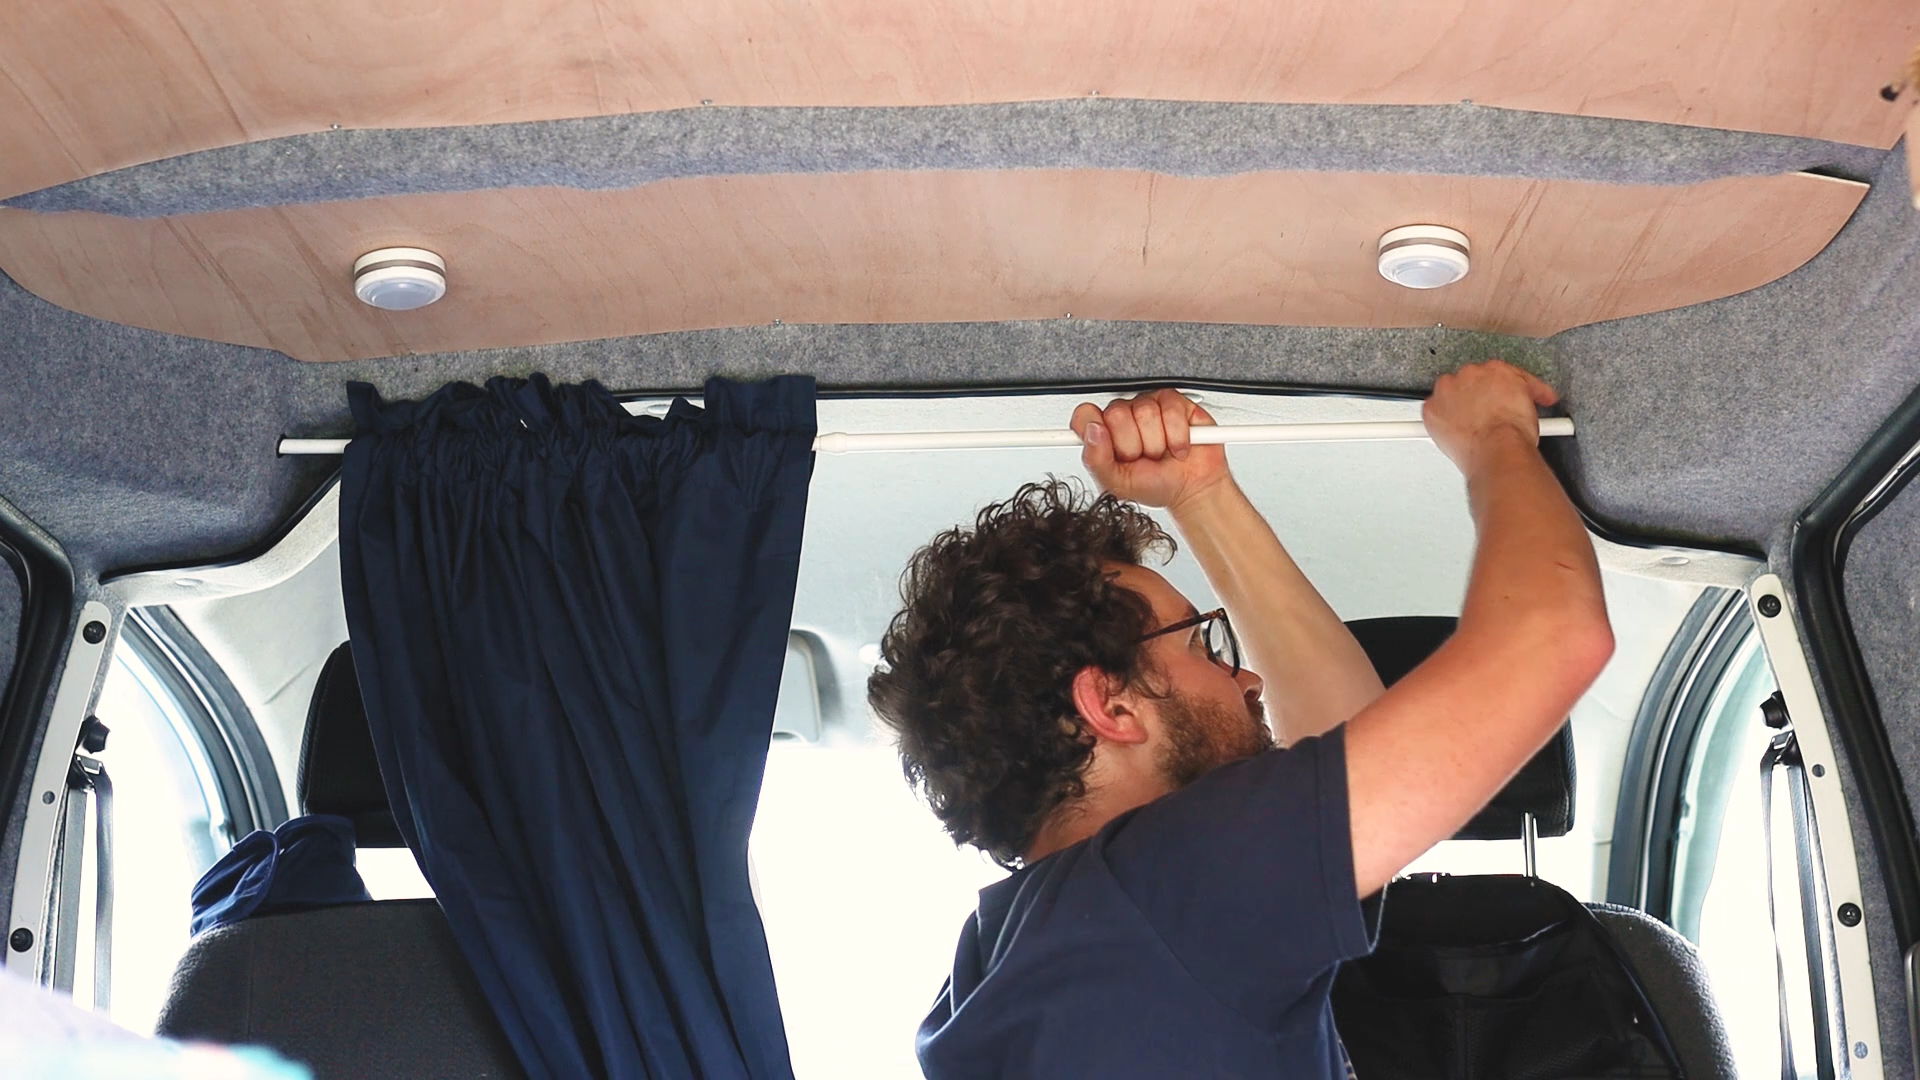
Tightening the tension rod further enabled me to make the curtain as secure as it needs to be and I’m pleased to say that it’s a really strong hold.
With the curtain reinstalled I could check its fit, and making these adjustments has made so much difference. The curtain is much stronger, is easier to draw across, and blocks out more light than before.


Using magnets to hold the curtain
I mentioned the use of magnets earlier and so I sewed a couple of these down each side of the curtain so they can hold the curtain in place while it’s drawn. They aren’t a perfect solution as they have a habit of coming away every so often, so this is something that I’ll look into more in the future.

Overall, I’m so happy with the result and I think it neatens up that whole area. I now have a sturdy, fully functional curtain to separate the front cab from the back load area!
If you want to see more of my camper van build in action, please CLICK HERE.
Click to buy your own…
(Affiliate links which help support this website)
